


目录
xml偶尔也做前后端交互用,常用的领域还是人工智能,在矩形框标注任务中的标注文件类型是xml
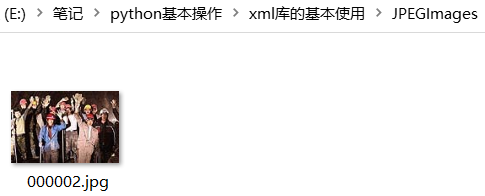
比如说下面的000002.xml就是000002.jpg的标注文件

xml可以用记事本打开,打开后的内容是这些
<annotation>
	<folder>JPEGImages</folder>
	<filename>000002.jpg</filename>
	<path>D:\study\project\label_hat\VOCdevkit\VOC2024\JPEGImages\000002.jpg</path>
	<source>
		<database>Unknown</database>
	</source>
	<size>
		<width>500</width>
		<height>332</height>
		<depth>3</depth>
	</size>
	<segmented>0</segmented>
	<object>
		<name>hat</name>
		<pose>Unspecified</pose>
		<truncated>0</truncated>
		<difficult>0</difficult>
		<bndbox>
			<xmin>37</xmin>
			<ymin>32</ymin>
			<xmax>76</xmax>
			<ymax>84</ymax>
		</bndbox>
	</object>
	<object>
		<name>hat</name>
		<pose>Unspecified</pose>
		<truncated>0</truncated>
		<difficult>1</difficult>
		<bndbox>
			<xmin>97</xmin>
			<ymin>44</ymin>
			<xmax>125</xmax>
			<ymax>82</ymax>
		</bndbox>
	</object>
	<object>
		<name>hat</name>
		<pose>Unspecified</pose>
		<truncated>0</truncated>
		<difficult>0</difficult>
		<bndbox>
			<xmin>165</xmin>
			<ymin>103</ymin>
			<xmax>208</xmax>
			<ymax>158</ymax>
		</bndbox>
	</object>
	<object>
		<name>hat</name>
		<pose>Unspecified</pose>
		<truncated>0</truncated>
		<difficult>0</difficult>
		<bndbox>
			<xmin>178</xmin>
			<ymin>71</ymin>
			<xmax>213</xmax>
			<ymax>113</ymax>
		</bndbox>
	</object>
	<object>
		<name>hat</name>
		<pose>Unspecified</pose>
		<truncated>0</truncated>
		<difficult>0</difficult>
		<bndbox>
			<xmin>221</xmin>
			<ymin>44</ymin>
			<xmax>251</xmax>
			<ymax>88</ymax>
		</bndbox>
	</object>
	<object>
		<name>hat</name>
		<pose>Unspecified</pose>
		<truncated>0</truncated>
		<difficult>0</difficult>
		<bndbox>
			<xmin>249</xmin>
			<ymin>61</ymin>
			<xmax>283</xmax>
			<ymax>112</ymax>
		</bndbox>
	</object>
	<object>
		<name>hat</name>
		<pose>Unspecified</pose>
		<truncated>0</truncated>
		<difficult>0</difficult>
		<bndbox>
			<xmin>335</xmin>
			<ymin>60</ymin>
			<xmax>376</xmax>
			<ymax>112</ymax>
		</bndbox>
	</object>
	<object>
		<name>hat</name>
		<pose>Unspecified</pose>
		<truncated>0</truncated>
		<difficult>0</difficult>
		<bndbox>
			<xmin>344</xmin>
			<ymin>107</ymin>
			<xmax>385</xmax>
			<ymax>163</ymax>
		</bndbox>
	</object>
	<object>
		<name>hat</name>
		<pose>Unspecified</pose>
		<truncated>0</truncated>
		<difficult>0</difficult>
		<bndbox>
			<xmin>372</xmin>
			<ymin>59</ymin>
			<xmax>402</xmax>
			<ymax>110</ymax>
		</bndbox>
	</object>
	<object>
		<name>hat</name>
		<pose>Unspecified</pose>
		<truncated>0</truncated>
		<difficult>0</difficult>
		<bndbox>
			<xmin>409</xmin>
			<ymin>77</ymin>
			<xmax>454</xmax>
			<ymax>136</ymax>
		</bndbox>
	</object>
	<object>
		<name>person</name>
		<pose>Unspecified</pose>
		<truncated>0</truncated>
		<difficult>0</difficult>
		<bndbox>
			<xmin>9</xmin>
			<ymin>75</ymin>
			<xmax>46</xmax>
			<ymax>124</ymax>
		</bndbox>
	</object>
</annotation>
里面有很多信息,比如size中的width和height就是标注图像的宽与高,name是标签名称,bndbox就是标注框的位置
我们下面来提取一下这些信息,用的方法比较多,简单看一下就能明白,逻辑上就是xml是一个树状的结构,顺着树杈一个一个找就能找到
1 提取标注信息
import xml.etree.ElementTree as ET

xml_file = '000002.xml'
tree = ET.parse(xml_file)
root = tree.getroot()

for size in root.iter('size'):
    width = int(size.find('width').text)
    height = int(size.find('height').text)

print('图像宽',width,'图像高',height)

for obj in root.iter('object'):
    cls = obj.find('name').text

    xmlbox = obj.find('bndbox')
    xmin = int(xmlbox.find('xmin').text)
    ymin = int(xmlbox.find('ymin').text)
    xmax = int(xmlbox.find('xmax').text)
    ymax = int(xmlbox.find('ymax').text)

    print('类型',cls,'xmin',xmin,'ymin',ymin,'xmax',xmax,'ymax',ymax)
2 将标注信息画在标注图像上
我们可以把标注文件搞到图像上看一下标注情况
import xml.etree.ElementTree as ET
import cv2

img = cv2.imread('000002.jpg')

xml_file = '000002.xml'
tree = ET.parse(xml_file)
root = tree.getroot()

for size in root.iter('size'):
    width = int(size.find('width').text)
    height = int(size.find('height').text)

for obj in root.iter('object'):
    cls = obj.find('name').text

    xmlbox = obj.find('bndbox')
    xmin = int(xmlbox.find('xmin').text)
    ymin = int(xmlbox.find('ymin').text)
    xmax = int(xmlbox.find('xmax').text)
    ymax = int(xmlbox.find('ymax').text)

    cv2.rectangle(img,(xmin,ymin),(xmax,ymax),(0,255,0),2)
    cv2.putText(img,cls,(xmin,ymin),cv2.FONT_HERSHEY_SIMPLEX,1,(255,0,0),2)

cv2.imshow('img',img)
cv2.waitKey(0)
cv2.destroyAllWindows()
3 将标注内容从图像上分割出来
首先需要在代码的同级目录下创建 Annotations 用于放xml,创建JPEGImages用于放jpg文件,Save_pic用于放保存后的图像
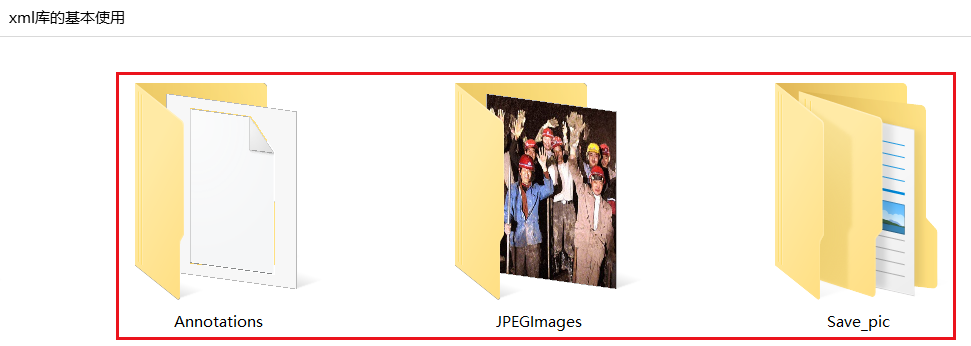
Annotations

JPEGImages
Save_pic下创建你标签名字的文件夹

之后运行代码
- 代码可以使用绝对路径,但是不能包含中文
- Annotations与JPEGImages中可以放多个标注图像与标注文件
import sys
import os
import cv2 as cv
import xml.etree.ElementTree as ET

root = "./"
ann_path = os.path.join(root,'Annotations') #xml文件路径
pic_path = os.path.join(root,'JPEGImages') #样本图片路径
save_path_root = "./Save_pic/" #图片保存路径

def Crop_image(pic_name, img_path, label, x0, y0, x1, y1):
    img = cv.imread(img_path)
    img_crop = img[y0:y1, x0:x1] #第一个是y方向取值,第二个是x方向取值
    save_path = os.path.join(save_path_root, label)
    img_new_name = (pic_name[0:7]+'_'+str(x0)+'.jpg')
    save_name = os.path.join(save_path, img_new_name)
    print(save_name)
    cv.imwrite(save_name, img_crop)

for filename in os.listdir(ann_path):
    xml_path = os.path.join(ann_path, filename)
    tree = ET.parse(filename)
    for xml_name in tree.findall('filename'):
        pic_name = xml_name.text
        img_path = os.path.join(pic_path, pic_name)
        for obj in tree.findall('object'): #遍历所有object
            label = obj.find('name').text
            bbox = obj.find('bndbox')
            x0 = int(bbox.find('xmin').text)
            y0 = int(bbox.find('ymin').text)
            x1 = int(bbox.find('xmax').text)
            y1 = int(bbox.find('ymax').text)
            Crop_image(pic_name, img_path, label, x0, y0, x1, y1)
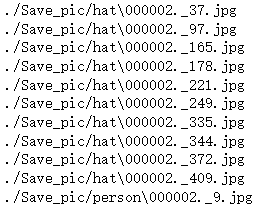
运行后在Save_pic中会得到分割好的不同标签的图像

4 修改xml
4.1 修改内容
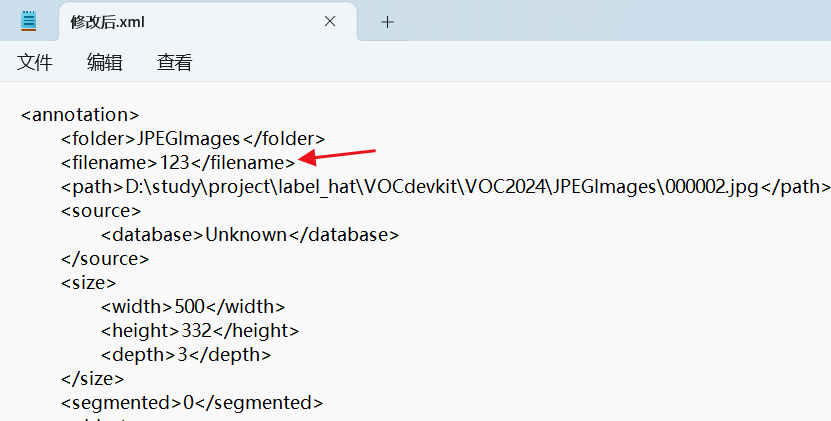
通过赋值进行修改,然后使用write()写入新的xml文件
- 新的xml文件不需要手动创建
import xml.etree.ElementTree as ET

tree = ET.parse('./修改xml/修改前.xml')
root = tree.getroot()

root.find('filename').text = '123'
tree.write('./修改xml/修改后.xml')
修改后的xml只有修改的地方改变了,区域的地方均不变
4.2 插入新值
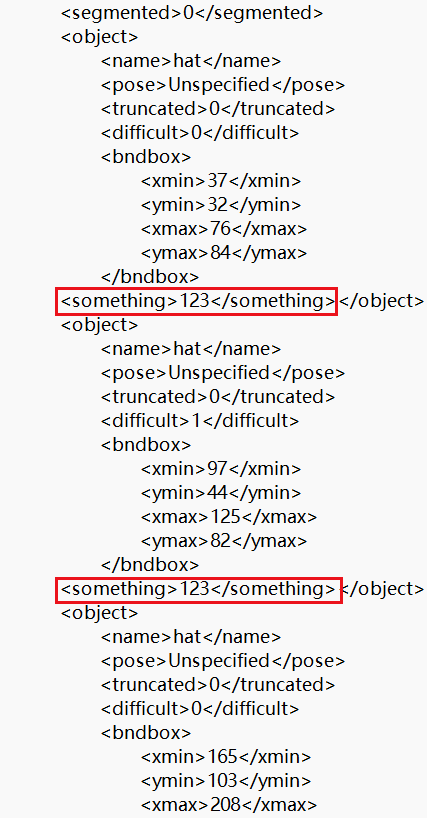
比如我想在所有的object中加入子节点something,并将子节点的值赋值为123
import xml.etree.ElementTree as ET

tree = ET.parse('./修改xml/修改前.xml')
root = tree.getroot()

for elem in root.iter('object'):
    new_child = ET.SubElement(elem, 'something')
    new_child.text = '123'

tree.write('./修改xml/修改后.xml')
发现可以成功添加


 1325
1325


 被折叠的 条评论
为什么被折叠?
被折叠的 条评论
为什么被折叠?
 到【灌水乐园】发言


