


vLLM 是一个简单易用的 LLM 推理服务库。加州大学伯克利分校于 2024 年 7 月将 vLLM 作为孵化项目正式捐赠给 LF AI & Data Foundation 基金会。欢迎 vLLM 加入 LF AI & Data 大家庭!🎉
在主流的 AI 应用架构中,大语言模型(LLM)通常与向量数据库配套使用,用于构建检索增强生成(RAG)应用,从而解决 AI 幻觉问题。本文将介绍如何使用 Milvus、vLLM 和 Llama 3.1 构建并运行RAG 应用。我们将详细展示如何将文本信息转换为 Embedding 向量并存储到 Milvus 向量数据库中、如何将 Milvus 作为知识库有效检索与用户问题相关的文本块。最后,我们将通过 vLLM 使用 Meta的Llama 3.1-8B 模型生成答案。
01
Milvus、vLLM 和 Llama 3.1 简介
Milvus 向量数据库
Milvus 是一款开源的分布式向量数据库,可用于存储、索引和搜索向量数据,适用于生成式 AI(GenAI)应用。Milvus 支持 hybrid search、元数据过滤、重排(Reranking),能够高效处理万亿规模的向量,助力开发者搭建 AI 和 ML 应用。您可以在本地运行 Milvus standalone 或 cluster 版本,或者使用全托管的 Milvus 服务——Zilliz Cloud。
vLLM
vLLM 是加州大学伯克利分校 SkyLab 推出的一个开源项目,专注于优化 LLM 服务性能。通过高效的内存管理技术,如 PagedAttention、持续批处理和优化 CUDA 内核,vLLm 与传统方法相比将服务性能提高了多达 24 倍,同时将 GPU 内存用量减少了一半。
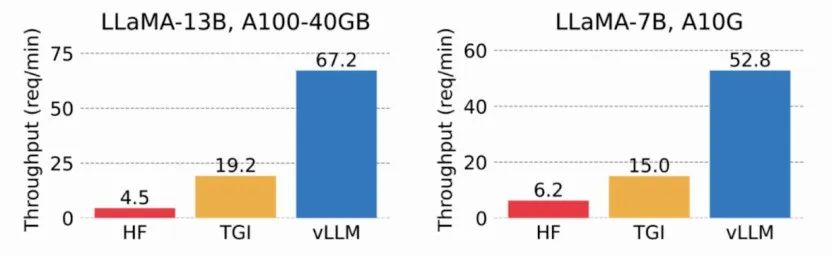
根据论文《Efficient Memory Management for Large Language Model Serving with PagedAttention》,KV 缓存使用约 30% 的 GPU 内存,可能会导致内存问题。KV 缓存存储在连续内存(contiguous memory)中,但内存变化可能导致内存碎片化,不利于计算效率。

通过使用虚拟内存缓存 KV,vLLM 只需要在必要时分配物理 GPU 内存,有效避免了内存碎片化和内存预分配。在测试中,vLLM 的吞吐量比 HuggingFace Transformers (HF) 高出多达 24 倍,比基于NVIDIA A10G 和 A100 GPU 的 Text Generation Inference (TGI) 高出 3.5 倍。
Meta Llama 3.1
Meta 于 2024 年 7 月 23 日宣布推出 Llama 3.1,允许用于多种商业用途。其 405B 模型(4050 亿参数)在多个公开的性能测试中均展示出了最出色的性能,并支持 128,000 个输入 Token 的上下文窗口。除了 405B 模型外,Meta 还发布了 Llama3.1 70B(700 亿参数)和 8B(80 亿参数)模型。您可以通过 Meta 官网下载模型权重(model weight)。
需要注意微调生成的数据可以提高模型性能,但低质量的数据可能会降低模型性能。Llama 团队已不断识别和去除这些低质量的数据,使用模型本身及其他辅助模型和工具,进一步优化模型。
02
使用 Milvus 搭建 RAG-Retrieval部分
准备数据
本教程将使用 Milvus 文档作为数据集。我们需要先下载并本地保存 Milvus 文档。
from langchain.document_loaders import DirectoryLoader
    # Load HTML files already saved in a local directory
    path = "../../RAG/rtdocs_new/"
    global_pattern = '*.html'
    loader = DirectoryLoader(path=path, glob=global_pattern)
    docs = loader.load()


    # Print num documents and a preview.
    print(f"loaded {len(docs)} documents")
    print(docs[0].page_content)
    pprint.pprint(docs[0].metadata)

下载 Embedding 模型
接着,从 HuggingFace 上下载一个免费的开源 Embedding 模型。
import torch
    from sentence_transformers import SentenceTransformer


    # Initialize torch settings for device-agnostic code.
    N_GPU = torch.cuda.device_count()
    DEVICE = torch.device('cuda:N_GPU' if torch.cuda.is_available() else 'cpu')


    # Download the model from huggingface model hub.
    model_name = "BAAI/bge-large-en-v1.5"
    encoder = SentenceTransformer(model_name, device=DEVICE)


    # Get the model parameters and save for later.
    EMBEDDING_DIM = encoder.get_sentence_embedding_dimension()
    MAX_SEQ_LENGTH_IN_TOKENS = encoder.get_max_seq_length()


    # Inspect model parameters.
    print(f"model_name: {model_name}")
    print(f"EMBEDDING_DIM: {EMBEDDING_DIM}")
    print(f"MAX_SEQ_LENGTH: {MAX_SEQ_LENGTH}")

切分数据并编码为向量
将文档数据切分成固定长度(512 个字符)的文本块,并将切分 overlap 设置为 10%。
from langchain.text_splitter import RecursiveCharacterTextSplitter


    CHUNK_SIZE = 512
    chunk_overlap = np.round(CHUNK_SIZE * 0.10, 0)
    print(f"chunk_size: {CHUNK_SIZE}, chunk_overlap: {chunk_overlap}")


    # Define the splitter.
    child_splitter = RecursiveCharacterTextSplitter(
       chunk_size=CHUNK_SIZE,
       chunk_overlap=chunk_overlap)


    # Chunk the docs.
    chunks = child_splitter.split_documents(docs)
    print(f"{len(docs)} docs split into {len(chunks)} child documents.")


    # Encoder input is doc.page_content as strings.
    list_of_strings = [doc.page_content for doc in chunks if hasattr(doc, 'page_content')]


    # Embedding inference using HuggingFace encoder.
    embeddings = torch.tensor(encoder.encode(list_of_strings))


    # Normalize the embeddings.
    embeddings = np.array(embeddings / np.linalg.norm(embeddings))


    # Milvus expects a list of `numpy.ndarray` of `numpy.float32` numbers.
    converted_values = list(map(np.float32, embeddings))


    # Create dict_list for Milvus insertion.
    dict_list = []
    for chunk, vector in zip(chunks, converted_values):
       # Assemble embedding vector, original text chunk, metadata.
       chunk_dict = {
           'chunk': chunk.page_content,
           'source': chunk.metadata.get('source', ""),
           'vector': vector,
       }
       dict_list.append(chunk_dict)

将向量数据存储在 Milvus 中
将向量存储到 Milvus 向量数据库中。
# Connect a client to the Milvus Lite server.
    from pymilvus import MilvusClient
    mc = MilvusClient("milvus_demo.db")


    # Create a collection with flexible schema and AUTOINDEX.
    COLLECTION_NAME = "MilvusDocs"
    mc.create_collection(COLLECTION_NAME,
           EMBEDDING_DIM,
           consistency_level="Eventually",
           auto_id=True,
           overwrite=True)


    # Insert data into the Milvus collection.
    print("Start inserting entities")
    start_time = time.time()
    mc.insert(
       COLLECTION_NAME,
       data=dict_list,
       progress_bar=True)


    end_time = time.time()
    print(f"Milvus insert time for {len(dict_list)} vectors: ", end="")
    print(f"{round(end_time - start_time, 2)} seconds")

进行向量搜索
输入问题,并在 Milvus 知识库中搜索与问题最相似的文本块。
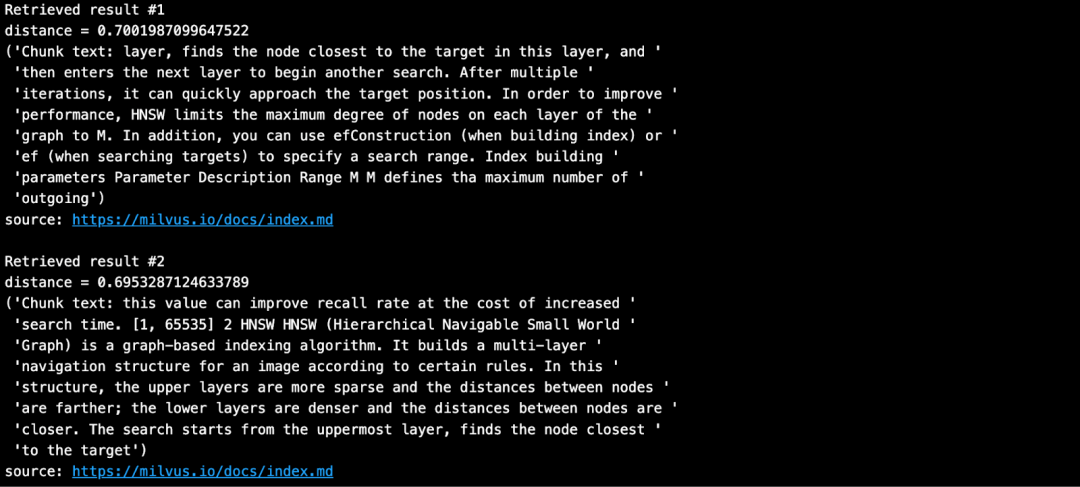
SAMPLE_QUESTION = "What do the parameters for HNSW mean?"


    # Embed the question using the same encoder.
    query_embeddings = torch.tensor(encoder.encode(SAMPLE_QUESTION))
    # Normalize embeddings to unit length.
    query_embeddings = F.normalize(query_embeddings, p=2, dim=1)
    # Convert the embeddings to list of list of np.float32.
    query_embeddings = list(map(np.float32, query_embeddings))


    # Define metadata fields you can filter on.
    OUTPUT_FIELDS = list(dict_list[0].keys())
    OUTPUT_FIELDS.remove('vector')


    # Define how many top-k results you want to retrieve.
    TOP_K = 2


    # Run semantic vector search using your query and the vector database.
    results = mc.search(
        COLLECTION_NAME,
        data=query_embeddings,
        output_fields=OUTPUT_FIELDS,
        limit=TOP_K,
        consistency_level="Eventually")
搜索结果如下所示:
03
使用 vLLM 和 Llama 3.1-8B 搭建 RAG-Generation 部分
安装 vLLM 与 HuggingFace 模型
vLLM 默认从 HuggingFace 下载大语言模型。通常情况下,如果您想使用 HuggingFace 上的新模型,需要执行 pip install --update 或 -U。此外,我们还需要 GPU 通过 vLLM 来运行 Meta 的 Llama 3.1 推理模型。
# (Recommended) Create a new conda environment.
    conda create -n myenv python=3.11 -y
    conda activate myenv


    # Install vLLM with CUDA 12.1.
    pip install -U vllm transformers torch
import vllm, torch
    from vllm import LLM, SamplingParams
    # Clear the GPU memory cache.
    torch.cuda.empty_cache()
    # Check the GPU.
    !nvidia-smi
获取 HuggingFace token
HuggingFace 上的部分模型(如 Meta Llama 3.1)要求用户在下载前接受其许可证。因此,您必须先创建一个 HuggingFace 帐户,接受模型的许可证,并生成一个 Token。
在 HuggingFace 的 Llama3.1 页上,您会收到一条消息要求您同意条款。单击"Accept License"以接受 Meta 条款,然后再下载模型权重。审批流程通常可以在一天内完成。
审批通过后,需要生成一个新的 HuggingFace token。旧 Token 无法使用。
在安装 vLLM 之前,请使用您的新 Token 登录 HuggingFace。以下示例代码中使用 Colab Secrets 来存储 Token。
# Login to HuggingFace using your new token.
    from huggingface_hub import login
    from google.colab import userdata
    hf_token = userdata.get('HF_TOKEN')
    login(token = hf_token, add_to_git_credential=True)
运行 RAG-Generation 部分
我们需要 GPU 和较大的内存来运行 Llama-3.1-8B 模型。以下示例是在 Google Colab Pro上使用 A100 GPU 运行的。
# 1. Choose a model
    MODELTORUN = "meta-llama/Meta-Llama-3.1-8B-Instruct"


    # 2. Clear the GPU memory cache, you're going to need it all!
    torch.cuda.empty_cache()


    # 3. Instantiate a vLLM model instance.
    llm = LLM(model=MODELTORUN,
             enforce_eager=True,
             dtype=torch.bfloat16,
             gpu_memory_utilization=0.5,
             max_model_len=1000,
             seed=415,
             max_num_batched_tokens=3000)

# Separate all the context together by space.
    contexts_combined = ' '.join(contexts)
    # Lance Martin, LangChain, says put the best contexts at the end.
    contexts_combined = ' '.join(reversed(contexts))


    # Separate all the unique sources together by comma.
    source_combined = ' '.join(reversed(list(dict.fromkeys(sources))))


    SYSTEM_PROMPT = f"""First, check if the provided Context is relevant to
    the user's question.  Second, only if the provided Context is strongly relevant, answer the question using the Context.  Otherwise, if the Context is not strongly relevant, answer the question without using the Context.
    Be clear, concise, relevant.  Answer clearly, in fewer than 2 sentences.
    Grounding sources: {source_combined}
    Context: {contexts_combined}
    User's question: {SAMPLE_QUESTION}
    """


    prompts = [SYSTEM_PROMPT]
使用从 Milvus 中检索获得的上下文和原始提问来编写提示,并生成回答。
# Sampling parameters
    sampling_params = SamplingParams(temperature=0.2, top_p=0.95)


    # Invoke the vLLM model.
    outputs = llm.generate(prompts, sampling_params)


    # Print the outputs.
    for output in outputs:
       prompt = output.prompt
       generated_text = output.outputs[0].text
       # !r calls repr(), which prints a string inside quotes.
       print()
       print(f"Question: {SAMPLE_QUESTION!r}")
       pprint.pprint(f"Generated text: {generated_text!r}")

答案十分准确!
如何学习AI大模型?
作为一名热心肠的互联网老兵,我决定把宝贵的AI知识分享给大家。 至于能学习到多少就看你的学习毅力和能力了 。我已将重要的AI大模型资料包括AI大模型入门学习思维导图、精品AI大模型学习书籍手册、视频教程、实战学习等录播视频免费分享出来。
这份完整版的大模型 AI 学习资料已经上传CSDN,朋友们如果需要可以微信扫描下方CSDN官方认证二维码免费领取【保证100%免费】

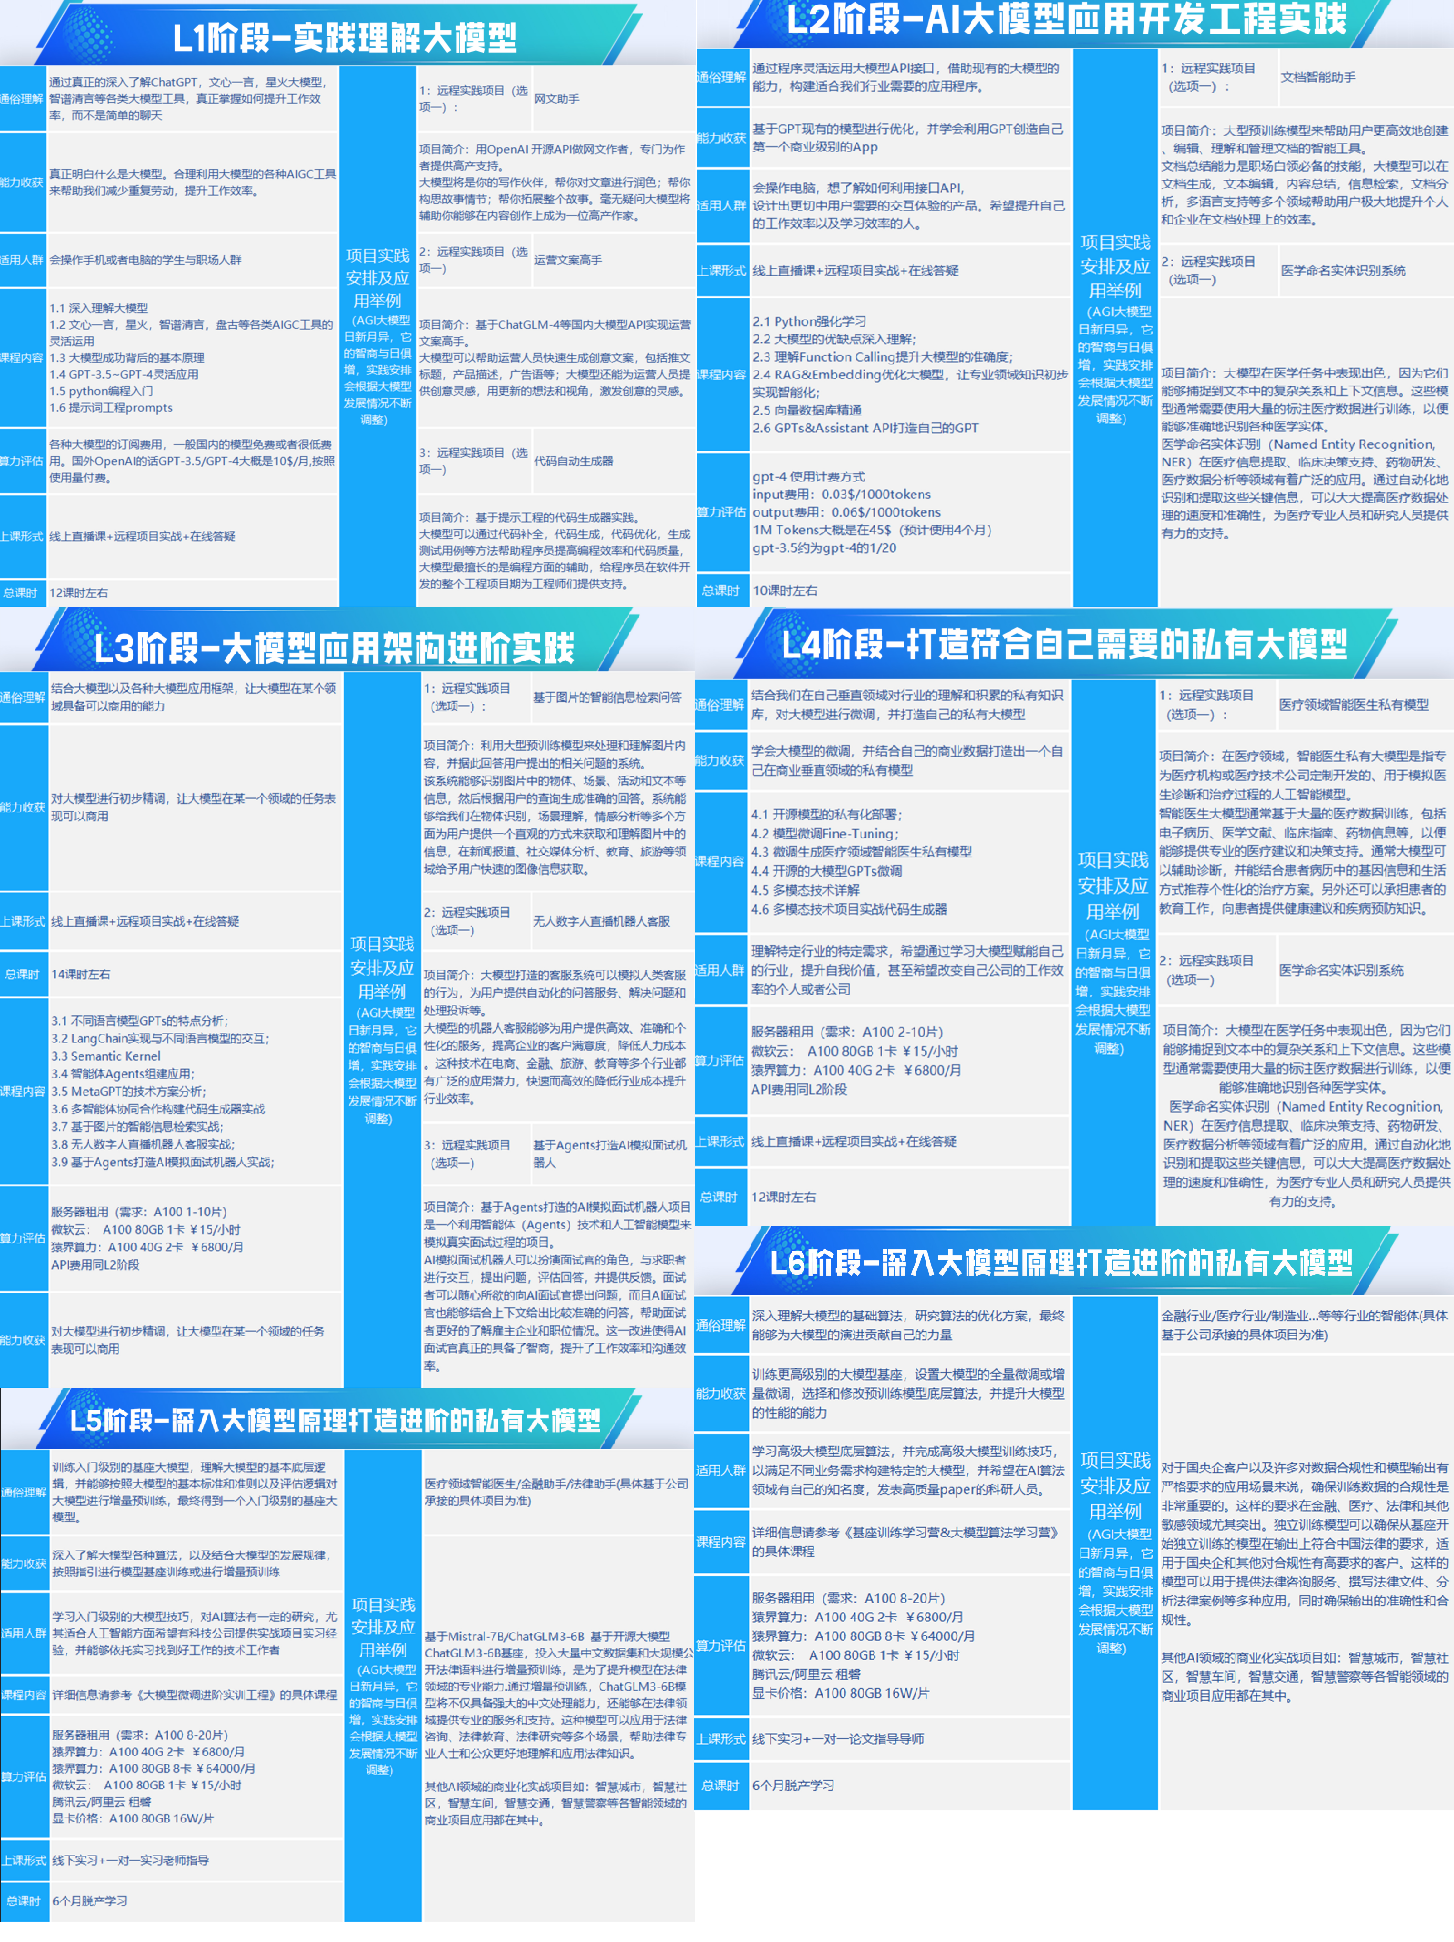
一、全套AGI大模型学习路线
AI大模型时代的学习之旅:从基础到前沿,掌握人工智能的核心技能!
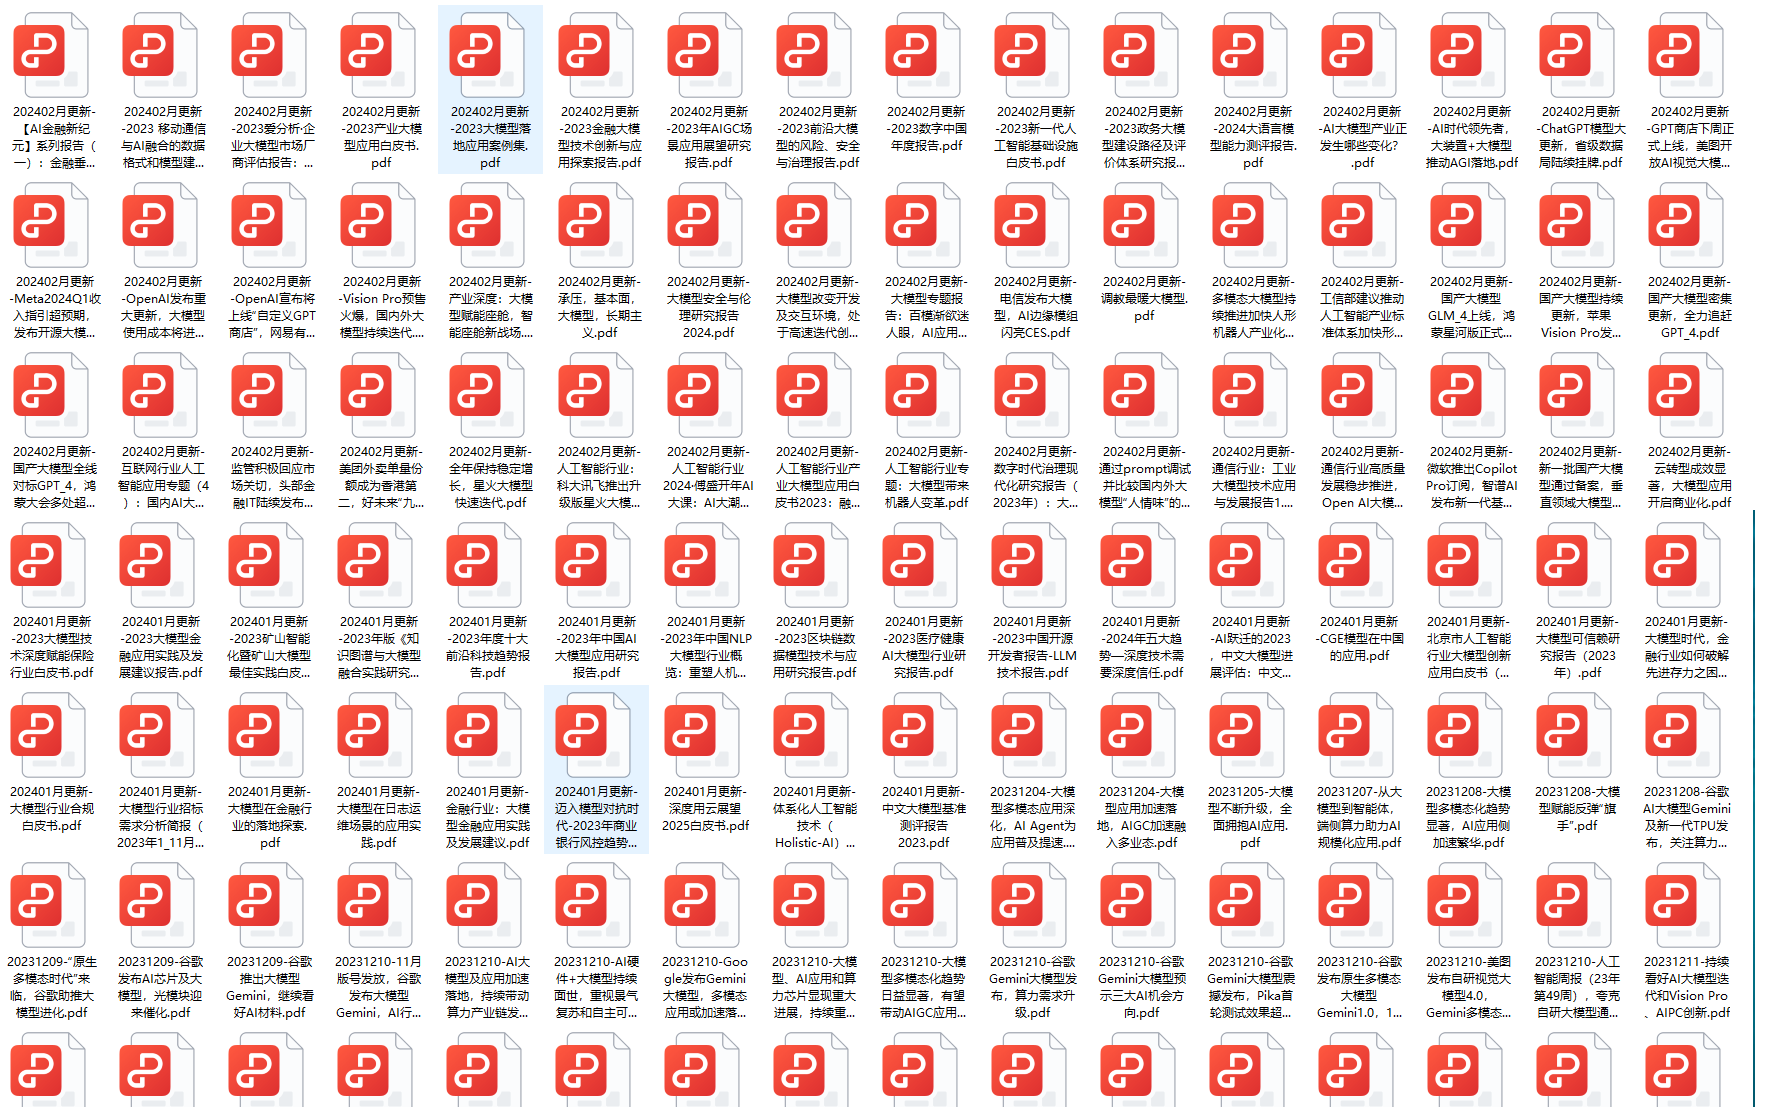
二、640套AI大模型报告合集
这套包含640份报告的合集,涵盖了AI大模型的理论研究、技术实现、行业应用等多个方面。无论您是科研人员、工程师,还是对AI大模型感兴趣的爱好者,这套报告合集都将为您提供宝贵的信息和启示。
三、AI大模型经典PDF籍
随着人工智能技术的飞速发展,AI大模型已经成为了当今科技领域的一大热点。这些大型预训练模型,如GPT-3、BERT、XLNet等,以其强大的语言理解和生成能力,正在改变我们对人工智能的认识。 那以下这些PDF籍就是非常不错的学习资源。
四、AI大模型商业化落地方案

作为普通人,入局大模型时代需要持续学习和实践,不断提高自己的技能和认知水平,同时也需要有责任感和伦理意识,为人工智能的健康发展贡献力量。


 970
970

 被折叠的 条评论
为什么被折叠?
被折叠的 条评论
为什么被折叠?
 到【灌水乐园】发言


