


1.背景
通常情况下我们在做项目时都是在LayaAir IDE下进行调试和开发的。通常情况不会接触到typescript的“编译”和bundle过程。这节我们要深入了解其中的过程,并剥离出来,能够在VsCode中直接运行项目,实时编译调试。
2.LayaAir的编译流程
打开LayaAirIDE的文件夹
LayaAirIDE_beta\resources\app\out\vs\layaEditor\laya\code\ts\empty
我们创建空项目时会应用这个套模板,直接再IDE中编译时会使用IDE自带的node环境和插件。
在.laya/compile.js中可知道使用的是gulp和rollup进行文件的编译的。
// v1.2.5
//是否使用IDE自带的node环境和插件,设置false后,则使用自己环境(使用命令行方式执行)
const useIDENode = process.argv[0].indexOf("LayaAir") > -1 ? true : false;
const useCMDNode = process.argv[1].indexOf("layaair2-cmd") > -1 ? true : false;

function useOtherNode(){
	return useIDENode||useCMDNode;
}
//获取Node插件和工作路径
let ideModuleDir = useOtherNode() ? process.argv[1].replace("gulp\\bin\\gulp.js", "").replace("gulp/bin/gulp.js", "") : "";
let workSpaceDir = useOtherNode() ? process.argv[2].replace("--gulpfile=", "").replace("\\.laya\\compile.js", "").replace("/.laya/compile.js", "") : "./../";

const gulp = require(ideModuleDir + "gulp");
const rollup = require(ideModuleDir + "rollup");
const typescript = require(ideModuleDir + 'rollup-plugin-typescript2');//typescript2 plugin
const glsl = require(ideModuleDir + 'rollup-plugin-glsl');
const path = require('path');
const fs = require('fs');

// 如果是发布时调用编译功能,增加prevTasks
let prevTasks = "";
if (global.publish) {
	prevTasks = ["loadConfig"];
}

gulp.task("compile", prevTasks, function () {
	// 发布时调用编译功能,判断是否点击了编译选项
    if (global.publish) {
        workSpaceDir = global.workSpaceDir; // 发布时调用编译,workSpaceDir使用publish.js里的变量
        let forceCompile = !fs.existsSync(path.join(workSpaceDir, "bin", "js", "bundle.js")); // 发布时,并且没有编译过,则强制编译
        if (!global.config.compile && !forceCompile) {
            return;
        }
    }

	return rollup.rollup({
		input: workSpaceDir + '/src/Main.ts',
		onwarn:(waring,warn)=>{
			if(waring.code == "CIRCULAR_DEPENDENCY"){
				console.log("warnning Circular dependency:");
				console.log(waring);
			}
		},
		treeshake: false, //建议忽略
		plugins: [
			typescript({
				tsconfig:workSpaceDir + "/tsconfig.json",
				check: true, //Set to false to avoid doing any diagnostic checks on the code
				tsconfigOverride:{compilerOptions:{removeComments: true}},
				include:/.*.ts/,
			}),
			glsl({
				// By default, everything gets included
				include: /.*(.glsl|.vs|.fs)$/,
				sourceMap: false,
				compress:false
			}),
			/*terser({
				output: {
				},
				numWorkers:1,//Amount of workers to spawn. Defaults to the number of CPUs minus 1
				sourcemap: false
			})*/
		]
	}).then(bundle => {
		return bundle.write({
			file: workSpaceDir + '/bin/js/bundle.js',
			format: 'iife',
			name: 'laya',
			sourcemap: false
		});
	}).catch(err=>{
			console.log(err);

	})
});
打开.vscode/launch.json可知道使用的是Debugger for Chrome插件来调试
{
	"version": "0.2.0",
	"configurations": [
		{
			"name": "chrome调试",
			"type": "chrome",
			"request": "launch",
			"file": "${workspaceRoot}/bin/index.html",
			// "换成自己的谷歌安装路径,": 比如
			//window 默认安装路径为: "C:/Program Files (x86)/Google/Chrome/Application/chrome.exe"
			//mac 系统上的默认安装路径为 "/Applications/Google Chrome.app/Contents/MacOS/Google Chrome";
			// "runtimeExecutable": "C:/Program Files (x86)/Google/Chrome/Application/chrome.exe",
			"runtimeArgs": [
				"--allow-file-access-from-files",
				" --disable-web-security"
			],
			"sourceMaps": true,
			"webRoot": "${workspaceRoot}",
			//假如谷歌调试报userDataDir不可用,请把谷歌安装路径取得管理员权限,或者更换${tmpdir}为其他可以读写的文件夹,也可以删除。
			"userDataDir": "${workspaceRoot}/.laya/chrome",
			"sourceMapPathOverrides": {
				"src/*": "${workspaceRoot}/src/*"
			}
		}
	]
}
3.gulp实时编译剥离
在传统的laya项目开发流程中,通常是在修改完代码后,点击IDE中的Chorme编译,然后等待一段时间后,才能打开浏览器进行调试。
其实这个过程是可以进一步优化的,通过watch代码的更新来及时重新编译,并刷新浏览器。
3.1 launch和task配置
{
"version": "0.2.0",
"configurations": [
{
"name": "chrome调试",
"type": "chrome",
"request": "launch",
"trace": true,
"smartStep": true,
"file": "${workspaceRoot}/bin/index.html",
"runtimeArgs": [
"--allow-file-access-from-files",
"--allow-file-access-frome-files",
"--disable-web-security"
],
"sourceMaps": true,
"webRoot": "${workspaceRoot}",
"userDataDir": "${workspaceRoot}/.vscode/chrome",
"fixedPort":false,
"sourceMapPathOverrides": {
"src/*": "${workspaceRoot}/src/*"
},
"preLaunchTask": "gulp"
},
{
"name": "chrome混淆",
"type": "chrome",
"request": "launch",
"trace": true,
"smartStep": true,
"file": "${workspaceRoot}/bin/index.html",
"runtimeArgs": [
"--allow-file-access-from-files",
"--allow-file-access-frome-files",
"--disable-web-security"
],
"sourceMaps": true,
"webRoot": "${workspaceRoot}",
"userDataDir": "${workspaceRoot}/.vscode/chrome",
"fixedPort":false,
"sourceMapPathOverrides": {
"src/*": "${workspaceRoot}/src/*"
},
"preLaunchTask": "uglify"
},
{
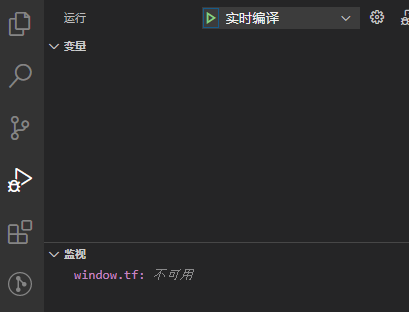
"name": "实时编译",
"request": "launch",
"type": "pwa-chrome",
"trace": true,
"smartStep": true,
"url": "http://localhost:1688",
"runtimeArgs": [
"--allow-file-access-from-files",
"--allow-file-access-frome-files",
"--disable-web-security"
],
"sourceMaps": true,
"webRoot": "${workspaceFolder}/bin",
"sourceMapPathOverrides": {
"src/*": "${workspaceRoot}/src/*"
},
},
]
}
task.json
{
	"version": "2.0.0",
	"tasks": [
		{
			"label": "gulp",
			"type": "shell",
			"command": "gulp",
			"group": {
				"kind": "build",
				"isDefault": true
			}
		},
		{
			"label": "uglify",
			"type": "shell",
			"command": "gulp uglify",
			"group": {
				"kind": "build",
				"isDefault": true
			}
		},
		{
			"label": "watch",
			"type": "shell",
			"command": "gulp watch",
			"group": {
				"kind": "build",
				"isDefault": true
			}
		},
	]
}
3.2 gulpfile
项目文件夹下安装好gulp和所需要的的库
//引用插件模块
var gulp = require("gulp");
var browserify = require("browserify");
var source = require("vinyl-source-stream");
var sourcemaps = require('gulp-sourcemaps');
var buffer = require('vinyl-buffer');
var tsify = require("tsify");
let uglify = require('gulp-uglify-es').default;
const watchify = require("watchify");
const gutil = require("gulp-util");
const connect = require('gulp-connect');

// ------------------------------------实时编译-----------------------------

const watchedBrowserify = watchify(browserify({
	debug: true,
	entries: ['src/Main.ts'],
	cache: {},
	packageCache: {}
}).plugin(tsify));

function browserifyBundle() {
	return watchedBrowserify
	.bundle()
	//使用source把输出文件命名为bundle.js
	.pipe(source('bundle.js'))
	.pipe(buffer())
	.pipe(sourcemaps.init({
		loadMaps: true
	}))
	.pipe(sourcemaps.write('./'))
	//把bundle.js复制到bin/js目录
	.pipe(gulp.dest("bin/js"))
	.pipe(connect.reload());
}

// 定义livereload任务
gulp.task('connect', function () {
	connect.server({
		root: "./bin",
		livereload: true,
		port: 1688
	});
});

gulp.task("browserify", function() {
	return browserifyBundle();
})

gulp.task("watch", gulp.series('browserify', 'connect'));
watchedBrowserify.on("update", browserifyBundle);
watchedBrowserify.on("log", gutil.log);

// ------------------------------------默认编译-----------------------------

//使用browserify,转换ts到js,并输出到bin/js目录
gulp.task("default", function () {
	return browserify({
			//是否开启调试,开启后会生成jsmap,方便调试ts源码,但会影响编译速度
			debug: true,
			entries: ['src/Main.ts'],
			cache: {},
			packageCache: {}
	    })
		//使用tsify插件编译ts
		.plugin(tsify)
		.bundle()
		//使用source把输出文件命名为bundle.js
		.pipe(source('bundle.js'))
		.pipe(buffer())
		.pipe(sourcemaps.init({
		   loadMaps: true
		}))
		.pipe(sourcemaps.write('./'))
		//把bundle.js复制到bin/js目录
		.pipe(gulp.dest("bin/js"));
});

gulp.task("uglify", function () {
	return browserify({
			//是否开启调试,开启后会生成jsmap,方便调试ts源码,但会影响编译速度
			debug: true,
			entries: ['src/Main.ts'],
			cache: {},
			packageCache: {}
	    })
		//使用tsify插件编译ts
		.plugin(tsify)
		.bundle()
		//使用source把输出文件命名为bundle.js
		.pipe(source('bundle.js'))
		.pipe(buffer())
		.pipe(sourcemaps.init({
		   loadMaps: true
		}))
		.pipe(uglify({mangle: false}))
		.pipe(sourcemaps.write('./'))
		//把bundle.js复制到bin/js目录
		.pipe(gulp.dest("bin/js"));
});
使用时,先在项目文件夹执行gulp watch,在点击实时编译即可


 579
579


 被折叠的 条评论
为什么被折叠?
被折叠的 条评论
为什么被折叠?
 到【灌水乐园】发言


