


Spring全家桶-Spring Security之会话管理
Spring Security是一个能够为基于Spring的企业应用系统提供声明式的安全访问控制解决方案的安全框架。它提供了一组可以在Spring应用上下文中配置的Bean,充分利用了Spring IoC(控制反转),DI(依赖注入)和AOP(面向切面编程)功能,为应用系统提供声明式的安全访问控制功能,减少了为企业系统安全控制编写大量重复代码的工作。
文章目录
前言
一、Session是什么?
Session(会话)就是无状态的HTTP实现用户状态可维持的一种解决方案。HTTP本身无状态使得用户在与服务器的交互过程中,每个请求之间都没有关联性。这意味着用户的访问没有身份记录,服务也不能为用户提供相关的个性话服务。Session可以解决以上问题。服务器通过与用户约定每个请求都携带一个ID,从而让不同请求之间有了关联, 而id又可以很方便地绑定具体用户, 所以我们可以把不同请求归类到同一用户。Session代表服务器与浏览器的一次会话过程,这个过程是连续的,也可以时断时续的。在Servlet中,当JSP页面没有显式禁止session的时候,在打开浏览器第一次请求该jsp的时候,服务器会自动为其创建一个session,并赋予其一个sessionID,发送给客户端的浏览器。以后客户端接着请求本应用中其他资源的时候,会自动在请求头上添加:(Cookie:SESSIONID=客户端第一次拿到的session ID)。这样,服务器端在接到请求时候,就会收到session ID,并根据ID在内存中找到之前创建的session对象,提供给请求使用。
URL重写很容易被恶意黑客利用。黑客只需访问一次系统, 将系统生成的sessionId提取并拼凑在URL上, 然后将该URL发给一些取得信任的用户。 只要用户在session有效期内通过此URL进行登录, 该sessionId就会绑定到用户的身份, 黑客便可以轻松享有同样的会话状态, 完全不需要用户名和密码, 这就是典型的会话固定攻击。
二、会话固定攻击
我们将sessionId会写入到cookie中,尽管cookie非常有用, 但有时用户会在浏览器中禁用它, 可能是出于安全考虑, 也可能是为了保护个人隐私。 在这种情况下, 基于cookie实现的sessionId自然就无法正常使用了。 因此, 我们还可以支持用URL重写的方式来实现类似的功能。
但是有一个问题:URL重写很容易被恶意黑客利用。黑客只需访问一次系统, 将系统生成的sessionId提取并拼凑在URL上, 然后将该URL发给一些取得信任的用户。 只要用户在session有效期内通过此URL进行登录, 该sessionId就会绑定到用户的身份, 黑客便可以轻松享有同样的会话状态, 完全不需要用户名和密码.这样就会产生会话固定攻击。
Spring Security进行会话管理
上面了解了相关的session,现在进行Spring Security中的session管理。
1.创建项目spring-security-session
创建项目spring-security-session,相关项目的pom.xml如下:
<dependencies>
        <dependency>
            <groupId>org.springframework.boot</groupId>
            <artifactId>spring-boot-starter-security</artifactId>
        </dependency>

        <dependency>
            <groupId>org.springframework.boot</groupId>
            <artifactId>spring-boot-starter-web</artifactId>
        </dependency>
    </dependencies>
我们一最简单的方式进行登陆验证,看看相关的session数据。
2.创建WebSecurityConfig
我们使用最简单配置进行配置处理。
@EnableWebSecurity
public class WebSecurityConfig extends WebSecurityConfigurerAdapter {

    @Override
    protected void configure(HttpSecurity http) throws Exception {
        http.authorizeRequests().antMatchers("/user/**").hasAnyRole("USER","ADMIN")
                .antMatchers("/books/**").hasAnyRole("ADMIN")
                .antMatchers("/").permitAll()
                .and()
                .formLogin()
                .loginPage("/login.html")
                .permitAll()
                .and()
                .csrf()
                .disable();
    }
}
3.修改配置文件application.yml
将用户设置到配置文件中
spring:
  security:
    user:
      name: admin
      roles: ADMIN
      password: 123456
4.创建相应的接口
- IndexController:
@RestController
public class IndexController {

    @GetMapping("/")
    public String index(){
        return "index";
    }
}
- BookController:
@RestController
public class BookController {

    @GetMapping("/books/index")
    public String index(){
        return "books/index";
    }

    @GetMapping("/books/list")
    public String list(){
        return "books/list";
    }
}
- UserController:
@RestController
public class UserController {

    @GetMapping("/user/index")
    public String index(){
        return "user/index";
    }

    @GetMapping("/user/list")
    public String list(){
        return "user/list";
    }
}
5.运行程序
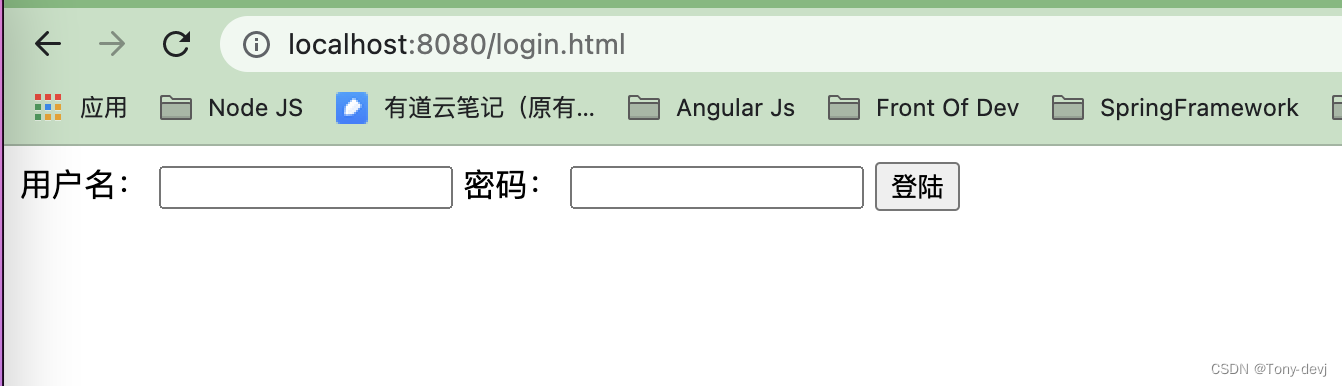
运行程序,访问:http://localhost:8080/user/list,将跳转到登陆页:
我们使用chrome的调试工具,快捷键F12进入。
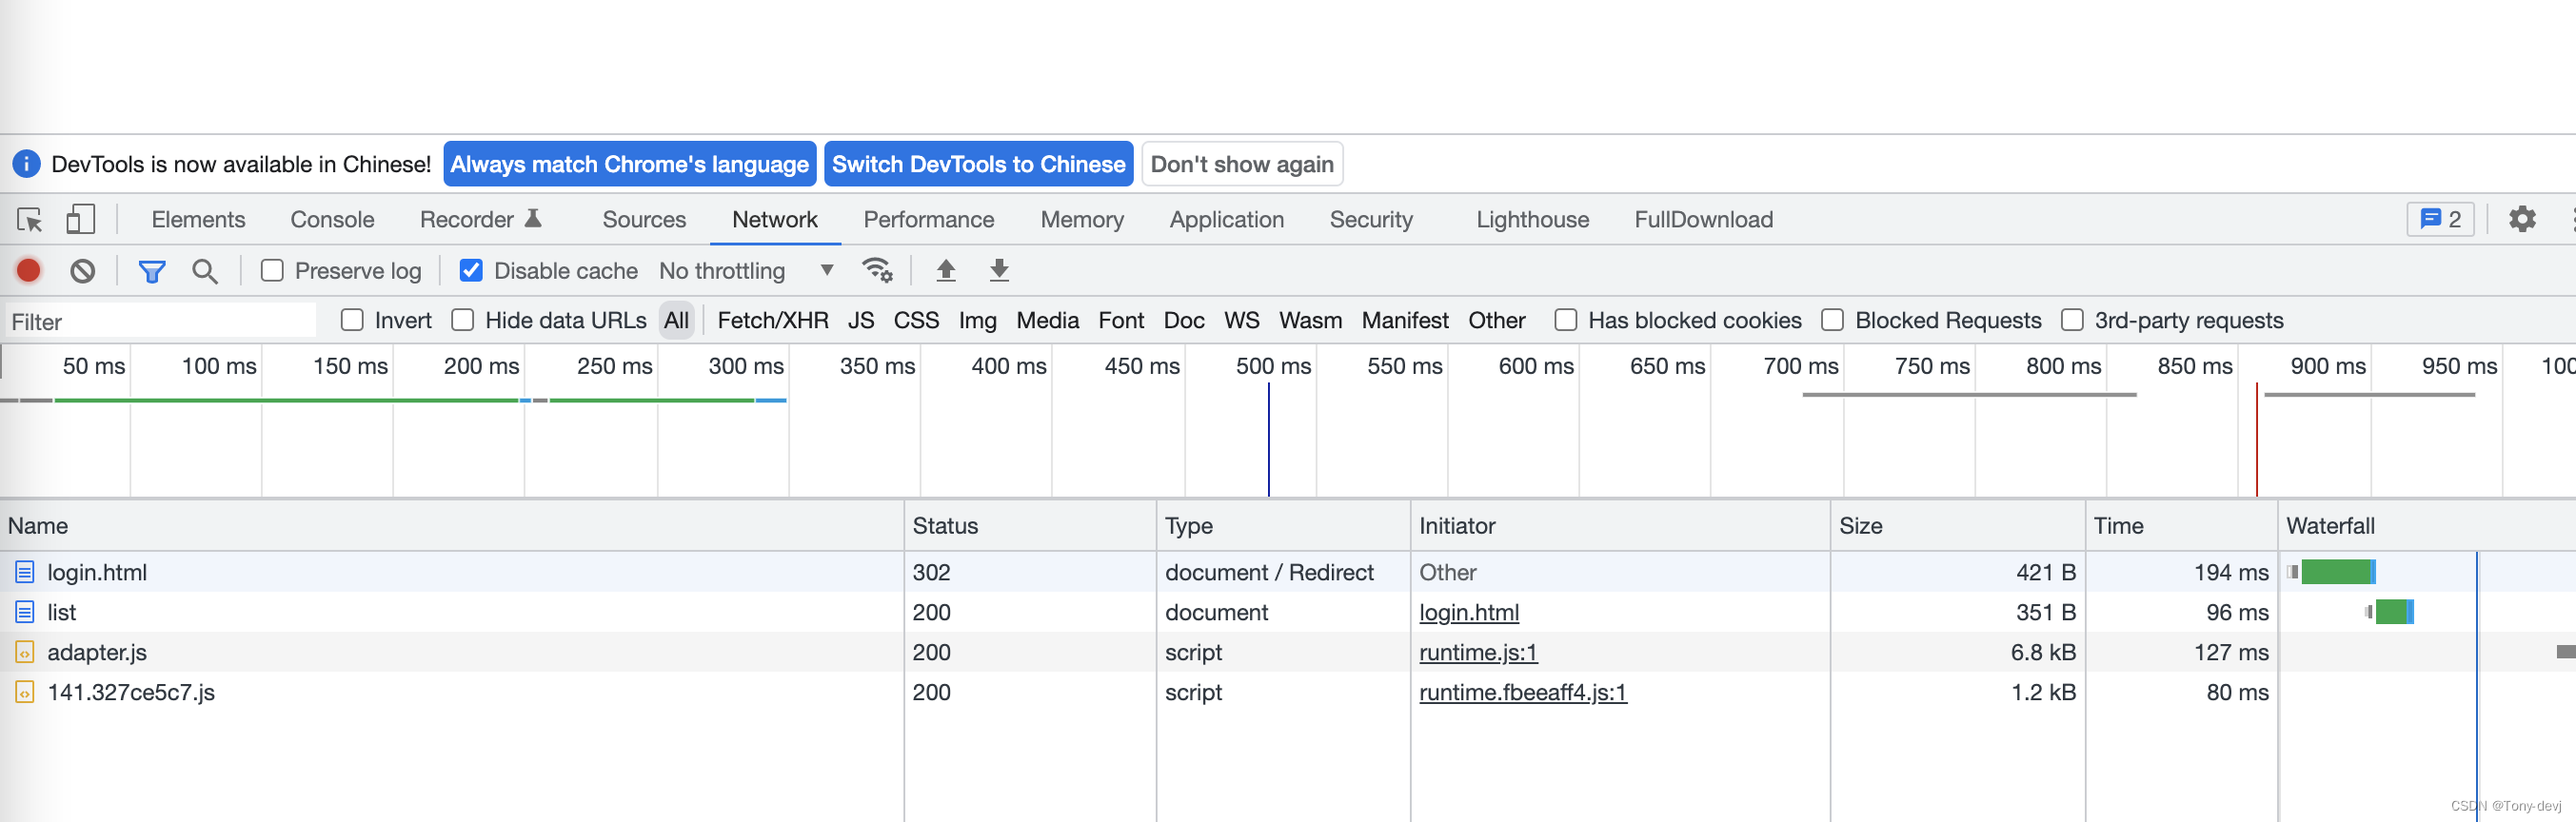
我们看看list接口的详细信息:
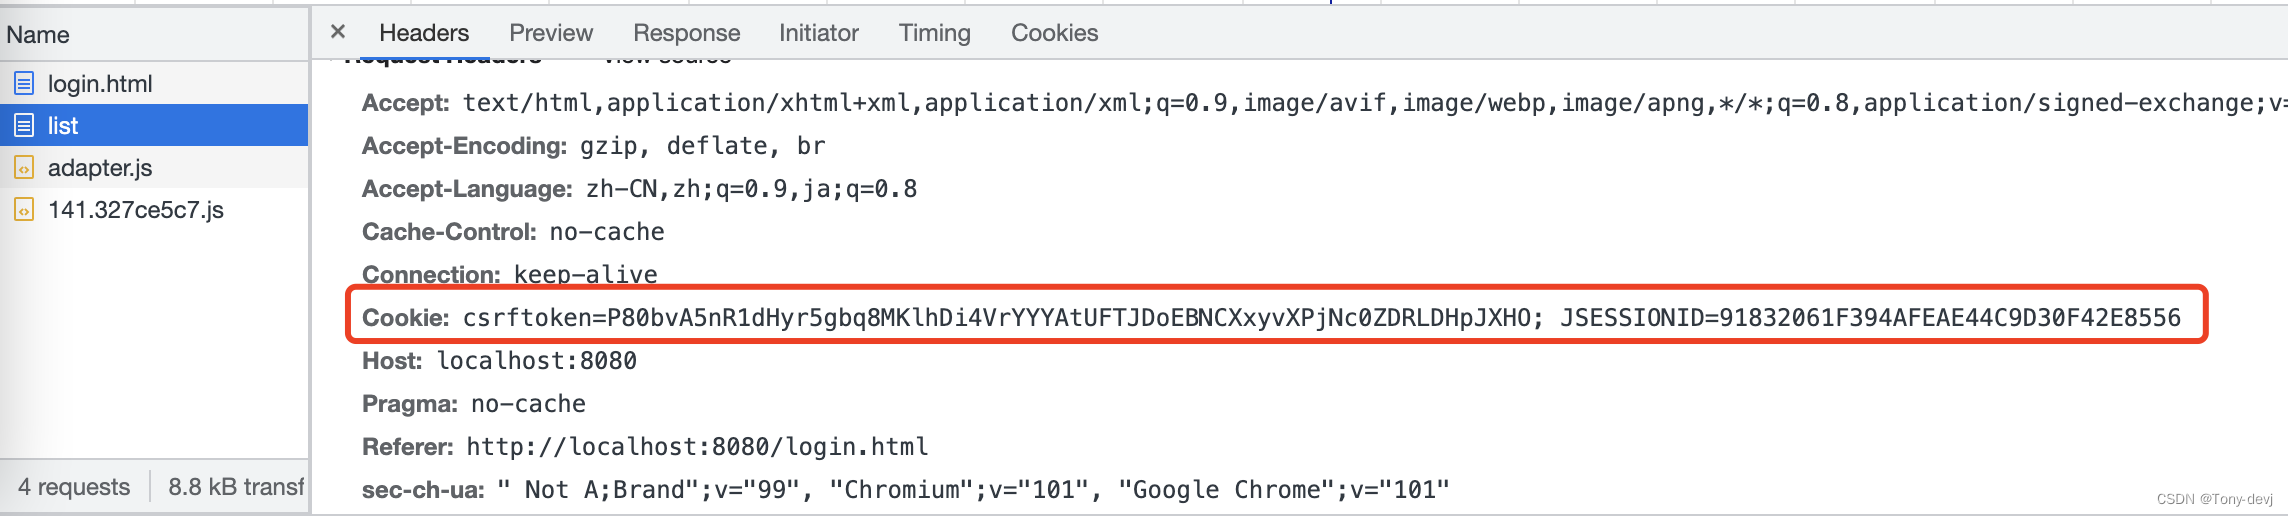
这个Spring Security给我们生成的,我们将后面jsessionId放到链接中访问试试。
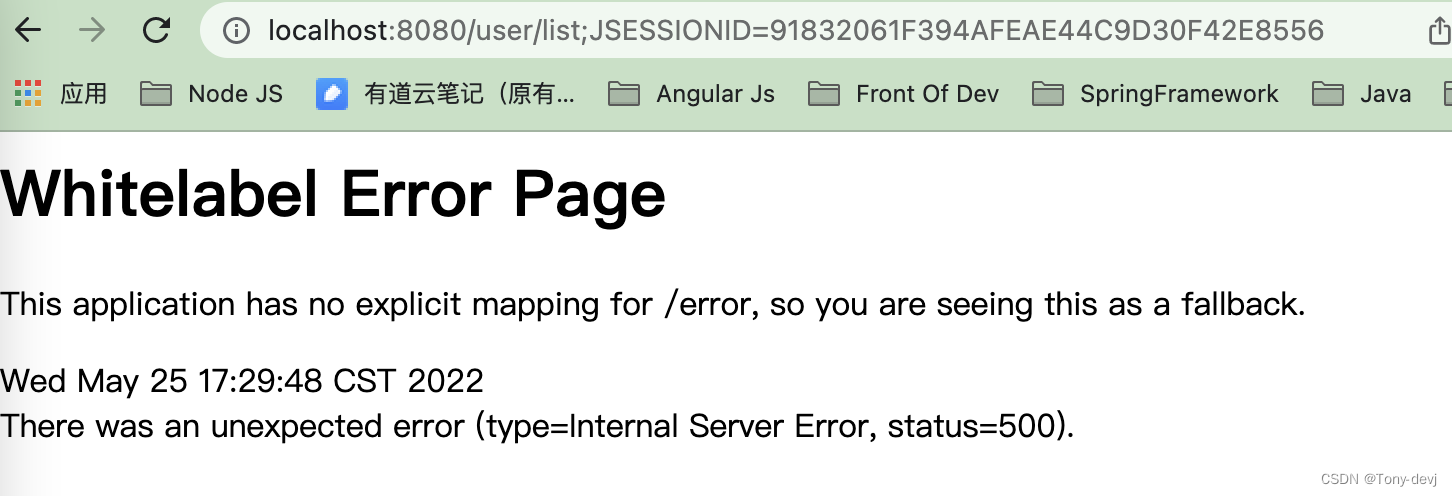
我们看到这里会报错,可以看出Spring Security已经给我们设置了URL重写的问题.默认spring security给我们规避了URL重写的漏洞。Spring Security的HTTP防火墙会帮助我们拦截不合法的URL, 当我们试图访问带session的URL时
后台会报错:
org.springframework.security.web.firewall.RequestRejectedException: The request was rejected because the URL contained a potentially malicious String ";"
	at org.springframework.security.web.firewall.StrictHttpFirewall.rejectedBlocklistedUrls(StrictHttpFirewall.java:456) ~[spring-security-web-5.6.2.jar:5.6.2]
	at org.springframework.security.web.firewall.StrictHttpFirewall.getFirewalledRequest(StrictHttpFirewall.java:429) ~[spring-security-web-5.6.2.jar:5.6.2]
	at org.springframework.security.web.FilterChainProxy.doFilterInternal(FilterChainProxy.java:196) ~[spring-security-web-5.6.2.jar:5.6.2]
	at org.springframework.security.web.FilterChainProxy.doFilter(FilterChainProxy.java:183) ~[spring-security-web-5.6.2.jar:5.6.2]
	at org.springframework.web.filter.DelegatingFilterProxy.invokeDelegate(DelegatingFilterProxy.java:354) ~[spring-web-5.3.18.jar:5.3.18]
	at org.springframework.web.filter.DelegatingFilterProxy.doFilter(DelegatingFilterProxy.java:267) ~[spring-web-5.3.18.jar:5.3.18]
	at org.apache.catalina.core.ApplicationFilterChain.internalDoFilter(ApplicationFilterChain.java:189) ~[tomcat-embed-core-9.0.60.jar:9.0.60]
	at org.apache.catalina.core.ApplicationFilterChain.doFilter(ApplicationFilterChain.java:162) ~[tomcat-embed-core-9.0.60.jar:9.0.60]
	at org.springframework.web.filter.RequestContextFilter.doFilterInternal(RequestContextFilter.java:100) ~[spring-web-5.3.18.jar:5.3.18]
	at org.springframework.web.filter.OncePerRequestFilter.doFilter(OncePerRequestFilter.java:117) ~[spring-web-5.3.18.jar:5.3.18]
	at org.apache.catalina.core.ApplicationFilterChain.internalDoFilter(ApplicationFilterChain.java:189) ~[tomcat-embed-core-9.0.60.jar:9.0.60]
	at org.apache.catalina.core.ApplicationFilterChain.doFilter(ApplicationFilterChain.java:162) ~[tomcat-embed-core-9.0.60.jar:9.0.60]
	at org.springframework.web.filter.FormContentFilter.doFilterInternal(FormContentFilter.java:93) ~[spring-web-5.3.18.jar:5.3.18]
	at org.springframework.web.filter.OncePerRequestFilter.doFilter(OncePerRequestFilter.java:117) ~[spring-web-5.3.18.jar:5.3.18]
	at org.apache.catalina.core.ApplicationFilterChain.internalDoFilter(ApplicationFilterChain.java:189) ~[tomcat-embed-core-9.0.60.jar:9.0.60]
	at org.apache.catalina.core.ApplicationFilterChain.doFilter(ApplicationFilterChain.java:162) ~[tomcat-embed-core-9.0.60.jar:9.0.60]
	at org.springframework.web.filter.CharacterEncodingFilter.doFilterInternal(CharacterEncodingFilter.java:201) ~[spring-web-5.3.18.jar:5.3.18]
	at org.springframework.web.filter.OncePerRequestFilter.doFilter(OncePerRequestFilter.java:117) ~[spring-web-5.3.18.jar:5.3.18]
	at org.apache.catalina.core.ApplicationFilterChain.internalDoFilter(ApplicationFilterChain.java:189) ~[tomcat-embed-core-9.0.60.jar:9.0.60]
	at org.apache.catalina.core.ApplicationFilterChain.doFilter(ApplicationFilterChain.java:162) ~[tomcat-embed-core-9.0.60.jar:9.0.60]
	at org.apache.catalina.core.StandardWrapperValve.invoke(StandardWrapperValve.java:197) ~[tomcat-embed-core-9.0.60.jar:9.0.60]
	at org.apache.catalina.core.StandardContextValve.invoke(StandardContextValve.java:97) ~[tomcat-embed-core-9.0.60.jar:9.0.60]
	at org.apache.catalina.authenticator.AuthenticatorBase.invoke(AuthenticatorBase.java:541) ~[tomcat-embed-core-9.0.60.jar:9.0.60]
	at org.apache.catalina.core.StandardHostValve.invoke(StandardHostValve.java:135) ~[tomcat-embed-core-9.0.60.jar:9.0.60]
	at org.apache.catalina.valves.ErrorReportValve.invoke(ErrorReportValve.java:92) ~[tomcat-embed-core-9.0.60.jar:9.0.60]
	at org.apache.catalina.core.StandardEngineValve.invoke(StandardEngineValve.java:78) ~[tomcat-embed-core-9.0.60.jar:9.0.60]
	at org.apache.catalina.connector.CoyoteAdapter.service(CoyoteAdapter.java:360) ~[tomcat-embed-core-9.0.60.jar:9.0.60]
	at org.apache.coyote.http11.Http11Processor.service(Http11Processor.java:399) ~[tomcat-embed-core-9.0.60.jar:9.0.60]
	at org.apache.coyote.AbstractProcessorLight.process(AbstractProcessorLight.java:65) ~[tomcat-embed-core-9.0.60.jar:9.0.60]
	at org.apache.coyote.AbstractProtocol$ConnectionHandler.process(AbstractProtocol.java:889) ~[tomcat-embed-core-9.0.60.jar:9.0.60]
	at org.apache.tomcat.util.net.NioEndpoint$SocketProcessor.doRun(NioEndpoint.java:1743) ~[tomcat-embed-core-9.0.60.jar:9.0.60]
	at org.apache.tomcat.util.net.SocketProcessorBase.run(SocketProcessorBase.java:49) ~[tomcat-embed-core-9.0.60.jar:9.0.60]
	at org.apache.tomcat.util.threads.ThreadPoolExecutor.runWorker(ThreadPoolExecutor.java:1191) ~[tomcat-embed-core-9.0.60.jar:9.0.60]
	at org.apache.tomcat.util.threads.ThreadPoolExecutor$Worker.run(ThreadPoolExecutor.java:659) ~[tomcat-embed-core-9.0.60.jar:9.0.60]
	at org.apache.tomcat.util.threads.TaskThread$WrappingRunnable.run(TaskThread.java:61) ~[tomcat-embed-core-9.0.60.jar:9.0.60]
	at java.base/java.lang.Thread.run(Thread.java:834) ~[na:na]
StrictHttpFirewall.class
private void rejectedBlocklistedUrls(HttpServletRequest request) {
        Iterator var2 = this.encodedUrlBlocklist.iterator();
        String forbidden;
        do {
            if (!var2.hasNext()) {
                var2 = this.decodedUrlBlocklist.iterator();
                do {
                    if (!var2.hasNext()) {
                        return;
                    }
                    forbidden = (String)var2.next();
                } while(!decodedUrlContains(request, forbidden));
                throw new RequestRejectedException("The request was rejected because the URL contained a potentially malicious String \"" + forbidden + "\"");
            }
            forbidden = (String)var2.next();
        } while(!encodedUrlContains(request, forbidden));
        throw new RequestRejectedException("The request was rejected because the URL contained a potentially malicious String \"" + forbidden + "\"");
    }
设置session过期处理
我们可以进行session过期跳转到相应的界面中,只需要进行如下配置即可:
protected void configure(HttpSecurity http) throws Exception {
        http.authorizeRequests().antMatchers("/user/**").hasAnyRole("USER","ADMIN")
                .antMatchers("/books/**").hasAnyRole("ADMIN")
                .antMatchers("/").permitAll()
                .and()
                .formLogin()
                .loginPage("/login.html")
                .permitAll()
                .and()
                .sessionManagement()
                //session过期跳转页面
                .invalidSessionUrl("/session/error")
                .and()
                .csrf()
                .disable();
    }
我们自定义扩展session 过期的策略,我们看到设置策略的地方是通过如下代码进行设置:
public SessionManagementConfigurer<H> invalidSessionStrategy(InvalidSessionStrategy invalidSessionStrategy) {
        Assert.notNull(invalidSessionStrategy, "invalidSessionStrategy");
        this.invalidSessionStrategy = invalidSessionStrategy;
        return this;
    }
我们可以创建一个自定义的session过期策略,只需要实现InvalidSessionStrategy接口即可。
我们还可以设置session的过期时间(默认为30分钟),通过如下设置:
server:
  servlet:
    session:
      timeout: 30m
一探究竟
我们看看Spring Security是怎么进行处理的呢?
我们已经知道,Spring Security通过我们的WebSecurityConfig进行HTTP的认证处理.如下:
 @Override
    protected void configure(HttpSecurity http) throws Exception {
        http.authorizeRequests().antMatchers("/user/**").hasAnyRole("USER","ADMIN")
                .antMatchers("/books/**").hasAnyRole("ADMIN")
                .antMatchers("/").permitAll()
                .and()
                .formLogin()
                .loginPage("/login.html")
                .permitAll()
                .and()
                .csrf()
                .disable();
    }
我们的配置类继承了WebSecurityConfigurerAdapter
protected void configure(HttpSecurity http) throws Exception {
        this.logger.debug("Using default configure(HttpSecurity). If subclassed this will potentially override subclass configure(HttpSecurity).");
        http.authorizeRequests((requests) -> {
            ((AuthorizedUrl)requests.anyRequest()).authenticated();
        });
        http.formLogin();
        http.httpBasic();
    }
在WebSecurityConfigurerAdapter有一个HttpSecurity属性,这个对象是进行http安全的设置类。
我们默认的时候怎么处理?
protected final HttpSecurity getHttp() throws Exception {
		//判断http是否为空
        if (this.http != null) {
            return this.http;
        } else {
            AuthenticationEventPublisher eventPublisher = this.getAuthenticationEventPublisher();
            this.localConfigureAuthenticationBldr.authenticationEventPublisher(eventPublisher);
            AuthenticationManager authenticationManager = this.authenticationManager();
            this.authenticationBuilder.parentAuthenticationManager(authenticationManager);
            Map<Class<?>, Object> sharedObjects = this.createSharedObjects();
            this.http = new HttpSecurity(this.objectPostProcessor, this.authenticationBuilder, sharedObjects);
            if (!this.disableDefaults) {
            	//申请默认的配置
                this.applyDefaultConfiguration(this.http);
                ClassLoader classLoader = this.context.getClassLoader();
                //加载相应的配置
                List<AbstractHttpConfigurer> defaultHttpConfigurers = SpringFactoriesLoader.loadFactories(AbstractHttpConfigurer.class, classLoader);
                Iterator var6 = defaultHttpConfigurers.iterator();

                while(var6.hasNext()) {
                    AbstractHttpConfigurer configurer = (AbstractHttpConfigurer)var6.next();
                    this.http.apply(configurer);
                }
            }

            this.configure(this.http);
            return this.http;
        }
    }
我们看看 applyDefaultConfiguration方法
private void applyDefaultConfiguration(HttpSecurity http) throws Exception {
        http.csrf();
        http.addFilter(new WebAsyncManagerIntegrationFilter());
        http.exceptionHandling();
        http.headers();
        //默认会进行session管理
        http.sessionManagement();
        http.securityContext();
        http.requestCache();
        http.anonymous();
        http.servletApi();
        http.apply(new DefaultLoginPageConfigurer());
        http.logout();
    }
这里spring security默认会进行session的管理,我们看看具体的实现
public SessionManagementConfigurer<HttpSecurity> sessionManagement() throws Exception {
        return (SessionManagementConfigurer)this.getOrApply(new SessionManagementConfigurer());
    }
Spring Security通过SessionManagementConfigurer进行session管理的相关配置。
//默认的session处理策略
private final SessionAuthenticationStrategy DEFAULT_SESSION_FIXATION_STRATEGY = createDefaultSessionFixationProtectionStrategy();

public SessionManagementConfigurer() {
		//设置session的相关策略
        this.sessionFixationAuthenticationStrategy = this.DEFAULT_SESSION_FIXATION_STRATEGY;
        this.sessionAuthenticationStrategies = new ArrayList();
    }
我们看到默认的策略是通过调用createDefaultSessionFixationProtectionStrategy方法进行生成。
private static SessionAuthenticationStrategy createDefaultSessionFixationProtectionStrategy() {
		//创建默认的session策略
        return new ChangeSessionIdAuthenticationStrategy();
    }
ChangeSessionIdAuthenticationStrategy类:
public final class ChangeSessionIdAuthenticationStrategy extends AbstractSessionFixationProtectionStrategy {
    public ChangeSessionIdAuthenticationStrategy() {
    }

    HttpSession applySessionFixation(HttpServletRequest request) {
    	//改变sessionId
        request.changeSessionId();
        return request.getSession();
    }
}
因此Spring Security默认是为请求每次生成sessionId进行处理的。所以URL重写就不能成功,会抛出相关的错误。
public void onAuthentication(Authentication authentication, HttpServletRequest request, HttpServletResponse response) {
        boolean hadSessionAlready = request.getSession(false) != null;
        if (hadSessionAlready || this.alwaysCreateSession) {
            HttpSession session = request.getSession();
            if (hadSessionAlready && request.isRequestedSessionIdValid()) {
                Object mutex = WebUtils.getSessionMutex(session);
                String originalSessionId;
                String newSessionId;
                synchronized(mutex) {
                    originalSessionId = session.getId();
                    //ChangeSessionIdAuthenticationStrategy
                    session = this.applySessionFixation(request);
                    newSessionId = session.getId();
                }

                if (originalSessionId.equals(newSessionId)) {
                    this.logger.warn("Your servlet container did not change the session ID when a new session was created. You will not be adequately protected against session-fixation attacks");
                } else if (this.logger.isDebugEnabled()) {
                    this.logger.debug(LogMessage.format("Changed session id from %s", originalSessionId));
                }

                this.onSessionChange(originalSessionId, session, authentication);
            }

        }
    }
我们看到AbstractSessionFixationProtectionStrategy实现了SessionAuthenticationStrategy接口,我们看看这个接口的实现,通过类名就不难看出是session的不同策略。

Spring Security提供了如下策略:
- newSession:登录之后创建一个新的session
 final HttpSession applySessionFixation(HttpServletRequest request) {
        HttpSession session = request.getSession();
        String originalSessionId = session.getId();
        this.logger.debug(LogMessage.of(() -> {
            return "Invalidating session with Id '" + originalSessionId + "' " + (this.migrateSessionAttributes ? "and" : "without") + " migrating attributes.";
        }));
        Map<String, Object> attributesToMigrate = this.extractAttributes(session);
        int maxInactiveIntervalToMigrate = session.getMaxInactiveInterval();
        session.invalidate();
        session = request.getSession(true);
        this.logger.debug(LogMessage.format("Started new session: %s", session.getId()));
        this.transferAttributes(attributesToMigrate, session);
        if (this.migrateSessionAttributes) {
            session.setMaxInactiveInterval(maxInactiveIntervalToMigrate);
        }

        return session;
    }
- migrateSession:登录之后创建一个新的session, 并将旧的session中的数据复制过来
final HttpSession applySessionFixation(HttpServletRequest request) {
        HttpSession session = request.getSession();
        String originalSessionId = session.getId();
        this.logger.debug(LogMessage.of(() -> {
            return "Invalidating session with Id '" + originalSessionId + "' " + (this.migrateSessionAttributes ? "and" : "without") + " migrating attributes.";
        }));
        Map<String, Object> attributesToMigrate = this.extractAttributes(session);
        int maxInactiveIntervalToMigrate = session.getMaxInactiveInterval();
        session.invalidate();
        session = request.getSession(true);
        this.logger.debug(LogMessage.format("Started new session: %s", session.getId()));
        this.transferAttributes(attributesToMigrate, session);
        if (this.migrateSessionAttributes) {
            session.setMaxInactiveInterval(maxInactiveIntervalToMigrate);
        }

        return session;
    }
- changeSessionId:不创建新的会话,而是使用由Servlet容器提供的会话固定保护
HttpSession applySessionFixation(HttpServletRequest request) {
        request.changeSessionId();
        return request.getSession();
    }
- none:不做任何的处理,登陆之后沿用就的session
 public void onAuthentication(Authentication authentication, HttpServletRequest request, HttpServletResponse response) {
    }
我们看看相关代码:
public final class SessionFixationConfigurer {
        public SessionFixationConfigurer() {
        }

        public SessionManagementConfigurer<H> newSession() {
            SessionFixationProtectionStrategy sessionFixationProtectionStrategy = new SessionFixationProtectionStrategy();
            sessionFixationProtectionStrategy.setMigrateSessionAttributes(false);
            SessionManagementConfigurer.this.setSessionFixationAuthenticationStrategy(sessionFixationProtectionStrategy);
            return SessionManagementConfigurer.this;
        }

        public SessionManagementConfigurer<H> migrateSession() {
            SessionManagementConfigurer.this.setSessionFixationAuthenticationStrategy(new SessionFixationProtectionStrategy());
            return SessionManagementConfigurer.this;
        }

        public SessionManagementConfigurer<H> changeSessionId() {
            SessionManagementConfigurer.this.setSessionFixationAuthenticationStrategy(new ChangeSessionIdAuthenticationStrategy());
            return SessionManagementConfigurer.this;
        }

        public SessionManagementConfigurer<H> none() {
            SessionManagementConfigurer.this.setSessionFixationAuthenticationStrategy(new NullAuthenticatedSessionStrategy());
            return SessionManagementConfigurer.this;
        }
    }
现在我们大体上知道了session的相关管理。具体的操作可以进入相应的类中看看具体的实现。
我们可以通过自己在http中设置sesssionManager进行处理。我们现在将不做任何session处理,我们修改 WebSecurityConfig,代码如下:
@Override
    protected void configure(HttpSecurity http) throws Exception {
        http.authorizeRequests().antMatchers("/user/**").hasAnyRole("USER","ADMIN")
                .antMatchers("/books/**").hasAnyRole("ADMIN")
                .antMatchers("/").permitAll()
                .and()
                .formLogin()
                .loginPage("/login.html")
                .permitAll()
                .and()
                .sessionManagement().sessionFixation().none()
                .and()
                .csrf()
                .disable();
    }
sessionManagement().sessionFixation().none()设置的策略为 none:不做任何的处理,登陆之后沿用就的session.
总结
Spring Security为我们提供了多种session的处理策略。方便我们进行session的管理。Spring也为我们提供了Spring session的相关包。后面我们会说到。因为我们是在单机中,一般我们的服务部署为了达到高可用的情况一般都不止一台服务,这个时候我们的session该如何管理?在并发的情况下,Spring Security是如何控制session的呢?


 1633
1633


 被折叠的 条评论
为什么被折叠?
被折叠的 条评论
为什么被折叠?
 到【灌水乐园】发言


