


1 rtsp 协议后编码解码
rtsp协议的问题就是,拼接完成后,还需要编码,而unity里面再需要解码,需要的过程多了一步编码再解码,大大加重了
2 rtsp 协议后轻量编码
rtsp协议使用mjpeg进行图片传输。why?这样做的好处是解码端进行像素处理以后不用再进行h264和h265编码,而unity端也不用再解码一次,这样增加了程序运行效率
3 server
1 rtsp server
2 websocket server
c# c++ 都可以做websocket server,
使用c++ 做一个server
server 既能接收推流,又能接收流
4 unity client
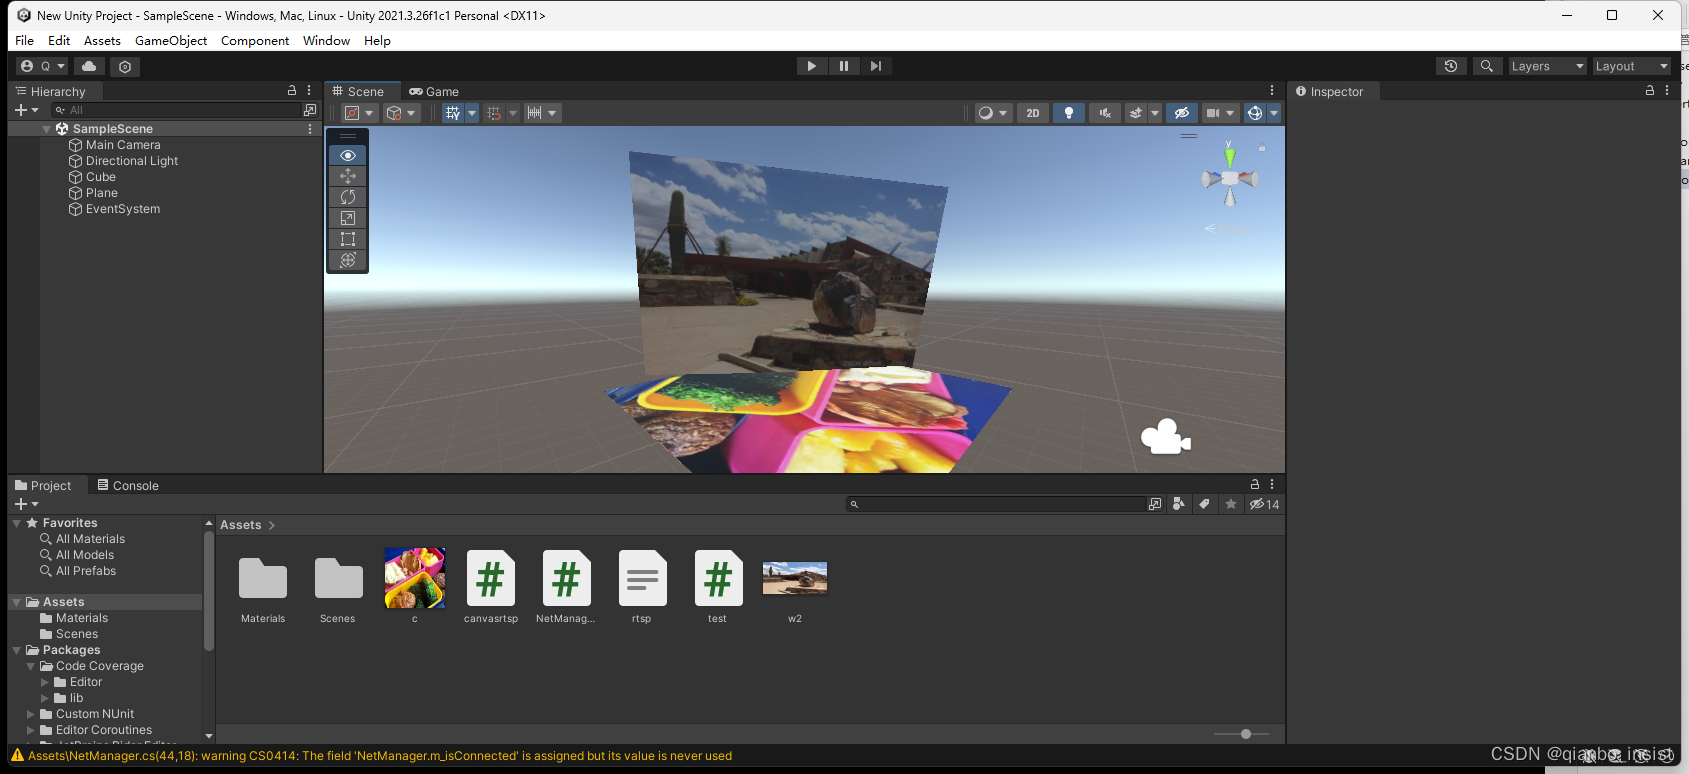
unity 上建立一个两个plane,调整位置
using System.Collections;
using System.Collections.Generic;
using UnityEngine;
using System.IO;
//using NetM
public class test : MonoBehaviour
{
    // Start is called before the first frame update
    private string msg = null;
    string[] file1Lines;
    void Start()
    {
        string path = Application.dataPath + "/rtsp.txt";

        path = path.Replace("/", "\\");
        //File静态类方式
        if (File.Exists(path))
        {
            Debug.Log("FileExists");
            file1Lines = File.ReadAllLines(path);
            foreach (string line in file1Lines)
            {
                Debug.Log(line);
            }
        }
        else
        {
            Debug.Log("FileNotExists");
            File.CreateText(path);
        }


        //Texture2D m_resultTure = new Texture2D((int)widthSize, (int)heighSize, TextureFormat.RGB24, false);
        //Texture2D m_resultTure = GetComponent(texture1);
        //texture rigidbody2D = GetComponent(texture1);
        //rawImage = GetComponent<RawImage>();
        //rawImage.texture = texture;
        //NetManager.M_Instance.Connect("ws://127.0.0.1:8888");   //本机地址
    }
    private void OnGUI()
    {
        //绘制输入框,以及获取输入框中的内容
        //PS:第二参数必须是msg,否则在我们输入后,虽然msg可以获得到输入内容,但马上就被第二参数在下一帧重新覆盖。
        msg = GUI.TextField(new Rect(10, 10, 100, 20), msg);

        //绘制按钮,以及按下发送信息按钮,发送信息
        if (GUI.Button(new Rect(120, 10, 80, 20), "发送信息") && msg != null)
        {
            NetManager.M_Instance.Send(msg);
        }

        //绘制按钮,以及按下断开连接按钮,发送断开连接请求
        if (GUI.Button(new Rect(210, 10, 80, 20), "断开连接"))
        {
            Debug.Log("向服务器请求断开连接......");
            NetManager.M_Instance.CloseClientWebSocket();
        }

    }

    void Update()
    {

    }
}
4.1 websocket client
using System;
using System.Collections;
using System.Collections.Generic;
using UnityEngine;
using System.Net.WebSockets;
using System.Threading;
using System.Text;

public class NetManager
{
    #region 实现单例的代码
    //变量
    private volatile static NetManager m_instance;
    private static object m_locker = new object();

    //属性
    public static NetManager M_Instance
    {
        get
        {
            //线程锁。防止同时判断为null时同时创建对象
            lock (m_locker)
            {
                //如果不存在对象则创建对象
                if (m_instance == null)
                {
                    m_instance = new NetManager();
                }
            }
            return m_instance;
        }
    }
    #endregion

    //私有化构造
    private NetManager() { }

    //客户端webSocket
    private ClientWebSocket m_clientWebSocket;
    //处理接收数据的线程
    private Thread m_dataReceiveThread;
    //线程持续执行的标识符
    private bool m_isDoThread;
    private bool m_isConnected = false;

    /// <summary>
    /// ClientWebSocket,与服务器建立连接。
    /// </summary>
    /// <param name="uriStr"></param>
    public void Connect(string uriStr)
    {
        try
        {
            //创建ClientWebSocket
            m_clientWebSocket = new ClientWebSocket();

            //初始化标识符
            m_isDoThread = true;

            //创建线程
            m_dataReceiveThread = new Thread(ReceiveData);  //创建数据接收线程
            m_dataReceiveThread.IsBackground = true;        //设置为后台可以运行,主线程关闭时,此线程也会关闭(实际在Unity中并没什么用,还是要手动关闭)

            //设置请求头部
            //m_clientWebSocket.Options.SetRequestHeader("headerName", "hearValue");

            //开始连接
            var task = m_clientWebSocket.ConnectAsync(new Uri(uriStr), CancellationToken.None);
            task.Wait();    //等待

            //启动数据接收线程
            m_dataReceiveThread.Start(m_clientWebSocket);

            //输出提示
            if (m_clientWebSocket.State == WebSocketState.Open)
            {
                Debug.Log("连接服务器完毕。");
                m_isConnected = true;
            }
        }
        catch (WebSocketException ex)
        {
            Debug.LogError("连接出错:" + ex.Message);
            Debug.LogError("WebSokcet状态:" + m_clientWebSocket.State);
            CloseClientWebSocket();
        }

    }


    /// <summary>
    /// 持续接收服务器的信息。
    /// </summary>
    /// <param name="socket"></param>
    private void ReceiveData(object socket)
    {
        //类型转换
        ClientWebSocket socketClient = (ClientWebSocket)socket;
        //持续接收信息
        while (m_isDoThread)
        {
            //接收数据
            string data = Receive(socketClient);
            //数据处理(可以和服务器一样使用事件(委托)来处理)
            if (data != null)
            {
                Debug.Log("接收的服务器消息:" + data);
            }
            //组装纹理
            //Texture2D tex2D = new Texture2D(100, 100);
            //tex2D.LoadImage(bytes);


        }
        Debug.Log("接收信息线程结束。");
    }

    /// <summary>
    /// 接收服务器信息。
    /// </summary>
    /// <param name="socket"></param>
    /// <returns></returns>
    private byte[] Receive(ClientWebSocket socket)
    {
        try
        {
            //接收消息时,对WebSocketState是有要求的,所以加上if判断(如果不是这两种状态,会报出异常)
            if (socket != null && (socket.State == WebSocketState.Open || socket.State == WebSocketState.CloseSent))
            {
                byte[] arrry = new byte[1024];  //注意长度,如果服务器发送消息过长,这也需要跟着调整
                ArraySegment<byte> buffer = new ArraySegment<byte>(arrry);  //实例化一个ArraySegment结构体
                //接收数据
                var task = socket.ReceiveAsync(buffer, CancellationToken.None);
                task.Wait();//等待

                //仅作状态展示。在客户端发送关闭消息后,服务器会回复确认信息,在收到确认信息后状态便是CloseReceived,这里打印输出。
                Debug.Log("socekt当前状态:" + socket.State);

                //如果是结束消息确认,则返回null,不再解析信息
                if (socket.State == WebSocketState.CloseReceived || task.Result.MessageType == WebSocketMessageType.Close)
                {
                    return null;
                }
                //如果是字符串
                //return Encoding.UTF8.GetString(buffer.Array, 0, task.Result.Count);
                return buffer.Array;
            }
            else
            {
                return null;
            }
        }
        catch (WebSocketException ex)
        {
            Debug.LogError("接收服务器信息错误:" + ex.Message);
            CloseClientWebSocket();
            return null;
        }
    }

    /// <summary>
    /// 发送消息
    /// </summary>
    /// <param name="content"></param>
    public void Send(string content)
    {
        try
        {
            //发送消息时,对WebSocketState是有要求的,加上if判断(如果不是这两种状态,会报出异常)
            if (m_clientWebSocket != null && (m_clientWebSocket.State == WebSocketState.Open || m_clientWebSocket.State == WebSocketState.CloseReceived))
            {
                ArraySegment<byte> array = new ArraySegment<byte>(Encoding.UTF8.GetBytes(content)); //创建内容的字节编码数组并实例化一个ArraySegment结构体
                var task = m_clientWebSocket.SendAsync(array, WebSocketMessageType.Binary, true, CancellationToken.None);  //发送
                task.Wait();  //等待

                Debug.Log("发送了一个消息到服务器。");
            }
        }
        catch (WebSocketException ex)
        {
            Debug.LogError("向服务器发送信息错误:" + ex.Message);
            CloseClientWebSocket();
        }
    }

    /// <summary>
    /// 关闭ClientWebSocket。
    /// </summary>
    public void CloseClientWebSocket()
    {
        //关闭Socket
        if (m_clientWebSocket != null && m_clientWebSocket.State == WebSocketState.Open)
        {
            var task = m_clientWebSocket.CloseAsync(WebSocketCloseStatus.NormalClosure, string.Empty, CancellationToken.None);
            Debug.Log("socekt状态:" + m_clientWebSocket.State);
            Debug.Log("close");
        }
        //关闭线程
        if (m_dataReceiveThread != null && m_dataReceiveThread.IsAlive)
        {
            m_isDoThread = false;
            m_dataReceiveThread = null;
        }
    }
}
以上为websocket client, 接收到数据以后就可以替换纹理,接下去我们把里面的纹理图像保存出来,这样可以使用多个不同的camera 来保存不同角度和三维场景中不同的图像流。然后使用websocket 传输出去,形成一个rtsp server。
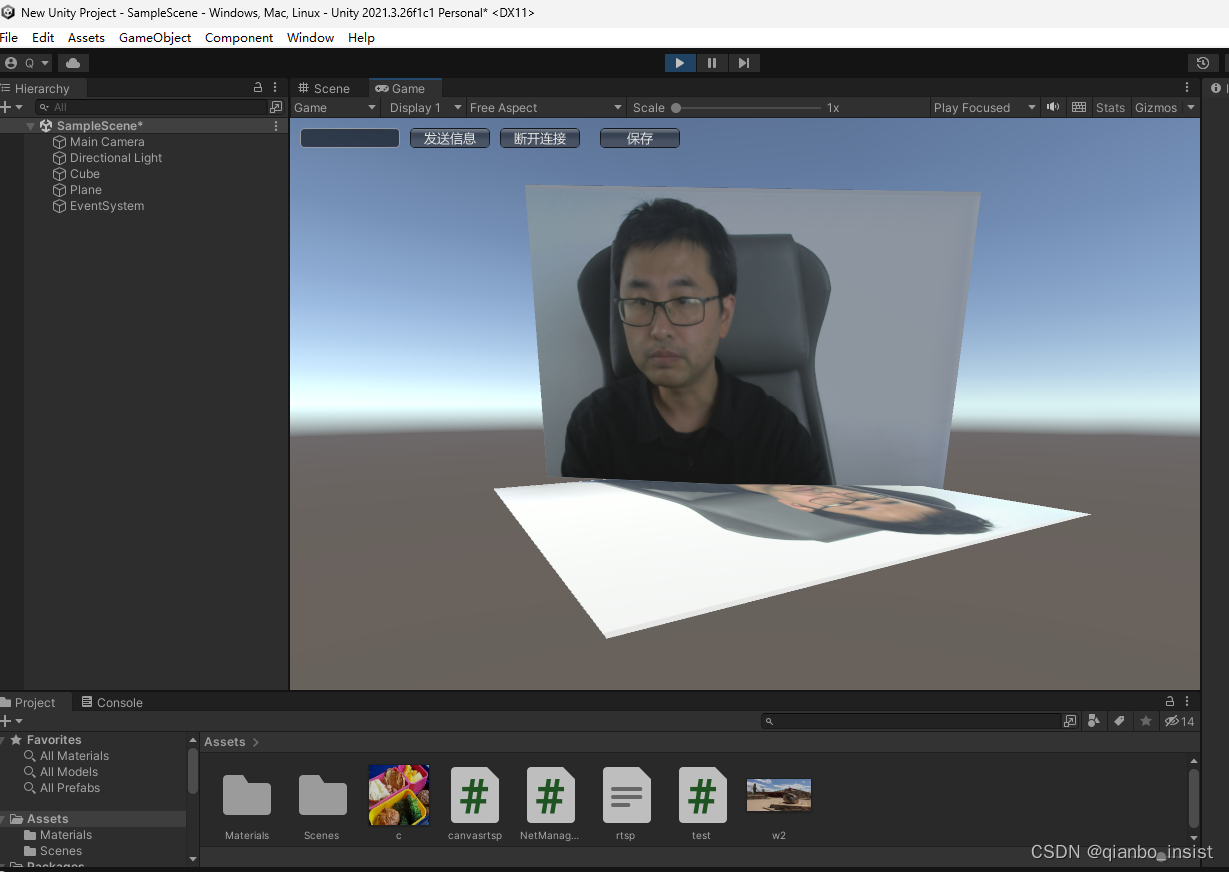
4.2 脚本start时候读取本地纹理
using System.Collections;
using System.Collections.Generic;
using UnityEngine;
using System.IO;
using System;
public class canvasrtsp : MonoBehaviour
{
    // Start is called before the first frame update
    //public RawImage rawImage;//相机渲染的UI
    //public GameObject plane1;//相机渲染的GameObject

    //StartCoroutine(LoadTextureFromInternet("http://avatar.csdnimg.cn/1/E/6/2_u013012420.jpg"));

    //IEnumerator LoadTextureFromInternet(string path)
    //{
    //    UnityWebRequest request = new UnityWebRequest(path);
    //    //给request的downloadhandle赋值,new出来的UnityWebRequest不附加downloadhandle
    //    //数据,不赋值的话访问不到下载出来的数据
    //    DownloadHandlerTexture texture = new DownloadHandlerTexture(true);
    //    request.downloadHandler = texture;
    //    yield return request.Send();
    //    if (string.IsNullOrEmpty(request.error))
    //    {
    //        pic = texture.texture;
    //    }

    //    Image tempImage = GameObject.Find("Image").GetComponent<Image>();
    //    Sprite sp = Sprite.Create((Texture2D)pic, new Rect(0, 0, pic.width, pic.height), Vector2.zero);
    //    tempImage.sprite = sp;

    //    GameObject go = GameObject.Find("plane1");
    //    go.GetComponent<MeshRenderer>().material.mainTexture = pic;
    //}

    Texture2D Base64ToRGBA32(string imageData, int offset = 0)
    {
        Texture2D tex2D = new Texture2D(2, 2, TextureFormat.RGB24, false);
        imageData = imageData.Substring(offset);
        byte[] data = Convert.FromBase64String(imageData);
        tex2D.LoadImage(data);
        return tex2D;
    }
    void Start()
    {
        string path1 = @"F:\pic\b.png";
        FileStream fileStream = new FileStream(path1, FileMode.Open, FileAccess.Read);
        fileStream.Seek(0, SeekOrigin.Begin);
        byte[] bye = new byte[fileStream.Length];
        fileStream.Read(bye, 0, bye.Length);
        fileStream.Close();
        //创建texture
        Texture2D texture2D = new Texture2D(240, 144);
        texture2D.LoadImage(bye);
        //plane1.gameObject.SetActive(true);
        GameObject go = GameObject.Find("Plane");
        //GameObject go1 = GameObject.FindWithTag("ppp");
        GameObject go1 = GameObject.Find("Cube");
        //Debug.Log(texture2D.width, texture2D.height);
        go.GetComponent<MeshRenderer>().material.mainTexture = texture2D;
        go1.GetComponent<MeshRenderer>().material.mainTexture = texture2D;
        //T image = GetComponent("image1");
    }

    // Update is called once per frame
    void Update()
    {

    }
}
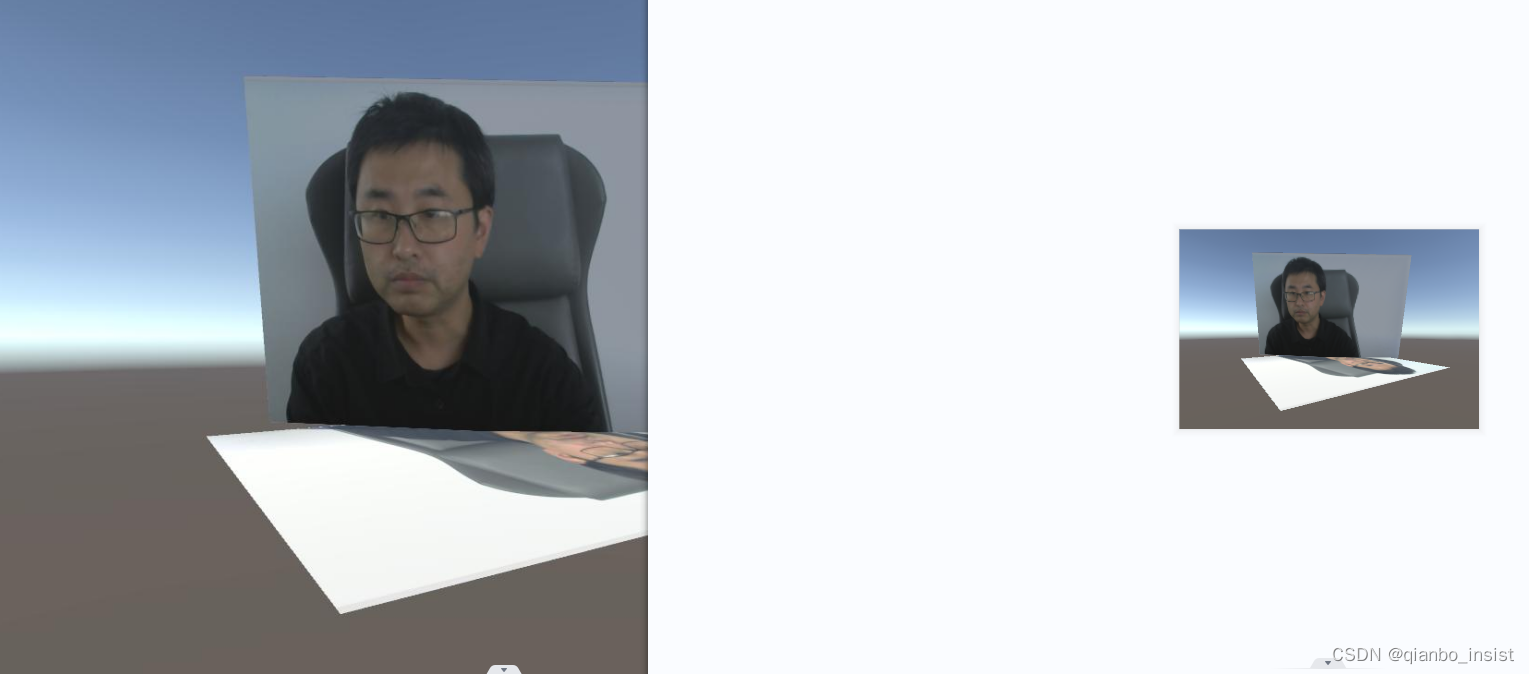
5 保存相机纹理
增加一个camera capture函数,这个函数将当前相机所见保存成图像
 Texture2D CaptureCamera(Camera camera, Rect rect)
    {
        RenderTexture rt = new RenderTexture((int)rect.width, (int)rect.height, 0);//创建一个RenderTexture对象
        camera.targetTexture = rt;//临时设置相关相机的targetTexture为rt, 并手动渲染相关相机
        camera.Render();
        //ps: --- 如果这样加上第二个相机,可以实现只截图某几个指定的相机一起看到的图像。
        //ps: camera2.targetTexture = rt;
        //ps: camera2.Render();
        //ps: -------------------------------------------------------------------

        RenderTexture.active = rt;//激活这个rt, 并从中中读取像素。
        Texture2D screenShot = new Texture2D((int)rect.width, (int)rect.height, TextureFormat.RGB24, false);
        screenShot.ReadPixels(rect, 0, 0);//注:这个时候,它是从RenderTexture.active中读取像素
        screenShot.Apply();

        //重置相关参数,以使用camera继续在屏幕上显示
        camera.targetTexture = null;
        //ps: camera2.targetTexture = null;
        RenderTexture.active = null; //JC: added to avoid errors
        GameObject.Destroy(rt);

        byte[] bytes = screenShot.EncodeToPNG();//最后将这些纹理数据,成一个png图片文件
        //string filename = Application.dataPath + "/Screenshot.png";
        string filename = "e:/qianbo2.png";
        System.IO.File.WriteAllBytes(filename, bytes);
        Debug.Log(string.Format("截屏了一张照片: {0}", filename));

        return screenShot;
    }
readpixel 方式
readpixel方式一定要注意等到 frameEnd 结束才能读取
 WaitForEndOfFrame frameEnd = new WaitForEndOfFrame();

    IEnumerator CaptureScreenshot2(Rect rect)
    {
        yield return frameEnd;
        Texture2D screenShot = new Texture2D((int)rect.width, (int)rect.height, TextureFormat.RGB24, false);//先创建一个的空纹理,大小可根据实现需要来设置
#pragma warning disable UNT0017 // SetPixels invocation is slow
        screenShot.ReadPixels(rect, 0, 0);//读取屏幕像素信息并存储为纹理数据,
#pragma warning restore UNT0017 // SetPixels invocation is slow
        screenShot.Apply();
        byte[] bytes = screenShot.EncodeToJPG();//然后将这些纹理数据,成一个png图片文件

        string filename = "e:/qianbo1.JPG";
        System.IO.File.WriteAllBytes(filename, bytes);
        Debug.Log(string.Format("截屏了一张图片: {0}", filename));
        //最后,我返回这个Texture2d对象,这样我们直接,所这个截图图示在游戏中,当然这个根据自己的需求的。
        //yield return screenShot;
    }
update
我们使用update 来测试我们的函数,按下空格,按下S,按下F,分别调用函数
 void Update()
    {
        if (Input.GetKeyDown(KeyCode.Space))
        {
            int screenWidth = Screen.width;
            int screenHeight = Screen.height;
            RenderTexture rt = new RenderTexture(screenWidth, screenHeight, 24);
            Camera.main.targetTexture = rt;
            Camera.main.Render();
            RenderTexture.active = rt;//激活这个rt, 并从中中读取像素。
            Texture2D screenShot = new Texture2D(screenWidth, screenHeight, TextureFormat.RGB24, false);
            screenShot.ReadPixels(new Rect(0, 0, screenWidth, screenHeight), 0, 0);
            screenShot.Apply();
            byte[] bytes = screenShot.EncodeToJPG();
            //string path = Application.dataPath + "/../" + fileName + ".jpg";
            //string path = Application.dataPath + "/../" + fileName + ".jpg";
            string path = "e:/qianbo3.jpg" ;
            File.WriteAllBytes(path, bytes);
            Debug.Log(string.Format("space: {0}", path));
        }
        else if(Input.GetKeyDown(KeyCode.F))
        {

            Rect rect = new Rect(10, 10, 300, 200);
            CaptureScreenshot2(rect);
            //Debug.Log(string.Format("F: {0}", path));
        }
        else if (Input.GetKeyDown(KeyCode.S))
        {
            mainCamera = GameObject.Find("Main Camera");

            Rect rect = new Rect(0, 0, 300, 200);
            //获取主摄像机的Camera组件
            //mainCamera= GameObject.Find("MainCamera").GetComponent<Camera>();
            //Camera ca = Camera.main;
            CaptureCamera(Camera.main, rect);
        }
    }
以下为存储到磁盘的图像
rtsp 方式传输
我们将使用rtsp方式传送抓取到的纹理图像,使用mjpeg over rtsp, 将jpeg 传送到server,由server提供rtsp 服务,或者http服务,使用c++来写这个server,这个由下一次再讲了。


 5368
5368


 被折叠的 条评论
为什么被折叠?
被折叠的 条评论
为什么被折叠?
 到【灌水乐园】发言


