


轮廓最小外接矩形—minAreaRect()
函数原型
RotatedRect minAreaRect( InputArray points );points: 输入的二维点集, 可以填Mat类型或std::vector
返回值: RotatedRect类矩形对象, 外接旋转矩形主要成员有center、size、 angle、points
注意点
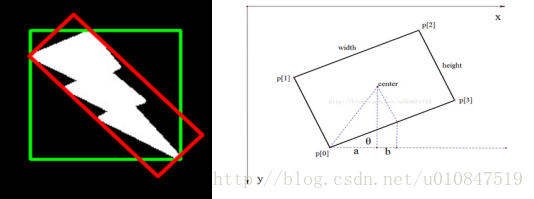
在opencv中,坐标的原点在左上角,与x轴平行的方向为角度为0,逆时针旋转角度为负,顺时针旋转角度为正。而RotatedRect类是以矩形的哪一条边与x轴的夹角作为角度的呢?angle 是水平轴(x轴)逆时针旋转,与碰到的第一个边的夹角,而opencv默认把这个边的边长作为width,angle的取值范围必然是负的
代码
   Mat srcImg = imread("D:\\1\\10.png");
    imshow("src", srcImg);
    Mat dstImg = srcImg.clone();

    cvtColor(srcImg, srcImg, CV_BGR2GRAY);
    threshold(srcImg, srcImg, 100, 255, CV_THRESH_BINARY); //二值化
    imshow("threshold", srcImg);

    vector<vector<Point>> contours;
    vector<Vec4i> hierarcy;

    findContours(srcImg, contours, hierarcy, CV_RETR_EXTERNAL, CV_CHAIN_APPROX_NONE);
    cout<<"num="<<contours.size()<<endl;
    vector<Rect> boundRect(contours.size());  //定义外接矩形集合
    vector<RotatedRect> box(contours.size()); //定义最小外接矩形集合
    Point2f rect[4];
    for(int i=0; i<contours.size(); i++)
    {
        box[i] = minAreaRect(Mat(contours[i]));  //计算每个轮廓最小外接矩形
        boundRect[i] = boundingRect(Mat(contours[i]));

        circle(dstImg, Point(box[i].center.x, box[i].center.y), 5, Scalar(0, 255, 0), -1, 8);  //绘制最小外接矩形的中心点
        box[i].points(rect);  //把最小外接矩形四个端点复制给rect数组

        rectangle(dstImg, Point(boundRect[i].x, boundRect[i].y), Point(boundRect[i].x + boundRect[i].width, boundRect[i].y + boundRect[i].height), Scalar(0, 255, 0), 2, 8);
        for(int j=0; j<4; j++)
        {
            line(dstImg, rect[j], rect[(j+1)%4], Scalar(0, 0, 255), 2, 8);  //绘制最小外接矩形每条边
        }

    }
    imshow("dst", dstImg);

    waitKey(0);
运行结果
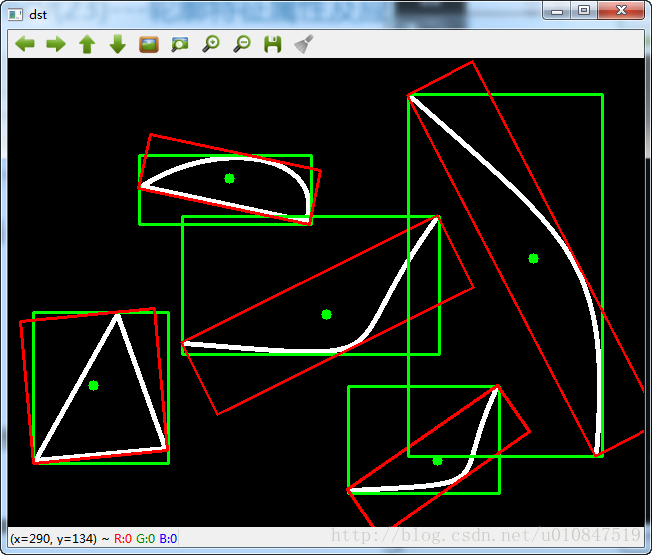
知识点分析
绘制最小外接矩形的轮廓
for(int j=0; j<4; j++)
{
line(dstImg, rect[j], rect[(j+1)%4], Scalar(0, 0, 255), 2, 8); //绘制最小外接矩形每条边
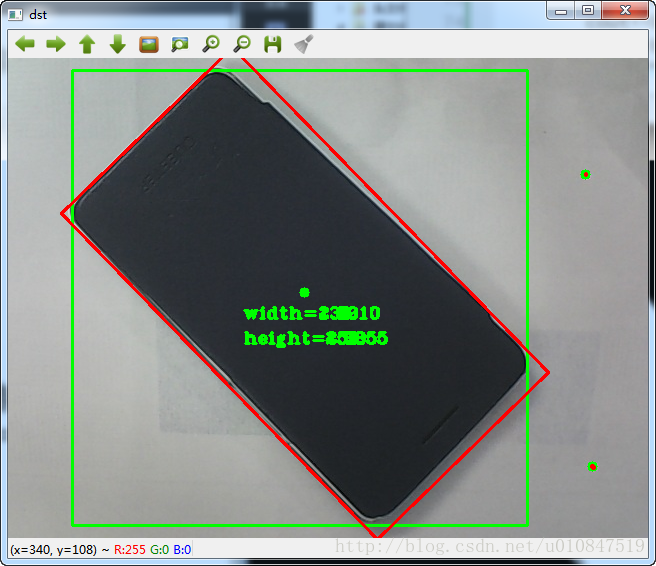
}应用一—粗略计算长宽(像素)
代码
Mat srcImg = imread("D:\\1\\phone.jpg");
imshow("src", srcImg);
Mat dstImg = srcImg.clone();
//进行了两次滤波
medianBlur(srcImg, srcImg, 5);
GaussianBlur(srcImg, srcImg, Size(3, 3), 0, 0);
cvtColor(srcImg, srcImg, CV_BGR2GRAY);
threshold(srcImg, srcImg, 100, 255, CV_THRESH_BINARY_INV);
imshow("threshold", srcImg);
vector<vector<Point>> contours;
vector<Vec4i> hierarcy;
findContours(srcImg, contours, hierarcy, CV_RETR_EXTERNAL, CV_CHAIN_APPROX_NONE);
cout<<"num="<<contours.size()<<endl;
vector<Rect> boundRect(contours.size());
vector<RotatedRect> box(contours.size());
Point2f rect[4];
for(int i=0; i<contours.size(); i++)
{
box[i] = minAreaRect(Mat(contours[i]));
boundRect[i] = boundingRect(Mat(contours[i]));
cout<<box[i].angle<<endl;
cout<<box[i].center<<endl;
cout<<box[i].size.width<<endl;
cout<<box[i].size.height<<endl;
circle(dstImg, Point(box[i].center.x, box[i].center.y), 5, Scalar(0, 255, 0), -1, 8);
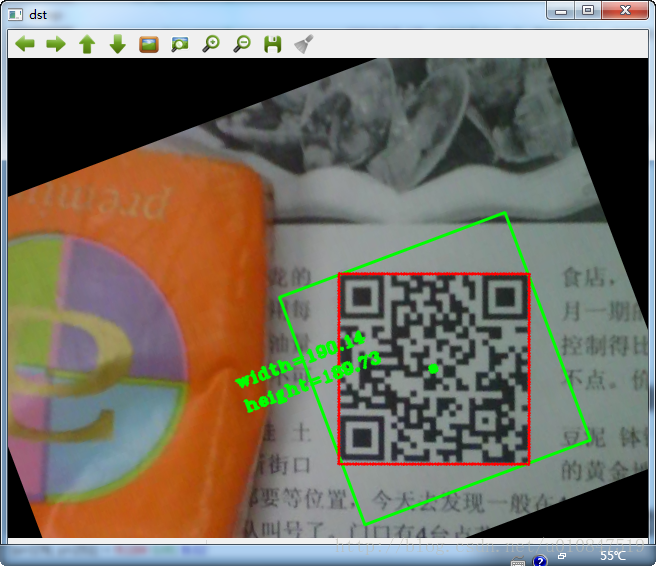
char width[20], height[20];
sprintf(width, "width=%0.2f", box[i].size.width);
sprintf(height, "height=%0.2f", box[i].size.height);
box[i].points(rect);
rectangle(dstImg, Point(boundRect[i].x, boundRect[i].y), Point(boundRect[i].x + boundRect[i].width, boundRect[i].y + boundRect[i].height), Scalar(0, 255, 0), 2, 8);
for(int j=0; j<4; j++)
{
line(dstImg, rect[j], rect[(j+1)%4], Scalar(0, 0, 255), 2, 8);
}
putText(dstImg, width, Point(235, 260), CV_FONT_HERSHEY_COMPLEX_SMALL, 0.85, Scalar(0, 255, 0), 2, 8);
putText(dstImg, height, Point(235, 285), CV_FONT_HERSHEY_COMPLEX_SMALL, 0.85, Scalar(0, 255, 0), 2, 8);
}
imshow("dst", dstImg);
waitKey(0);
运行结果
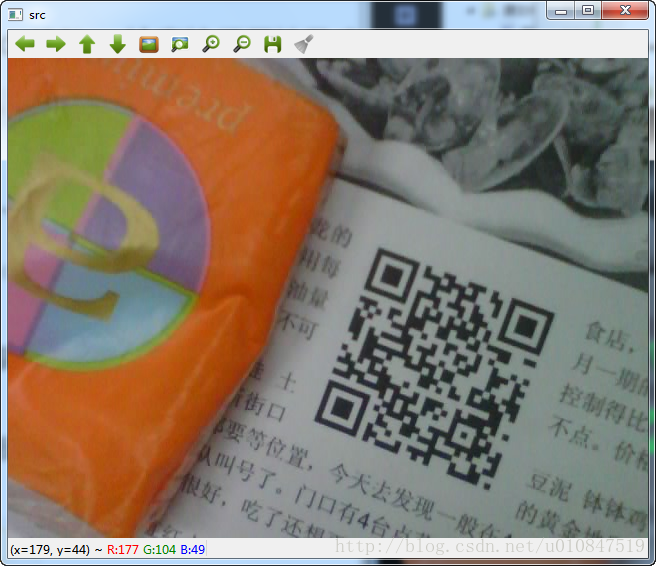
应用二—-旋转矫正
代码
Mat srcImg = imread("D:\\1\\qrcode.jpg");
imshow("src", srcImg);
Mat dstImg = srcImg.clone();
//高斯滤波
GaussianBlur(srcImg, srcImg, Size(3, 3), 0, 0);
cvtColor(srcImg, srcImg, CV_BGR2GRAY);
//边缘检测
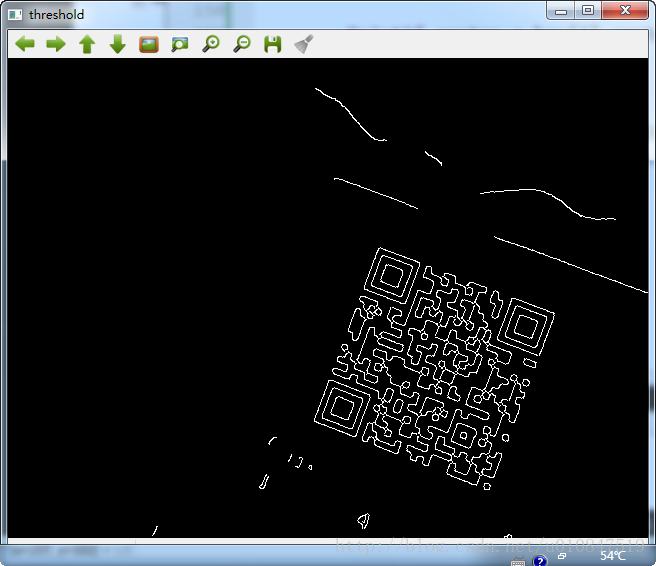
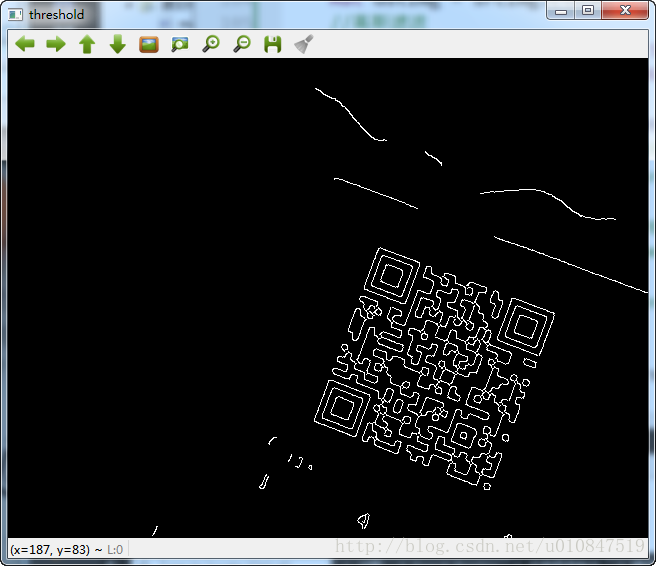
Canny(srcImg, srcImg, 100, 200);
//threshold(srcImg, srcImg, 100, 255, CV_THRESH_BINARY_INV); //二值化
//adaptiveThreshold(srcImg, srcImg, 255, ADAPTIVE_THRESH_GAUSSIAN_C, CV_THRESH_BINARY_INV, 15, 3);
imshow("threshold", srcImg);
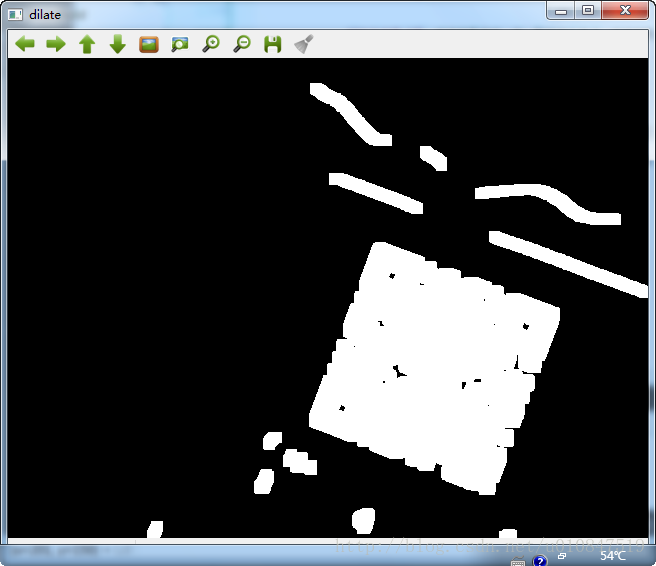
Mat element = getStructuringElement(MORPH_RECT, Size(11, 11), Point(-1, -1)); //定义结构元素
dilate(srcImg, srcImg, element); //膨胀,将二维码区域连接起来
imshow("dilate", srcImg);
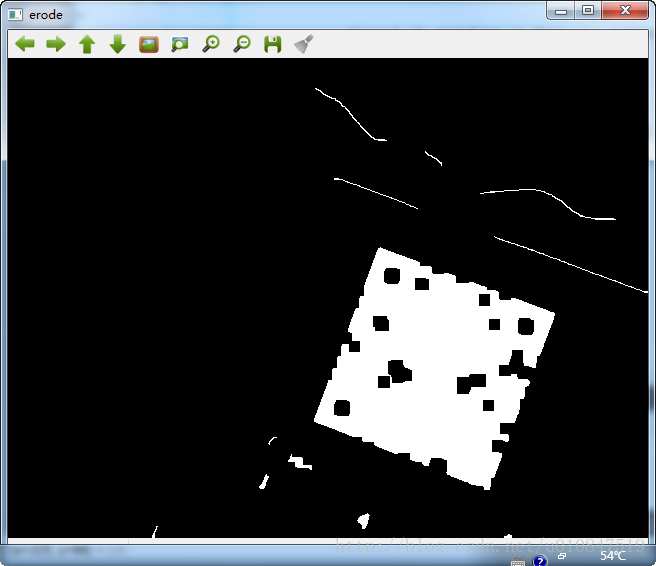
erode(srcImg, srcImg, element);
imshow("erode", srcImg);
vector<vector<Point>> contours;
vector<Vec4i> hierarcy;
findContours(srcImg, contours, hierarcy, CV_RETR_TREE, CV_CHAIN_APPROX_NONE);
cout<<"num="<<contours.size()<<endl;
vector<Rect> boundRect(contours.size());
vector<RotatedRect> box(contours.size());
Point2f rect[4];
for(int i=0; i<contours.size(); i++)
{
box[i] = minAreaRect(Mat(contours[i]));
boundRect[i] = boundingRect(Mat(contours[i]));
//利用长宽来选择符合条件的轮廓
if(box[i].size.width < 100 || box[i].size.height<100)
continue;
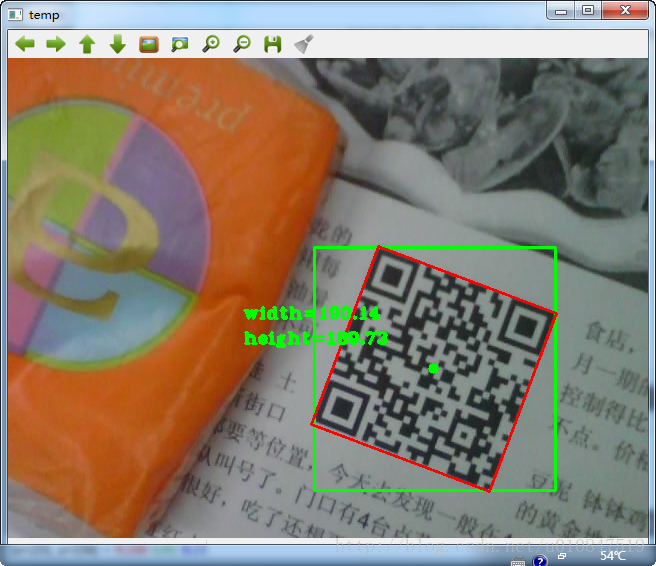
circle(dstImg, Point(box[i].center.x, box[i].center.y), 5, Scalar(0, 255, 0), -1, 8);
cout<<"num="<<box[i].angle<<endl;
angle = box[i].angle;
char width[20], height[20];
sprintf(width, "width=%0.2f", box[i].size.width);
sprintf(height, "height=%0.2f", box[i].size.height);
box[i].points(rect);
rectangle(dstImg, Point(boundRect[i].x, boundRect[i].y), Point(boundRect[i].x + boundRect[i].width, boundRect[i].y + boundRect[i].height), Scalar(0, 255, 0), 2, 8);
for(int j=0; j<4; j++)
{
line(dstImg, rect[j], rect[(j+1)%4], Scalar(0, 0, 255), 2, 8);
}
putText(dstImg, width, Point(235, 260), CV_FONT_HERSHEY_COMPLEX_SMALL, 0.85, Scalar(0, 255, 0), 2, 8);
putText(dstImg, height, Point(235, 285), CV_FONT_HERSHEY_COMPLEX_SMALL, 0.85, Scalar(0, 255, 0), 2, 8);
imshow("temp", dstImg);
//经验值
if (0< abs(angle) && abs(angle)<=45) //逆时针
angle = angle;
else if (45< abs(angle) && abs(angle)<90) //顺时针
angle = 90 - abs(angle);
Point2f center = box[i].center; //定义旋转中心坐标
double angle0 = angle;
double scale = 1;
Mat roateM;
roateM = getRotationMatrix2D(center, angle0, scale); //获得旋转矩阵
warpAffine(dstImg, dstImg, roateM, dstImg.size()); //利用放射变换进行旋转
}
imshow("dst", dstImg);
waitKey(0);运行结果
原图
阈值化图
膨胀图
腐蚀图
结果图
旋转图
知识点讲解
1.不同灰度处理方式处理后的灰度图
Canny(srcImg, srcImg, 100, 200);
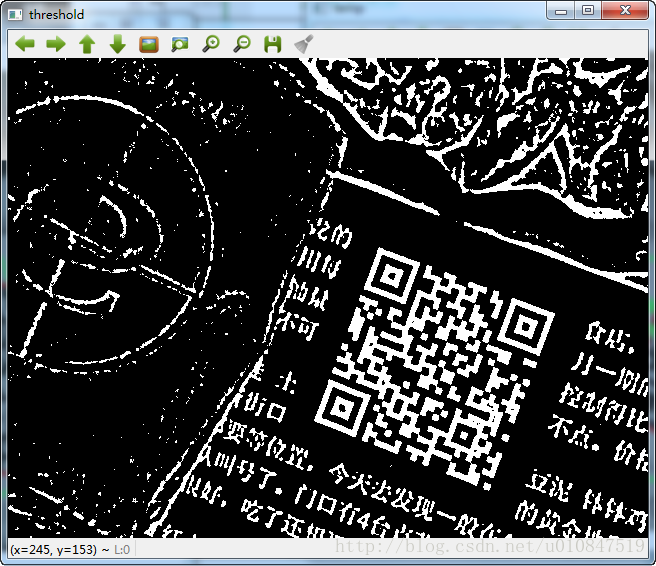
threshold(srcImg, srcImg, 100, 255, CV_THRESH_BINARY_INV); //二值化
adaptiveThreshold(srcImg, srcImg, 255, ADAPTIVE_THRESH_GAUSSIAN_C, CV_THRESH_BINARY_INV, 15, 3);canny
threshold

adaptiveThreshold
2.腐蚀膨胀
Mat element = getStructuringElement(MORPH_RECT, Size(11, 11), Point(-1, -1)); //定义结构元素
dilate(srcImg, srcImg, element); //膨胀,将二维码区域连接起来
imshow("dilate", srcImg);
erode(srcImg, srcImg, element);
imshow("erode", srcImg);
先进行膨胀,使所有的二维码连接成一个整体
在进行腐蚀,使得二维码大小不进行改变
3.筛选
if(box[i].size.width < 100 || box[i].size.height<100)
     continue;
4. 旋转角度
//经验值
if (0< abs(angle) && abs(angle)<=45)  //逆时针
  angle = angle;
else if (45< abs(angle) && abs(angle)<90) //顺时针
  angle = 90 -  abs(angle);
5.对二维码进行旋转
Point2f center = box[i].center;  //定义旋转中心坐标
double angle0 = angle;
double scale = 1;
Mat roateM;
roateM = getRotationMatrix2D(center, angle0, scale);  //获得旋转矩阵
warpAffine(dstImg, dstImg, roateM, dstImg.size()); //利用放射变换进行旋转


 3375
3375


 被折叠的 条评论
为什么被折叠?
被折叠的 条评论
为什么被折叠?
 到【灌水乐园】发言


