


在看Android的文档时,看到了这么一个东西: Loader
究竟是什么东西呢?
Introduced in Android 3.0, loaders make it easy to asynchronously load data in an activity or fragment. Loaders have these characteristics:
1、They are available to every Activity and Fragment. //支持Activity和Fragment
2、They provide asynchronous loading of data. //异步下载
3、They monitor the source of their data and deliver new results when the content changes. //当数据源改变时能及时通知客户端
4、They automatically reconnect to the last loader's cursor when being recreated after a configuration change. Thus, they don't need to re-query their data. //发生configuration change时自动重连接
看来这东西蛮强大的,开始我的探索之路吧.
先简单看一下它的用法先:
|
1
2
3
4
5
6
7
8
9
10
11
12
13
14
15
16
17
18
19
20
21
22
23
24
25
26
27
28
29
30
31
32
33
34
35
36
37
38
39
40
41
42
43
44
45
46
47
48
49
50
51
52
53
54
55
56
57
58
59
60
61
62
63
64
65
66
67
68
69
70
71
72
73
74
75
76
77
78
79
80
81
82
83
84
85
86
87
88
89
90
91
92
93
94
95
96
97
98
99
100
101
|
/**
* Demonstration of the use of a CursorLoader to load and display contacts
* data in a fragment.
*/
public
class
LoaderCursor
extends
Activity {
@Override
protected
void
onCreate(Bundle savedInstanceState) {
super
.onCreate(savedInstanceState);
FragmentManager fm = getFragmentManager();
// Create the list fragment and add it as our sole content.
if
(fm.findFragmentById(android.R.id.content) ==
null
) {
CursorLoaderListFragment list =
new
CursorLoaderListFragment();
fm.beginTransaction().add(android.R.id.content, list).commit();
}
}
public
static
class
CursorLoaderListFragment
extends
ListFragment
implements
LoaderManager.LoaderCallbacks<Cursor> {
// This is the Adapter being used to display the list's data.
SimpleCursorAdapter mAdapter;
// If non-null, this is the current filter the user has provided.
String mCurFilter;
@Override
public
void
onActivityCreated(Bundle savedInstanceState) {
mAdapter =
new
SimpleCursorAdapter(getActivity(),
android.R.layout.simple_list_item_2,
null
,
new
String[] { Contacts.DISPLAY_NAME, Contacts.CONTACT_STATUS },
new
int
[] { android.R.id.text1, android.R.id.text2 },
0
);
setListAdapter(mAdapter);
getLoaderManager().initLoader(
0
,
null
,
this
);
}
@Override
public
void
onListItemClick(ListView l, View v,
int
position,
long
id) {
// Insert desired behavior here.
Log.i(
"FragmentComplexList"
,
"Item clicked: "
+ id);
}
// These are the Contacts rows that we will retrieve.
static
final
String[] CONTACTS_SUMMARY_PROJECTION =
new
String[] {
Contacts._ID,
Contacts.DISPLAY_NAME,
Contacts.CONTACT_STATUS,
Contacts.CONTACT_PRESENCE,
Contacts.PHOTO_ID,
Contacts.LOOKUP_KEY,
};
public
Loader<Cursor> onCreateLoader(
int
id, Bundle args) {
// This is called when a new Loader needs to be created. This
// sample only has one Loader, so we don't care about the ID.
// First, pick the base URI to use depending on whether we are
// currently filtering.
Uri baseUri;
if
(mCurFilter !=
null
) {
baseUri = Uri.withAppendedPath(Contacts.CONTENT_FILTER_URI,
Uri.encode(mCurFilter));
}
else
{
baseUri = Contacts.CONTENT_URI;
}
// Now create and return a CursorLoader that will take care of
// creating a Cursor for the data being displayed.
String select =
"(("
+ Contacts.DISPLAY_NAME +
" NOTNULL) AND ("
+ Contacts.HAS_PHONE_NUMBER +
"=1) AND ("
+ Contacts.DISPLAY_NAME +
" != '' ))"
;
return
new
CursorLoader(getActivity(), baseUri,
CONTACTS_SUMMARY_PROJECTION, select,
null
,
Contacts.DISPLAY_NAME +
" COLLATE LOCALIZED ASC"
);
}
public
void
onLoadFinished(Loader<Cursor> loader, Cursor data) {
// Swap the new cursor in. (The framework will take care of closing the
// old cursor once we return.)
mAdapter.swapCursor(data);
// The list should now be shown.
if
(isResumed()) {
setListShown(
true
);
}
else
{
setListShownNoAnimation(
true
);
}
}
public
void
onLoaderReset(Loader<Cursor> loader) {
// This is called when the last Cursor provided to onLoadFinished()
// above is about to be closed. We need to make sure we are no
// longer using it.
mAdapter.swapCursor(
null
);
}
}
}
|
这里是Android提供的实例代码,有删减。
从代码上看来,通过实现LoaderManager.LoaderCallbacks就行了.
在onCreateLoader里面实现你要请求的耗时操作,当异步线程操作完成之后就会从onLoadFinished返回数据.
用起来是不是很简单呢?下面具体来看一下它是怎么做到的吧.
getLoaderManager()是定义在Activity类的一个方法,返回类型LoaderManager,但这只是个接口,它真正的实现类是谁呢?
继续往下走,看到这个LoaderManagerImpl getLoaderManager(String who, boolean started, boolean create),方法时,答案便揭晓了.
下面我们来看看LoaderManager相关的类结构,省略了很多东西,但不影响我们的分析.

现在我们来到了LoaderManagerImp的initLoader方法了.
|
1
2
3
4
5
6
7
8
9
10
11
12
13
14
15
16
17
18
19
20
21
22
23
|
public
<D> Loader<D> initLoader(
int
id, Bundle args, LoaderManager.LoaderCallbacks<D> callback) {
if
(mCreatingLoader) {
throw
new
IllegalStateException(
"Called while creating a loader"
);
}
LoaderInfo info = mLoaders.get(id);
if
(info ==
null
) {
// Loader doesn't already exist; create.
info = createAndInstallLoader(id, args, (LoaderManager.LoaderCallbacks<Object>)callback);
if
(DEBUG) Log.v(TAG,
" Created new loader "
+ info);
}
else
{
if
(DEBUG) Log.v(TAG,
" Re-using existing loader "
+ info);
info.mCallbacks = (LoaderManager.LoaderCallbacks<Object>)callback;
}
if
(info.mHaveData && mStarted) {
// If the loader has already generated its data, report it now.
info.callOnLoadFinished(info.mLoader, info.mData);
}
return
(Loader<D>)info.mLoader;
}
|
这是一个新的Loader,那么info应该是null,转入执行createAndInstallLoader.
|
1
2
3
4
5
6
7
8
9
10
11
12
13
14
15
16
17
18
19
20
21
22
23
24
25
26
27
28
29
|
private
LoaderInfo createAndInstallLoader(
int
id, Bundle args,
LoaderManager.LoaderCallbacks<Object> callback) {
try
{
mCreatingLoader =
true
;
LoaderInfo info = createLoader(id, args, callback);
installLoader(info);
return
info;
}
finally
{
mCreatingLoader =
false
;
}
}
private
LoaderInfo createLoader(
int
id, Bundle args,
LoaderManager.LoaderCallbacks<Object> callback) {
LoaderInfo info =
new
LoaderInfo(id, args, (LoaderManager.LoaderCallbacks<Object>)callback);
Loader<Object> loader = callback.onCreateLoader(id, args);
info.mLoader = (Loader<Object>)loader;
return
info;
}
void
installLoader(LoaderInfo info) {
mLoaders.put(info.mId, info);
if
(mStarted) {
// The activity will start all existing loaders in it's onStart(),
// so only start them here if we're past that point of the activitiy's
// life cycle
info.start();
}
}
|
createLoader把必要的信息都封装在LoaderInfo类里面,留意以下这一行:
callback.onCreateLoader(id,arg),这里正是我们上面在客户端实现接口LoaderCallback的那个方法.
接着调用installLoader,这个方法把这次Loader的信息put进mLoader这个SparseArrayCompat中,这个对象可以理解为一个Map,它的性能比Map要好.
mStarted的值是true,它是在getLoaderManager的时候在Activity中传进来的true值.
好了,下面进入LoaderInfo的start方法了.
|
1
2
3
4
5
6
7
8
9
10
|
void
start() {
if
(mLoader !=
null
) {
if
(!mListenerRegistered) {
mLoader.registerListener(mId,
this
);
mListenerRegistered =
true
;
}
mLoader.startLoading();
}
}
|
mLoader就是在客户端实现的那个Loader,回到我们刚开始时的例子,它就是一个CursorLoader.
在分析CursorLoader的startLoading之前,我们先看一下这些Loader的类结构先:

从这些类的名称看来,真正实现了异步传输功能的类应该就是AsyncTaskLoader了,事实是不是这样呢?
继续深入下去:
这里的startLoading是调用了Loader类的方法,下文中我会用这样的方法来标识方法是属于哪个类的: 如Loader –> startLoading
|
1
2
3
4
5
6
7
8
9
10
11
12
13
14
15
16
17
18
19
20
21
22
23
24
25
26
|
Loader:
public
final
void
startLoading() {
mStarted =
true
;
mReset =
false
;
mAbandoned =
false
;
onStartLoading();
}
CursorLoader:
protected
void
onStartLoading() {
if
(mCursor !=
null
) {
deliverResult(mCursor);
}
if
(takeContentChanged() || mCursor ==
null
) {
forceLoad();
}
}
AsynTaskLoader:
protected
void
onForceLoad() {
super
.onForceLoad();
cancelLoad();
mTask =
new
LoadTask();
if
(DEBUG) Slog.v(TAG,
"Preparing load: mTask="
+ mTask);
executePendingTask();
}
|
终于看到了LoadTask关键字啦,答案就要揭晓啦.
|
1
2
3
4
5
6
7
8
9
10
11
12
13
14
15
16
17
18
19
20
21
22
23
24
25
26
27
28
29
30
31
32
33
34
35
36
37
38
39
40
41
42
43
44
45
46
47
48
49
50
51
52
53
|
AsyncTaskLoader:
final
class
LoadTask
extends
AsyncTask<Void, Void, D>
implements
Runnable {
private
final
CountDownLatch mDone =
new
CountDownLatch(
1
);
// Set to true to indicate that the task has been posted to a handler for
// execution at a later time. Used to throttle updates.
boolean
waiting;
/* Runs on a worker thread */
@Override
protected
D doInBackground(Void... params) {
if
(DEBUG) Slog.v(TAG,
this
+
" >>> doInBackground"
);
try
{
D data = AsyncTaskLoader.
this
.onLoadInBackground();
return
data;
}
catch
(OperationCanceledException ex) {
}
}
/* Runs on the UI thread */
@Override
protected
void
onPostExecute(D data) {
if
(DEBUG) Slog.v(TAG,
this
+
" onPostExecute"
);
try
{
AsyncTaskLoader.
this
.dispatchOnLoadComplete(
this
, data);
}
finally
{
mDone.countDown();
}
}
}
AsyncTaskLoader:
protected
D onLoadInBackground() {
return
loadInBackground();
}
CursorLoader:
public
Cursor loadInBackground() {
try
{
Cursor cursor = getContext().getContentResolver().query(mUri, mProjection, mSelection,
mSelectionArgs, mSortOrder, mCancellationSignal);
if
(cursor !=
null
) {
// Ensure the cursor window is filled
cursor.getCount();
registerContentObserver(cursor, mObserver);
}
return
cursor;
}
finally
{
synchronized
(
this
) {
mCancellationSignal =
null
;
}
}
|
LoadTask原来是个AsyncTask类型,看到这里大家大家应该觉得有种豁然的感觉了吧.
在ForceLoad里面启动该线程,开始执行doInBackground,回调CursorLoader里面的loadInBackgroud,这个方法里面执行真正的耗时操作,
执行完之后一层一层返回,接着调用onPostExecute方法.
好了,现在数据总算是拿到了.
接着执行,把获取的数据往回调.
LoadTask -> onPostExecute
----->
AsynTaskLoader-> dispatchOnLoadComplete
----->
Loader->deliverResult
回调前面注册的loadComplete:
LoaderInfo -> onLoadComplete
---->
LoaderInfo ->callOnLoadFinished
把数据回调给客户端
mCallbacks.onLoadFinished(loader, data);
到这里就完美解释了Loader的特点2,异步
第三点当数据源改变时能及时通知客户端又是如何体现的呢?
这里用了观察者模式来实现.我们先看一下CursorLoader的构造函数:
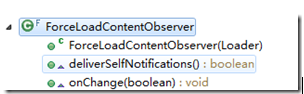
mObserver = new ForceLoadContentObserver();
这个ForceLoadContentObserver是什么东西呢?
ForceLoadContentObserver继承了ContentObserver,这是Android内部的一个对象,继承了它,就能享受到数据变化时可以接收到通知(也就是观察者中的Subject),这里类似于数据库中的触发器.
先往下看:
在CursorLoader->loadInBackground方法中有这么一句:
registerContentObserver(cursor, mObserver);//注册观察者
答案揭晓了.
注册观察者后,当对应的URI发生变化是,会触发onChange方法
|
1
2
3
4
5
6
7
8
9
10
11
12
13
14
|
public
void
onChange(
boolean
selfChange) {
onContentChanged();
}
public
void
onContentChanged() {
if
(mStarted) {
forceLoad();
//这里重新发送请求.
}
else
{
// This loader has been stopped, so we don't want to load
// new data right now... but keep track of it changing to
// refresh later if we start again.
mContentChanged =
true
;
}
}
|
对于forceLoad方法前面已经提高过了,大家应该还有印象吧.
最后一个问题,也就是第四点:如何做到在configuration change自动重链接的呢?
只要能回答这两个问题,这个问题就解决了.
<1>loader如何在configuration change之前保存数据?
<2>loader如何在configuration chage之后恢复数据并继续load?
LoaderManager:
还记得吗?Loader创建之初,在LoaderManagerImp->installLoader方法里面,
mLoaders.put(info.mId, info);
Info 是LoaderInfo对象,里面封装了Loader的相关信息,表示这个LoaderInfo的Key是mId.
就是在这里保存了loader.这样就回答了问题<1>
对于问题二,首先我们来了解一下configuration change发生之后会发生什么事情呢?

还记得这个生命周期图吗,Fragment的也是差不多的.
当configuration change发生之后,会先把原来的Activity销毁掉,然后再重新构建一个,
也就是会重走一遍onCreate->onStart->onResume的过程.
好了,明白这个之后,我在onStart方法里面找到了线索.
|
1
2
3
4
5
6
7
8
9
10
11
12
13
14
15
16
17
18
19
20
21
22
23
24
25
26
27
28
29
30
31
32
33
34
35
36
|
Activity:
protected
void
onStart() {
if
(DEBUG_LIFECYCLE) Slog.v(TAG,
"onStart "
+
this
);
mCalled =
true
;
if
(!mLoadersStarted) {
mLoadersStarted =
true
;
if
(mLoaderManager !=
null
) {
mLoaderManager.doStart();
}
else
if
(!mCheckedForLoaderManager) {
mLoaderManager = getLoaderManager(
null
, mLoadersStarted,
false
);
}
mCheckedForLoaderManager =
true
;
}
getApplication().dispatchActivityStarted(
this
);
}
LoaderManagerImp:
void
doStart() {
if
(DEBUG) Log.v(TAG,
"Starting in "
+
this
);
if
(mStarted) {
RuntimeException e =
new
RuntimeException(
"here"
);
e.fillInStackTrace();
Log.w(TAG,
"Called doStart when already started: "
+
this
, e);
return
;
}
mStarted =
true
;
// Call out to sub classes so they can start their loaders
// Let the existing loaders know that we want to be notified when a load is complete
for
(
int
i = mLoaders.size()-
1
; i >=
0
; i--) {
mLoaders.valueAt(i).start();
}
}
|
留意doStart的For循环,真相大白了..
最后总结一下:
1、异步是通过AsynTaskLoader来实现的。
2、通过观察者模式来实现监控数据的变化.
3、通过Activity生命周期中的onStart来实现自动重连接.


 2201
2201

 被折叠的 条评论
为什么被折叠?
被折叠的 条评论
为什么被折叠?
 到【灌水乐园】发言


