自己写的双击事件以及
主程序
package com.test.dukang.mypullgoogle;


import android.app.Activity;
import android.content.Context;
import android.os.Bundle;
import android.support.v4.widget.SwipeRefreshLayout;
import android.view.Menu;
import android.view.MenuItem;
import android.view.View;
import android.widget.ArrayAdapter;
import android.widget.ImageView;
import android.widget.ListView;

public class MainActivity extends Activity {
    private SwipeRefreshLayout mSwipeRefreshLayout;
    private ListView mListView;
    private MyButton myButton;
    private ImageView mImageView;
    @Override
    protected void onCreate(Bundle savedInstanceState) {
        super.onCreate(savedInstanceState);
        setContentView(R.layout.activity_main);
        myButton= (MyButton) findViewById(R.id.button);
        mImageView= (ImageView) findViewById(R.id.imageView);
        myButton.setOnDoubleClickListener(new MyButton.OnDoubleClick() {
            @Override
            public void onDoubleClick(View view) {
                mImageView.setImageResource(R.mipmap.ic_launcher);
            }
        });

    }
}
继承控件的程序
package com.test.dukang.mypullgoogle;
import android.animation.ObjectAnimator;
import android.content.Context;
import android.util.AttributeSet;
import android.util.Log;
import android.view.GestureDetector;
import android.view.MotionEvent;
import android.view.View;
import android.widget.Button;
import java.net.InterfaceAddress;
/**
* Created by Administrator on 2015/9/24.
*/
public class MyButton extends Button {
private GestureDetector mGestureDetector;
private OnDoubleClick onDoubleClickListener;
public OnDoubleClick getOnDoubleClickListener() {
return onDoubleClickListener;
}
public void setOnDoubleClickListener(OnDoubleClick onDoubleClickListener) {
this.onDoubleClickListener = onDoubleClickListener;
}
public MyButton(Context context) {
super(context);
}
interface OnDoubleClick {
public void onDoubleClick(View view);
}
public MyButton(Context context, AttributeSet attrs) {
super(context, attrs);
mGestureDetector = new GestureDetector(context, new GestureDetector.SimpleOnGestureListener() {
@Override
public boolean onDoubleTap(MotionEvent e) {
if (onDoubleClickListener != null) {
onDoubleClickListener.onDoubleClick(MyButton.this);
}
Log.d("asdfd", "点击了两次");
return true;
}
@Override
public boolean onFling(MotionEvent e1, MotionEvent e2, float velocityX, float velocityY) {
if (Math.abs(e2.getX() - e1.getX()) > 50) {
Log.d("asdfd", "在X轴滑动");
ObjectAnimator.ofFloat(MyButton.this, "translationX", getTranslationX(), e2.getX() - e1.getX()).setDuration(1000).start();
return true;
}
return super.onFling(e1, e2, velocityX, velocityY);
}
@Override
public boolean onScroll(MotionEvent e1, MotionEvent e2, float distanceX, float distanceY) {
setTranslationX(getTranslationX() + e2.getX() - e1.getX());
setTranslationY(getTranslationY() + e2.getY() - e1.getY());
return true;
}
});
}
public MyButton(Context context, AttributeSet attrs, int defStyle) {
super(context, attrs, defStyle);
}
@Override
public boolean onTouchEvent(MotionEvent event) {
mGestureDetector.onTouchEvent(event);
return super.onTouchEvent(event);
}
}
主布局文件
<LinearLayout xmlns:android="http://schemas.android.com/apk/res/android"
    xmlns:tools="http://schemas.android.com/tools"
    android:layout_width="match_parent"
    android:layout_height="match_parent"
    android:orientation="vertical"
    tools:context=".MainActivity">

    <com.test.dukang.mypullgoogle.MyButton
        android:id="@+id/button"
        android:layout_width="300dp"
        android:layout_height="150dp"
        android:text="Button">

    </com.test.dukang.mypullgoogle.MyButton>

    <ImageView
        android:id="@+id/imageView"
        android:layout_width="wrap_content"
        android:layout_height="wrap_content" />

</LinearLayout>
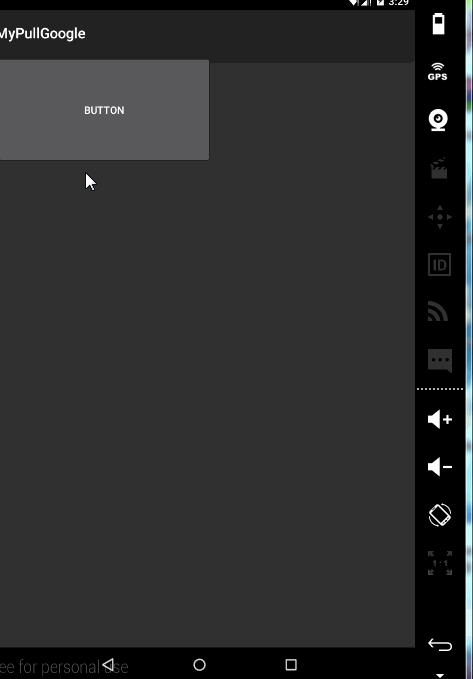
效果图
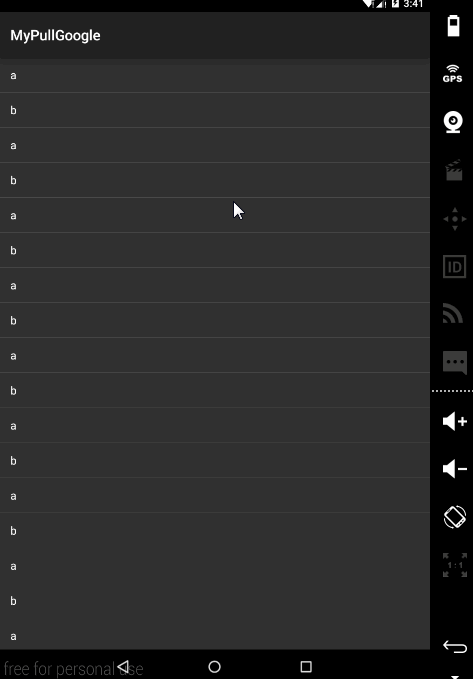
谷歌自带下拉刷新
主程序
package com.test.dukang.mypullgoogle;


import android.app.Activity;
import android.content.Context;
import android.os.Bundle;
import android.support.v4.widget.SwipeRefreshLayout;
import android.view.Menu;
import android.view.MenuItem;
import android.view.View;
import android.widget.ArrayAdapter;
import android.widget.ImageView;
import android.widget.ListView;

public class MainActivity extends Activity {
    private SwipeRefreshLayout mSwipeRefreshLayout;
    private ListView mListView;
    private MyButton myButton;
    private ImageView mImageView;
    @Override
    protected void onCreate(Bundle savedInstanceState) {
        super.onCreate(savedInstanceState);
        setContentView(R.layout.activity_main);
        mSwipeRefreshLayout= (SwipeRefreshLayout) findViewById(R.id.swipeLayout);
        mListView= (ListView) findViewById(R.id.listView);
        ArrayAdapter<String> adapter=new ArrayAdapter<String>(MainActivity.this,android.R.layout.simple_list_item_1,new String[]{"a","b","a","b","a","b","a","b","a","b","a","b","a","b","a","b","a","b","a","b","a","b","a","b","a","b","a","b","a","b","a","b","a","b","a","b","a","b","a","b"});
        mListView.setAdapter(adapter);
        mSwipeRefreshLayout.setOnRefreshListener(new SwipeRefreshLayout.OnRefreshListener() {
            @Override
            public void onRefresh() {
                mSwipeRefreshLayout.setRefreshing(true);
            }
        });
    }
}
主布局文件
<LinearLayout xmlns:android="http://schemas.android.com/apk/res/android"
    xmlns:tools="http://schemas.android.com/tools"
    android:layout_width="match_parent"
    android:layout_height="match_parent"
    android:orientation="vertical"
    tools:context=".MainActivity">

    <android.support.v4.widget.SwipeRefreshLayout
    android:layout_height="match_parent"
    android:layout_width="match_parent"
    android:id="@+id/swipeLayout">
    <ListView
    android:id="@+id/listView"
    android:layout_width="match_parent"
    android:layout_height="match_parent"></ListView>

    </android.support.v4.widget.SwipeRefreshLayout>

</LinearLayout>
效果图
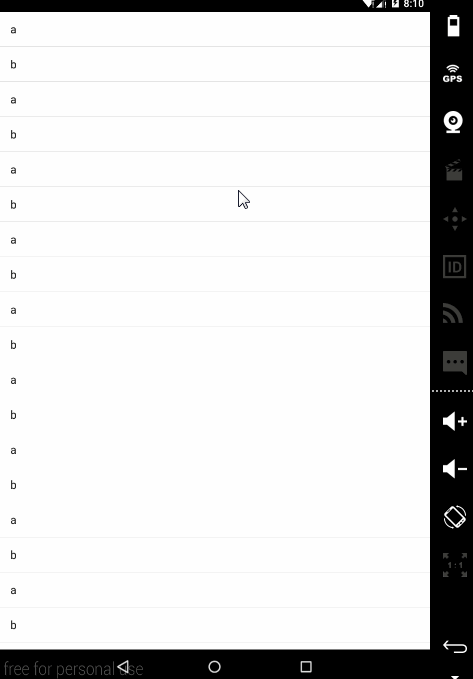
自己写的简单的下拉刷新
主程序
package com.test.mypulldown;


import android.app.Activity;
import android.os.Bundle;


public class MainActivity extends Activity {

    @Override
    protected void onCreate(Bundle savedInstanceState) {
        super.onCreate(savedInstanceState);
        setContentView(R.layout.activity_main);

    }
}
继承Fragment的程序
package com.test.mypulldown;
import android.animation.ObjectAnimator;
import android.annotation.TargetApi;
import android.content.Context;
import android.os.Build;
import android.util.AttributeSet;
import android.util.Log;
import android.view.LayoutInflater;
import android.view.MotionEvent;
import android.view.View;
import android.widget.ArrayAdapter;
import android.widget.FrameLayout;
import android.widget.ListView;
@TargetApi(Build.VERSION_CODES.HONEYCOMB)
public class MyFragment extends FrameLayout {
private ListView shuaXin;
public MyFragment(Context context, AttributeSet attrs, int defStyleAttr) {
super(context, attrs, defStyleAttr);
}
public MyFragment(Context context, AttributeSet attrs) {
super(context, attrs);
LayoutInflater inflater = (LayoutInflater) context.getSystemService(Context.LAYOUT_INFLATER_SERVICE);
View bottomView = inflater.inflate(R.layout.shuaxin, null);
addView(bottomView);
shuaXin = (ListView) inflater.inflate(R.layout.list_view, null);
ArrayAdapter<String> adapter = new ArrayAdapter<String>(context, android.R.layout.simple_list_item_1,
new String[] { "a", "b", "a", "b", "a", "b", "a", "b", "a", "b", "a", "b", "a", "b", "a", "b", "a", "b",
"a", "b", "a", "b", "a", "b", "a", "b", "a", "b", "a", "b", "a", "b", });
shuaXin.setAdapter(adapter);
addView(shuaXin);
}
public MyFragment(Context context) {
super(context);
}
@Override
public boolean onInterceptTouchEvent(MotionEvent ev) {
if (shuaXin.getFirstVisiblePosition() == 0) {
View firstView = shuaXin.getChildAt(shuaXin.getFirstVisiblePosition());
if (firstView.getY() >= 0) {
Log.d("aa", "拦截到事件");
return true;
}
}
return super.onInterceptTouchEvent(ev);
}
float y = 0;
float oldY = 0;
@Override
public boolean onTouchEvent(MotionEvent event) {
switch (event.getAction()) {
case MotionEvent.ACTION_DOWN:
oldY = event.getY();
break;
case MotionEvent.ACTION_MOVE:
Log.d("yidon", "发生移动");
y = event.getY();
Float diatance = y - oldY;
shuaXin.setTranslationY(shuaXin.getTranslationY() + diatance);
oldY = y;
invalidate();
break;
case MotionEvent.ACTION_UP:
ObjectAnimator.ofFloat(shuaXin, "translationY", shuaXin.getTranslationY(), 0).setDuration(300).start();
break;
default:
break;
}
return true;
}
}
主布局文件
<LinearLayout xmlns:android="http://schemas.android.com/apk/res/android"
    xmlns:tools="http://schemas.android.com/tools"
    android:layout_width="match_parent"
    android:layout_height="match_parent"
    android:orientation="vertical" >

    <com.test.mypulldown.MyFragment
        android:id="@+id/swiperefresh"
        android:layout_width="match_parent"
        android:layout_height="match_parent" >
    </com.test.mypulldown.MyFragment>

</LinearLayout>
listView布局文件
<?xml version="1.0" encoding="utf-8"?>
<ListView xmlns:android="http://schemas.android.com/apk/res/android"
    android:layout_width="match_parent"
    android:id="@+id/list_view"
    android:background="#ffffffff"
    android:layout_height="match_parent"
    android:orientation="vertical" >


</ListView>
刷新界面显示
<?xml version="1.0" encoding="utf-8"?>
<LinearLayout xmlns:android="http://schemas.android.com/apk/res/android"
    android:id="@+id/shuxin_layout"
    android:layout_width="match_parent"
    android:layout_height="match_parent"
    android:gravity="center_horizontal"
    android:orientation="vertical" >
 <TextView
     android:layout_width="wrap_content"
     android:layout_height="wrap_content"
     android:text="jsidfssf"
     android:textSize="30sp"/>
</LinearLayout>
在这里需要特别注意的是用谷歌提供的或者是用自己的定义的下拉时,都需要改主布局文件中的包名,仅此注意
效果图


 595
595

 被折叠的 条评论
为什么被折叠?
被折叠的 条评论
为什么被折叠?
 到【灌水乐园】发言


