


代码已提交到Github,有兴趣的同学可以下载来看看:https://github.com/ylw-github/SpringBoot-Cache-Demo
接下来讲解SpringBoot是如何使用缓存的,以及关于缓存文件的配置。
1.Spring使用缓存的步骤
1.1 添加Maven依赖
<dependency>
	<groupId>org.springframework.boot</groupId>
	<artifactId>spring-boot-starter-cache</artifactId>
</dependency>
1.2 新建ehcache.xml文件
ehcache.xml文件放在classpath目录下,即src/main/resources/ehcache.xml
<?xml version="1.0" encoding="UTF-8"?>
<ehcache xmlns:xsi="http://www.w3.org/2001/XMLSchema-instance"
         xsi:noNamespaceSchemaLocation="http://ehcache.org/ehcache.xsd"
         updateCheck="false">
    <diskStore path="java.io.tmpdir/Tmp_EhCache" />

    <!-- 默认配置 -->
    <defaultCache maxElementsInMemory="5000" eternal="false"
                  timeToIdleSeconds="120" timeToLiveSeconds="120"
                  memoryStoreEvictionPolicy="LRU" overflowToDisk="false" />

    <cache name="baseCache" maxElementsInMemory="10000"
           maxElementsOnDisk="100000" />

</ehcache>
1.3 代码使用cacheable
@CacheConfig(cacheNames = "baseCache")
public interface UserMapper {

    @Select("SELECT * FROM t_user WHERE NAME = #{name}")
    @Cacheable
    User findByName(@Param("name") String name);

    @Insert("INSERT INTO t_user(uuid,name, age) VALUES(#{uuid},#{name}, #{age})")
    int insert(@Param("uuid") String uuid, @Param("name") String name, @Param("age") Integer age);
}
1.4 Controller 新增接口验证(添加、查询和移除缓存)
package com.ylw.springboot.controller;

import com.ylw.springboot.bean.User;
import com.ylw.springboot.mapper.UserMapper;
import org.springframework.beans.factory.annotation.Autowired;
import org.springframework.cache.Cache;
import org.springframework.cache.CacheManager;
import org.springframework.stereotype.Controller;
import org.springframework.web.bind.annotation.RequestMapping;
import org.springframework.web.bind.annotation.RestController;

@RestController
public class CacheController {

    @Autowired
    private CacheManager cacheManager;

    @Autowired
    private UserMapper userMapper;

    @RequestMapping("/addCache")
    public String addCache() {
        User user = userMapper.findByName("Dumas");
        if(user == null){
            return "fail";
        }
        return user.toString();
    }

    @RequestMapping("/getCache")
    public String getCache() {
        Cache baseCache = cacheManager.getCache("baseCache");
        if(baseCache == null){
            return "fail";
        }
        return baseCache.getNativeCache().toString();
    }

    @RequestMapping("/removeCache")
    public String removeCache() {
        cacheManager.getCache("baseCache").clear();
        return "success";
    }
}
1.5 启动类加入缓存@EnableCaching

1.6 测试,运行程序
1.先插入缓存,访问:http://localhost:8080/addCache,返回成功!

2.查询本地缓存,访问:http://localhost:8080/getCache,返回查询成功!

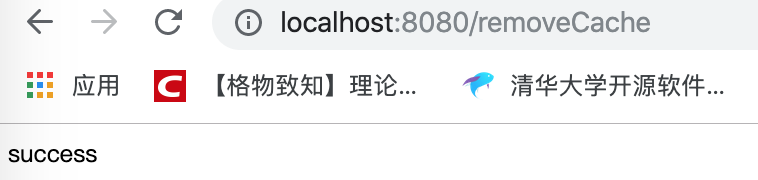
3.把缓存移除,访问:http://localhost:8080/removeCache,返回移除成功!
执行第二步骤,查询缓存,看看缓存是否还在?发现缓存已经被移除了。

2.ehcache.xml文件参数解析
| 参数 | 解析 |
|---|---|
| name | 缓存名称 |
| maxElementsInMemory | 缓存最大个数 |
| eternal | 对象是否永久有效,一但设置了,timeout将不起作用 |
| timeToIdleSeconds | 设置对象在失效前的允许闲置时间(单位:秒)。仅当eternal=false对象不是永久有效时使用,可选属性,默认值是0,也就是可闲置时间无穷大。 |
| timeToLiveSeconds | 设置对象在失效前允许存活时间(单位:秒)。最大时间介于创建时间和失效时间之间。仅当eternal=false对象不是永久有效时使用,默认是0.,也就是对象存活时间无穷大。 |
| overflowToDisk | 当内存中对象数量达到maxElementsInMemory时,Ehcache将会对象写到磁盘中。 |
| diskSpoolBufferSizeMB | 这个参数设置DiskStore(磁盘缓存)的缓存区大小。默认是30MB。每个Cache都应该有自己的一个缓冲区 |
| maxElementsOnDisk | 硬盘最大缓存个数 |
| diskPersistent | 是否缓存虚拟机重启期数据 Whether the disk store persists between restarts of the Virtual Machine. The default value is false. |
| diskExpiryThreadIntervalSeconds | 磁盘失效线程运行时间间隔,默认是120秒 |
| memoryStoreEvictionPolicy | 当达到maxElementsInMemory限制时,Ehcache将会根据指定的策略去清理内存。默认策略是LRU(最近最少使用)。你可以设置为FIFO(先进先出)或是LFU(较少使用) |
| clearOnFlush | 内存数量最大时是否清除 |
总结


 2万+
2万+


 被折叠的 条评论
为什么被折叠?
被折叠的 条评论
为什么被折叠?
 到【灌水乐园】发言


