


添加Glide
Gradle
compile 'com.github.bumptech.glide:glide:3.6.1'Maven
Glide 也支持 Maven 项目:
<dependency>
<groupId>com.github.bumptech.glide</groupId>
<artifactId>glide</artifactId>
<version>3.6.1</version>
<type>aar</type>
</dependency>
加载图片
从URL 中加载图片
Glide 建造者要求最少有三个参数。
- with(Context context) - 对于很多 Android API 调用,Context 是必须的。Glide 在这里也一样
- load(String imageUrl) - 这里你可以指定哪个图片应该被加载,同上它会是一个字符串的形式表示一个网络图片的 URL
- into(ImageView targetImageView) 你的图片会显示到对应的 ImageView 中。
Glide
    .with(context)
    .load(internetUrl)
    .into(targetImageView);
从资源中加载
int resourceId = R.mipmap.ic_launcher;
Glide
    .with(context)
    .load(resourceId)
    .into(imageViewResource);
从文件中加载
//这个文件可能不存在于你的设备中。然而你可以用任何文件路径,去指定一个图片路径。
File file = new File(Environment.getExternalStoragePublicDirectory(Environment.DIRECTORY_PICTURES), "Running.jpg");
Glide
    .with(context)
    .load(file)
    .into(imageViewFile);
从 Uri 中加载
//这可能是任何 Uri。为了演示的目的我们只是用一个 launcher icon 去创建了一个 Uri
Uri uri = resourceIdToUri(context, R.mipmap.future_studio_launcher);

Glide
    .with(context)
    .load(uri)
    .into(imageViewUri);
一个小助手功能:简单的从资源 id 转换成 Uri。
public static final String ANDROID_RESOURCE = "android.resource://";
public static final String FOREWARD_SLASH = "/";

private static Uri resourceIdToUri(Context context, int resourceId) {
    return Uri.parse(ANDROID_RESOURCE + context.getPackageName() + FOREWARD_SLASH + resourceId);
}
默认图片和错误图片
默认图片:加载过程中显示的图片
错误图片:加载错误后显示的图片
Glide
    .with(context)
    .load("http://futurestud.io/non_existing_image.png")
    .placeholder(R.mipmap.ic_launcher) // 加载过程中显示的图片drawable(resource)
    .error(R.mipmap.future_studio_launcher) // 加载错误则显示这个
    .into(imageViewError);
Gif图
显示Gif
String gifUrl = "http://i.kinja-img.com/gawker-media/image/upload/s--B7tUiM5l--/gf2r69yorbdesguga10i.gif";
Glide
    .with( context )
    .load( gifUrl )
    .into( imageViewGif );
就这样!
Gif 检查
Glide 接受 Gif 或者图片作为 load() 参数。如果你期望这个 URL 是一个 Gif,Glide 不会自动检查是否是 Gif。因此他们引入了一个额外的防区强制 Glide变成一个 Gif asGif():
Glide
    .with( context )
    .load( gifUrl )
    .asGif()
    .error( R.drawable.full_cake )
.into( imageViewGif );- 如果 gifUrl 是一个 Gif,这没什么变化。
- 如果这个 gifUrl 不是一个 Gif,Glide 将会把这个 load 当成失败处理。
这样做的的好处是,.error() 回调被调用并且错误占位符被显示,即使 gifUrl 是一个完美的图片(但不是一个 Gif)。
Gif 转为 Bitmap
如果你的 App 显示一个位置的网络 URL 列表,它可能遇到常规的图片或者 Gif。
如果你仅仅想要显示 Gif 的第一帧,你可以调用 asBitmap() 去保证其作为一个常规的图片显示,即使这个 URL 是一个 Gif。
Glide
    .with( context )
    .load( gifUrl )
    .asBitmap()
    .into( imageViewGifAsBitmap );
显示本地视频
Glide 还能显示视频,不过仅仅对于本地视频起作用!只要他们是存储在手机上的。让我们假设你通过让用户选择一个视频后得到了一个文件路径:
String filePath = "/storage/emulated/0/Pictures/example_video.mp4";
Glide
    .with( context )
    .load( Uri.fromFile( new File( filePath ) ) )
    .into( imageViewGifAsBitmap );
淡出淡入的效果
图片加载完成后,显示的动画,默认有淡出淡入的效果
Glide
    .with(context)
    .load(UsageExampleListViewAdapter.eatFoodyImages[0])
    .placeholder(R.mipmap.ic_launcher) // can also be a drawable
    .error(R.mipmap.future_studio_launcher) // will be displayed if the image cannot be loaded
    .crossFade()//淡出淡入动画,默认有这个效果,默认时间为300ms
//    .crossFade(int duration)//crossFade()的重载方法,可设置动画的时间
//    .dontAnimate()//去除淡入淡出效果
    .into(imageViewFade);
调整图片大小和显示
调整大小
如果图片不会自动适配到 ImageView,调用 override(horizontalSize, verticalSize) 。
Glide
    .with(context)
    .load(UsageExampleListViewAdapter.eatFoodyImages[0])
    .override(600, 200) // resizes the image to these dimensions (in pixel). does not respect aspect ratio
    .into(imageViewResize);
缩放图像
缩放图像,默认.fitCenter()
- CenterCrop(),缩放图像让它填充到 ImageView 界限内并且侧键额外的部分。
- ImageView 可能会完全填充,但图像可能不会完整显示。
- fitCenter() ,缩放图像让图像都测量出来等于或小于 ImageView 的边界范围。
- 该图像将会完全显示,但可能不会填满整个 ImageView。
Glide
    .with(context)
    .load(UsageExampleListViewAdapter.eatFoodyImages[0])
    .override(600, 200) // resizes the image to these dimensions (in pixel)
    .centerCrop() // this cropping technique scales the image so that it fills the requested bounds and then crops the extra.
//    .fitCenter()
    .into(imageViewResizeCenterCrop);
缩略图
Glide 为缩略图提供2个不同的方式。
第一个是简单的选择,在原始图像被用过之后,这只需要一个较小的分辨率。
这个方法在 ListView的组合和详细视图中是非常有用的。
Glide
    .with( context )
    .load( UsageExampleGifAndVideos.gifUrl )
    .thumbnail( 0.1f )
    .into( imageView2 );
例如, 你传了一个 0.1f 作为参数,Glide 将会显示原始图像的10%的大小。如果原始图像有 1000x1000 像素,那么缩略图将会有 100x100 像素。因为这个图像将会明显比 ImageView 小很多,你需要确保它的 ScaleType 的设置是正确的。
第二个选择是传一个完全新的 Glide 请求作为参数。
private void loadImageThumbnailRequest() {
    // setup Glide request without the into() method
    DrawableRequestBuilder<String> thumbnailRequest = Glide
        .with( context )
        .load( eatFoodyImages[2] );

    // pass the request as a a parameter to the thumbnail request
    Glide
        .with( context )
        .load( UsageExampleGifAndVideos.gifUrl )
        .thumbnail( thumbnailRequest )
        .into( imageView3 );
}
所不同的是,第一个缩略图请求是完全独立于第二个原始请求的。该缩略图可以是不同的资源或图片 URL,你可以为其应用不同的转换,等等。
缓存策略
内存缓存
Glide 将会默认将所有的图片资源放到内存缓存中去。
如果你不想把这张图片放到内存缓存中去,该怎么办呢?
Glide
    .with( context )
    .load( eatFoodyImages[0] )
    .skipMemoryCache( true )
    .into( imageViewInternet );
我们调用了 .skipMemoryCache(true) 去明确告诉 Glide 跳过内存缓存。这意味着 Glide 将不会把这张图片放到内存缓存中去。但是,这只是会影响内存缓存!Glide 将会仍然利用磁盘缓存来避免重复的网络请求。
磁盘缓存
现在有一个需求,url是固定的,但图片不停的在换?要保持每次load都是最新的图片。该怎么避免缓存呢?内存缓存已经学过了,下面来看看磁盘缓存。
Glide
    .with( context )
    .load( eatFoodyImages[0] )
    .diskCacheStrategy( DiskCacheStrategy.NONE )//不做磁盘缓存
    .skipMemoryCache( true )//跳过内存缓存
    .into( imageViewInternet );
你可以用 .diskCacheStrategy() 方法为 Glide 改变磁盘缓存的行为。不同的于 .skipMemoryCache() 方法,它需要一个枚举而不是一个简答的布尔值。如果你想要为一个请求禁用磁盘缓存。使用枚举 DiskCacheStrategy.NONE 作为参数。
Glide 有多个选项去配置磁盘缓存行为。
比如,如果你请求的一个图像是 1000x1000 像素的,但你的 ImageView 是 500x500 像素的,Glide 将会把这两个尺寸都进行缓存。
现在你将会理解对于 .diskCacheStrategy() 方法来说不同的枚举参数的意义:
DiskCacheStrategy.NONE什么都不缓存,就像刚讨论的那样DiskCacheStrategy.SOURCE仅仅只缓存原来的全分辨率的图像。在我们上面的例子中,将会只有一个 1000x1000 像素的图片DiskCacheStrategy.RESULT仅仅缓存最终的图像,即,降低分辨率后的(或者是转换后的)DiskCacheStrategy.ALL缓存所有版本的图像(默认行为)
作为最后一个例子,如果你有一张图片,你知道你将会经常操作处理,并做了一堆不同的版本,对其有意义的仅仅是缓存原始分辨率图片。因此,我们用 DiskCacheStrategy.SOURCE 去告诉 Glide 仅仅保存原始图片:
Glide
    .with( context )
    .load( eatFoodyImages[2] )
    .diskCacheStrategy( DiskCacheStrategy.SOURCE )
    .into( imageViewFile );
图片请求的优先级
通常,你会遇到这样的使用场景:你的 App 将会需要在同一时间内加载多个图像。让我们假设你正在构建一个信息屏幕,这里有一张很大的英雄图片在顶部,还有两个小的,在底部还有一些不那么重要的图片。对于最好的用户体验来说,应用图片元素是显示要被加载和显示的,然后才是底部不紧急的 ImageView。Glide 可以用 Priority 枚举来支持你这样的行为,调用 .priority() 方法。
Priority 枚举有四个不同的选项,下面是按照递增priority(优先级)的列表:
Priority.LOWPriority.NORMALPriority.HIGHPriority.IMMEDIATE
你应该知道的是:优先级并不是完全严格遵守的。Glide 将会用他们作为一个准则,并尽可能的处理这些请求,但是它不能保证所有的图片都会按照所要求的顺序加载。
Glide 中的回调:Targets
之前的学习,我们直接使用 Glide 建造者去加载图片到 ImageView 中。如果假定 ImageView 不再是图像的最后一步,我们只要 Bitmap 本身,该如何处理呢?
Glide 提供了一个用 Targets 的简单的方式去接受图片资源的 Bitmap。Targets 是没有任何别的回调,它在 Glide 做完所有的加载和处理之后返回结果。
SimpleTarget
看如下代码实例:
//一旦 Glide 已加载并处理完图像,它将被调用
private SimpleTarget target = new SimpleTarget<Bitmap>() {
    @Override
    public void onResourceReady(Bitmap bitmap, GlideAnimation glideAnimation) {
        // do something with the bitmap
        // for demonstration purposes, let's just set it to an ImageView
        imageView1.setImageBitmap( bitmap );
    }
};

private void loadImageSimpleTarget() {
    Glide
        .with( context ) // could be an issue!
        .load( eatFoodyImages[0] )
        .asBitmap()//为了防止 target 的冲突(可能是一个 Gif),强制 Glide 去返回一个 Bitmap 对象
        .into( target );//target:和 ImageView 用法完全相同的!
}
注意:
- 1、Java/Android 会允许你在 .into() 方法中去声明 target 的匿名内部类
- 2、在 Glide 做完图片请求之前, Android 垃圾回收有可能移除了这个匿名内部类对象
- 3、确保你所声明的回调对象是作为一个字段对象的,这样你就可以保护它避免被邪恶的 Android 垃圾回收机制回收
- 4、
.with(context),当你传了一个 context,例如是当前应用的 activity,当activity 已经停止的时候,Glide 将会自动停止请求当请求的 。 - 5、如果你的 target 是独立于应用的 activity 生命周期,可以用 application 的 context:
.with(context.getApplicationContext))。
private void loadImageSimpleTargetApplicationContext() {
    Glide
        .with( context.getApplicationContext() ) // safer!
        .load( eatFoodyImages[1]
        .asBitmap()
        .into( target2 );
}
另外,你可以在回调声明中指定图片的大小,以节省一些内存。
因为如果你你传一个 ImageView 作为参数给 .into(),Glide 将会用 ImageView 的大小去限制图像的大小。
而target 则没有指明大小。
private SimpleTarget target2 = new SimpleTarget<Bitmap>( 250, 250 ) {
    @Override
    public void onResourceReady(Bitmap bitmap, GlideAnimation glideAnimation) {
        imageView2.setImageBitmap( bitmap );
    }
};
加载图片到 Custom view
假设你有一个 Custom View(自定义View)。Glide 并不支持加载图片到自定义 view 中,因为并没有方法知道图片应该在哪里被设置。然而,Glide 可以用 ViewTarget 来实现。
让我们看一个简单的自定义 View,它继承自 FrameLayout 并内部使用了一个 ImageView 以及覆盖了一个 TextView。
public class FutureStudioView extends FrameLayout {
    ImageView iv;
    TextView tv;
    public void initialize(Context context) {
        inflate( context, R.layout.custom_view_futurestudio, this );
        iv = (ImageView) findViewById( R.id.custom_view_image );
        tv = (TextView) findViewById( R.id.custom_view_text );
    }
    public FutureStudioView(Context context, AttributeSet attrs) {
        super( context, attrs );
        initialize( context );
    }
    public FutureStudioView(Context context, AttributeSet attrs, int defStyleAttr) {
        super( context, attrs, defStyleAttr );
        initialize( context );
    }
    public void setImage(Drawable drawable) {
        iv = (ImageView) findViewById( R.id.custom_view_image );
        iv.setImageDrawable( drawable );
    }
}
你不能使用常规的 Glide 的方法 .into(),因为我们的自定义 view 并不继承自 ImageView。因此,我们必须创建一个 ViewTarget,并用 .into() 方法:
private void loadImageViewTarget() {
    FutureStudioView customView = (FutureStudioView) findViewById( R.id.custom_view );

    viewTarget = new ViewTarget<FutureStudioView, GlideDrawable>( customView ) {
        @Override
        public void onResourceReady(GlideDrawable resource, GlideAnimation<? super GlideDrawable> glideAnimation) {
            customView.setImage( resource.getCurrent() );
        }
    };
    Glide
        .with( context.getApplicationContext() ) // safer!
        .load( eatFoodyImages[2] )
        .into( viewTarget );
}
在 target 回调方法中,我们使用我们创建的方法 setImage(Drawable drawable) 在自定义 view 类中去设置图片。另外确保你注意到我们必须在 ViewTarget 的构造函数中传递我们自定义 view 作为参数:new ViewTarget<FutureStudioView, GlideDrawable>(customView)。
这应该涵盖了所有你需要的自定义 view。你也可以在回调中添加额外的工作。如,我们可以分析传入的 Bitmap 的主要的颜色并设置十六进制值给 TextView。
加载图片到 Notifications
加载图片到 App Widgets
调试和错误处理
Glide 不能直接去访问 GenericRequest 类去设置日志,如果你明确想要知道这个异常,可以创建一个监听并传 .listener() 方法到 Glide 的建造者中。比如,如果图片不可用,Glide 会(默默地)抛出一个异常,并且显示一个 drawable ,如果你已经指定了 .error() 的话。
首先,创建一个监听作为一个字段对象去避免垃圾回收(注:之前说过不要用匿名内部类的形式):
private RequestListener<String, GlideDrawable> requestListener = new RequestListener<String, GlideDrawable>() {
    @Override
    public boolean onException(Exception e, String model, Target<GlideDrawable> target, boolean isFirstResource) {
        // todo log exception

        // important to return false so the error placeholder can be placed
        return false;
    }

    @Override
    public boolean onResourceReady(GlideDrawable resource, String model, Target<GlideDrawable> target, boolean isFromMemoryCache, boolean isFirstResource) {
        return false;
    }
};
在 onException 方法中, 你可以捕获错误,并且你可以决定要做什么,比如,打个 log。重要的是如果 Glide 要在后续处理的话,如显示一个错误的占位符等情况的话,你需要返回了 false 在 onException 方法中。
你可以设置一个监听在 Glide 建造者中:
Glide
    .with( context )
    .load(UsageExampleListViewAdapter.eatFoodyImages[0])
    .listener( requestListener )
    .error( R.drawable.cupcake )
.into( imageViewPlaceholder );要使日志工作正常的话,.error() 并不是必须的。然而,如果你在监听的 onException 中返回 false 的话,R.drawable.cupcake 只是显示出来而已。
自定义转换
旋转图片
android.graphics.Matrix 类提供了我们所需要的准确办法(甚至更多办法)。这个代码片段就是用来旋转图像的:
Bitmap toTransform = ... // your bitmap source

Matrix matrix = new Matrix();

matrix.postRotate(rotateRotationAngle);

Bitmap.createBitmap(toTransform, 0, 0, toTransform.getWidth(), toTransform.getHeight(), matrix, true);
为了使它对我们有用,尤其是用在 Glide 中,我们会包裹它作为一个 BitmapTransformation:
public class RotateTransformation extends BitmapTransformation {

    private float rotateRotationAngle = 0f;

    public RotateTransformation(Context context, float rotateRotationAngle) {
        super( context );

        this.rotateRotationAngle = rotateRotationAngle;
    }
    @Override
    protected Bitmap transform(BitmapPool pool, Bitmap toTransform, int outWidth, int outHeight) {
        Matrix matrix = new Matrix();

        matrix.postRotate(rotateRotationAngle);

        return Bitmap.createBitmap(toTransform, 0, 0, toTransform.getWidth(), toTransform.getHeight(), matrix, true);
    }

    @Override
    public String getId() {
        return "rotate" + rotateRotationAngle;
    }
}
最后,让我们看看新的转换的实例:
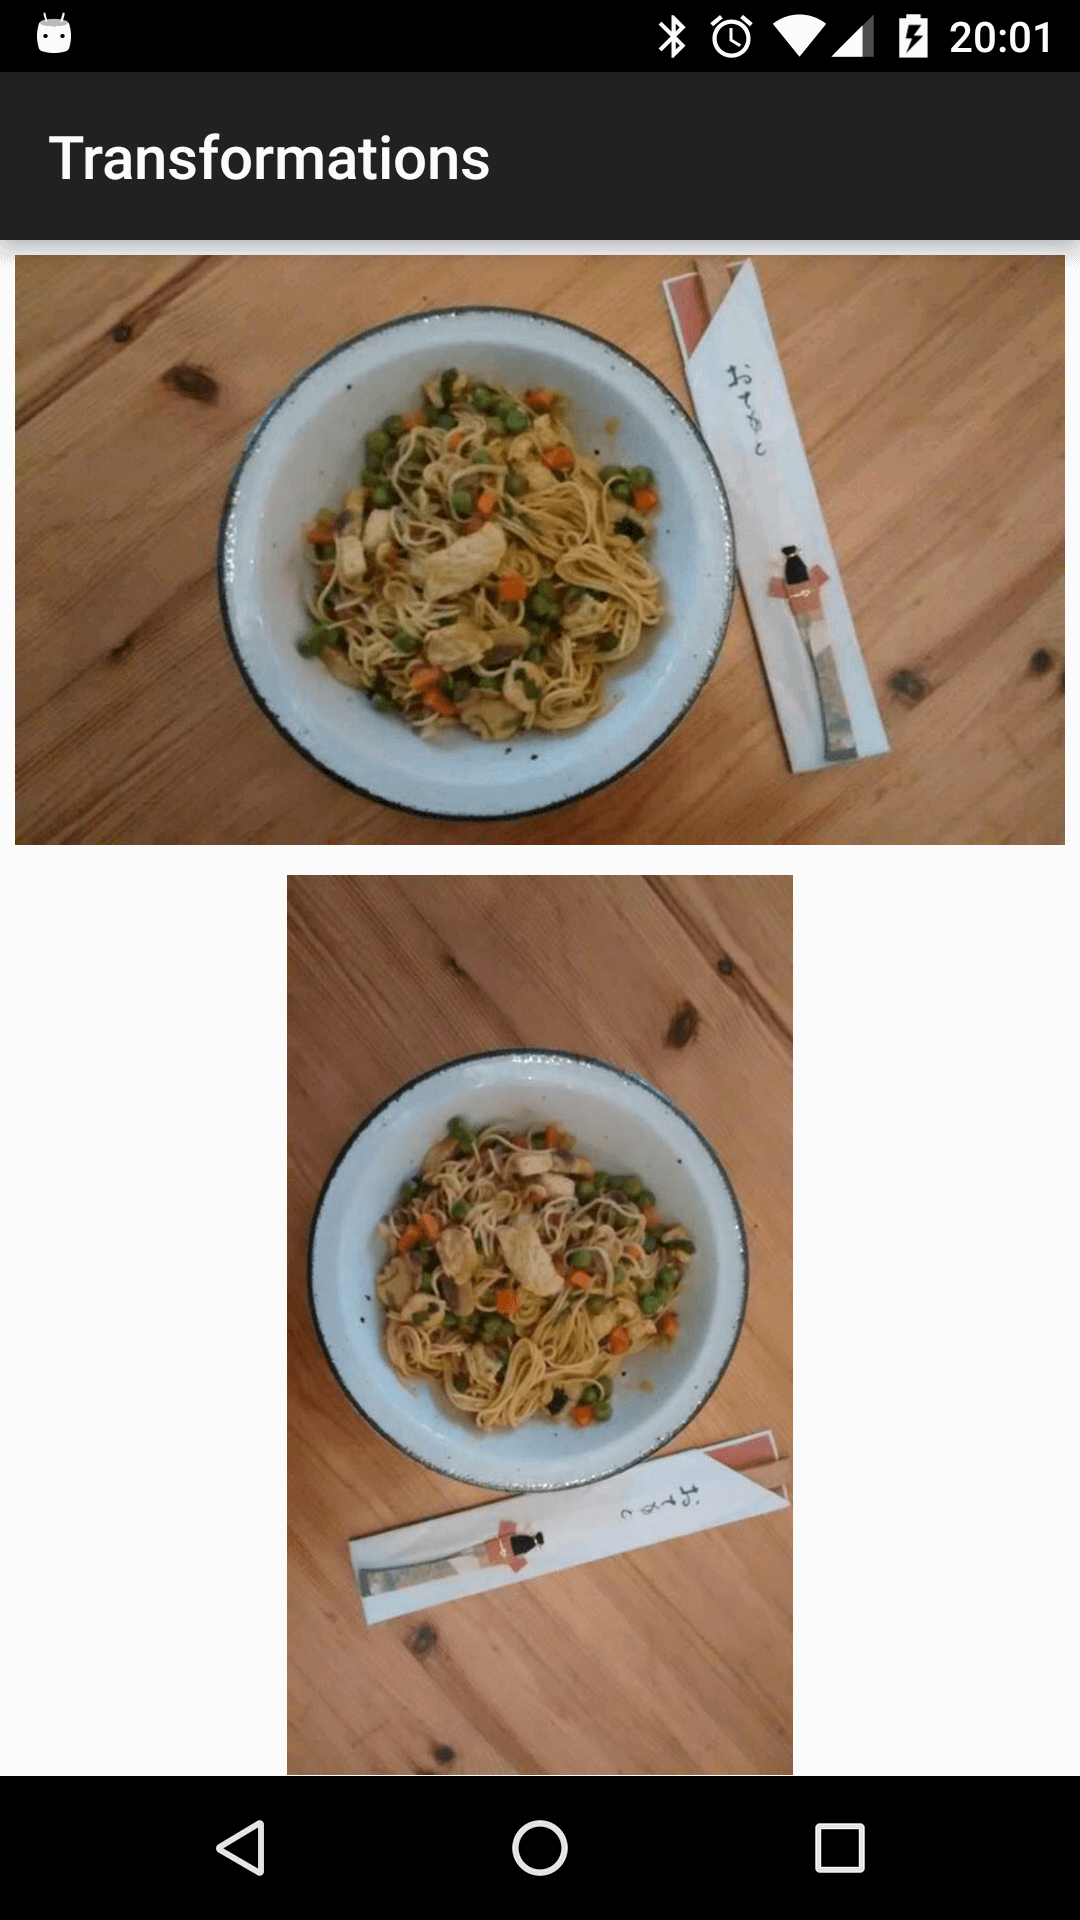
private void loadImageOriginal() {
    Glide
        .with( context )
        .load( eatFoodyImages[0] )
        .into( imageView1 );
}

private void loadImageRotated() {
    Glide
        .with( context )
        .load( eatFoodyImages[0] )
        .transform( new RotateTransformation( context, 90f ))
        .into( imageView3 );
}
自定义动画
ImageView
针对ImageView,你可以使用系统自带的动画,比如android.R.anim.slide_in_left(从左滑入):
<?xml version="1.0" encoding="utf-8"?>
<set xmlns:android="http://schemas.android.com/apk/res/android">
    <translate android:fromXDelta="-50%p" android:toXDelta="0"
            android:duration="@android:integer/config_mediumAnimTime"/>
    <alpha android:fromAlpha="0.0" android:toAlpha="1.0"
            android:duration="@android:integer/config_mediumAnimTime" />
</set>
当然你可以创建你自己的 XML 动画。比如一个小的缩放动画,图片刚开始小的,然后逐渐增大到原尺寸。
<?xml version="1.0" encoding="utf-8"?>
<set xmlns:android="http://schemas.android.com/apk/res/android"
     android:fillAfter="true">

    <scale
        android:duration="@android:integer/config_longAnimTime"
        android:fromXScale="0.1"
        android:fromYScale="0.1"
        android:pivotX="50%"
        android:pivotY="50%"
        android:toXScale="1"
        android:toYScale="1"/>
</set>
这两个动画都可以用到 Glide 建造者中:
Glide
    .with( context )
    .load( eatFoodyImages[0] )
    .animate( android.R.anim.slide_in_left ) // or R.anim.zoom_in
    .into( imageView1 );
Custom View
如果是一个自定义View呢?我们可以通过传递一个一个动画资源的引用来实现,这个动画资源必须实现 ViewPropertyAnimation.Animator 接口。
这个很简单,你只需实现 void animate(View view) 方法。这个视图对象是整个 target 视图。如果它是一个自定义的视图,你要找到你的视图的子元素,并且做些必要的动画。
来看个简单的例子。假设你想要实现一个渐现动画,你得需要创建这样的动画对象:
ViewPropertyAnimation.Animator animationObject = new ViewPropertyAnimation.Animator() {
    @Override
    public void animate(View view) {
        // if it's a custom view class, cast it here
        // then find subviews and do the animations
        // here, we just use the entire view for the fade animation
        view.setAlpha( 0f );

        ObjectAnimator fadeAnim = ObjectAnimator.ofFloat( view, "alpha", 0f, 1f );
        fadeAnim.setDuration( 2500 );
        fadeAnim.start();
    }
};
接下来,你需要在 Glide 请求中去设置这个动画:
Glide
    .with( context )
    .load( eatFoodyImages[1] )
    .animate( animationObject )
    .into( imageView2 );
集成网络栈
Glide 的开发者不强制设置网络库给你,所以 Glide 可以说和 HTTP/S 无关。理论上,它可以与任何的网络库实现,只要覆盖了基本的网络能力就行。用 Glide 集成一个网络不是完全无缝的。它需要一个 Glide 的 ModeLoader 的接口。为了让你更加易用,Glide 为2个网络库提供了实现:OkHttp 和 Volley。
OkHttp
假定你要集成 OkHttp 作为你给 Glide 的网络库。集成可以通过声明一个 GlideModule 手动实现。如果你想要避免手动实现,只需要打开你的 build.gradle 然后在你的依赖中添加下面这两行代码:
dependencies {
    // your other dependencies
    // ...

    // Glide
    compile 'com.github.bumptech.glide:glide:3.6.1'

    // Glide's OkHttp Integration
    compile 'com.github.bumptech.glide:okhttp-integration:1.3.1@aar'
    compile 'com.squareup.okhttp:okhttp:2.5.0'
}
Gradle 会自动合并必要的 GlideModule 到你的 Android.Manifest。Glide 会认可在 manifest 中的存在,然后使用 OkHttp 做到所有的网络连接。
Volley
另一方面,如果你偏爱使用 Volley,你必须改变你的 build.gradle 依赖:
dependencies {
    // your other dependencies
    // ...

    // Glide
    compile 'com.github.bumptech.glide:glide:3.6.1'

    // Glide's Volley Integration
    compile 'com.github.bumptech.glide:volley-integration:1.3.1@aar'
    compile 'com.mcxiaoke.volley:library:1.0.8'
}
这将添加 Volley 并集成该库到你的项目中。集成库添加到 GlideModule 到你的 Android.Manifest。Glide 会自动认出它,然后使用 Volley 作为网络库。并不要求做其他的配置!
警告::如果你把这两个库都在你的 build.gradle 中声明了,那这两个库都会被添加。因为 Glide
没有任何特殊的加载顺序,你将会有一个不稳定的状态,它并不明确使用哪个网络库,所以确保你只添加了一个集成库。
引用:
Glide - 开始! - 傅圆的博客 | MrFu Blog
Google推荐的图片加载库Glide介绍 - 泡在网上的日子
Glide使用简介及流程分析 - 简书
http://www.jianshu.com/p/7125feef0ddf


 400
400

 被折叠的 条评论
为什么被折叠?
被折叠的 条评论
为什么被折叠?
 到【灌水乐园】发言


