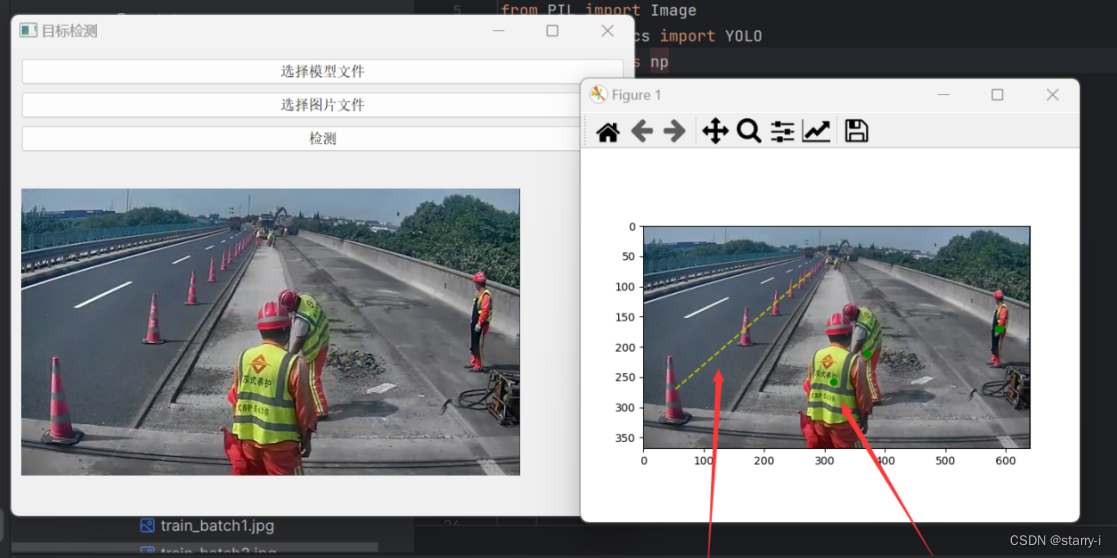
检测后效果如下:

左边是原图,右边是模型处理好的图片,锥桶被连成线,化成一个区域,行人被划分成点,用来判断范围。底下控制台输出信息,行人是否出界,我们可看出行人并未出界。此程序目前只做了照片的识别,也可以修改为视频识别或者实时识别。

该难点在于如何判断出界范围,有时候锥桶摆在左边,此时锥桶右边为界内,左边为界外;有时候锥桶摆在右边,此时又恰好相反。


下面开始进行配置
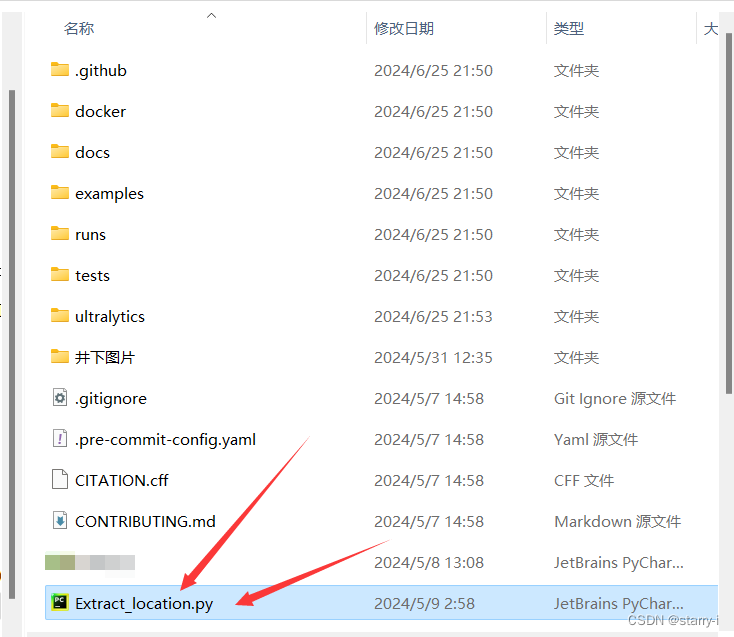
从官网下载好yolov8并且配置好环境之后,将下列代码复制进名称为“ultralytics-main”的根目录下

“Extract_location.py”中的代码如下
import sys
from PyQt5.QtWidgets import QApplication, QMainWindow, QLabel, QPushButton, QFileDialog, QVBoxLayout, QWidget
from PyQt5.QtGui import QPixmap
import torch
from PIL import Image
from ultralytics import YOLO
import numpy as np
import matplotlib.pyplot as plt
import matplotlib.patches as patches

class MainWindow(QMainWindow):
    def __init__(self):
        super().__init__()

        # 初始化模型
        self.model = None

        # 设置主窗口标题和大小
        self.setWindowTitle("目标检测")
        self.setGeometry(100, 100, 800, 600)

        # 创建主布局
        layout = QVBoxLayout()

        # 创建按钮
        self.model_button = QPushButton("选择模型文件")
        self.model_button.clicked.connect(self.load_model)
        layout.addWidget(self.model_button)

        self.image_button = QPushButton("选择图片文件")
        self.image_button.clicked.connect(self.load_image)
        layout.addWidget(self.image_button)

        self.detect_button = QPushButton("检测")
        self.detect_button.clicked.connect(self.detect)
        layout.addWidget(self.detect_button)

        # 创建图片显示区域
        self.image_label = QLabel()
        layout.addWidget(self.image_label)

        # 创建主窗口主部件
        main_widget = QWidget()
        main_widget.setLayout(layout)
        self.setCentralWidget(main_widget)

    def load_model(self):
        # 使用文件对话框选择模型文件
        model_path, _ = QFileDialog.getOpenFileName(self, "选择模型文件", "", "PyTorch 模型文件 (*.pt)")
        if model_path:
            self.model = YOLO(model_path)

    def load_image(self):
        # 使用文件对话框选择图片文件
        image_path, _ = QFileDialog.getOpenFileName(self, "选择图片文件", "", "图片文件 (*.jpg *.png)")
        if image_path:
            self.image = Image.open(image_path)
            pixmap = QPixmap(image_path)
            self.image_label.setPixmap(pixmap)

    def detect(self):
        if self.model and self.image:
            results = self.model(self.image)
            img_np = np.array(self.image)
            fig, ax = plt.subplots()
            ax.imshow(img_np)

            # 分析结果
            for r in results:
                boxes = r.boxes.xyxy.cpu()  # 将边界框信息移至CPU
                confs = r.boxes.conf.cpu()  # 将置信度信息移至CPU
                classes = r.boxes.cls.cpu()  # 将类别信息移至CPU
                class_names = r.names  # 类别名称

                cone_coords = []
                person_coords = []

                # 提取锥桶和行人的信息
                for i, cls_idx in enumerate(classes):
                    class_name = class_names[int(cls_idx)]
                    if class_name == 'cone':
                        cone_coords.append(boxes[i])  # 保存锥桶的边界框
                    elif class_name == 'person':
                        person_coords.append(((boxes[i][0] + boxes[i][2]) / 2, (boxes[i][1] + boxes[i][3]) / 2))  # 保存行人的中心坐标

                # 只有当锥桶坐标非空时才进行进一步处理
                if cone_coords:
                    x_coords = [(box[0] + box[2]) / 2 for box in cone_coords]  # 锥桶中心x坐标
                    y_coords = [(box[1] + box[3]) / 2 for box in cone_coords]  # 锥桶中心y坐标

                    if len(x_coords) > 1:  # 确保有足够的点进行线性回归
                        slope, intercept = np.polyfit(x_coords, y_coords, 1)  # 线性回归拟合

                        # 绘制锥桶连线
                        ax.plot([min(x_coords), max(x_coords)], [min(x_coords) * slope + intercept, max(x_coords) * slope + intercept], 'y--')

                    # 检查行人是否越界
                    for person in person_coords:
                        person_x, person_y = person
                        if person_y < slope * person_x + intercept:
                            print(f"此人{person} 已经越界!")
                            ax.plot(person_x, person_y, 'ro')  # 红色点表示越界
                        else:
                            print(f"此人{person} 在界内。")
                            ax.plot(person_x, person_y, 'go')  # 绿色点表示未越界

            plt.show()
        else:
            print("请先选择模型文件和图片文件!")

if __name__ == "__main__":
    app = QApplication(sys.argv)
    window = MainWindow()
    window.show()
    sys.exit(app.exec_())
详细内容,后面在慢慢更新...


 789
789

 被折叠的 条评论
为什么被折叠?


