


本文主要讲“图片上传预览”、“html单文件上传"、“html多文件上传”、“使用VUE实现文件上传”、“文件下载”;
1、图片上传预览
<!DOCTYPE html PUBLIC "-//W3C//DTD HTML 4.01 Transitional//EN" "http://www.w3.org/TR/html4/loose.dtd">
<html>
<head>
    <meta http-equiv="Content-Type" content="text/html; charset=UTF-8">
    <title>图片上传预览</title>
    <script typet="text/javascript" src="http://libs.baidu.com/jquery/1.9.1/jquery.min.js"></script>
    <script type="text/javascript">
        function showPreview(source) {
            var file = source.files[0];
            if(window.FileReader) {
                var fr = new FileReader();
                fr.onloadend = function(e) {
                    document.getElementById("portrait").src = e.target.result; //这个就是图片的流,可以直接展示到页面上
                };
                fr.readAsDataURL(file);
            }
        }
    </script>
</head>
<body>

<input type="file" name="file" onchange="showPreview(this)" />
<img id="portrait" src="" width="70" height="75">

</body>
</html>
2、单文件上传(使用ajax)
<!DOCTYPE html>
<html lang="en">
<head>
    <meta charset="UTF-8">
    <title>Title</title>
    <script typet="text/javascript" src="http://libs.baidu.com/jquery/1.9.1/jquery.min.js"></script>
    <script>
        $(function(){
            $('#multiFile').change(function() {
                console.log(this.files);
                var file = this.files[0];
                var name = file.name;
                console.log(name);
                var size = file.size;
                var type = file.type;
                //your validation
                var formData = new FormData(file);//这个文件就是我们上传的数据
            });
            $('#file1').change(function() {
                console.log(this.files);
                var file = this.files[0];
                var name = file.name;
                console.log(name);
                var size = file.size;
                var type = file.type;
                //your validation
            });

        });

    </script>
</head>
<body>
<input id="multiFile"  name="uploadedfile" multiple="true"  accept=".xlsx,.xls,.txt" type="file"  />
<input id="file1"  name="uploadedfile"  accept=".xlsx,.xls,.txt" type="file"  />

</body>
</html>
**3、多文件使用form表单上传(使用ajax)
前端:**
<!DOCTYPE html>
<html lang="en">
<head>
    <meta charset="UTF-8">
    <title>多文件上传</title>
    <script typet="text/javascript" src="http://libs.baidu.com/jquery/1.9.1/jquery.min.js"></script>
    <script>
        function doUpload() {
            var formData = new FormData($("#uploadForm")[0]);
            console.log($("#uploadForm"));
            console.log(formData);
            $.ajax({
                url: '/shapeFile/upload',
                type: 'POST',
                data: formData,
                async: false,
                cache: false,
                contentType: false,
                processData: false,
                success: function (returndata) {
                    console.log(returndata);
                },
                error: function (returndata) {
                    alert(returndata);
                }
            });
        }
    </script>
</head>
<body>

<form id="uploadForm" enctype="multipart/form-data">
    <p >指定文件夹名: <input type="text" name="uploadDir" value= ""/></p >
    <p >上传文件: <input type="file" name="file"/></p>
    <p >上传文件: <input type="file" name="file2"/></p>
    <input type="button" value="上传" onclick="doUpload()" />
</form>

</body>
</html>
后台接收:
@RequestMapping(value="/upload",method = RequestMethod.POST)
    @CrossOrigin //跨域
    public Object getFile(HttpServletRequest request){
        /**
         下边这个是获取非文件的属性值方法
         **/
        String uploadDir= request.getParameter("uploadDir");
        MultipartHttpServletRequest multipartRequest = (MultipartHttpServletRequest) request;
//        List<MultipartFile> fileList = multipartRequest.getFiles("file");
        Map<String, MultipartFile> fileMap = multipartRequest.getFileMap();
        if(fileMap == null || fileMap.size() == 0){
            return new Myexception("请上传文件,注意文件的name属性为file");
        }
        Collection<MultipartFile> files = fileMap.values();
        for(MultipartFile file:files){
            /**
             注意这里获取的个数,是根据前端form表单里有几个,type=file来决定的,
             比如你虽然只点选了一个文件,上传,但这里实际上回有两个MultipartFile对 象,只不过其中一个MutipartFile的文件名会为空,这就是为什么下边会有个判断文件名
             为空的步骤**/
            String req= file.getOriginalFilename();
            if(StringUtils.isEmpty(req)){
                continue;
            }
            File tempFile = getTmpFile(req);
            System.out.println(tempFile.getAbsolutePath());
            if(!tempFile.exists()){
                tempFile.getParentFile().mkdirs();
                try {
                    tempFile.createNewFile();
                    file.transferTo(tempFile); //到这里tempFile即是上传上来的文件。
                } catch (IOException e) {
                    e.printStackTrace();
                }
            }
            System.out.println(req);
        }
        return null;
    }
    /**
     下边这个是好方法
     **/
    public File getTmpFile(String fileName) {
        File tmpDir = FileUtils.getTempDirectory();//此处可以自定义上传文件放在哪里
        System.out.println("========"+tmpDir.getAbsolutePath());
        String tmpFileName = (Math.random() * 10000 + "").replace(".", "")+"_"+fileName;
        return new File(tmpDir, tmpFileName);
    }
4、form多文件上传(直接提交)
前端:**
$("#fm").form("submit", {
url: url,
onSubmit: function () {
return $(this).form("validate");
},
success: function (result) {
$.messager.alert("系统提示", "保存成功");
resetValue();
$("#dlg").dialog("close");
$("#dg").datagrid("reload");
}
});
<form id="fm" method="post" enctype="multipart/form-data">
<table cellspacing="8px">
<tr>
<td>商品名称:</td>
<td><input type="text" id="goodsName" name="goodsName"
class="easyui-validatebox" required="true"/> <font
color="red">*</font>
</td>
<tr>
<td>选择图片:</td>
<td>
<input id="goodsPicture" name="goodsPicture" type="file" />
</td>
</tr>
<tr>
<td>选择图片:</td>
<td>
<input id="goodsPicture1" name="goodsPicture1" type="file"/>
</td>
</tr>
</table>
</form>
后台接收:(跟标题3中的方法大体一致)
CommonsMultipartResolver multipartResolver = new CommonsMultipartResolver(request.getSession().getServletContext());

   //获取前台提交图片
         if (multipartResolver.isMultipart(request)){
             MultipartHttpServletRequest multiRequest = (MultipartHttpServletRequest) request;
              String filepath = "D:/test";
             Map<String, MultipartFile> fileMap = multiRequest.getFileMap();
             String fileName = null;
             for (Map.Entry<String, MultipartFile> entity : fileMap.entrySet()) {
                 // 获取单个文件
                 MultipartFile mf = entity.getValue(); // 获得原始文件名
                 fileName = mf.getOriginalFilename(); // 截取文件类型; 这里可以根据文件类型进行判断
                 String fileType = fileName.substring(fileName.lastIndexOf('.'));
                 try {
                     // 截取上传的文件名称
                     String newFileName = fileName.substring(0, fileName.lastIndexOf('.'));
                     //图片转换成io,存到数据库
                     byte[] image = mf.getBytes();
                     // 拼接上传文件位置
                     goods.setImage(image);
                     goods.setImageName(newFileName);
                     goods.setImageType(fileType);


                    //保存到服务器
                     String newfilePath = filepath + File.separatorChar + newFileName + fileType;
                     System.out.println("拼接好的文件路径地址------------->>>>>>>>" + newfilePath);
                     // 重新组装文件路径,用于保存在list集合中
                     File dest = new File(filepath);
                     // 判断文件夹不存在就创建
                     if (!dest.exists()) {
                         dest.mkdirs();
                         }
                     // 创建文件实例
                     File uploadFile = new File(newfilePath);
                     // 判断文件已经存在,则删除该文件
                     if (uploadFile.exists()) {
                         uploadFile.delete();
                         }
                     } catch (Exception e) {
                         e.printStackTrace();
                 }
             }
         }
5、vue中使用文件上传
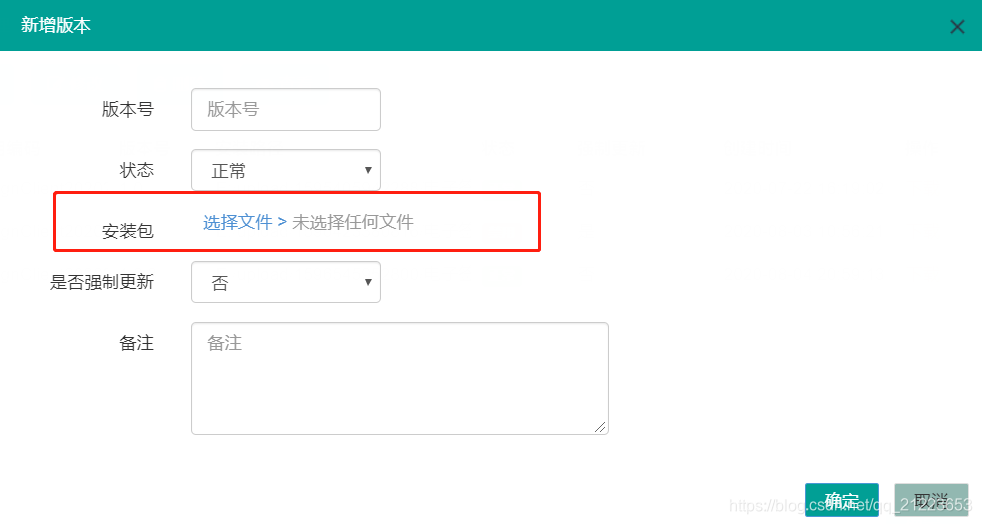
我们是用ref=“”来定位dom,然后vue写法通过DOM取文件数据
前端:**
<div class="form-group" style="width:100%;">
            <div class="col-sm-2 control-label">安装包</div>
            <div class="col-sm-9" class="test">
                <a v-show="!showUpload" href="javascript:void(0);" class="upload" >选择文件 > <span>未选择任何文件</span>
                    <input id="upload" class="replyFileid" type="file"   @change="getfilename(this);" ref="inputer" style="width: 400px;"   />
                </a>
                <input  v-show="showUpload" type="text" class="form-control" :readonly="true"  v-model="version.fileName" />

            </div>
        </div>
自定义css:
        .upload {
            padding: 4px 10px;
            height: 20px;
            line-height: 20px;
            position: relative;
            text-decoration: none;
            color: #4d90d3;
            cursor: pointer;
        }
        .replyFileid{
            width:100%;
            position: absolute;
            overflow: hidden;
            right: 0;
            top: 0;
            filter:alpha(opacity=0);
            -moz-opacity:0;
            -khtml-opacity: 0;
            opacity: 0;
            cursor: pointer;
            text-decoration: none;
        }
        .upload span{
            color:#999;
            cursor: pointer;
        }
        a:link {
            text-decoration: none;
        }
        a:visited {
            text-decoration: none;
        }
        a:hover {
            text-decoration: none;
        }
        a:active {
            text-decoration: none;
        }
js中:
 getfilename (e) {
            let inputDOM = this.$refs.inputer;
            vm.file = inputDOM.files[0];// 通过DOM取文件数据
            //判断文件类型
            var filepath = inputDOM.files[0].name
            var extStart = filepath.lastIndexOf(".");
            var ext = filepath.substring(extStart, filepath.length).toUpperCase();
            if (ext != ".APK" && ext != ".EXE" && ext != ".JAR" ) {
                alert("文件限于apk,exe,jar格式");
                return ;
            }
            //判断文件大小
            var size = Math.floor(inputDOM.files[0].size / 1024/1024);//计算文件的大小
            console.log(size);
            if(size>180){
                alert("上传文件过大,不得超过180M");
                return ;
            }
            this.formData=new FormData();//new一个formData事件
            this.formData.append("file",vm.file); //将file属性添加到formData里
            //此时formData就是我们要向后台传的参数了
            //返回文件名
            $('.upload span').html(vm.file.name);


        },
后台接收:
@RequestMapping("/upload")
    public BaseResponse upload(@RequestParam("file")MultipartFile file){
        BaseResponse response=new BaseResponse(StatusCode.Success);
        try{
            if(file.isEmpty()){
                response.setMsg("上传文件为空!");
                response.setCode(-1);
                return response;
            }
            String fileName = file.getOriginalFilename();
            String suffixName = fileName.substring(fileName.lastIndexOf("."));
            //设置文件存储路径
            String filePath = this.uploadPath;
            String randomPath = String.valueOf(new Date().getTime());
            filePath = filePath+randomPath+"/";
            String path = filePath + fileName;
            File dest = new File(path);
            //检测是否存在目录
            if(!dest.getParentFile().exists()){
                dest.getParentFile().mkdirs();//新建文件夹
            }
            file.transferTo(dest);//文件写入
            Map<String,Object> map = new HashMap<>();
            map.put("path",path);
            response.setData(map);
        }catch (Exception e){
            e.printStackTrace();
            response=new BaseResponse(StatusCode.Fail.getCode(),e.getMessage());
        }
        return response;
    }
拓展:
1、当上传文件过大时,需要在springboot中配置:
spring.servlet.multipart.max-file-size=200MB
spring.servlet.multipart.max-request-size=200MB
spring.servlet.multipart.enabled=true
2、上传页面长时间等待,需要遮罩层:
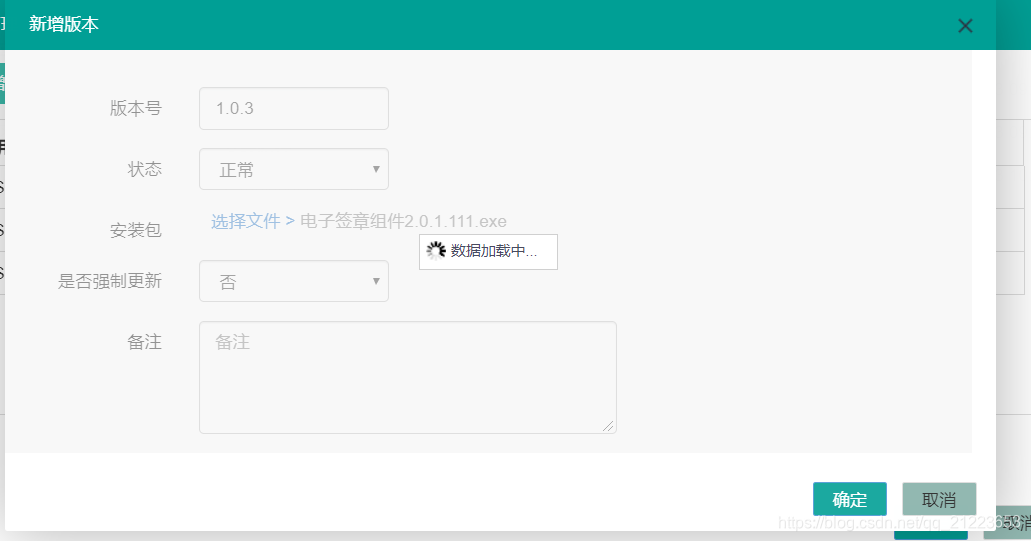
遮罩层实现:(其实就是在页面最顶层追加了一个透明度高的div)
 //此处执行loading
                    var ele_id ="#operaterLayer"//需要遮罩的div
                    //添加遮罩元素
                    var mask = '<div class="mask" ele='+ele_id+' style="z-index: 99999999; width: '+780+'px !important; height: '+325+'px !important; left: '+$(ele_id).offset().left+'px !important; top: '+$(ele_id).offset().top+'px !important;"><div>数据加载中...</div></div>';
                    $("body").append(mask);
  //清除loading
  $(".mask").remove();
6、文件下载(浏览器直接访问下载)
    @RequestMapping(value = "/downloadFile",method = RequestMethod.GET)
    public void downLoad(HttpServletResponse response) throws Exception {
        File f = new File("e://Test/model01.txt");
        boolean isOnLine = false;
        if (!f.exists()) {
            response.sendError(404, "File not found!");
            return;
        }
        String fileName = f.getName();
        fileName = new String(fileName.getBytes("UTF-8"), "ISO-8859-1");

        BufferedInputStream br = new BufferedInputStream(new FileInputStream(f));
        byte[] buf = new byte[1024];
        int len = 0;
        response.reset(); // 非常重要
        if (isOnLine) { // 在线打开方式
            URL u = new URL("file:///" + "e://Test/model01.txt");
            response.setContentType(u.openConnection().getContentType());
            response.setHeader("Content-Disposition", "inline; filename=" + fileName);
            // 文件名应该编码成UTF-8
        } else { // 纯下载方式
            response.setContentType("application/x-msdownload");
            response.setHeader("Content-Disposition", "attachment; filename=" + fileName);
        }
        OutputStream out = response.getOutputStream();
        while ((len = br.read(buf)) > 0)
            out.write(buf, 0, len);
        br.close();
        out.close();
    }
}
上边这个接口是一个文件下载的接口,主要有以下几个注意的:
filePath 参数,是在文件上传后,后台应该给你返回一个相对路径,比如/upload/2018-08-03/test.jpg 这样的字符串,接着你在调用这个图片下载接口时,可以直接传回来即可。
isOnLine 参数,这个其实为了方便前端对于下载的文件,是预览,还是下载 ,提供了两种选择,请注意,文件预览,必须是可预览的文件,比如doc 、xls 这种是浏览器无法预览的。传入true ,则会打开,传入false或者不传入这个参数,则只会下载。
关于这个预览 、下载 多说几句,就是对于我们http 请求来说,文件的预览 、下载 ,其实对应于请求 中,是一个请求头设置 的问题,当然前提是这个文件可以被浏览器识别打开:
 response.setHeader("Content-Disposition", "inline; filename=" + fileName);
 response.setHeader("Content-Disposition", "attachment; filename=" + fileName);
- 如果是下载,那么上边为attachment。
- 如果是预览,那么上边为inline。
对于前端来说,其实图片的预览不需要关注这个,因为图片对于等那种可以访问路径资源的标签,即使你设置的是下载 ,它也能自动打开,但是对于pdf ,貌似必须要在上边接口里,设置成预览 ,才能把它打开。
参考:https://blog.csdn.net/wohaqiyi/article/details/79179600
8、上传文件到项目静态目录中,而不是编译后的target里面
上传文件到两个不同的路径下,一个是项目路径,一个的项目编译路径,上传到编译路径下(target)文件可能会自动消失。
	@PostMapping("/uploadfile")
    @ResponseBody
    public String upload(@RequestParam("file") MultipartFile file) throws IOException {
		//如果文件不存在上传失败
        if (file.isEmpty()) {
            LOGGER.info("上传失败");
            System.out.println("文件不存在");
            return "upload fail";
        }
		//获取文件名字
        String fileName = file.getOriginalFilename();
        //设置编译后文件存在路径
        String path = ClassUtils.getDefaultClassLoader().getResource("").getPath()+"static/images/tx/";
        //获取项目路径
        File directory = new File("src/main/resources/static/images/tx");
        String paths = directory.getCanonicalPath();

        File dest = new File(paths+'/' + fileName);
        System.out.println(dest.getAbsoluteFile());

        FileInputStream fileInputStream = (FileInputStream) file.getInputStream();
        //以流的方式上传
        BufferedOutputStream bos = new BufferedOutputStream(new FileOutputStream(path + File.separator + fileName));
        byte[] bs = new byte[1024];
        int len;
        while ((len = fileInputStream.read(bs)) != -1) {
            bos.write(bs, 0, len);
        }
        bos.flush();
        bos.close();
        try {
        	//文件上传
            file.transferTo(dest);
            LOGGER.info("上传成功");
            return "upload success";
        } catch (IOException e) {
            LOGGER.error(e.toString(), e);
        }
        return "upload success";
    }
拓展:判断文件上传时文件的类型
https://blog.csdn.net/lpp_dd/article/details/78954297


 1723
1723

 被折叠的 条评论
为什么被折叠?
被折叠的 条评论
为什么被折叠?
 到【灌水乐园】发言


