linux线程是由进程模拟,和进程没有什么本质上的区别,相比于进程,线程在使用上便利很多,线程之间可以共享数据,但这也带来了一系列的问题。在我们在一个线程中对一个数据进行操作时,有时不希望别的线程修改数据,因此锁就诞生了,把资源进行上锁和解锁,被上锁的资源,在别的线程想要访问时,将不能访问,根据逻辑处理,一般情况下会进入阻塞状态(等待),被称为线程同步
线程的锁的种类有互斥锁、读写锁、条件变量、自旋锁、信号灯。实际开发中只需要会玩互斥锁就够了
这边在CentOS中创建一个c文件,其中创建两个线程,分别对一个int变量做处理
#include <unistd.h>
#include <pthread.h>
#include <stdio.h>

int num = 0;

pthread_t pthid;

void * thread_start(void *arg){
  while(1){

     num++;

     usleep(random()%200);
  }
}

void * thread_start1(void *arg){
  while(1){

     printf("num1 = %d\n",num);
     num++;
     usleep(random()%200);
     printf("num2 = %d\n",num);

     usleep(random()%200);
  }
}


int main(){

  srand(time(0));

  //创建线程1
  pthread_create(&pthid,0,thread_start,(void *)1);

  //创建线程2
  pthread_create(&pthid,0,thread_start1,(void *)2);

  usleep(20000);

}
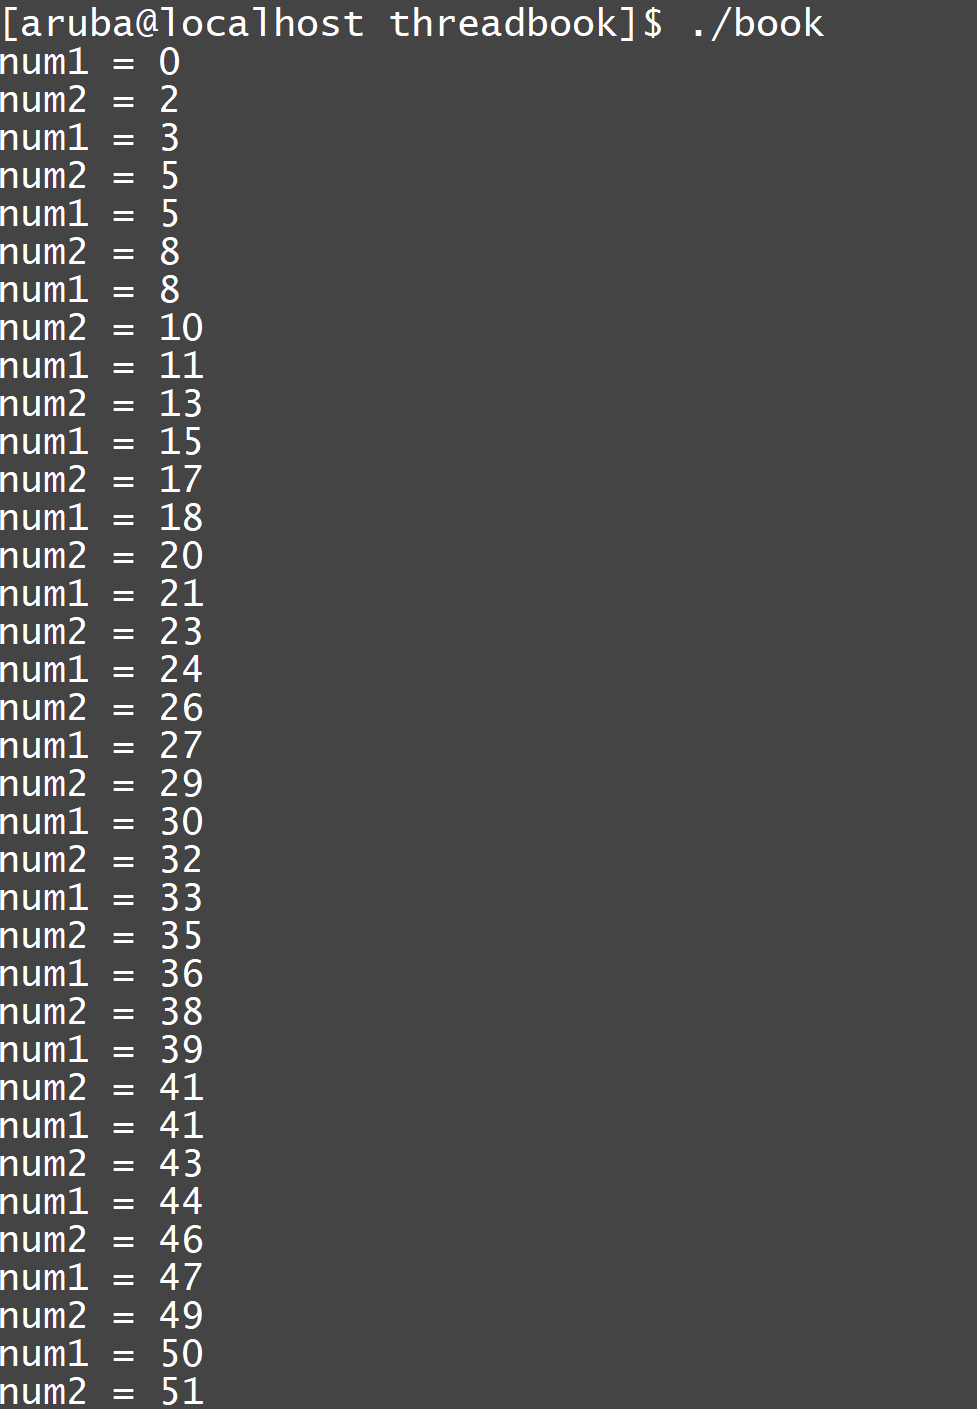
thread_start中对num进行++操作,thread_start1中打印num,并做++处理后再打印num,结果如下:
我们预想的是num1和num2是连续的,不想让其他线程影响,所以需要用到线程锁,修改后的c文件:
#include <unistd.h>
#include <pthread.h>
#include <stdio.h>

int num = 0;

pthread_t pthid;

pthread_mutex_t foo_mutex;

void * thread_start(void *arg){
  while(1){

     //申请加锁
     pthread_mutex_lock(&foo_mutex);

     num++;

     //释放锁
     pthread_mutex_unlock(&foo_mutex);

     usleep(random()%200);
  }
}

void * thread_start1(void *arg){
  while(1){

     //申请加锁
     pthread_mutex_lock(&foo_mutex);

     printf("num1 = %d\n",num);
     num++;
     usleep(random()%200);
     printf("num2 = %d\n",num);

     //释放锁
     pthread_mutex_unlock(&foo_mutex);

     usleep(random()%200);
  }
}


int main(){

  srand(time(0));

  //默认锁类型:当一个线程加锁以后,其余请求锁的线程将形成一个等待队列,并在解锁后按优先级获得锁
  pthread_mutex_init(&foo_mutex, NULL);

  //创建线程1
  pthread_create(&pthid,0,thread_start,(void *)1);

  //创建线程2
  pthread_create(&pthid,0,thread_start1,(void *)2);

  usleep(20000);

  //销毁锁
  pthread_mutex_destroy(&foo_mutex);
}
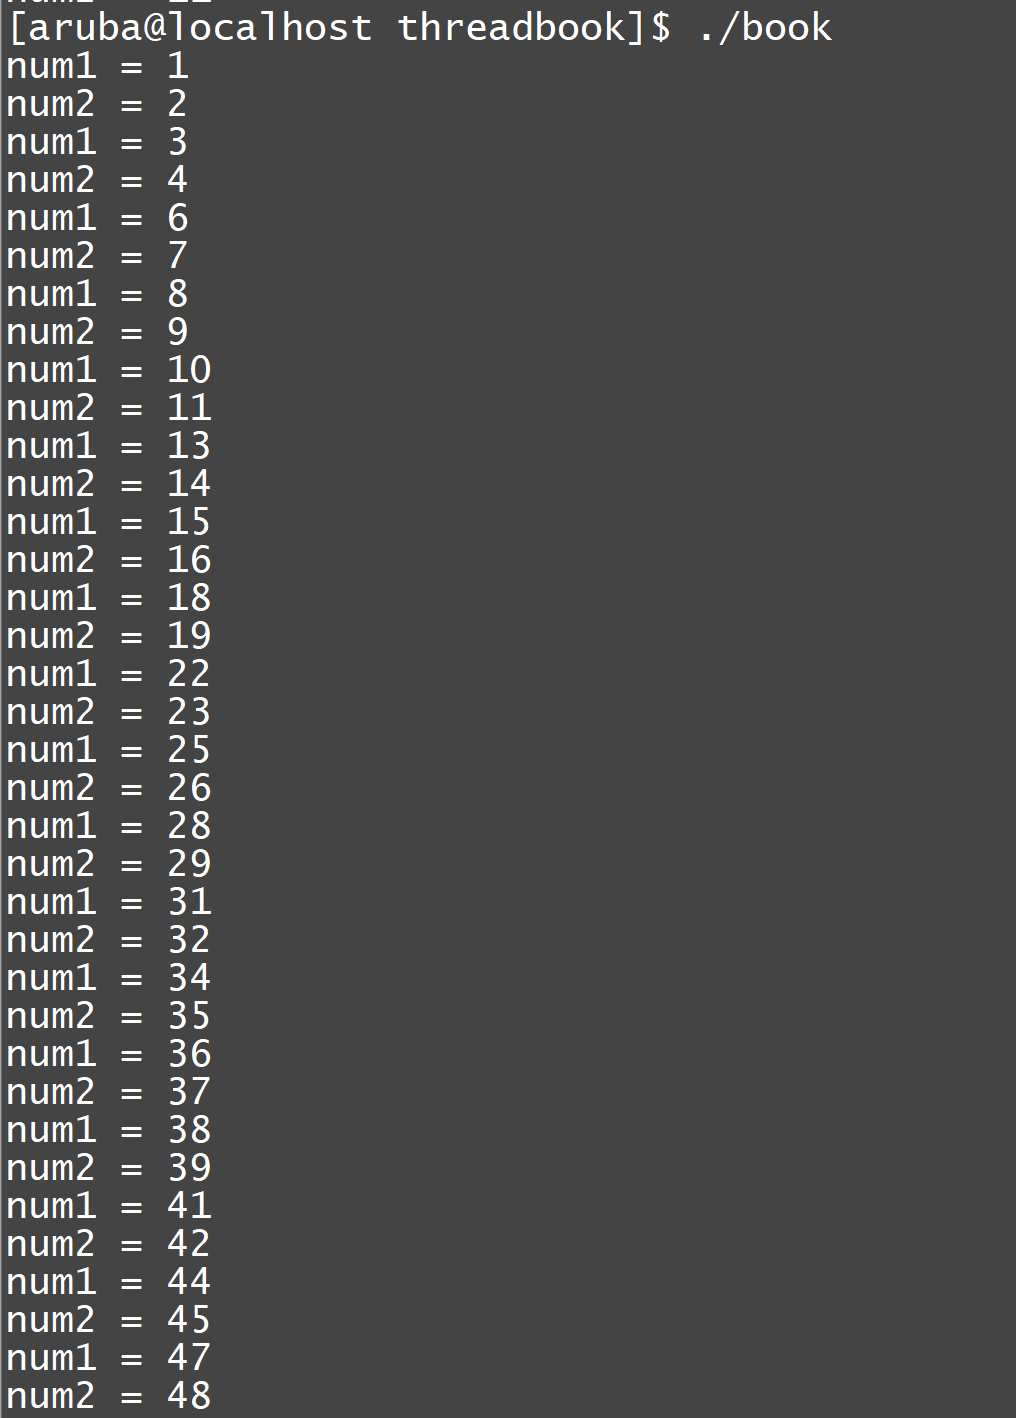
执行结果如下:num1和num2是连续的数字
JNI创建线程
在JNI中,我们在java层调用native方法,是在一个线程中的,所以主线程中调用native方法,如果耗时严重,有必要在native层使用多线程,下面介绍native中使用多线程的方法
首先新建一个Java类
package com.aruba.ndkapplication;

import android.util.Log;

/**
 * Created by aruba on 2020/4/17.
 */
public class ThreadUtils {
    public static native void startThread();

    public native void setEnv();

    public static native void destroy();

    public static void getInfoFromC() {
        Log.i("ThreadUtils", "getInfoFromC方法被native层调用");
        destroy();
    }
}
在c++中编写相应的方法,由于一个应用对应一个JVM,一个线程对应一个ENV,所以JNI中使用线程比较特殊,需要通过AttachCurrentThread先将线程添加到JVM,得到对应的ENV,并且子线程中得到的ENV不能使用FindClass方法获取非系统class,通过AttachCurrentThread附加到虚拟机的线程在查找类时只会通过系统类加载器进行查找,不会通过应用类加载器进行查找,因此可以加载系统类,但是不能加载非系统类,如自己在java层定义的类会返回NULL。所以我们这边使用java的setEnv方法调用native层,保存一个全局的jobject
//===================================多线程================================================

#include <pthread.h>

pthread_t pthid;
JavaVM *vm;
jobject g_obj;

//线程方法
void *thread_start(void *arg) {
    LOGI("thread_start begin");
    JNIEnv *env;
    //将线程添加到JVM中
    if (vm->AttachCurrentThread(&env, NULL) != JNI_OK) {
        LOGI("%s AttachCurrentThread error failed ", __FUNCTION__);
        return NULL;
    }

    sleep(3);
    //调用java中的getInfoFromC方法
    jclass clz = env->GetObjectClass(g_obj);
    jmethodID mid = env->GetStaticMethodID(clz, "getInfoFromC", "()V");
    env->CallStaticVoidMethod(clz, mid);

    pthread_exit(0);
}

//开启线程
JNIEXPORT void JNICALL
native_startThread(JNIEnv *env, jclass type) {
    LOGI("native_startThread begin");

    //创建线程
    pthread_create(&pthid, 0, thread_start, (void *) 1);
}

//设置环境
JNIEXPORT void JNICALL
native_set_env(JNIEnv *env, jobject jobj) {
    if (vm != NULL)
        vm = NULL;

    env->GetJavaVM(&vm);
    //保持ThreadUtils对象
    g_obj = env->NewGlobalRef(jobj);
}


//销毁资源
JNIEXPORT void JNICALL
native_destroy(JNIEnv *env, jclass type) {
    if (vm != NULL)
        vm = NULL;
    env->DeleteGlobalRef(g_obj);
}

//多线程
static const JNINativeMethod gMethodsThread[] = {
        {
                "startThread", "()V", (void *) native_startThread
        },
        {
                "setEnv",      "()V", (void *) native_set_env
        },
        {
                "destroy",     "()V", (void *) native_destroy
        }
};

//注册多线程Method
static int registerNativesThread(JNIEnv *env) {
    LOGI("registerNatives begin");
    jclass clazz;
    //找到java的类
    clazz = env->FindClass("com/aruba/ndkapplication/ThreadUtils");

    if (clazz == NULL) {
        LOGI("clazz is null");
        return JNI_FALSE;
    }

    if (env->RegisterNatives(clazz, gMethodsThread, NELEM(gMethodsThread)) < 0) {
        LOGI("RegisterNatives error");
        return JNI_FALSE;
    }

    return JNI_TRUE;
}

//===================================多线程end================================================
在java中调用
Button btn_click3 = findViewById(R.id.btn_click3);
        btn_click3.setOnClickListener(new View.OnClickListener() {
            @Override
            public void onClick(View v) {
                ThreadUtils threadUtils = new ThreadUtils();
                threadUtils.setEnv();
                threadUtils.startThread();
            }
        });
点击按钮后,我们查看logcat
其中native_startThread begin打印在主线程,另外两个都在子线程


 5777
5777


 被折叠的 条评论
为什么被折叠?
被折叠的 条评论
为什么被折叠?
 到【灌水乐园】发言


