


Cesium gltf 模型亮度调整,解决加载后过暗的问题
话不多说,有三种调节方式,第一种是调整模型的lightColor,指定在对模型进行着色时使用的光源颜色;第二种调整反射系数imageBasedLightingFactor;第三种通过自定义shader,把默认的PBR光照模型改为UNLIT
一、调整模型lightColor
  const model = await Cesium.Model.fromGltfAsync({
    url: '/model/dgl.glb', // 替换为你的 GLB 模型路径
    modelMatrix: Cesium.Transforms.eastNorthUpToFixedFrame(modelPosition),
    scale: 10.0, // 设置模型的缩放比例
    lightColor: new Cesium.Cartesian3(10.0,10.0, 10.0),//解决模型发暗,直接把光增强10倍
    //这样就是白光增强到100倍。对Pbr材质有效
  })
二、调整反射系数imageBasedLightingFactor
  const model = await Cesium.Model.fromGltfAsync({
    url: '/model/dgl.glb', // 替换为你的 GLB 模型路径
    modelMatrix: Cesium.Transforms.eastNorthUpToFixedFrame(modelPosition),
    scale: 10.0, // 设置模型的缩放比例
    imageBasedLightingFactor:new Cesium.Cartesian2(10,1)//解决模型发暗,把反射系数提高 第一个diffuse 第二个specular
  })
三、自定义Shader(CustomShader)
完美解决方案,改变光照模式,效果最佳
 const customShader = new Cesium.CustomShader({
    lightingModel: Cesium.LightingModel.UNLIT,//更改为UNLIT
    fragmentShaderText: `
    void fragmentMain(FragmentInput fsInput, inout czm_modelMaterial material) {
       // material.diffuse += vec3(0.1, 0.1, 0.1); // 增加你自定义的效果
    }
  `
  });

const model = await Cesium.Model.fromGltfAsync({
    url: '/model/dgl.glb', // 替换为你的 GLB 模型路径
    modelMatrix: Cesium.Transforms.eastNorthUpToFixedFrame(modelPosition),
    scale: 10.0, // 设置模型的缩放比例
    customShader: customShader
  })
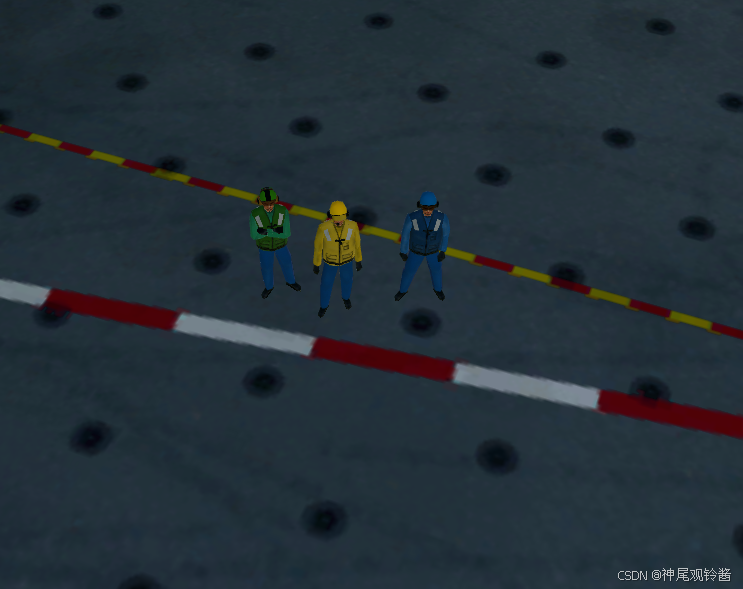
调整前:
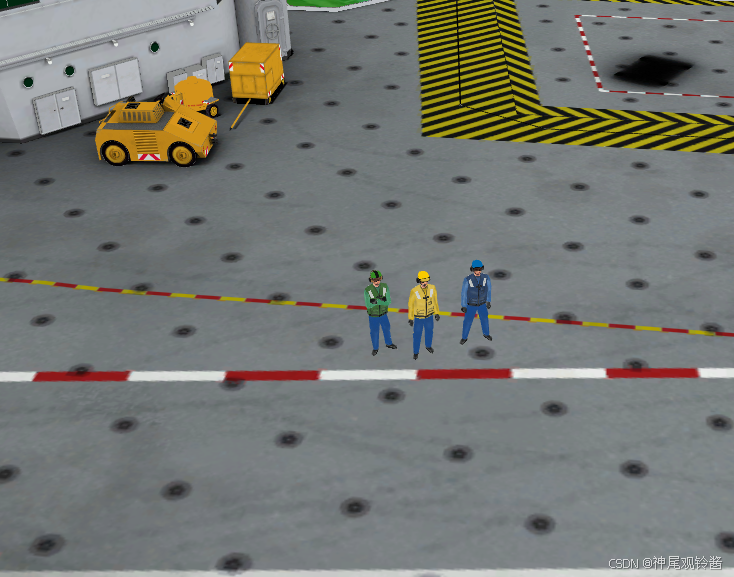
调整后:
光照模型解释
在 CesiumJS 中,模型的渲染模式主要分为两种:PBR (Physically-Based Rendering) 和 Unlit (无光照渲染)。这两种模式在视觉效果和性能方面有显著差异。
PBR (Physically-Based Rendering)
模拟真实世界中的光照、反射和材质特性。
使用环境光、方向光和点光等光源。
支持金属度(metalness)、粗糙度(roughness)、法线贴图等高级材质属性。
适用场景:
需要逼真的光照和材质效果,如建筑模型、车辆模型等。
性能影响:
开销较大,适合高性能设备。
Unlit (无光照渲染)
模型显示不受场景光照影响。
纹理和颜色直接显示,不计算光照效果。
渲染简单,效果类似于“自发光”。
适用场景:
简单模型或需要固定外观的模型(如地图标记、UI 元素)。
性能影响:
性能友好,适合低性能设备。
相信你也找了很久
顺便说一嘴,就看不惯那些文章动不动就专栏收费的,本来就是公开资源,吃相真的恶心


 3663
3663

 被折叠的 条评论
为什么被折叠?
被折叠的 条评论
为什么被折叠?
 到【灌水乐园】发言


