


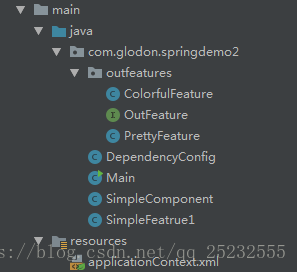
目录结构
ColorfulFeature跟PrettyFeature是实现OutFeature接口的两个类。
为了熟悉一遍笔记1中xml配置的方式,这个demo实现了两种依赖关系的配置方式:基于xml与基于java类的配置。
基于java类的配置:
package com.glodon.springdemo2;

import org.springframework.context.annotation.Bean;
import org.springframework.context.annotation.ComponentScan;
import org.springframework.context.annotation.Configuration;

@Configuration
@ComponentScan("com.glodon.springdemo2")
public class DependencyConfig {

    @Bean
    public SimpleComponent simpleComponent(){
        return new SimpleComponent();
    }

}
如果要说明一个类是配置类,需要加注解@Configuration,注解@ComponentScan是指要扫描的Bean目录。
@Bean注解就类似在xml配置文件中的<bean >
定义一个比较简单的Component:
package com.glodon.springdemo2;

import com.glodon.springdemo2.outfeatures.OutFeature;
import org.springframework.beans.factory.annotation.Autowired;
import org.springframework.beans.factory.annotation.Qualifier;
import org.springframework.stereotype.Component;

@Component
public class SimpleComponent {

    /**
     * 设置require为false当没有匹配的类型时可以免除抛出异常。
     * 但是要小心,如果没有匹配的类型,此时成员会为null,
     * 直接调用的话会抛空指针异常。
     */
    @Autowired(required = false)
    private SimpleFeatrue1 simpleFeatrue1;

    @Autowired
    @Qualifier("prettyFeature")
    private OutFeature outFeature;

    public SimpleFeatrue1 getSimpleFeatrue1() {
        return simpleFeatrue1;
    }

    public void setSimpleFeatrue1(SimpleFeatrue1 simpleFeatrue1) {
        this.simpleFeatrue1 = simpleFeatrue1;
    }

    public OutFeature getOutFeature() {
        return outFeature;
    }

    public void setOutFeature(OutFeature outFeature) {
        this.outFeature = outFeature;
    }
}
其包含两个依赖,simpleFeature1跟outFeature,可以看到javaconfig里并没有传入其构造参数,那么只要把simpleFeature1跟outFeature放在配置类指定的扫描路径下,在成员声明或者getset方法上添加注解@Autowired,就会在相应的目录下按类型去寻找相应的依赖。
此处有个问题,实现OutFeature接口的有两个类,就会出现装配歧义。这个时候可以使用@primary或者指定唯一标识符@Qualifier(beanid),就能有优先选择的bean装配进来了。此处指定为prettyFeature(beanid默认是bean类的第一个字母变为小写,所以可以找得到)
注意,在需要自动装配的bean上需要添加@Component注解,不然是扫描不到的。
对应的单元测试:
package com.glodon.springdemo2;

import org.junit.Assert;
import org.junit.Test;
import org.junit.runner.RunWith;
import org.springframework.beans.factory.annotation.Autowired;
import org.springframework.test.context.ContextConfiguration;
import org.springframework.test.context.junit4.SpringJUnit4ClassRunner;

@RunWith(SpringJUnit4ClassRunner.class)
@ContextConfiguration(classes = DependencyConfig.class)
public class DependencyWithSimpleComponentTest {

    @Autowired
    private SimpleComponent simpleComponent;

    @Test
    public void getSimpleComponent() {
        Assert.assertNotNull(simpleComponent.getSimpleFeatrue1());
    }
}
@ContextConfiguration指明java配置对象。如果在Main中需要读取java配置对象,使用AnnotationConfigApplicationContext。


 2万+
2万+


 被折叠的 条评论
为什么被折叠?
被折叠的 条评论
为什么被折叠?
 到【灌水乐园】发言


