


文章目录
概述
Spring Cloud Config 是由 Spring Cloud 官方推出,基于 Spring Cloud 体系的配置中心。
相比 Nacos、Apollo 等其它配置中心来说,Spring Cloud Config 是一个轻量级的配置中心,和 Spring Cloud 的集成度会更好,不过功能上会薄弱一些。例如说,灰度发布、运维界面、配置回滚等等。因此,还是推荐使用 Apollo 或者 Nacos 嘿嘿~
Spring Cloud Config 整体架构如下图所示:

一共分成 Spring Cloud Config Client 和 Server 两个角色:
- Spring Cloud Config Server 支持从 Git、数据库、本地文件等多种存储器中,读取数据作为配置,并提供 HTTP API 给 Spring Cloud Config Client 使用。
- Spring Cloud Config Client 在项目启动时,从 Spring Cloud Config Server 中读取到配置,并缓存在本地使用。
快速入门图片: 
搭建 Spring Cloud Config Server
创建 sc-config-server-git 项目,搭建的使用 Git 作为存储器的 Spring Cloud Config Server。
创建 Git 仓库
① 创建一个 Git 仓库 demo-config-server ,作为 Spring Cloud Config Server 的 Git 存储器。如下图所示:demo-config-server
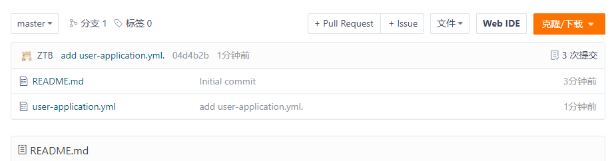
② 在仓库下,创建 user-application.yml 配置文件,如下图所示:
user-application.yml 
稍后,我们创建的用户服务 user-application,就会通过 Spring Cloud Config Server 提供的 HTTP 接口,读取到 user-application.yml 配置文件的配置。注意,这里名字要对应上 。
引入依赖
首先在 pom.xml 文件中,引入 Spring Cloud Config Server 依赖如下:
<?xml version="1.0" encoding="UTF-8"?>
<project xmlns="http://maven.apache.org/POM/4.0.0"
         xmlns:xsi="http://www.w3.org/2001/XMLSchema-instance"
         xsi:schemaLocation="http://maven.apache.org/POM/4.0.0 http://maven.apache.org/xsd/maven-4.0.0.xsd">
    <modelVersion>4.0.0</modelVersion>
    <groupId>org.example</groupId>
    <artifactId>sc-config-server-git</artifactId>
    <version>1.0-SNAPSHOT</version>
    <properties>
        <maven.compiler.target>1.8</maven.compiler.target>
        <maven.compiler.source>1.8</maven.compiler.source>
        <spring.boot.version>2.2.4.RELEASE</spring.boot.version>
        <spring.cloud.version>Hoxton.SR1</spring.cloud.version>
    </properties>
    <!--
        引入 Spring Boot、Spring Cloud、Spring Cloud Alibaba 三者 BOM 文件,进行依赖版本的管理,防止不兼容。
        在 https://dwz.cn/mcLIfNKt 文章中,Spring Cloud Alibaba 开发团队推荐了三者的依赖关系
     -->
    <dependencyManagement>
        <dependencies>
            <dependency>
                <groupId>org.springframework.boot</groupId>
                <artifactId>spring-boot-starter-parent</artifactId>
                <version>${spring.boot.version}</version>
                <type>pom</type>
                <scope>import</scope>
            </dependency>
            <dependency>
                <groupId>org.springframework.cloud</groupId>
                <artifactId>spring-cloud-dependencies</artifactId>
                <version>${spring.cloud.version}</version>
                <type>pom</type>
                <scope>import</scope>
            </dependency>
        </dependencies>
    </dependencyManagement>
    <dependencies>
        <!-- 引入 Spring Cloud Config Server 相关依赖,实现配置中心的服务端,并实现对其的自动配置 -->
        <dependency>
            <groupId>org.springframework.cloud</groupId>
            <artifactId>spring-cloud-config-server</artifactId>
        </dependency>
    </dependencies>
</project>
通过 spring-cloud-config-server 依赖,引入 Spring Cloud Config Server 相关依赖,实现配置中心的服务端,并实现对其的自动配置。
配置文件
创建 application.yml 配置文件,引入 Spring Cloud Config Server 相关配置项。配置内容如下:
server:
  port: 8888
spring:
  application:
    name: demo-config-server
  profiles:
    active: git # 使用的 Spring Cloud Config Server 的存储器方案
  cloud:
    config:
      server:
        # Spring Cloud Config Server 的 Git 存储器的配置项,对应 MultipleJGitEnvironmentProperties 类
        git:
          uri: https://gitee.com/zhutongbing/demo-config-server.git # Git 仓库地址
          search-paths: / # 读取文件的根地址
          default-label: master # 使用的默认分支,默认为 master
#          username: ${CODING_USERNAME} # 账号
#          password: ${CODING_PASSWORD} # 密码
          username: gitee仓库的账号 # 账号
          password: gitee仓库的密码 # 密码
#          force-pull: true #强制pull, 默认为false
① 设置 spring.profiles.active 配置项为 git,设置使用的 Spring Cloud Config Server 的存储器方案为 Git。Spring Cloud Config Server 是基于 spring.profiles.active 配置项来选择使用的存储器方案,如下图所示:EnvironmentRepositoryConfiguration 配置类 
② spring.cloud.config.server 为 Spring Cloud Config Server 的配置项,对应 ConfigServerProperties 类。一般情况下,默认配置即可,因此本示例也是如此。
③ spring.cloud.config.server.git 为 Spring Cloud Config Server 的 Git 存储器的配置项,对应 MultipleJGitEnvironmentProperties 类。
uri:配置文件所在的 Git 仓库地址。search-paths:配置文件所在的根目录。default-label:使用的默认分支,默认为 master。在 Spring Cloud Config Client 读取 Spring Cloud Config Server 的配置时,如果 Client 未传递 label 请求参数,则默认读取 Server 设置的 default-label 默认分支。username和password为账号密码,有需要的时候配置。
ConfigServerApplication
创建 ConfigServerApplication 类,作为 Spring Cloud Config Server 的启动类。代码如下:
@SpringBootApplication
@EnableConfigServer
public class ConfigServerApplication {
    public static void main(String[] args) {
        SpringApplication.run(ConfigServerApplication.class, args);
    }
}
通过 @EnableConfigServer 注解,声明启动 Spring Cloud Config Server。
HTTP 接口
Spring Cloud Config Server 的EnvironmentController类,提供了读取配置的 HTTP API 接口。简化代码如下:
@RequestMapping(path = "/{name}/{profiles:.*[^-].*}", produces = MediaType.APPLICATION_JSON_VALUE)

@RequestMapping("/{name}-{profiles}.properties")

@RequestMapping("/{label}/{name}-{profiles}.properties")

@RequestMapping("{name}-{profiles}.json")

@RequestMapping("/{label}/{name}-{profiles}.json")

@RequestMapping({ "/{name}-{profiles}.yml", "/{name}-{profiles}.yaml" })

@RequestMapping({ "/{label}/{name}-{profiles}.yml", "/{label}/{name}-{profiles}.yaml" })
每一个API实际是由三个参数的组合排列:
① {name}:配置文件的名字。Spring Cloud Config Client 默认约定,使用应用名 spring.application.name 读取对应的配置文件。
例如说,对于应用名 spring.application.name 为 user-application 时,会从 Spring Cloud Config Server 读取 user-application.yaml 等配置文件。
② {profiles}:配置文件的 Profile,一般用于解决不同环境下的配置文件。Spring Cloud Config Client 默认约定,使用 spring.profiles.active 读取对应的 Profile 配置文件。
例如说,在 spring.profiles.active 为 dev 时,会从 Spring Cloud Config Server 读取 user-application-dev.yaml 等配置文件。当然,不带有 Profile 的 user-application.yaml 配置文件也会被读取。
③ {label}:标签。在使用 Spring Cloud Config Server 使用 Git 作为存储器时,{label} 对应的是分支。
下面,我们来进行下 HTTP API 的简单使用:
① 使用 ConfigServerApplication 类,启动 Spring Cloud Config Server。启动日志如下:
// ... 省略部分非关键

// 使用 Git 存储器
2022-04-06 11:04:20.435  INFO 15428 --- [           main] sc.ConfigServerApplication               : The following profiles are active: git

// 服务的端口为 8888
2022-04-06 11:04:25.127  INFO 15428 --- [           main] o.s.b.w.embedded.tomcat.TomcatWebServer  : Tomcat started on port(s): 8888 (http) with context path ''
访问 http://127.0.0.1:8888/user-application.yaml 地址,获得名字为 user-application 的配置文件,结果如下: 
另外,控制台可以看到 Spring Cloud Config Server 从 Git 拉取配置的日志如下:
2022-04-06 11:04:49.527 INFO 15428 --- [nio-8888-exec-1] o.s.c.c.s.e.NativeEnvironmentRepository : Adding property source: file:/C:/Users/TONGBI~1/AppData/Local/Temp/config-repo-22506244931764226/user-application.yml
使用 Spring Cloud Config Client
创建 sc-config-user-application 项目,使用 Spring Cloud Config Client 从 Spring Cloud Config Server 读取配置,并使用 @ConfigurationProperties 和 @Value 注解来进一步读取对应的配置。
引入依赖
在 pom.xml 文件中,引入 Spring Cloud Config Client 依赖如下:
<properties>
    <maven.compiler.target>1.8</maven.compiler.target>
    <maven.compiler.source>1.8</maven.compiler.source>
    <spring.boot.version>2.2.4.RELEASE</spring.boot.version>
    <spring.cloud.version>Hoxton.SR1</spring.cloud.version>
</properties>
<!--
    引入 Spring Boot、Spring Cloud、Spring Cloud Alibaba 三者 BOM 文件,进行依赖版本的管理,防止不兼容。
    在 https://dwz.cn/mcLIfNKt 文章中,Spring Cloud Alibaba 开发团队推荐了三者的依赖关系
 -->
<dependencyManagement>
    <dependencies>
        <dependency>
            <groupId>org.springframework.boot</groupId>
            <artifactId>spring-boot-starter-parent</artifactId>
            <version>${spring.boot.version}</version>
            <type>pom</type>
            <scope>import</scope>
        </dependency>
        <dependency>
            <groupId>org.springframework.cloud</groupId>
            <artifactId>spring-cloud-dependencies</artifactId>
            <version>${spring.cloud.version}</version>
            <type>pom</type>
            <scope>import</scope>
        </dependency>
    </dependencies>
</dependencyManagement>
<dependencies>
    <!-- 引入 SpringMVC 相关依赖,并实现对其的自动配置 -->
    <dependency>
        <groupId>org.springframework.boot</groupId>
        <artifactId>spring-boot-starter-web</artifactId>
    </dependency>
    <!-- 引入 Spring Cloud Config Client 相关依赖,作为配置中心的客户端,并实现自动化配置 -->
    <dependency>
        <groupId>org.springframework.cloud</groupId>
        <artifactId>spring-cloud-starter-config</artifactId>
    </dependency>
</dependencies>
配置文件
创建 bootstrap.yml 配置文件,引入 Spring Cloud Config Client 相关配置项。配置内容如下:
spring:
  application:
    name: user-application
  cloud:
    # Spring Cloud Config Client 配置项,对应 ConfigClientProperties 类
    config:
      uri: http://127.0.0.1:8888 # Spring Cloud Config Server 的地址
      name: ${spring.application.name} # 读取的配置文件的名字,默认为 ${spring.application.name}
spring.cloud.config 为 Spring Cloud Config Client 的配置项,对应 ConfigServerProperties 类。
uri:Spring Cloud Config Server 的地址。name:读取的配置文件的名字,默认为${spring.application.name}。通过该默认值,实现了 Spring Cloud Config Client 的默认约定的读取。
为什么要将 Spring Cloud Config Client 的配置项添加到 bootstrap.yaml 配置文件,而不像我们之前一样操作,添加到 application.yaml 配置文件中呢?
在 Spring Cloud 应用中,会先创建一个 Bootstrap Context(引导上下文),比 Spring Boot 创建 Application Context(应用上下文)更早初始化。
Bootstrap Context 新增了一个 bootstrap.yaml 配置文件,保证和 Application Context 的 application.yaml 配置文件的隔离。
有了配置文件的隔离之后,Bootstrap Context 初始化的 Bean 从哪里来?Spring Cloud 新定义了专属于 Bootstrap Context 的自动化配置类的拓展点 BootstrapConfiguration,和 Spring Boot 为 Application Context 的自动化配置类的拓展点 EnableAutoConfiguration的隔离,保证两个 Context 创建各自的 Bean。以 Spring Cloud Alibaba Nacos 的 spring.factories 举例子,如下图所示:
Bootstrap Context 和 Application Context 做了这么多隔离,但是它们有一点是共享的,那就是 Environment。在 Spring 中,我们通过 Environment 获取属性配置,例如说 spring.application.name 对应的值是多少。
了解完这些之后,我们把它们串联在一起去思考一下,Bootstrap Context 的目的究竟是什么呢?通过 Bootstrap Context 的优先初始化,将配置加载到 Environment 中,提供给后面的 Application Context 使用。
举个贼重要的例子,稍后我们会在 bootstrap.yaml 添加 Spring Cloud Alibaba Nacos Config相关的配置,这样 Bootstrap Context 在初始化时,通过 NacosConfigBootstrapConfiguration 创建 Nacos 相关的 Bean,然后实现从 Nacos 配置中心加载配置到 Environment 中。
如果我们把 Spring Cloud Alibaba Nacos Config 相关的配置添加在 application.yaml中,那么可能无法保证 Nacos 相关的 Bean 被最先初始化,完成从 Nacos 获取配置,从而影响创建的 Bean。
OrderProperties
创建 OrderProperties 配置类,读取 order 配置项。代码如下:
@Component
@ConfigurationProperties(prefix = "order")
public class OrderProperties {
    /**
     * 订单支付超时时长,单位:秒。
     */
    private Integer payTimeoutSeconds;
    /**
     * 订单创建频率,单位:秒
     */
    private Integer createFrequencySeconds;

    public Integer getPayTimeoutSeconds() {
        return payTimeoutSeconds;
    }
    public void setPayTimeoutSeconds(Integer payTimeoutSeconds) {
        this.payTimeoutSeconds = payTimeoutSeconds;
    }
    public Integer getCreateFrequencySeconds() {
        return createFrequencySeconds;
    }
    public void setCreateFrequencySeconds(Integer createFrequencySeconds) {
        this.createFrequencySeconds = createFrequencySeconds;
    }
}
- 在类上,添加
@Component注解,保证该配置类可以作为一个 Bean 被扫描到。 - 在类上,添加
@ConfigurationProperties注解,并设置prefix = "order"属性,这样它就可以读取前缀为 order 配置项,设置到配置类对应的属性上。
DemoController
创建 DemoController 类,提供测试 @ConfigurationProperties 和 @Value 注入配置的两个 HTTP 接口。代码如下:
@RestController
@RequestMapping("/demo")
public class DemoController {
    @Autowired
    private OrderProperties orderProperties;
    /**
     * 测试 @ConfigurationProperties 注解的配置属性类
     */
    @GetMapping("/test01")
    public OrderProperties test01() {
        return orderProperties;
    }
    @Value(value = "${order.pay-timeout-seconds}")
    private Integer payTimeoutSeconds;
    @Value(value = "${order.create-frequency-seconds}")
    private Integer createFrequencySeconds;
    /**
     * 测试 @Value 注解的属性
     */
    @GetMapping("/test02")
    public Map<String, Object> test02() {
        Map<String, Object> result = new HashMap<>();
        result.put("payTimeoutSeconds", payTimeoutSeconds);
        result.put("createFrequencySeconds", createFrequencySeconds);
        return result;
    }
}
UserApplication
创建 UserApplication 类,作为应用启动类。代码如下:
@SpringBootApplication
public class UserApplication {
    public static void main(String[] args) {
        SpringApplication.run(UserApplication.class,args);
    }
}
测试
① 使用 ConfigServerApplication 类,启动 Spring Cloud Config Server。
② 使用 UserApplication 类,启动用户服务。在 IDEA 控制台中,可以看到 Spring Cloud Config Client 相关的日志如下:
2022-04-06 14:03:07.991  INFO 6680 --- [           main] c.c.c.ConfigServicePropertySourceLocator : Fetching config from server at : http://127.0.0.1:8888
2022-04-06 14:03:12.983  INFO 6680 --- [           main] c.c.c.ConfigServicePropertySourceLocator : Located environment: name=user-application, profiles=[default], label=null, version=9579cb8462b328fe0c509aeb42a7b726d9369de8, state=null
2022-04-06 14:03:12.983  INFO 6680 --- [           main] b.c.PropertySourceBootstrapConfiguration : Located property source: [BootstrapPropertySource {name='bootstrapProperties-configClient'}, BootstrapPropertySource {name='bootstrapProperties-https://gitee.com/zhutongbing/demo-config-server.git/user-application.yml'}]
③ 使用浏览器,访问 http://127.0.0.1:8080/demo/test01 接口,测试 @ConfigurationProperties 注解的配置属性类,返回结果如下,符合预期:
{
"payTimeoutSeconds": 60,
"createFrequencySeconds": 120
}
④ 使用浏览器,访问 http://127.0.0.1:8080/demo/test02 接口,测试 @Valuen 注解的属性,返回结果如下,符合预期:
{
"payTimeoutSeconds": 60,
"createFrequencySeconds": 120
}
多环境配置
通过 Spring Cloud Config Server 提供的 {profiles} 参数,我们可以读取不同环境对应的 {name}-{profiles}.yml 配置文件。
同时,在我们给项目设定 spring.profiles.active 配置项后,Spring Cloud Config Client 会按照约定,以该配置项作为 {profiles} 参数,自动从 Spring Cloud Config Server 读取对应的 {name}-{profiles}.yml 配置文件。
不过也要注意,Spring Cloud Config Client 还是会读取 {name}.yml 配置文件哈!
修改 Git 仓库
修改 Git 仓库,增加用户服务user-application的 dev 环境对应的 user-application-dev.yml 配置文件,和prod环境对应的user-application-prod.yml配置文件。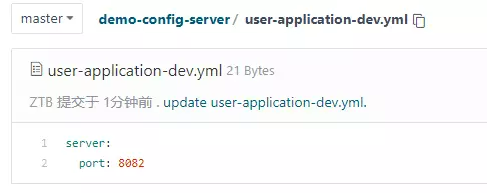
prod环境的与上述的一样:server.port=8084
简单测试
① 使用 ConfigServerApplication 类,启动 Spring Cloud Config Server。
下面,我们使用命令行参数进行 --spring.profiles.active 配置项,实现不同环境,读取不同配置文件。
② 开发环境示例:直接在 IDEA 中,增加--spring.profiles.active=dev到 Program arguments 中。如下图所示:

使用 UserApplication 应用,输出日志如下:
# 省略其它日志...
#  Spring Cloud Config 日志
2022-04-06 14:30:21.635  INFO 16716 --- [           main] c.c.c.ConfigServicePropertySourceLocator : Fetching config from server at : http://127.0.0.1:8888
2022-04-06 14:30:23.276  INFO 16716 --- [           main] c.c.c.ConfigServicePropertySourceLocator : Located environment: name=user-application, profiles=[dev], label=null, version=079727c63f8cc0be6935406c109f56da6091c1af, state=null
2022-04-06 14:30:23.276  INFO 16716 --- [           main] b.c.PropertySourceBootstrapConfiguration : Located property source: [BootstrapPropertySource {name='bootstrapProperties-configClient'}, BootstrapPropertySource {name='bootstrapProperties-https://gitee.com/zhutongbing/demo-config-server.git/user-application-dev.yml'}, BootstrapPropertySource {name='bootstrapProperties-https://gitee.com/zhutongbing/demo-config-server.git/user-application.yml'}]

#Tomcat日志
2022-04-06 14:30:25.258  INFO 16716 --- [           main] o.s.b.w.embedded.tomcat.TomcatWebServer  : Tomcat initialized with port(s): 8082 (http)
通过看到 Spring Cloud Config 日志,不仅仅读取了 user-application-dev.yml 配置文件,也读取了 user-application.yml。并且,前者的优先级高于后者。
同时,Tomcat 启动在 8082 端口,也符合读取 dev 环境读取 user-application-dev.yml 配置文件。
③ 生产环境示例:--spring.profiles.active=prod
2022-04-06 14:36:40.107  INFO 3168 --- [           main] c.c.c.ConfigServicePropertySourceLocator : Fetching config from server at : http://127.0.0.1:8888
2022-04-06 14:36:40.998  INFO 3168 --- [           main] c.c.c.ConfigServicePropertySourceLocator : Located environment: name=user-application, profiles=[prod], label=null, version=079727c63f8cc0be6935406c109f56da6091c1af, state=null
2022-04-06 14:36:40.998  INFO 3168 --- [           main] b.c.PropertySourceBootstrapConfiguration : Located property source: [BootstrapPropertySource {name='bootstrapProperties-configClient'}, BootstrapPropertySource {name='bootstrapProperties-https://gitee.com/zhutongbing/demo-config-server.git/user-application-prod.yml'}, BootstrapPropertySource {name='bootstrapProperties-https://gitee.com/zhutongbing/demo-config-server.git/user-application.yml'}]
2022-04-06 14:36:41.013  INFO 3168 --- [           main] sc.UserApplication                       : The following profiles are active: prod
2022-04-06 14:36:41.560  INFO 3168 --- [           main] o.s.cloud.context.scope.GenericScope     : BeanFactory id=23ec2cc1-f7aa-38a3-b80f-e9d58b821699
2022-04-06 14:36:42.029  INFO 3168 --- [           main] o.s.b.w.embedded.tomcat.TomcatWebServer  : Tomcat initialized with port(s): 8084 (http)

因为 Spring Cloud Config Server 在使用 Git 作为存储器时,支持使用 <label> 来选择不同的 Git 分支。所以,我们也可以选择给不同的环境,创建不同的 Git 分支。
这样,我们就可以利用上 Git 分支提供的权限功能,让开发直接使用和修改 dev 对应的开发环境的分支,然后在没有问题之后,提供 Pull Request 到 prod 对应的生产环境的分支,进行审核和上线。如此,实现不同环境的配置的权限管理。
Spring Cloud Config采用Git存储时两种常用的配置策略
第一种:多个项目公用一个Git仓库,用不同的目录区分项目
主要的配置项如下:
spring.cloud.config.server.git.uri=https://github.com/dyc87112/config-repo.git
spring.cloud.config.server.git.search-paths=/{application}
这种模式下不同的项目会对应到https://github.com/dyc87112/config-repo.git仓库下的不同目录,如果项目中spring.application.name=user-service,那么它的配置仓库会定位到https://github.com/dyc87112/config-repo.git仓库下的/user-service目录。配置文件按application-{profile}.properties的格式存储,{profile}代表环境名。
优缺点分析:因为只使用一个Git库存储,所以当配置是由专人统一维护的时候比较方便。但是如果要做DevOps的话,权限控制上将变的非常的弱。
第二种:多个项目使用多个不同Git仓库
主要的配置项如下:
spring.cloud.config.server.git.uri=https://github.com/dyc87112/{application}.git
这种模式下不同的项目会对应的不同的Git仓库,如果项目中spring.application.name=user-service,那么它的配置仓库会定位到https://github.com/dyc87112/user-service.git仓库下的配置。配置文件按application-{profile}.properties的格式存储,{profile}代表环境名。
优缺点分析:由于一个项目就有一个对应的存储配置的Git仓库,所以这种模式对于DevOps的应用支持较好,如果使用Gitlab作为Git服务端的话,还有不错的界面和权限管理来方便项目所属者使用和维护。如果团队不是DevOps模式管理的话,专人管理就会遇到有N多Git仓库要维护的困境。
自动配置刷新
在项目启动时,Spring Cloud Config Client 从 Spring Cloud Config Server 读取到配置时,考虑到后续的访问效率,是将配置缓存在本地内存中。也就是说,后续我们使用到的配置,都是直接访问内存中的配置,无需重复去 Spring Cloud Config Server 读取。
这样,就导致后续如果 Spring Cloud Config Server 配置发生变化时,项目是无法及时更新,即无法自动配置刷新!
解决这个问题的方案有很多种,我们先来看第一种,直接使用 Spring Cloud Config Client 的 /actuator/refresh 接口,让 Spring Cloud Config Client 重新去 Spring Cloud Config Server 读取配置,从而刷新本地缓存。
使用/actuator/refresh 接口:
最终项目如下图:
搭建 Spring Cloud Config Server
直接使用sc-config-server-git 项目即可。
搭建 Spring Cloud Config Client
从sc-config-user-application 项目,复制出 sc-config-user-application-auto-refresh-by-actuator 项目来使用 Spring Cloud Config Client。
引入依赖
在 pom.xml 文件中,额外引入 Spring Boot Actuator 相关依赖。新增如下:
<!-- 实现对 Actuator 的自动化配置 -->
<dependency>
    <groupId>org.springframework.boot</groupId>
    <artifactId>spring-boot-starter-actuator</artifactId>
</dependency>
稍后调用的 /actuator/refresh 接口,是基于 Actuator 做的拓展 RefreshEndpoint 提供的。
配置文件
创建 application.yml 配置文件,额外增加 Spring Boot Actuator 配置项。配置如下:
management:
  endpoints:
    # Actuator HTTP 配置项,对应 WebEndpointProperties 配置类
    web:
      exposure:
        include: refresh # 需要开放的端点。默认值只打开 health 和 info 两个端点。通过设置 * ,可以开放所有端点。
设置 management.endpoints.web.exposure.include 为 refresh,将 /actuator/refresh 接口开放出来。
@RefreshScope
在 Spring Cloud 中,提供了@RefreshScope注解,可以声明在 Bean 上,实现该 Bean 的配置刷新。
将 @RefreshScope 注解添加在 DemoController 类上,实现 @Value 注解的属性的刷新。
注意,不加 @RefreshScope 注解的情况下,使用 @ConfigurationProperties 注解的属性,依然可以配置刷新。
简单测试
① 使用 ConfigServerApplication 类,启动 Spring Cloud Config Server。使用 UserApplication 类,启动用户服务。
使用 curl 命令,请求 DemoController 提供的两个测试接口,获得当前的配置。过程如下:
# 测试 `@ConfigurationProperties` 注解的配置属性类
$ curl http://127.0.0.1:8080/demo/test01
{"payTimeoutSeconds":60,"createFrequencySeconds":240}
# 测试 `@Value` 注解的属性
$ curl http://127.0.0.1:8080/demo/test02
{"createFrequencySeconds":240,"payTimeoutSeconds":60}
② 将 Git 中的user-application.yml配置文件,将order.create-frequency-seconds配置项修改成 480,并 Push 到 Git 仓库。
order:
  pay-timeout-seconds: 60 # 订单支付超时时长,单位:秒。
  create-frequency-seconds: 480 # 订单创建频率,单位:秒
使用 curl 命令,请求 DemoController 提供的两个测试接口, 获取当前的配置
# 测试 `@ConfigurationProperties` 注解的配置属性类
$ curl http://127.0.0.1:8080/demo/test01
{"payTimeoutSeconds":60,"createFrequencySeconds":240}

# 测试 `@Value` 注解的属性
$ curl http://127.0.0.1:8080/demo/test02
{"createFrequencySeconds":240,"payTimeoutSeconds":60}
发现配置没有变,因为我们没有通知 Spring Cloud Config Client 配置变化,重新去 Spring Cloud Config Server 重新拉取。
③ 使用 Postman 模拟 POST 请求用户服务的 http://127.0.0.1:8080/actuator/refresh 地址,通知用户刷新配置,触发 Spring Cloud Config Client 从 Spring Cloud Config Server 重新拉取配置。返回结果如下:
[
    "config.client.version",
    "order.create-frequency-seconds"
]
- 返回结果是一个数组,告诉我们变化的配置项有哪些。这里,可以看到我们刚修改的
"order.create-frequency-seconds"配置项,符合预期。
同时,在 IDEA 控制台看到用户服务的日志,可以发现从 Spring Cloud Config Server 重新读取了配置内容:
2022-04-06 14:26:19.337  INFO 60921 --- [nio-8080-exec-8] c.c.c.ConfigServicePropertySourceLocator : Fetching config from server at : http://127.0.0.1:8888
2022-04-06 14:26:21.506  INFO 60921 --- [nio-8080-exec-8] c.c.c.ConfigServicePropertySourceLocator : Located environment: name=user-application, profiles=[default], label=null, version=c262a44be148d3dc2bfb4191f0bc18a22f7a67d5, state=null
2022-04-06 14:26:21.507  INFO 60921 --- [nio-8080-exec-8] b.c.PropertySourceBootstrapConfiguration : Located property source: [BootstrapPropertySource {name='bootstrapProperties-configClient'}, BootstrapPropertySource {name='bootstrapProperties-https://github.com/YunaiV/demo-config-server.git/user-application.yml'}]
使用 curl 命令,请求 DemoController 提供的两个测试接口,获得当前的配置。过程如下
# 测试 `@ConfigurationProperties` 注解的配置属性类
$ curl http://127.0.0.1:8080/demo/test01
{"payTimeoutSeconds":60,"createFrequencySeconds":480}

# 测试 `@Value` 注解的属性
$ curl http://127.0.0.1:8080/demo/test02
{"createFrequencySeconds":480,"payTimeoutSeconds":60}
配置成功刷新。
当前方案只刷新单节点,生产环境下基本是多节点的,因此再生产环境下我们一般不使用这个方案。
基于 Spring Cloud Bus 实现
基于 Spring Cloud Bus 实现,可以通知到项目的所有节点,刷新本地缓存的配置。
Spring Cloud Bus 是事件、消息总线,用于在集群(例如,配置变化事件)中传播状态变化,可与 Spring Cloud Config 联合实现热部署。
简单来说,Spring Cloud Bus 是基于 RabbitMQ、Kafka、RocketMQ 等消息队列,通过发送事件(消息),广播到订阅该事件(消息)的所有节点上。如此,我们就很好理解 Spring Cloud Config + Spring Cloud Bus 来实现自动配置刷新的整体架构,整体如下图所示:

- 在我们修改完 Spring Cloud Config Server 配置中心的配置时后,调用其
/monitor接口,发布RefreshRemoteApplicationEvent事件到 Spring Cloud Bus 中。 - 使用了 Spring Cloud Config Client 的项目,在启动时会订阅 RefreshRemoteApplicationEvent 事件。这样,在从 Spring Cloud Bus 接收到该事件时,会使用 Spring Cloud Config Client 重新从 Server 拉取配置,从而自动刷新本地缓存的配置。
本质上,是基于消息队列实现广播消费,刷新本地缓存

搭建 Spring Cloud Config Server
从sc-config-user-application 项目,复制出 sc-config-server-git-auto-refresh-by-bus 项目来接入 Spring Cloud Bus。
引入依赖
修改 pom.xml 文件中,额外引入 Spring Cloud Bus 相关依赖。
<!-- 引入基于 RabbitMQ 的 Spring Cloud Bus 的实现的依赖,并实现对其的自动配置 -->
<dependency>
    <groupId>org.springframework.cloud</groupId>
    <artifactId>spring-cloud-starter-bus-amqp</artifactId>
</dependency>

<!-- 引入 Spring Cloud Config Monitor 依赖,提供 `/monitor` 接口,用于刷新配置 -->
<dependency>
    <groupId>org.springframework.cloud</groupId>
    <artifactId>spring-cloud-config-monitor</artifactId>
</dependency>
配置文件
修改 application.yml 配置文件,增加 spring.rabbitmq 配置项,从而初始化 RabbitMQ 客户端,提供给 Spring Cloud Bus RabbitMQ 使用。完整配置如下:
server:
  port: 8888

spring:
  application:
    name: demo-config-server

  profiles:
    active: git # 使用的 Spring Cloud Config Server 的存储器方案
  # Spring Cloud Config 相关配置项
  cloud:
    config:
      server:
        # Spring Cloud Config Server 的 Git 存储器的配置项,对应 MultipleJGitEnvironmentProperties 类
        git:
          uri: https://github.com/YunaiV/demo-config-server.git # Git 仓库地址
          search-paths: / # 读取文件的根地址
          default-label: master # 使用的默认分支,默认为 master
  #          username: ${CODING_USERNAME} # 账号
  #          password: ${CODING_PASSWORD} # 密码

  # RabbitMQ 相关配置项
  rabbitmq:
    host: localhost
    port: 5672
    username: guest
    password: guest
搭建 Spring Cloud Config Client
从sc-config-user-application 项目,复制出sc-config-user-application-auto-refresh-by-bus 项目来接入 Spring Cloud Bus。
引入依赖
修改pom.xml文件中,额外引入 Spring Cloud Bus 相关依赖。新增如下:
<!-- 引入基于 RabbitMQ 的 Spring Cloud Bus 的实现的依赖,并实现对其的自动配置 -->
<dependency>
    <groupId>org.springframework.cloud</groupId>
    <artifactId>spring-cloud-starter-bus-amqp</artifactId>
</dependency>
配置文件
创建 application.yml 配置文件,增加spring.rabbitmq配置项,从而初始化 RabbitMQ 客户端,提供给 Spring Cloud Bus RabbitMQ 使用。配置如下:
spring:
  # RabbitMQ 相关配置项
  rabbitmq:
    host: localhost
    port: 5672
    username: guest
    password: guest
@RefreshScope
将 @RefreshScope 注解添加在 DemoController 类上,实现 @Value 注解的属性的刷新。代码如下:
@RestController
@RequestMapping("/demo")
@RefreshScope // 加我加我加我!
public class DemoController {

    // ... 省略其它代码

}
简单测试
① 使用 ConfigServerApplication 类,启动 Spring Cloud Config Server。使用 UserApplication 类,启动用户服务。
使用 curl 命令,请求 DemoController 提供的两个测试接口,获得当前的配置。过程如下:
# 测试 `@ConfigurationProperties` 注解的配置属性类
$ curl http://127.0.0.1:8080/demo/test01
{"payTimeoutSeconds":60,"createFrequencySeconds":240}

# 测试 `@Value` 注解的属性
$ curl http://127.0.0.1:8080/demo/test02
{"createFrequencySeconds":240,"payTimeoutSeconds":60}
② 将 Git 中的 user-application.yml 配置文件,将order.create-frequency-seconds配置项修改成 480,并 Push 到 Git 仓库。最终内容如下:
order:
  pay-timeout-seconds: 60 # 订单支付超时时长,单位:秒。
  create-frequency-seconds: 480 # 订单创建频率,单位:秒
使用 curl 命令,请求 DemoController 提供的两个测试接口,获得当前的配置。过程如下:
# 测试 `@ConfigurationProperties` 注解的配置属性类
$ curl http://127.0.0.1:8080/demo/test01
{"payTimeoutSeconds":60,"createFrequencySeconds":240}

# 测试 `@Value` 注解的属性
$ curl http://127.0.0.1:8080/demo/test02
{"createFrequencySeconds":240,"payTimeoutSeconds":60}
配置没有发生变化,因为我们没有通知 Spring Cloud Config Client 配置变化,重新去 Spring Cloud Config Server 重新拉取。
Postman 模拟 POST 请求 Spring Cloud Config Server 的 http://127.0.0.1:8888/monitor 地址,实现 Spring Cloud Config Server 使用 Spring Cloud Bus 发送事件(消息)到 RabbitMQ 中。如下图所示:

path参数,设置要自动配置刷新的服务名。这里设置为*表示通知所有服务 。
此时在 IDEA 的控制台中,我们会看到 Spring Cloud Config Server 会打印 Spring Cloud Config Monitor 的日志如下:
2020-03-14 08:10:42.459 INFO 33375 --- [io-8888-exec-10] o.s.c.c.monitor.PropertyPathEndpoint : Refresh for: *
用户服务通过 Spring Cloud Bus 会接收到来自 RabbitMQ 的事件(消息),会触发 Spring Cloud Config Client 从 Spring Cloud Config Server 重新拉取配置。
此时在 IDEA 的控制台中,我们会看到用户服务的日志,可以发现从 Spring Cloud Config Server 重新读取了配置内容:
# Spring Cloud Config 相关日志
2022-04-08 15:13:17.893  INFO 33721 --- [rKC4AuvtW_ZYw-1] c.c.c.ConfigServicePropertySourceLocator : Fetching config from server at : http://127.0.0.1:8888
2022-04-08 15:13:18.945  INFO 33721 --- [rKC4AuvtW_ZYw-1] c.c.c.ConfigServicePropertySourceLocator : Located environment: name=user-application, profiles=[default], label=null, version=65469edc06892d76d2b3d3e35b4cdd5ff71d3c52, state=null
# Spring Cloud Bus 相关日志
2022-04-08 15:13:18.983  INFO 33721 --- [rKC4AuvtW_ZYw-1] o.s.cloud.bus.event.RefreshListener      : Received remote refresh request. Keys refreshed []
使用 curl 命令,请求 DemoController 提供的两个测试接口,获得当前的配置。
# 测试 `@ConfigurationProperties` 注解的配置属性类
$ curl http://127.0.0.1:8080/demo/test01
{"payTimeoutSeconds":60,"createFrequencySeconds":480}

# 测试 `@Value` 注解的属性
$ curl http://127.0.0.1:8080/demo/test02
{"createFrequencySeconds":480,"payTimeoutSeconds":60}
配置成功刷新
基于监听器
通过 @ConfigurationProperties 或者 @Value + @RefreshScope 注解,已经能够满足我们绝大多数场景下的自动刷新配置的功能。但是,在一些场景下,我们仍然需要实现对配置的监听,执行自定义的逻辑。
在 Spring Cloud 中,在 Environment 的属性配置发生变化时,会发布 EnvironmentChangeEvent 事件。这样,我们只需要实现 EnvironmentChangeEvent 事件的监听器,就可以进行自定义的逻辑处理。
例如说,Spring Cloud 内置了LoggingRebinder监听器,实现了对 EnvironmentChangeEvent 事件的监听,在发现 logging.level 配置项发生变化时,重新设置日志组件的日志级别。如下图所示:
下面,我们来演示 Spring Cloud 的 EnvironmentChangeEvent 的事件监听器,通过内置的 LoggingRebinder 监听器,以及稍后我们会自定义一个简单的监听器。最终项目如下图所示:

LoggingRebinder
通过 LoggingRebinder 监听器,我们可以实现日志级别的动态修改。
先在 DemoController 类中,增加一个打印日志的 API 接口。代码如下:
// DemoController.java

private Logger logger = LoggerFactory.getLogger(getClass());

@GetMapping("/logger")
public void logger() {
    logger.debug("[logger][测试一下]");
}
然后,开始我们来测试日志级别的动态修改的功能:
① 在 Git 中的 user-application.yml 配置文件,增加 logging.level.cn.iocoder.springcloud.labx12.userapplication.controller.DemoController 配置项为 INFO,即让 DemoController 使用 INFO 日志级别。修改完成,记得推送到 Git 仓库噢。
然后,使用 ConfigServerApplication 类,启动 Spring Cloud Config Server。使用 UserApplication 类,启动用户服务。
最后,请求http://127.0.0.1:8080/demo/logger接口,控制台并未打印日志,因为当前日志级别是 INFO。
② 在 Git 中的user-application.yml配置文件,增加 logging.level.cn.iocoder.springcloud.labx12.userapplication.controller.DemoController 配置项为 DEBUG,即让 DemoController 使用DEBUG日志级别。修改完成,记得推送到 Git 仓库噢。
然后,使用 Postman 模拟 POST 请求用户服务的 http://127.0.0.1:8080/actuator/refresh 地址,通知用户刷新配置,触发 Spring Cloud Config Client 从 Spring Cloud Config Server 重新拉取配置。
最终,控制台打印日志,因为当前日志级别是 DEBUG。日志内容如下:
2022-04-08 15:21:24.022 DEBUG 50417 --- [nio-8080-exec-3] c.i.s.l.u.controller.DemoController : [logger][测试一下]
- 符合预期。
DemoEnvironmentChangeListener
我们来实现一个自定义的 DemoEnvironmentChangeListener 监听器,打印下变化配置项的最新值。代码如下:
@Component
public class DemoEnvironmentChangeListener implements ApplicationListener<EnvironmentChangeEvent> {

    private Logger logger = LoggerFactory.getLogger(getClass());

    @Autowired
    private ConfigurableEnvironment environment;

    @Override
    public void onApplicationEvent(EnvironmentChangeEvent event) {
        for (String key : event.getKeys()) {
            logger.info("[onApplicationEvent][key({}) 最新 value 为 {}]", key, environment.getProperty(key));
        }
    }

}
然后,开始我们来测试 DemoEnvironmentChangeListener 的功能:
① 使用 ConfigServerApplication 类,启动 Spring Cloud Config Server。使用 UserApplication 类,启动用户服务。
② 在 Git 中的 user-application.yml 配置文件,增加 test 配置项为 true,只是为了修改下配置。修改完成,记得推送到 Git 仓库噢。
然后,使用 Postman 模拟 POST 请求用户服务的 http://127.0.0.1:8080/actuator/refresh 地址,通知用户刷新配置,触发 Spring Cloud Config Client 从 Spring Cloud Config Server 重新拉取配置。
最终,我们在 IDEA 控制台可以看到 DemoEnvironmentChangeListener 打印如下日志,符合预期:
2020-03-14 09:29:09.439  INFO 50417 --- [nio-8080-exec-6] .i.s.l.u.l.DemoEnvironmentChangeListener : [onApplicationEvent][key(config.client.version) 最新 value 为 b484b8cae6d99a392a0e7ce59fb23f44d3030b3e]
2020-03-14 09:29:09.439  INFO 50417 --- [nio-8080-exec-6] .i.s.l.u.l.DemoEnvironmentChangeListener : [onApplicationEvent][key(test) 最新 value 为 true]
配置加密
spring Cloud Config 是唯一内置配置加密的功能的配置中心,这点是比 Nacos 和 Apollo 强大的地方,它们都需要结合 Jasypt 来实现该功能,并且存在不兼容的问题。
Spring Cloud Config 的配置的加解密行为,是在 Server 端完成,对 Client 端是完全透明的。
例如说,我们将 xx-password 配置项加密存储到 Git 仓库后,Spring Cloud Config Client 在从 Spring Cloud Config Server 请求该配置项时,Server 会从 Git 仓库获取 xx-password 配置项,并解密返回给 Spring Cloud Config Client。
下面,我们来演示 Spring Cloud Config 的配置加密的功能。

搭建 Spring Cloud Config Server
直接使用sc-config-server-git 项目即可,开启配置加密功能。
安装 JCE
因为 Spring Cloud Config Server 的配置加密功能,是基于 JCE(Java Cryptography Extension)实现,在使用它实现 ACE 加密时,会抛出如下异常:
java.security.InvalidKeyException: Illegal key size
原因是,默认安装的 JDK 或者 JRE 包含 JCE 的 policy 文件是受限.
解决办法也很简单,去 Oracle 官方下载 Java Cryptography Extension (JCE) Unlimited Strength Jurisdiction Policy Files,然后覆盖掉 JDK 或 JRE 中的 local_policy.jar 和 US_export_policy.jar 即可。下载地址为

配置文件
创建 bootstrap.yml 配置文件,增加加密功能相关的配置项。配置如下:
一定要放在 bootstrap.yml 配置文件中,不然配置解密功能是无法生效的!
# 加密配置项,对应 KeyProperties 类
encrypt:
  # 对称加密
  key: yudaoyuanma # 对称加密 key
  salt: dfaad7761f0729b35ec3b3543604eda7 # 对称加密 salt,默认为 "deadbeef",必须是 16 进制
encrypt 为加密配置项,对应 KeyProperties 类。Spring Cloud Config 支持对称加密和非对称加密,后者安全性更高。这里先采用对称加密:
key:对称加密的 key。salt:对称加密的 salt,默认为 “deadbeef”。注意,生产环境下推荐自定义,必须是 16 进制,可以通过 Hex(16 进制)随机生成计算器 来生成。
EncryptionController
在 Spring Cloud Config Server 中,内置 EncryptionController 提供加解密功能的 HTTP 接口,比较常用的有两个:
- 加密:
curl {CONFIG_SERVER}/encrypt -d 需要加密的字符串 - 解密:
curl {CONFIG_SERVER}/decrypt -d 需要解密的字符串
在后面,我们可以通过/encrypt接口来加密需要的配置项的值,然后添加到 Git 仓库中。
搭建 Spring Cloud Config Client
使用sc-config-user-application 项目即。
为了方便读取稍后测试的 xx-password 配置项,我们在 DemoController 中添加读取该配置项的接口。代码如下:
// DemoController.java

@Value(value = "${xx-password:''}")
private String xxPassword;

@GetMapping("/xx_password")
public String xxPassword() {
    return xxPassword;
}
简单测试
① 使用 ConfigServerApplication 类,启动 Spring Cloud Config Server。
② 调用 Spring Cloud Config Server 的 /encrypt 接口,将 "wosshimima" 进行解密。操作如下:
$ curl http://127.0.0.1:8888/encrypt -d woshimima
5fca0df4439ee4b2830195555934985442efee67fe1e4bb4cce6fde2ff081a10
然后,添加xx-password配置项为 5fca0df4439ee4b2830195555934985442efee67fe1e4bb4cce6fde2ff081a10 到 Git 仓库中。如下图所示:

注意,需要使用'{cipher}'进行包裹,这样 Spring Cloud Config Server 才能知道该配置项的值是经过加密的,需要进行解密。
非对称加密
以下的操作都是在sc-config-server-git项目里进行操作的
①使用 keytool 命令来生成 Key Store。操作如下:
keytool -genkeypair -alias mytestkey -keyalg RSA -dname "CN=Config Server,OU=Unit,O=Organization,L=City,S=State,C=CN" -keypass nicainicai -keystore configserver.jks -storepass buzhidao
具体的参数含义如下:
-genkeypair:创建密钥对-alias:产生别名,默认为 “mykey”-keyalg:指定密钥的算法,例如说 RSA、DSA。默认为 DSA-dname:指定证书拥有者信息,例如:“CN=名字与姓氏,OU=组织单位名称,O=组织名称,L=城市或区域名称,ST=州或省份名称,C=单位的两字母国家代码”-keypass:指定别名条目的密码(私钥的密码)-keystore:指定密钥库的名称(产生的各类信息将不在 .keystore 文件中)-storepass:指定密钥库的密码(获取 keystore 信息所需的密码)
执行完成后,在当前目录我们会获得 configserver.jks。 我们需要将它复制到 Spring Cloud Config Server 项目的 resources 目录下,如下图所示: 
② 修改 bootstrap.yml 配置文件,设置使用 KeyStore。完整配置如下:
# 加密配置项,对应 KeyProperties 类
encrypt:
  # 对称加密
#  key: yudaoyuanma # 对称加密 key
#  salt: dfaad7761f0729b35ec3b3543604eda7 # 对称加密 salt,默认为 "deadbeef",必须是 16 进制
  # 非对应加密
  key-store:
    location: classpath:/configserver.jks # jks 文件所在的路径
    password: buzhidao # 对应 storepass 参数
    alias: mytestkey # 对应 alias 参数
    secret: nicainicai # 对应 keypass 参数
③因为 Maven 配置下,不会将 *.jks 打包到项目中,所以我们需要修改下 pom.xml 文件的 <build /> 属性如下:
<build>
<resources>
    <resource>
        <directory>src/main/resource</directory>
        <includes>
            <include>**/*.yml</include> <!-- 将 .yml 后缀包含进去 -->
            <include>**/*.jks</include> <!-- 将 .jks 后缀包含进去 -->
        </includes>
        <filtering>false</filtering> <!-- 不进行过滤 -->
    </resource>
</resources>
</build>
④ 使用 ConfigServerApplication 类,启动 Spring Cloud Config Server。
然后,调用 Spring Cloud Config Server 的 /encrypt 接口,将 “wosshimima” 进行解密
与注册中心集成

Spring Cloud Config Server
修改 pom.xml 文件,引入 spring-cloud-starter-alibaba-nacos-discovery 依赖。
<!-- 引入 Spring Cloud Alibaba Nacos Discovery 相关依赖,将 Nacos 作为注册中心,并实现对其的自动配置 -->
        <dependency>
            <groupId>com.alibaba.cloud</groupId>
            <artifactId>spring-cloud-starter-alibaba-nacos-discovery</artifactId>
        </dependency>
修改 application.yml 配置文件
server:
  port: 8888
spring:
  application:
    name: demo-config-server
  profiles:
    active: git # 使用的 Spring Cloud Config Server 的存储器方案
  # Spring Cloud Config 相关配置项
  cloud:
    config:
      server:
        # Spring Cloud Config Server 的 Git 存储器的配置项,对应 MultipleJGitEnvironmentProperties 类
        git:
          uri: https://github.com/YunaiV/demo-config-server.git # Git 仓库地址
          search-paths: / # 读取文件的根地址
          default-label: master # 使用的默认分支,默认为 master
#          username: ${CODING_USERNAME} # 账号
#          password: ${CODING_PASSWORD} # 密码
    # Spring Cloud Nacos Discovery 相关配置项
    nacos:
      # Nacos 作为注册中心的配置项,对应 NacosDiscoveryProperties 配置类
      discovery:
        server-addr: 127.0.0.1:8848 # Nacos 服务器地址
        service: ${spring.application.name} # 注册到 Nacos 的服务名。默认值为 ${spring.application.name}。
Spring Cloud Config Client
 <dependencies>
        <!-- 引入 SpringMVC 相关依赖,并实现对其的自动配置 -->
        <dependency>
            <groupId>org.springframework.boot</groupId>
            <artifactId>spring-boot-starter-web</artifactId>
        </dependency>
        <!-- 引入 Spring Cloud Config Client 相关依赖,作为配置中心的客户端,并实现自动化配置 -->
        <dependency>
            <groupId>org.springframework.cloud</groupId>
            <artifactId>spring-cloud-starter-config</artifactId>
        </dependency>
        <!-- 引入 Spring Cloud Alibaba Nacos Discovery 相关依赖,将 Nacos 作为注册中心,并实现对其的自动配置 -->
        <dependency>
            <groupId>com.alibaba.cloud</groupId>
            <artifactId>spring-cloud-starter-alibaba-nacos-discovery</artifactId>
        </dependency>
    </dependencies>
修改 bootstrap.yml 配置文件 ,增加 spring.cloud.nacos.discovery 配置项,实现 Spring Cloud Alibaba Nacos Discovery 的配置。完整配置如下:
spring:
  application:
    name: user-application
  cloud:
    # Spring Cloud Config Client 配置项,对应 ConfigClientProperties 类
    config:
      name: ${spring.application.name} # 读取的配置文件的名字,默认为 ${spring.application.name}
      discovery:
        enabled: true # 是否使用注册发现,获取配置中心的地址,默认为 false
        service-id: demo-config-server # 配置中心的服务名
    # Spring Cloud Nacos Discovery 相关配置项
    nacos:
      # Nacos 作为注册中心的配置项,对应 NacosDiscoveryProperties 配置类
      discovery:
        server-addr: 127.0.0.1:8848 # Nacos 服务器地址
        service: ${spring.application.name} # 注册到 Nacos 的服务名。默认值为 ${spring.application.name}。
重点看下在 spring.cloud.config 配置项,我们去掉了 uri 配置项,并增加 discovery 配置项来配置和 Spring Cloud 注册中心的集成。这里我们设置 service-id 为 demo-config-server,就是我们搭建的 Spring Cloud Config Server 的服务名。


 896
896


 被折叠的 条评论
为什么被折叠?
被折叠的 条评论
为什么被折叠?
 到【灌水乐园】发言


