


说在盘前:切记qml文件,除了main.qml, 其它 .qml 文件必须首字母大写: 否则其它qml文件无法调用到
-
qml 按键 打印 以及资源文件用法
1. Button
Button{
          x:260
          y:150
          width: 90
          height: 60
          text: "qml test"
          onClicked:  {
             console.log("LM pressed")
                }
        }
打印就是 console.log("Hello World")
2. 资源文件用法
所谓资源文件,即是将 .icon的图标放到 Button上面,使其更加形象。
创建资源文件方法:
1. 鼠标在工程栏的 Resources 上右键,点击 Add New
2. 依次选择 Qt -> Qt Resource File

3. 起个名称为 icon 即可,点击下一步

4. 此时工程栏上面便出现了 icon.qrc 目录,如下:
5. 拷贝 icon 图片到工程路径下
5.1 在工程目录下新建 icon 文件夹,然后将需要的 .icon 格式文件拷贝进去
5.2 在工程栏的 icon.qrc 上面右键,点击 Add Existing Directory... 并选择刚创建的icon文件夹
此时便可以看到icon图片都加载了进来,如下所示: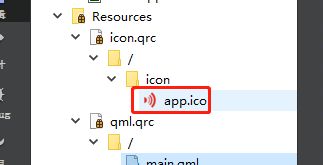
然后,鼠标在 app.icon 上面右键,即可复制URL 文件路径,如下:
最后一步,将复制的资源URL,添加到 Button的属性内,如下:
Button{
x:160
y:60
width: 90
height: 60
text: "HelloWorld"
icon.source: "qrc:/icon/app.ico"
onClicked: console.log("pressed")
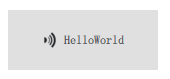
}即上述代码中的 icon.source: "qrc:/icon/app.ico"
运行效果:
布局摆放
- 布局之 anchors
anchors 使用:
Button{
        id: bt1
        anchors.centerIn: parent  //bt1放到界面中间

        width: 150
        height: 60
        text: "BT1"
        icon.source: "qrc:/icon/app.ico"
        onClicked: console.log("pressed-1")
       }

    Button{
        id: bt2
        anchors.top: bt1.bottom  //bt2的顶部放在bt1的底部
        anchors.left: bt1.left   //bt2的左边与bt1左边对齐
        anchors.topMargin: 5       //bt2与bt1上下间隔5

        width: 150
        height: 60
        text: "BT2"
        icon.source: "qrc:/icon/app.ico"
        onClicked: console.log("pressed-2")
       }
效果: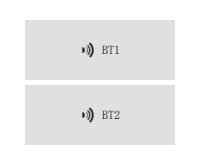
Rectangle 矩形框用法:
    Button{
        id: bt3
        x:10
        y:20
        width: 90
        height: 60
        text: "qml test"
        onClicked:  {
            console.log("LM pressed")
        }

     Rectangle{
        anchors.top:  bt3.bottom
        anchors.topMargin: 20
        width: 100
        height: 100
        color: "#ff0000"
        border.color: "black"
        border.width: 2
        radius: 6  //边角半径
     }
效果: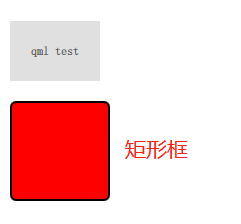
如果要制作圆形,只需要将 radius: 6 中的 6改为width 的1/2 即可,如下:
Rectangle{
        anchors.top:  bt3.bottom
        anchors.topMargin: 20
        width: 100
        height: 100
        color: "#ff0000"
        border.color: "black"
        border.width: 2
        radius: 50  //边角半径为 1/2 width时,为圆形
     }
效果: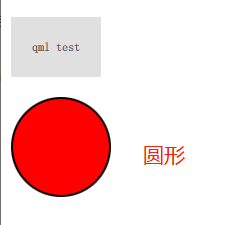
设置字体颜色
- Label字体颜色
Label {
        text: qsTr("You are on Page 1.")
        color: "#ff00ff"    //直接使用color 标签
        font.pointSize: 24
        anchors.centerIn: parent
}- Button字体颜色
Button {
        id: button
        x: 72
        y: 36
        text: qsTr('<font color="#ff00ff">Home</font>')  //通过 <font > 标签来设置

        background: Rectangle {   // 设置按键字体颜色
                  implicitHeight: button1.height
                  implicitWidth:  button1.width
                  color: button.down ? "#ff0000" : "#00ff00"
              }
}-
多界面之 StackView
通过点击各个界面上的Button来实现界面的切换功能Demo如下:
main.qml 文件内容:
import QtQuick 2.12
import QtQuick.Controls 2.5

ApplicationWindow {
    id: window
    visible: true
    width: 640
    height: 480
    title: qsTr("Stack")

   /* 使用stackView需要添加如下语句 */
    StackView {
        id: stackView
        initialItem: "HomeForm.qml"
        anchors.fill: parent
    }
}
Page1Form.qml 文件:
xxx

Button {
        id: button
        x: 72
        y: 36
        text: qsTr('<font color="#ff00ff">Home</font>')

        onClicked: {
            stackView.pop(stackView.currentItem)  //先清除上一级界面
            stackView.push("HomeForm.qml")     //进入新的目录HomeForm.qml 界面
        }
    }

xxx-
多界面之 SwipeView
通过左右滑动界面来实现界面的切换功能,Demo如下:
main.qml 文件内容:
import QtQuick 2.12
import QtQuick.Controls 2.5

ApplicationWindow {
    id: window
    visible: true
    width: 640
    height: 480
    title: qsTr("Stack")

  /* 写一个下面的SwipeView 来实现Page1Form界面与Page2Form左右滑动 */
    SwipeView {
        id: swipeView
        anchors.fill: parent
        currentIndex: tabBar.currentIndex

    // Page1Form.qml 文件名
        Page1Form {
        }
    // Page2Form.qml 文件名
        Page2Form {
        }
    }
}
c++与qml结合 前后端分离
Qt官方参考资料:
https://doc.qt.io/qt-5/qtqml-cppintegration-overview.html
https://doc.qt.io/qt-5/qtqml-cppintegration-topic.html
CSDN网友资料:
https://blog.csdn.net/qq_40876689/article/details/107970174

分离方法如下:
- 新建handle.cpp类来处理槽函数
- main.qml创建Button Click的信号
- handle.cpp 创建处理Button Click信号的槽函数
- 修改main.cpp 并连接信号与槽
1. 新建handle.cpp类来处理槽函数
在工程栏Sources文件夹右键, 新建一个cpp class类 名为handle.cpp 并继承QObject。
编写槽函数,如下所示:
handle.h 文件
#ifndef HANDLE_H
#define HANDLE_H

#include <QObject>

class handle : public QObject
{
    Q_OBJECT
public:
    explicit handle(QObject *parent = nullptr);

signals:

public slots:
    void cppSingleClickSlot();   //Button-1 的槽函数
    void cppSingleClickSlot2();  //Button-2 的槽函数

};

#endif // HANDLE_H
handle.cpp 文件
#include "handle.h"
#include <QDebug>
handle::handle(QObject *parent) : QObject(parent)
{

}

void handle::cppSingleClickSlot()  //Button-1 槽函数
{
    qDebug()<<"cpp clicked"<<endl;
}

void handle::cppSingleClickSlot2()  //Button-2 槽函数
{
    qDebug()<<"cpp clicked 2"<<endl;
}
2. main.qml创建Button Click的信号
main.qml
import QtQuick 2.12
import QtQuick.Controls 2.5

ApplicationWindow {
    visible: true
    width: 640
    height: 480
    title: qsTr("Tabs")

    signal bt1_singleClick()  //创建Button-1 的Click 信号
    signal bt2_singleClick()  //创建Button-2 的Click 信号

    Button{
           id: bt1
           anchors.centerIn: parent

           width: 150
           height: 60
           text: "BT1"
           icon.source: "qrc:/icon/app.ico"
           onClicked: bt1_singleClick()  //调用信号
          }


     Button{
          id: bt2
          anchors.top: bt1.bottom
          anchors.left: bt1.left
          anchors.topMargin:  5

          width: 150
          height: 60
          text: "BT2"
          icon.source: "qrc:/icon/app.ico"
          onClicked: bt2_singleClick()  //调用信号
        }
}
3. 修改main.cpp 并连接信号与槽
#include <QGuiApplication>
#include <QQmlApplicationEngine>
#include <QQmlComponent>
#include "handle.h"

int main(int argc, char *argv[])
{
    QCoreApplication::setAttribute(Qt::AA_EnableHighDpiScaling);

    QGuiApplication app(argc, argv);

//    QQmlApplicationEngine engine;
//    const QUrl url(QStringLiteral("qrc:/main.qml"));
//    QObject::connect(&engine, &QQmlApplicationEngine::objectCreated,
//                     &app, [url](QObject *obj, const QUrl &objUrl) {
//        if (!obj && url == objUrl)
//            QCoreApplication::exit(-1);
//    }, Qt::QueuedConnection);
//    engine.load(url);

    QQmlEngine eng;
    QQmlComponent compent(&eng,QUrl(QStringLiteral("qrc:/main.qml")));
    QObject *obj = compent.create();

    handle h;
    QObject::connect(obj,SIGNAL(bt1_singleClick()),&h,SLOT(cppSingleClickSlot()));
    QObject::connect(obj,SIGNAL(bt2_singleClick()),&h,SLOT(cppSingleClickSlot2()));

    return app.exec();
}
将main.cpp 原来的调用注释掉,写入新的。
运行结果如下图:


 1381
1381


 被折叠的 条评论
为什么被折叠?
被折叠的 条评论
为什么被折叠?
 到【灌水乐园】发言


