


1. windows环境下下载docker
1.1 windows桌面版的docker配置
- 在docker官网下载docker hub并安装:docker官网地址 ,自行安装。
- 对windows环境中可能存在的问题进行的基础配置:链接地址
1.2 测试docker环境是否安装正确
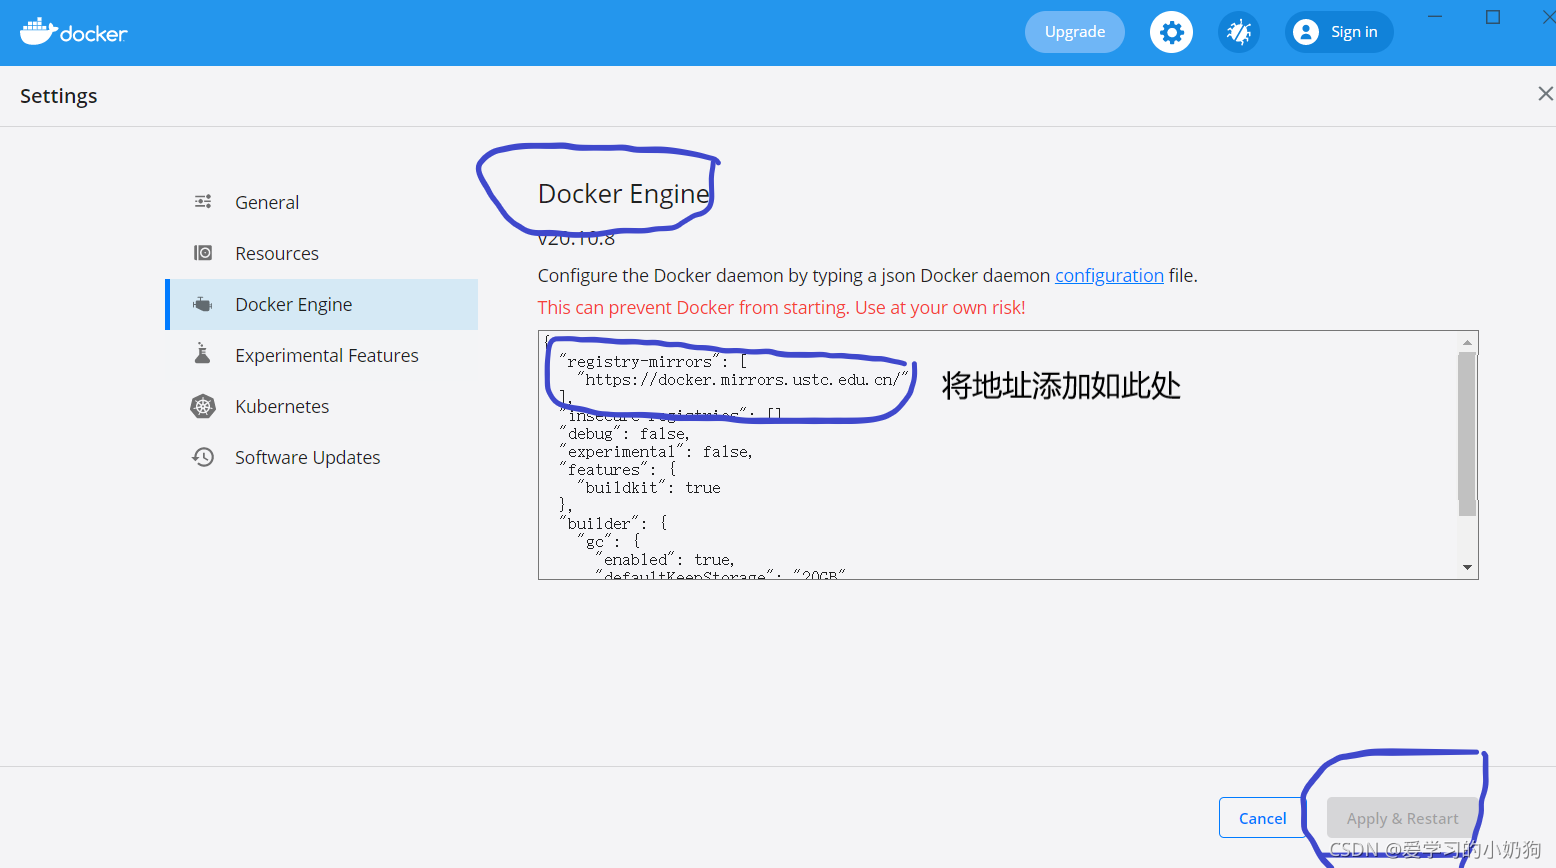
- 基础配置设置:为了提高在后续镜像环境的下载速度,加入国内的镜像源。本人加入的是中科大的镜像源地址:https://docker.mirrors.ustc.edu.cn,具体加入方法如下:
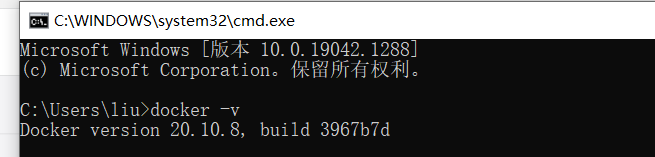
- 测试docker环境是否安装正确: 在命令行下输入:docker-v得到如下信息
输入:docker run hello-world 得到如下信息。

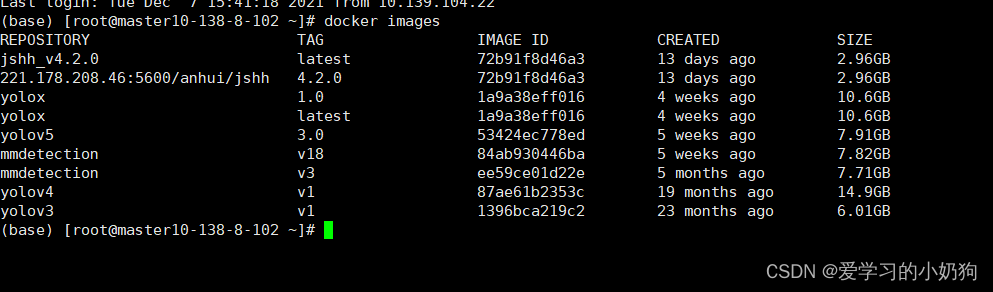
输入:docker images。可以看到目前我们的docker镜像只有hello-world
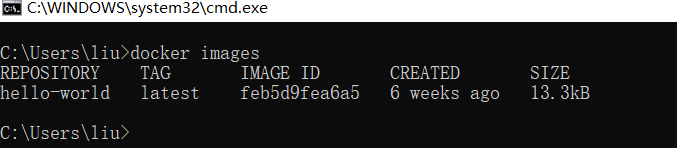
其中: pepository:为镜像的名字,TAG:为镜像的版本号,IMAG ID:为镜像的ID
2. 深度学习环境镜像的制作
2.1 mmdetection源码的下载和版本的选择
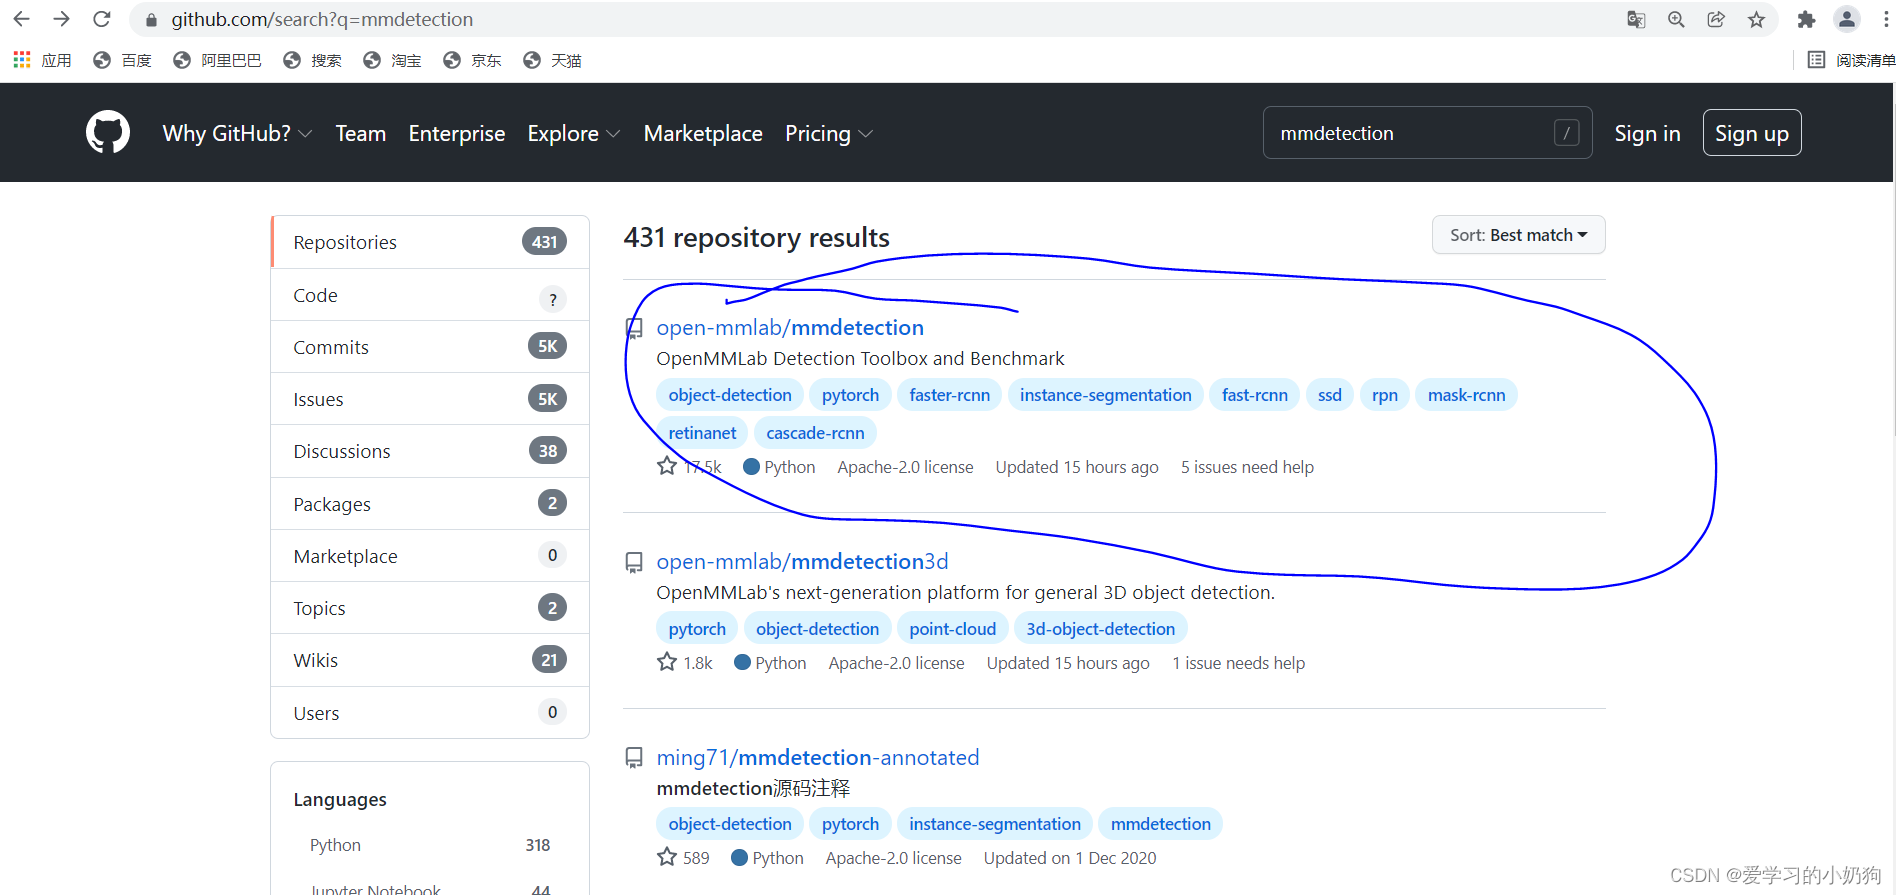
- 在github官网上搜索mmdetection不同版本的代码网络链接,选取stars最高的代码。
- 下载源码至本地

由于各版本存在差异,此次下载的为最新版本,若想下载不同版本,可以做如下操作

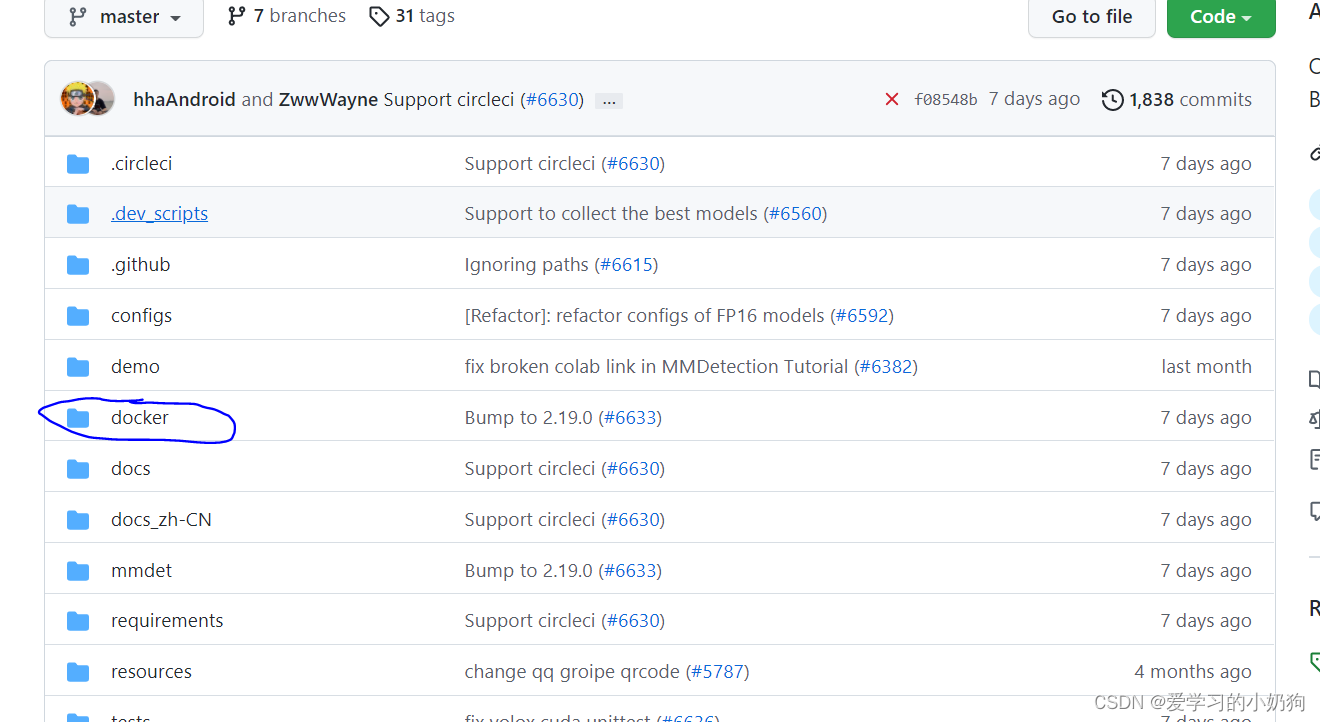
- 查看docker中的Dockerfile,打开dockerfile文件,查看cuda、pytorch等包的版本号。

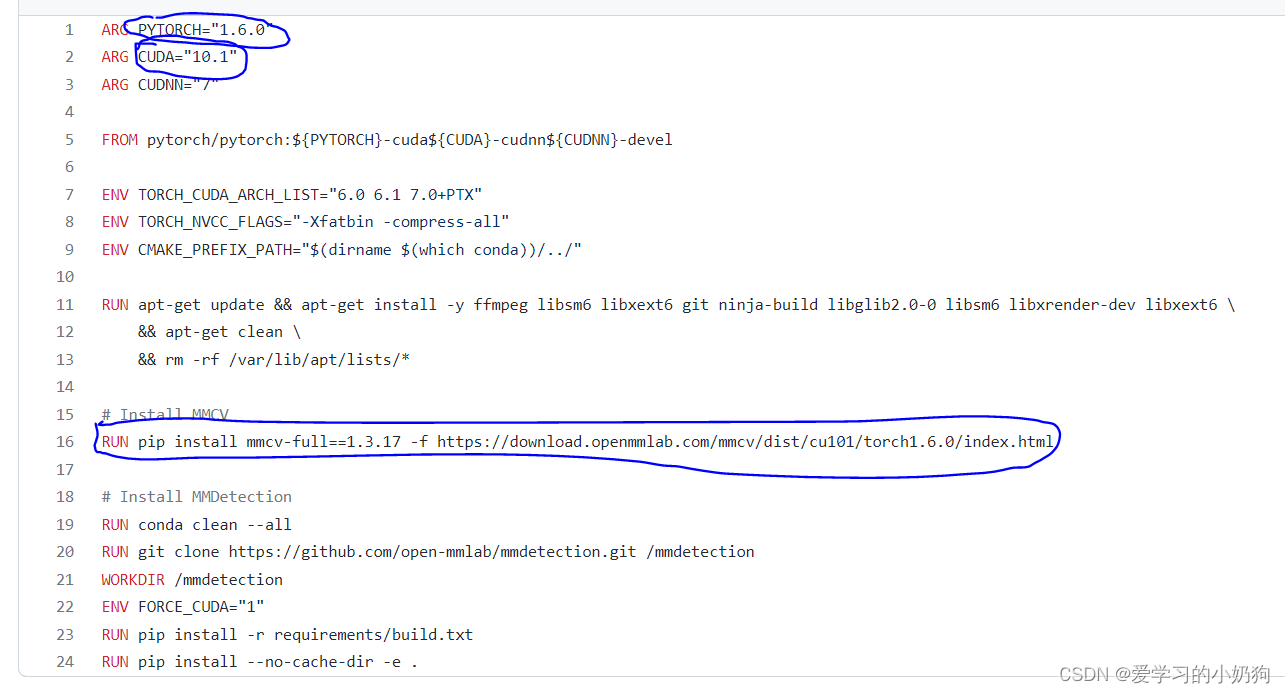
可以看到,在dockerfile文件中已经配置好当前版本号所对应的各种包的版本号,我们所需要关注的是pytorch、cuda的版本号,由于每个人的cuda版本号是不一样的,我们可以自己设置我们所需要的cuda版本号。
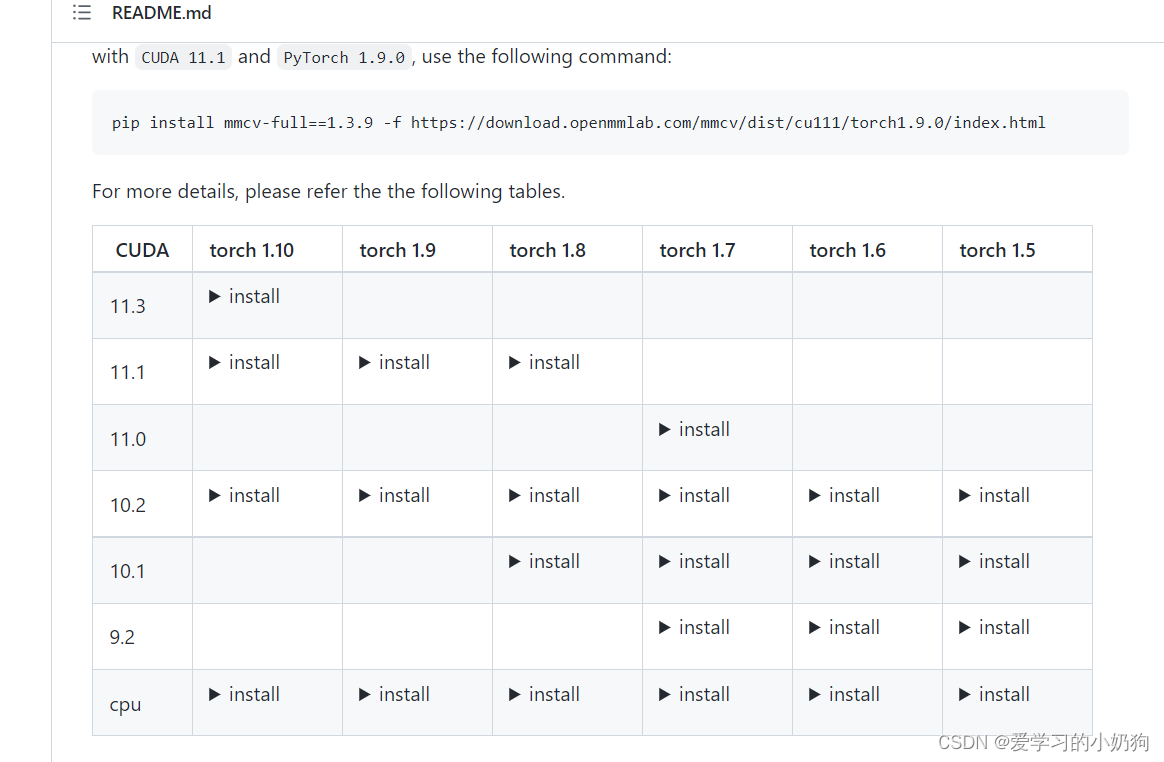
注意: 版本号的变换,需要遵循官方给出的版本号建议,链接,我们可以针对不同版本的cuda和pytorch选择。
2.2 采用dockerfile 制作mmdetection的镜像
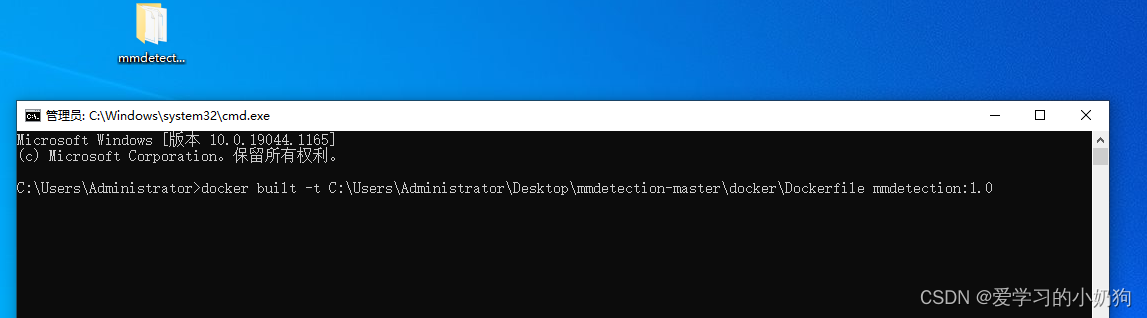
- 采用docker build -t [dockerfile的地址] 镜像的名字:版本号,如下所示:
其中镜像的名字、版本号可以自己指定。下载完毕后 - 采用docker imges查看镜像
- 使用docker save -o [xxx.tar] [镜像ID],将本地下载的镜像打包为xxx.tar
- 将打包好的镜像上传后,在服务器上采用: docker load < xxx.tar,将上传的镜像载入服务器中。
致此:docker环境下的mmdetection环境制作完毕。
如果我们想制作其他深度学习的镜像,如yolox的,我们可以使用本次制作的mmdetection镜像,在本地创建容器,然后采用pip命令下载yolox中所需要的包,然后将容器固化为镜像即可。
ARG PYTORCH="1.8.0"
ARG CUDA="11.1"
ARG CUDNN="7"

FROM pytorch/pytorch:${PYTORCH}-cuda${CUDA}-cudnn${CUDNN}-devel

ENV TORCH_CUDA_ARCH_LIST="6.0 6.1 7.0+PTX"
ENV TORCH_NVCC_FLAGS="-Xfatbin -compress-all"
ENV CMAKE_PREFIX_PATH="$(dirname $(which conda))/../"
RUN apt-key adv --fetch-keys https://developer.download.nvidia.com/compute/cuda/repos/ubuntu1804/x86_64/3bf863cc.pub
RUN apt-key adv --fetch-keys https://developer.download.nvidia.com/compute/machine-learning/repos/ubuntu1804/x86_64/7fa2af80.pub
RUN apt-get update && apt-get install -y ffmpeg libsm6 libxext6 git ninja-build libglib2.0-0 libsm6 libxrender-dev libxext6 \
    && apt-get clean \
    && rm -rf /var/lib/apt/lists/*


RUN apt-getl install -i https://pypi.mirrors.ustc.edu.cn/simple/   scipy==1.4.1 \
        && apt-getl install -i https://pypi.mirrors.ustc.edu.cn/simple/ torchvision==0.9.0 \
        && apt-getl install -i https://pypi.mirrors.ustc.edu.cn/simple/   numpy\
        && apt-getl install -i https://pypi.mirrors.ustc.edu.cn/simple/   opencv-python \
 	&& apt-getl install  install -i https://pypi.mirrors.ustc.edu.cn/simple/   PyYAML \
	&& apt-getl install  install -i https://pypi.mirrors.ustc.edu.cn/simple/   tqdm \
	&& apt-getl install install -i https://pypi.mirrors.ustc.edu.cn/simple/  addict \
	&& apt-getl install install -i https://pypi.mirrors.ustc.edu.cn/simple/  pycocotools \
	&& apt-getl install install -i https://pypi.mirrors.ustc.edu.cn/simple/  onnx \
	&& apt-getl install -i https://pypi.mirrors.ustc.edu.cn/simple/  thop \
	&& apt-getl install -i https://pypi.mirrors.ustc.edu.cn/simple/  onnx-simplifier \
	&& apt-getl install -i https://pypi.mirrors.ustc.edu.cn/simple/  tensorboard

#RUN rm -rf /usr/local/python3/Python-3.7.8.tgz
#WORKDIR /var/www/algo_voice_rec
#ADD algo_voice_rec/  /var/www/algo_voice_rec/
#RUN /usr/local/python3/bin/pip3 install -i https://pypi.mirrors.ustc.edu.cn/simple/ pycocotools
#RUN /usr/local/python3/bin/pip3 install --no-cache-dir -e .

#CMD ["/usr/local/python3/bin/gunicorn", "--chdir", "/var/www/algo_voice_rec", "main:app", "-c", "/var/www/algo_voice_rec/gunicorn.py"]
#CMD ["/bin/bash", "run.sh"]

RUN conda clean --all
RUN git clone https://github.com/meituan/YOLOv6.git /yolo
WORKDIR /yolo
ENV FORCE_CUDA="1"


 3970
3970


 被折叠的 条评论
为什么被折叠?
被折叠的 条评论
为什么被折叠?
 到【灌水乐园】发言


