


 该文详细介绍了如何使用OpenCV进行图像轮廓检测,包括findContours函数的使用、轮廓的绘制、面积和周长的计算,以及多边形逼近与凸包的概念。此外,还探讨了特征检测的重要性,如角点检测(Harris和Shi-Tomasi)、SIFT和ORB算法,并讨论了特征匹配的方法,如暴力匹配和FLANN匹配。最后,提到了利用特征匹配和单应性矩阵进行图像查找的应用。
一、图像轮廓
1、图像轮廓的概述
具有相同颜色或者强度的连续点的曲线,
轮廓的作用:可以用于图像的分析;可以用于物体的识别和检测;
需要注意的地方:为了检测的准确性,需要先对图像进行二值化或Canny的操作;画轮廓时会修改输入图像,一般使用黑底白物;
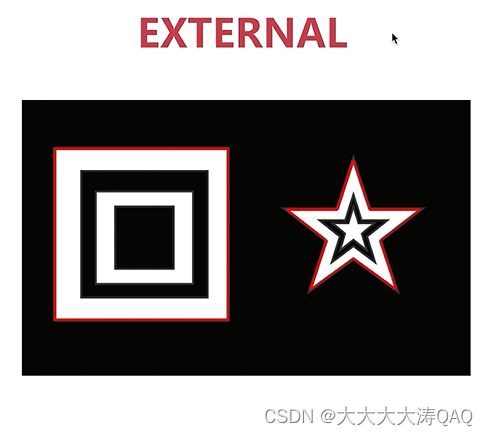
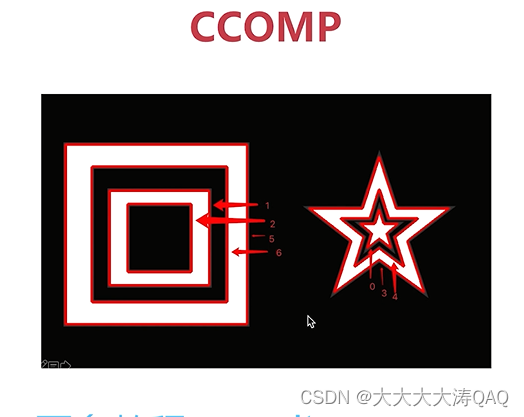
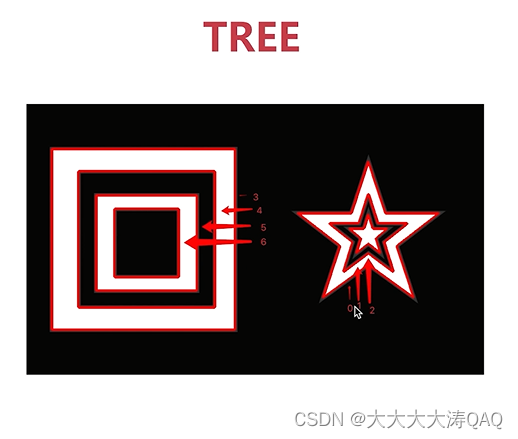
2、轮廓查找的API
(1)findContours(img, mode, ApproximationMode,.....)-->contours,herarchy
首先介绍mode: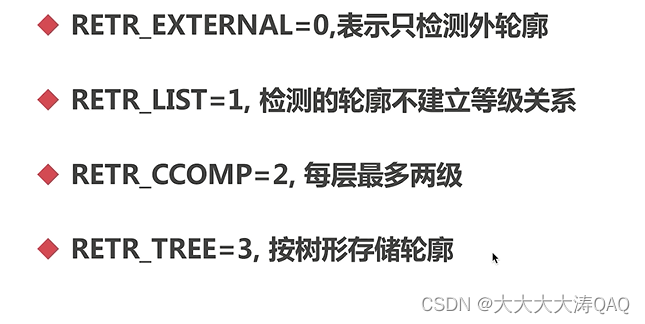

ApproximationMode的介绍:常见的两个

轮廓查找的流程如下:
import cv2
import numpy as np
#读取文件
img = cv2.imread("F:\\tupian\\contours1.jpeg")
print(img.shape)
#转化为单通道
gray = cv2.cvtColor(img, cv2.COLOR_BGR2GRAY)
print(gray.shape)
#二值化
ret, binary = cv2.threshold(gray, 150, 255, cv2.THRESH_BINARY)
print(binary.shape)
#轮廓查找
contours, hierarchy = cv2.findContours(binary, cv2.RETR_TREE, cv2.CHAIN_APPROX_SIMPLE)
print(contours)
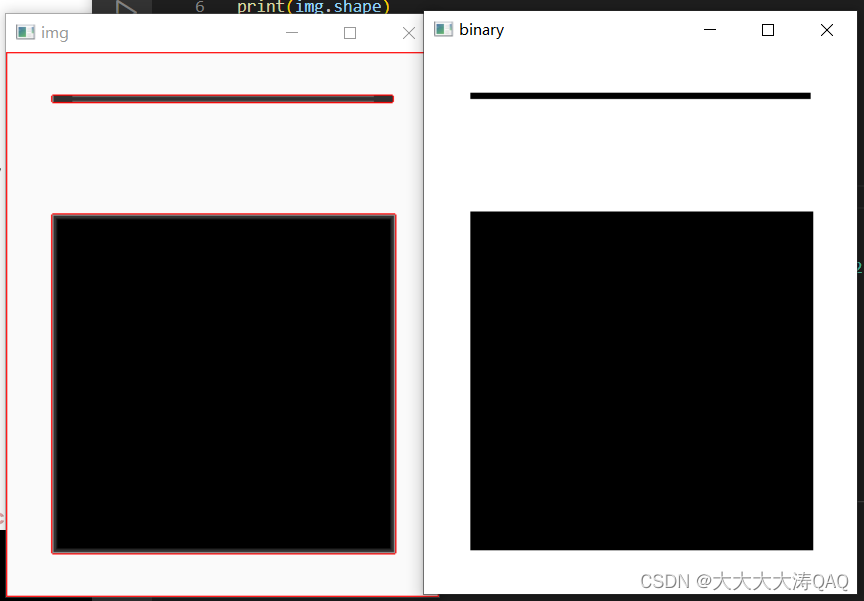
cv2.imshow('img',img)
cv2.imshow('binary',binary)
cv2.waitKey(0)
cv2.destroyAllWindows()
3、绘制轮廓
API:drawContours(img, contours, contourIdx, color, thickness....)
contourIdx, 绘制哪些轮廓,-1表示绘制所有轮廓;
thickness:线宽,-1表示全部填充;
import cv2
import numpy as np

#读取文件
img = cv2.imread("F:\\tupian\\contours1.jpeg")
print(img.shape)

#转化为单通道
gray = cv2.cvtColor(img, cv2.COLOR_BGR2GRAY)
print(gray.shape)

#二值化
ret, binary = cv2.threshold(gray, 150, 255, cv2.THRESH_BINARY)
print(binary.shape)

#轮廓查找
contours, hierarchy = cv2.findContours(binary, cv2.RETR_TREE, cv2.CHAIN_APPROX_SIMPLE)
print(contours)

#绘制轮廓在img上
cv2.drawContours(img, contours, -1, (0,0,255), 1)

cv2.imshow('img',img)
cv2.imshow('binary',binary)
cv2.waitKey(0)

cv2.destroyAllWindows()
4、轮廓的面积和周长
面积 API:contourArea(contour)
周长 API:arcLength(curve, closed)
curve是轮廓,closed是否闭合;
#计算面积周长
area = cv2.contourArea(contours[0])
print ("area=%d"%(area))
len = cv2.arcLength(contours[0], True)
print ("len= %d"%len)
5、多边形逼近与凸包
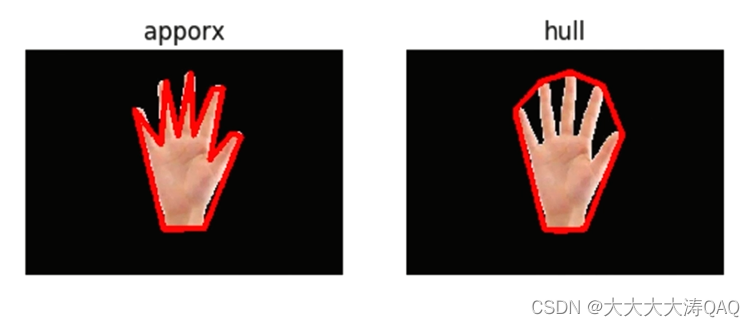
保存正常手型的存储数据量很大,如果利用多边形逼近与凸包的方法减少不必要的存储,
(1)多边形逼近API:approxPolyDP:(curve, epsilon, closed)
curve轮廓; epsilon精度; closed是否闭合
(2)凸包:convexHull:(points, clockwise,....)
points轮廓, clockwise顺时针绘制
import cv2
import numpy as np

def drawShape(src, points):
    i = 0
    while i < len(points):

        if(i == len(points) - 1):
            x,y = points[0][0]
            x1,y1 = points[0][0]
            cv2.line(src, (x,y),(x1,y1),(0,0,255), 2)
        else:
            x,y = points[i][0]
            x1,y1 = points[i+1][0]
            cv2.line(src, (x,y),(x1,y1),(0,0,255), 2)
        i = i + 1

#读取文件
img = cv2.imread("F:\\tupian\\hand.png")
# print(img.shape)

#转化为单通道
gray = cv2.cvtColor(img, cv2.COLOR_BGR2GRAY)
# print(gray.shape)

#二值化
ret, binary = cv2.threshold(gray, 150, 255, cv2.THRESH_BINARY)
# print(binary.shape)

#轮廓查找
contours, hierarchy = cv2.findContours(binary, cv2.RETR_TREE, cv2.CHAIN_APPROX_SIMPLE)
# print(contours)

#绘制轮廓在img上
cv2.drawContours(img, contours, -1, (0,255,0), 2)

#计算面积周长
# area = cv2.contourArea(contours[0])
# print ("area=%d"%(area))
# len = cv2.arcLength(contours[0], True)
# print ("len= %d"%len)

e = 10
approx = cv2.approxPolyDP(contours[0], e, True)
print(approx[0][0])

drawShape(img, approx)

hull = cv2.convexHull(contours[0])
drawShape(img,hull)

cv2.imshow('img',img)
cv2.imshow('binary',binary)
cv2.waitKey(0)

cv2.destroyAllWindows()
6、外接矩阵
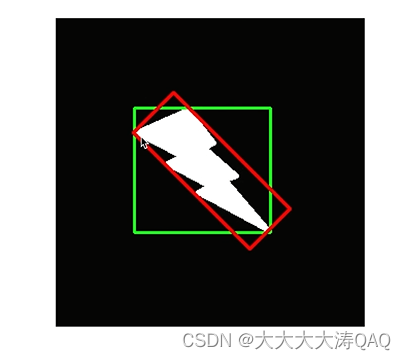
外接矩阵分为最大外接矩阵(绿色)和最小外接矩阵(红色)
(1)最小外接矩阵API:minAreaRect( points#轮廓 ) --->RotatedRect
RotatedTRect包括x,y,width,height,angle;
(2)最大外接矩阵API:boundingRect( array#轮廓 ) -- >Rect
此API返回四个值x,y,width,height
r= cv2.minAreaRect(contours[1])
box = cv2.boxPoints(r)
box = np.int0(box)
cv2.drawContours(img, [box],0,(0,0,255),2)

x,y,w,h= cv2.boundingRect(contours[1])
cv2.rectangle(img, (x,y), (x+w,y+h),(255,0,0),2)
二、 opencv特征检测
1、应用场景
① 图片搜索,以图搜图;取出特征点再搜索相同特征点
② 拼图游戏,将图片拆分,进行分类查找特征;方法是:寻找特征点,特征是唯一的,可追踪的,能比较的;
③ 图像拼接,将两长有关联的图拼接到一起,比如全景图像;

特征的定义:

角点:特征中最重要的就是角点;灰度梯度的最大值对应的像素;两条线的交点;极值点(一阶导最大值,但二阶导为0)
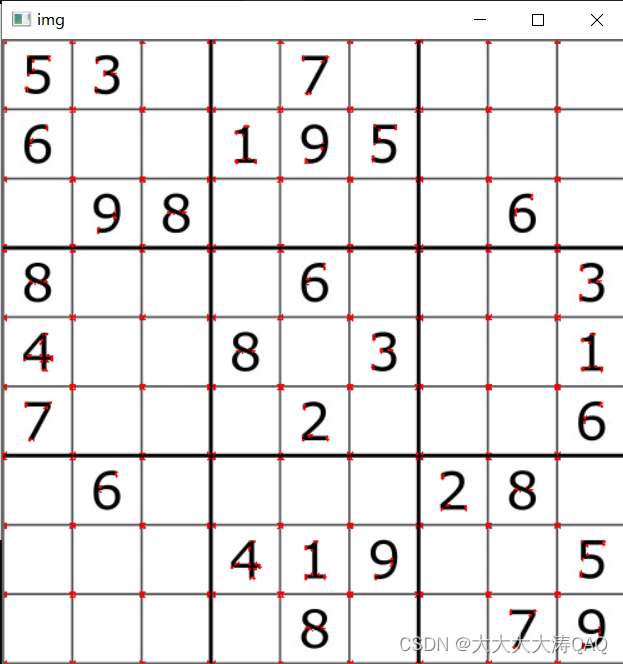
2、Harris角点检测
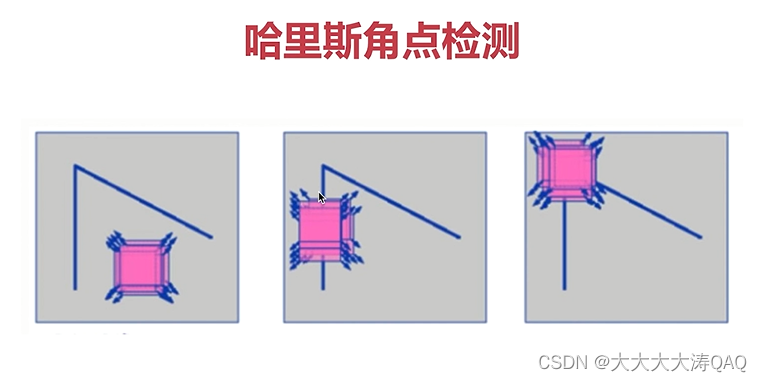

API:cornerHarris(img, dst, blockSize, ksize, k )
blockSize检测窗口的大小;
k是权重系数,一般取0.02~0.04之间
import cv2
import numpy as np

blockSize = 2
ksize = 3
k = 0.04

img = cv2.imread("F:\\tupian\\chess.jpeg")
gray = cv2.cvtColor(img, cv2.COLOR_BGR2GRAY)

#角点检测
dst = cv2.cornerHarris(gray, blockSize, ksize, k)

#角点展示
img[dst>0.01*dst.max()] = [0,0,255]

cv2.imshow('img', img)
cv2.waitKey(0)
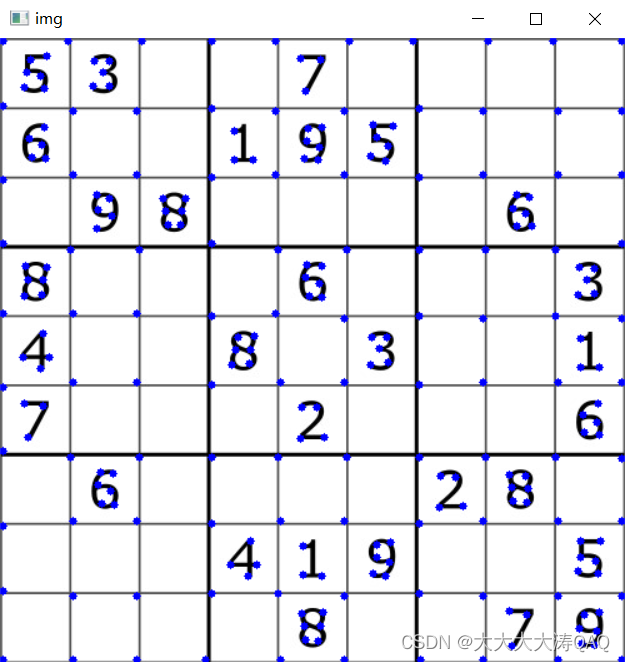
3、Shi-Tomasi角点检测
Shi-Tomasi角点检测是对Harris角点检测的调整改进,解决了Harris的k值需要根据不同图片调整的问题;
API:goodFeaturesToTrack(img , maxCorners, .......)
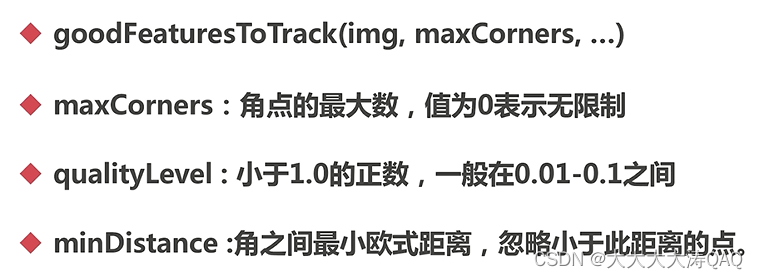
import cv2
import numpy as np

# blockSize = 2
# ksize = 3
# k = 0.04

maxCorners = 1000
ql = 0.01
minDistance = 10

img = cv2.imread("F:\\tupian\\chess.jpeg")
gray = cv2.cvtColor(img, cv2.COLOR_BGR2GRAY)

#角点检测
corners = cv2.goodFeaturesToTrack(gray, maxCorners, ql, minDistance)

corners = np.int0(corners)

#角点展示
for i in corners:
    x,y = i.ravel()
    cv2.circle(img, (x,y), 3,(255,0,0), -1)

cv2.imshow('img', img)
cv2.waitKey(0)
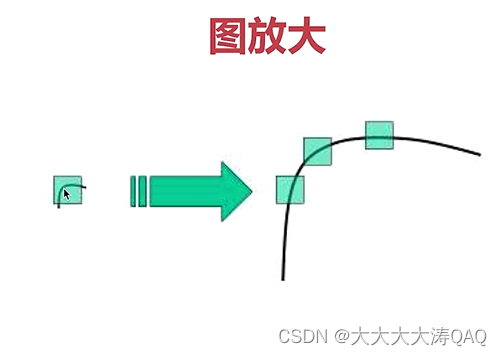
4、SIFT(与缩放无关的特征转换)
Harris角点具有旋转不变的特性,但是缩放后,原来的角点有可能就不是角点了

版本问题:自从OpenCV 4.5版本起,SIFT和SURF算法不再默认包含在OpenCV中,这是因为它们基于专利算法。如果您正在使用OpenCV 4.5或更高版本,则需要手动编译OpenCV并启用SIFT模块。surf同样。
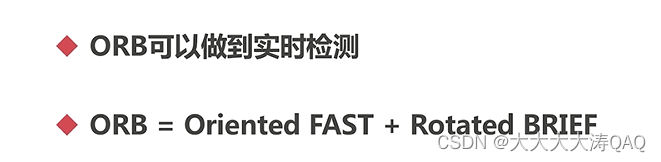
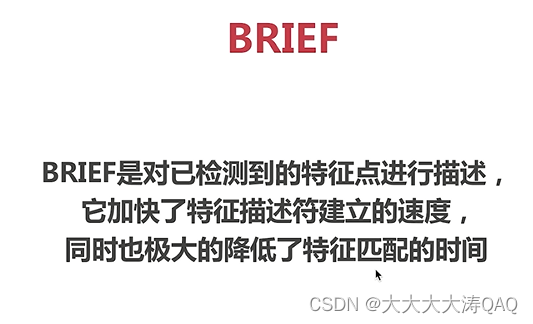
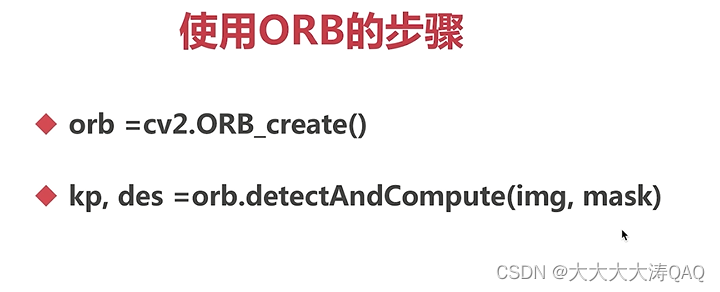
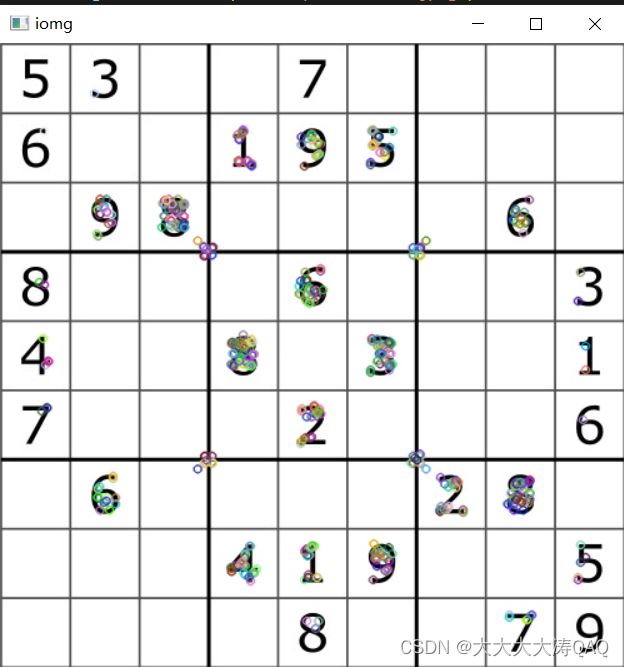
5、ORB
ORB可以实时检测,

import cv2
import numpy as np

img = cv2.imread("F:\\tupian\\chess.jpeg")
gray = cv2.cvtColor(img , cv2.COLOR_BGR2GRAY)

#创建ORB对象
orb = cv2.ORB_create()

#进行orb检测
kp, des = orb.detectAndCompute(gray, None)

cv2.drawKeypoints(gray, kp, img)

cv2.imshow('iomg',img)
cv2.waitKey(0)
三、特征匹配

1、暴力特征匹配

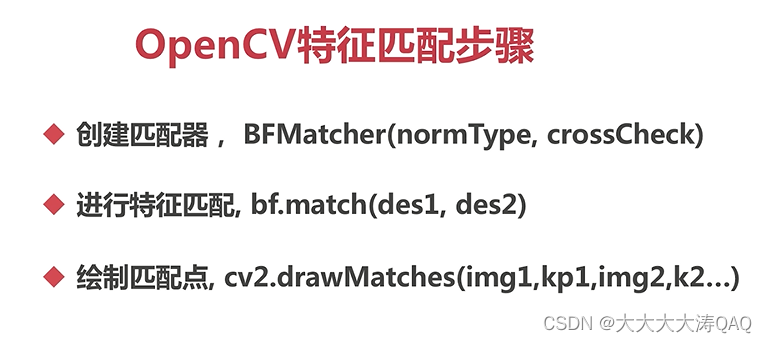

import cv2
import numpy as np
img1 = cv2.imread("F:\\tupian\\opencv_search.png")
img2 = cv2.imread("F:\\tupian\\opencv_orig.png")
gray1 = cv2.cvtColor(img1 , cv2.COLOR_BGR2GRAY)
gray2 = cv2.cvtColor(img2 , cv2.COLOR_BGR2GRAY)
#创建对象
orb = cv2.ORB_create()
#进行orb检测
kp1, des1 = orb.detectAndCompute(gray1, None)
kp2, des2 = orb.detectAndCompute(gray2, None)
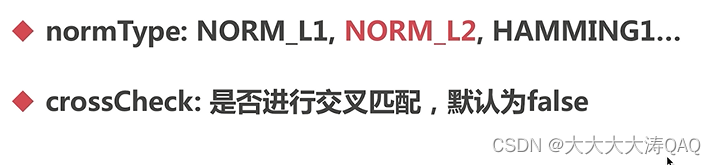
#创建匹配器
bf = cv2.BFMatcher(cv2.NORM_HAMMING2)
match = bf.match(des1,des2)
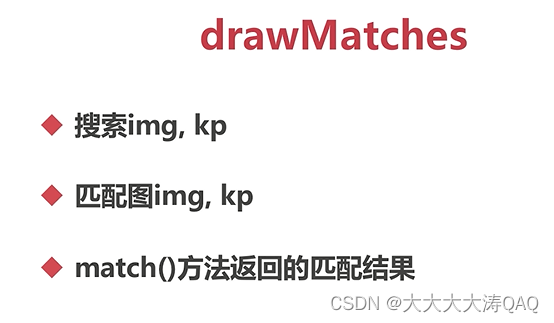
img3 = cv2.drawMatches(img1,kp1,img2,kp2,match,None)
cv2.imshow('iomg',img3)
cv2.waitKey(0)
2、FLANN匹配
FLANN的匹配速度快,利用邻近近似值,使用精度不高;
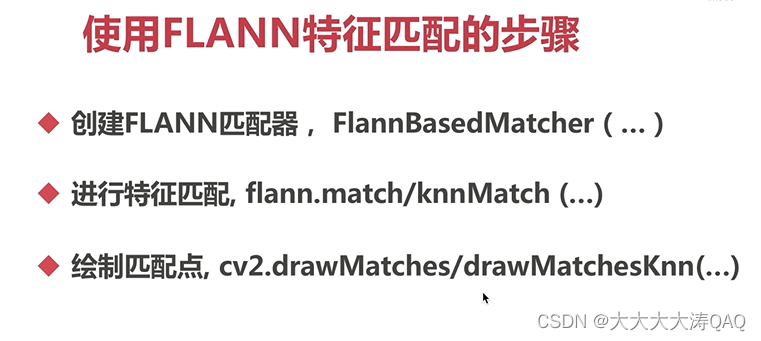
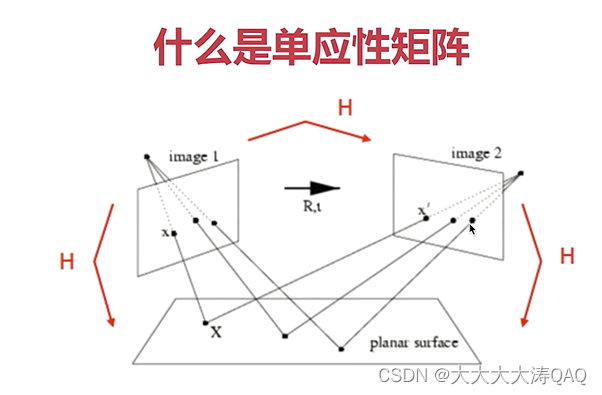
三、图像查找
特征匹配 + 单应性矩阵
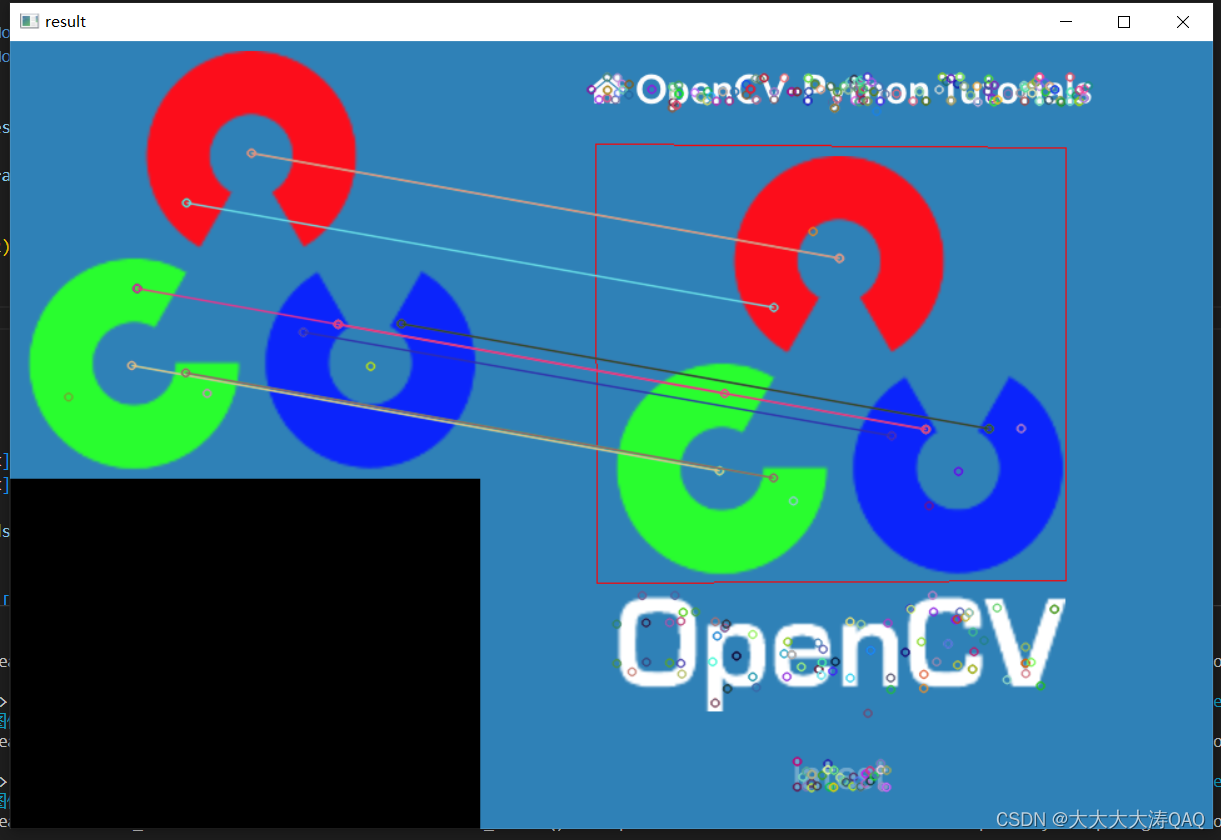
1、单应性矩阵
import cv2
import numpy as np
#打开两个文件
img1 = cv2.imread("F:\\tupian\\opencv_search.png")
img2 = cv2.imread("F:\\tupian\\opencv_orig.png")
#灰度化
g1 = cv2.cvtColor(img1, cv2.COLOR_BGR2GRAY)
g2 = cv2.cvtColor(img2, cv2.COLOR_BGR2GRAY)
#他建SIFT特征检测器
sift = cv2.xfeatures2d.SIFT_create()
#计算描述子与特征点
kp1, des1 = sift.detectAndCompute(g1, None)
kp2, des2 = sift.detectAndCompute(g2, None)
#创建匹配器
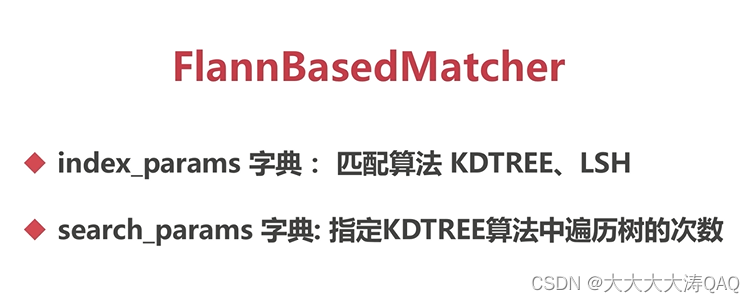
index_params = dict(algorithm = 1, trees = 5)
search_params = dict(checks = 50)
flann = cv2.FlannBasedMatcher(index_params, search_params)
#对描述子进行匹配计算
matchs = flann.knnMatch(des1, des2, k=2)
good = []
for i, (m, n) in enumerate(matchs):
if m.distance < 0.7 * n.distance:
good.append(m)
if len(good) >= 4:
srcPts = np.float32([kp1[m.queryIdx].pt for m in good]).reshape(-1, 1, 2)
dstPts = np.float32([kp2[m.trainIdx].pt for m in good]).reshape(-1, 1, 2)
H, _ = cv2.findHomography(srcPts, dstPts, cv2.RANSAC, 5.0)
h, w = img1.shape[:2]
pts = np.float32([[0,0], [0, h-1], [w-1, h-1], [w-1, 0]]).reshape(-1, 1, 2)
dst = cv2.perspectiveTransform(pts, H)
cv2.polylines(img2, [np.int32(dst)], True, (0, 0, 255))
else:
print('the number of good is less than 4.')
exit()
ret = cv2.drawMatchesKnn(img1, kp1, img2, kp2, [good], None)
cv2.imshow('result', ret)
cv2.waitKey()


 519
519

 被折叠的 条评论
为什么被折叠?
被折叠的 条评论
为什么被折叠?
 到【灌水乐园】发言


