


写在开头:
手写框架体系文章,缺手写vue和微前端框架文章,今日补上微前端框架,觉得写得不错,记得点个关注+在看,转发更好
对源码有兴趣的,可以看我之前的系列手写源码文章
原创:带你从零看清Node源码createServer和负载均衡整个过程
精读:10个案例让你彻底理解React hooks的渲染逻辑
原创:如何自己实现一个简单的webpack构建工具 【附源码】
正式开始:
对于微前端,最近好像很火,之前我公众号也发过比较多微前端框架文章
那么现在我们需要手写一个微前端框架,首先得让大家知道什么是微前端,现在微前端模式分很多种,但是大都是一个基座+多个子应用模式,根据子应用注册的规则,去展示子应用。

这是目前的微前端框架基座加载模式的原理,基于single-spa封装了一层,我看有不少公司是用Vue做加载器(有天然的keep-alive),还有用angular和web components技术融合的
首先项目基座搭建,这里使用parcel:
mkdir panguyarn init//输入一系列信息yarn add parcel@next
然后新建一个index.html文件,作为基座
<!DOCTYPE html><html lang="en"><head><meta charset="UTF-8"><meta name="viewport" content="width=device-width, initial-scale=1.0"><title>Document</title></head><body></body></html>
新建一个index.js文件,作为基座加载配置文件
新建src文件夹,作为pangu框架的源码文件夹,
新建example案例文件夹
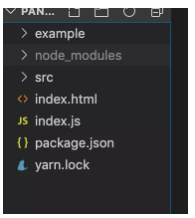
现在项目结构长这样
既然是手写,就不依赖其他任何第三方库
我们首先需要重写hashchange popstate这两个事件,因为微前端的基座,需要监听这两个事件根据注册规则去加载不同的子应用,而且它的实现必须在React、vue子应用路由组件切换之前,单页面的路由源码原理实现,其实也是靠这两个事件实现,之前我写过一篇单页面实现原理的文章,不熟悉的可以去看看
https://segmentfault.com/a/1190000019936510
const HIJACK_EVENTS_NAME = /^(hashchange|popstate)$/i;const EVENTS_POOL = {hashchange: [],popstate: [],};window.addEventListener('hashchange', loadApps);window.addEventListener('popstate', loadApps);const originalAddEventListener = window.addEventListener;const originalRemoveEventListener = window.removeEventListener;window.addEventListener = function (eventName, handler) {if (eventName &&HIJACK_EVENTS_NAME.test(eventName) &&typeof handler === 'function') {EVENTS_POOL[eventName].indexOf(handler) === -1 &&EVENTS_POOL[eventName].push(handler);}return originalAddEventListener.apply(this, arguments);};window.removeEventListener = function (eventName, handler) {if (eventName && HIJACK_EVENTS_NAME.test(eventName)) {let eventsList = EVENTS_POOL[eventName];eventsList.indexOf(handler) > -1 &&(EVENTS_POOL[eventName] = eventsList.filter((fn) => fn !== handler));}return originalRemoveEventListener.apply(this, arguments);};function mockPopStateEvent(state) {return new PopStateEvent('popstate', { state });}// 拦截history的方法,因为pushState和replaceState方法并不会触发onpopstate事件,所以我们即便在onpopstate时执行了reroute方法,也要在这里执行下reroute方法。const originalPushState = window.history.pushState;const originalReplaceState = window.history.replaceState;window.history.pushState = function (state, title, url) {let result = originalPushState.apply(this, arguments);reroute(mockPopStateEvent(state));return result;};window.history.replaceState = function (state, title, url) {let result = originalReplaceState.apply(this, arguments);reroute(mockPopStateEvent(state));return result;};// 再执行完load、mount、unmout操作后,执行此函数,就可以保证微前端的逻辑总是第一个执行。然后App中的Vue或React相关Router就可以收到Location的事件了。export function callCapturedEvents(eventArgs) {if (!eventArgs) {return;}if (!Array.isArray(eventArgs)) {eventArgs = [eventArgs];}let name = eventArgs[0].type;if (!HIJACK_EVENTS_NAME.test(name)) {return;}EVENTS_POOL[name].forEach((handler) => handler.apply(window, eventArgs));}
上面代码很简单,创建两个队列,使用数组实现
const EVENTS_POOL = {hashchange: [],popstate: [],};
如果检测到是hashchange popstate两种事件,而且它们对应的回调函数不存在队列中时候,那么就放入队列中。(相当于redux中间件原理)
然后每次监听到路由变化,调用reroute函数:
function reroute() {invoke([], arguments);}
这样每次路由切换,最先知道变化的是基座,等基座同步执行完(阻塞)后,就可以由子应用的vue-Rourer或者react-router-dom等库去接管实现单页面逻辑了。
那,路由变化,怎么加载子应用呢?
像一些微前端框架会用import-html之类的这些库,我们还是手写吧
逻辑大概是这样,一共四个端口,nginx反向代理命中基座服务器监听的端口(用户必须首先访问到根据域名),然后去不同子应用下的服务器拉取静态资源然后加载。

提示:所有子应用加载后,只是在基座的一个div标签中加载,实现原理跟ReactDom.render()这个源码一样,可参考我之前的文章
那么我们先编写一个registrApp方法,接受一个entry参数,然后去根据url变化加载子应用(传入的第二个参数activeRule)
/**** @param {string} entry* @param {string} function*/const Apps = [] //子应用队列function registryApp(entry,activeRule) {Apps.push({entry,activeRule})}
注册完了之后,就要找到需要加载的app
export async function loadApp() {const shouldMountApp = Apps.filter(shouldBeActive);console.log(shouldMountApp, 'shouldMountApp');// const res = await axios.get(shouldMountApp.entry);fetch(shouldMountApp.entry).then(function (response) {return response.json();}).then(function (myJson) {console.log(myJson, 'myJson');});}
shouldBeActive根据传入的规则去判断是否需要此时挂载:
export function shouldBeActive(app){return app.activeRule(window.location)}
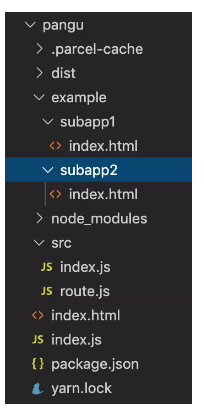
此时的res数据,就是我们通过get请求获取到的子应用相关数据,现在我们新增subapp1和subapp2文件夹,模拟部署的子应用,我们把它用静态资源服务器跑起来
subapp1.js作为subapp1的静态资源服务器
const express = require('express');const app = express();const { resolve } = require('path');app.use(express.static(resolve(__dirname, '../subapp1')));app.listen(8889, (err) => {!err && console.log('8889端口成功');});
subapp2.js作为subapp2的静态资源服务器
const express = require('express');const app = express();const { resolve } = require('path');app.use(express.static(resolve(__dirname, '../subapp2')));app.listen(8890, (err) => {!err && console.log('8890端口成功');});
现在文件目录长这样:
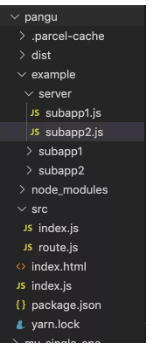
基座index.html运行在1234端口,subapp1部署在8889端口,subapp2部署在8890端口,这样我们从基座去拉取资源时候,就会跨域,所以静态资源服务器、webpack热更新服务器等服务器,都要加上cors头,允许跨域。
const express = require('express');const app = express();const { resolve } = require('path');//设置跨域访问app.all('*', function (req, res, next) {res.header('Access-Control-Allow-Origin', '*');res.header('Access-Control-Allow-Headers', 'X-Requested-With');res.header('Access-Control-Allow-Methods', 'PUT,POST,GET,DELETE,OPTIONS');res.header('X-Powered-By', ' 3.2.1');res.header('Content-Type', 'application/json;charset=utf-8');next();});app.use(express.static(resolve(__dirname, '../subapp1')));app.listen(8889, (err) => {!err && console.log('8889端口成功');});
⚠️:如果是dev模式,记得在webpack的热更新服务器中配置允许跨域,如果你对webpack不是很熟悉,可以看我之前的文章:
原创:如何自己实现一个简单的webpack构建工具 【附源码】
这里我使用nodemon启用静态资源服务器,简单为主,如果你没有下载,可以:
npm i nodemon -g或yarn add nodemon global
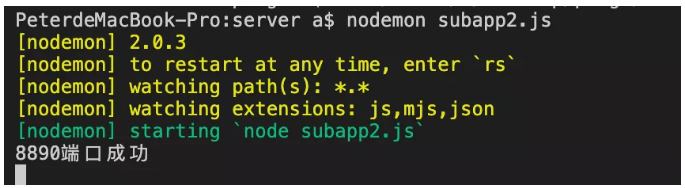
这样我们先访问下8889,8890端口,看是否能访问到。

访问8889和8890都可以访问到对应的资源,成功
正式开启启用我们的微前端框架pangu.封装start方法,启用需要挂载的APP。
export function start(){loadApp()}
注册子应用subapp1,subapp2,并且手动启用微前端
import { registryApp, start } from './src/index';registryApp('localhost:8889', (location) => location.pathname === '/subapp1');registryApp('localhost:8890', (location) => location.pathname === '/subapp2');start()
修改index.html文件:
<!DOCTYPE html><html lang="en"><head><meta charset="UTF-8"><meta name="viewport" content="width=device-width, initial-scale=1.0"><title>Document</title></head><body><div><h1>基座</h1><div class="subapp"><div><a href="/subapp1">子应用1</a></div><div><a href="/subapp2">子应用2</a></div></div><div id="subApp"></div></div></body><script src="./index.js"></script></html>
ok,运行代码,发现挂了,为什么会挂呢?因为那边返回的是html文件,我这里用的fetch请求,JSON解析不了

那么我们去看看别人的微前端和第三方库的源码吧,例如import-html-entry这个库
由于之前我解析过qiankun这个微前端框架源码,我这里就不做过度讲解,它们是对fetch做了一个text()。
export async function loadApp() {const shouldMountApp = Apps.filter(shouldBeActive);console.log(shouldMountApp, 'shouldMountApp');// const res = await axios.get(shouldMountApp.entry);fetch(shouldMountApp.entry).then(function (response) {return response.text();}).then(function (myJson) {console.log(myJson, 'myJson');});}
然后我们已经可以得到拉取回来的html文件了(此时是一个字符串)

由于现实的项目,一般这个html文件会包含js和css的引入标签,也就是我们目前的单页面项目,类似下面这样:

于是我们需要把脚本、样式、html文件分离出来。用一个对象存储
本想照搬某个微前端框架源码的,但是觉得它写得也就那样,今天又主要讲原理,还是自己写一个能跑的把,毕竟html的文件都回来了,数据处理也不难
export async function loadApp() {const shouldMountApp = Apps.filter(shouldBeActive);console.log(shouldMountApp, 'shouldMountApp');// const res = await axios.get(shouldMountApp.entry);fetch(shouldMountApp[0].entry).then(function (response) {return response.text();}).then(function (text) {const dom = document.createElement('div');dom.innerHTML = text;console.log(dom, 'dom');});}
先改造下,打印下DOM

发现已经能拿到dom节点了,那么我先处理下,让它展示在基座中
export async function loadApp() {const shouldMountApp = Apps.filter(shouldBeActive);console.log(shouldMountApp, 'shouldMountApp');// const res = await axios.get(shouldMountApp.entry);fetch(shouldMountApp[0].entry).then(function (response) {return response.text();}).then(function (text) {const dom = document.createElement('div');dom.innerHTML = text;const content = dom.querySelector('h1');const subapp = document.querySelector('#subApp-content');subapp && subapp.appendChild(content);});}
此时,我们已经可以加载不同的子应用了。

乞丐版的微前端框架就完成了,后面会逐步完善所有功能,向主流的微前端框架靠拢,并且完美支持IE11.记住它叫:pangu


 423
423


 被折叠的 条评论
为什么被折叠?
被折叠的 条评论
为什么被折叠?
 到【灌水乐园】发言


