


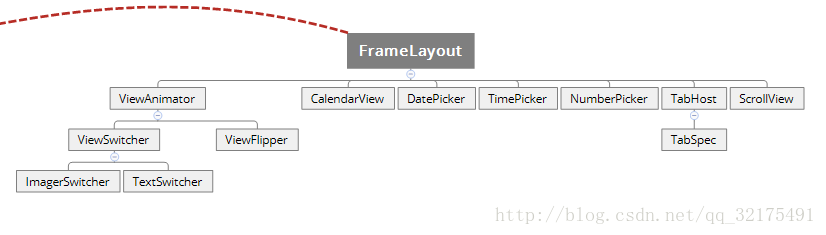
很长一段时间没有写博客了,最近忙着赶工期。时间紧任务中,在写项目中,发现很多基础的东西还是模棱两可,所以抽时间好好看下基础知识,巩固下。为之后的程序员之路铺好路!废话不多说,先上图,后扯淡。
ViewSwitcher代码区
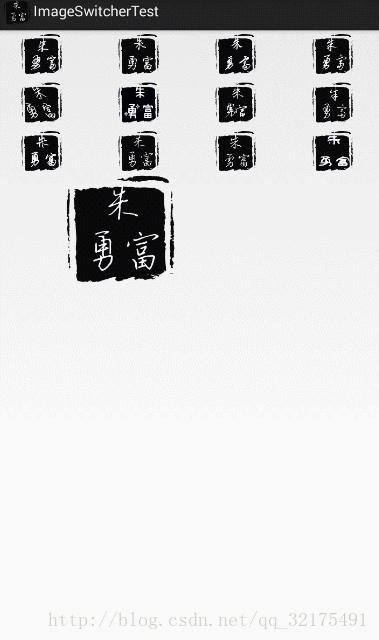
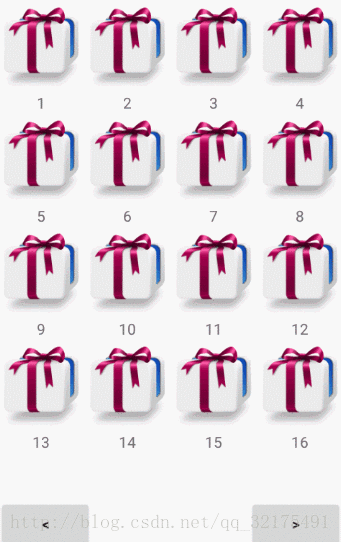
ImagerSwitcher代码区:
main.xml代码:
<?xml version="1.0" encoding="utf-8"?>
<LinearLayout xmlns:android="http://schemas.android.com/apk/res/android"
    android:orientation="vertical"
    android:layout_width="match_parent"
    android:layout_height="match_parent"
    android:gravity="center_horizontal">
    <!-- 定义一个GridView组件 -->
    <GridView
        android:id="@+id/grid01"
        android:layout_width="match_parent"
        android:layout_height="wrap_content"
        android:horizontalSpacing="2dp"
        android:verticalSpacing="2dp"
        android:numColumns="4"
        android:gravity="center"/>
    <!-- 定义一个ImageSwitcher组件 -->
    <ImageSwitcher android:id="@+id/switcher"
        android:layout_width="300dp"
        android:layout_height="300dp"
        android:layout_gravity="center_horizontal"
        android:inAnimation="@android:anim/fade_in"
        android:outAnimation="@android:anim/fade_out"/>
</LinearLayout>
cell.xml中就一个ImageView组件,这里自行补充
Acticity中的代码:
public class MainActivity extends Activity
{
int[] imageIds = new int[]
{
R.drawable.art_cursive, R.drawable.art , R.drawable.big_cursive
, R.drawable.cursive , R.drawable.forty_five , R.drawable.hallowmas
, R.drawable.hand , R.drawable.hard, R.drawable.mouse
, R.drawable.pen , R.drawable.running_script, R.drawable.taiji
};
ImageSwitcher switcher;
@Override
public void onCreate(Bundle savedInstanceState)
{
super.onCreate(savedInstanceState);
setContentView(R.layout.main);
// 创建一个List对象,List对象的元素是Map
List<Map<String, Object>> listItems =
new ArrayList<Map<String, Object>>();
for (int i = 0; i < imageIds.length; i++)
{
Map<String, Object> listItem = new HashMap<String, Object>();
listItem.put("image", imageIds[i]);
listItems.add(listItem);
}
// 获取显示图片的ImageSwitcher
switcher = (ImageSwitcher)
findViewById(R.id.switcher);
// 为ImageSwitcher设置图片切换的动画效果
switcher.setFactory(new ViewFactory()
{
@Override
public View makeView()
{
// 创建ImageView对象
ImageView imageView = new ImageView(MainActivity.this);
imageView.setScaleType(ImageView.ScaleType.FIT_CENTER);
imageView.setLayoutParams(new ImageSwitcher.LayoutParams(
LayoutParams.WRAP_CONTENT, LayoutParams.WRAP_CONTENT));
// 返回ImageView对象
return imageView;
}
});
// 创建一个SimpleAdapter
SimpleAdapter simpleAdapter = new SimpleAdapter(this,
listItems
// 使用/layout/cell.xml文件作为界面布局
, R.layout.cell, new String[]{"image"},
new int[] { R.id.image1 });
GridView grid = (GridView) findViewById(R.id.grid01);
// 为GridView设置Adapter
grid.setAdapter(simpleAdapter);
// 添加列表项被选中的监听器
grid.setOnItemSelectedListener(new OnItemSelectedListener()
{
@Override
public void onItemSelected(AdapterView<?> parent, View view,
int position, long id)
{
// 显示当前被选中的图片
switcher.setImageResource(imageIds[position]);
}
@Override
public void onNothingSelected(AdapterView<?> parent)
{
}
});
// 添加列表项被单击的监听器
grid.setOnItemClickListener(new OnItemClickListener()
{
@Override
public void onItemClick(AdapterView<?> parent, View view,
int position, long id)
{
// 显示被单击的图片
switcher.setImageResource(imageIds[position]);
}
});
}
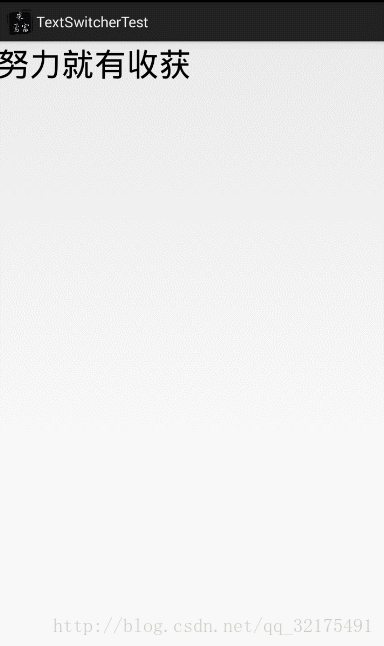
}TextSwitcher代码区:
main.xml代码:
<LinearLayout xmlns:android="http://schemas.android.com/apk/res/android"
    android:layout_width="match_parent"
    android:layout_height="match_parent" >
    <!-- 定义一个TextSwitcher,并指定了文本切换时的动画效果 -->
    <TextSwitcher
        android:id="@+id/textSwitcher"
        android:layout_width="match_parent"
        android:layout_height="wrap_content"
        android:inAnimation="@android:anim/slide_out_right"
        android:outAnimation="@android:anim/slide_in_left"
        android:onClick="next"/>
</LinearLayout>
Activity代码:
public class MainActivity extends Activity
{
    TextSwitcher textSwitcher;
    String[] strs = new String[]
    {
        "带你走入Android世界",
        "和你讨论不一样的人生",
        "努力就有收获",
        "高薪就业,走向人生巅峰"
    };
    int curStr;
    @Override
    public void onCreate(Bundle savedInstanceState)
    {
        super.onCreate(savedInstanceState);
        setContentView(R.layout.main);
        textSwitcher = (TextSwitcher) findViewById(R.id.textSwitcher);
        textSwitcher.setFactory(new ViewSwitcher.ViewFactory()
        {
            public View makeView()
            {
                TextView tv = new TextView(MainActivity.this);
                tv.setTextSize(40);
                tv.setTextColor(Color.BLACK);
                return tv;
            }
        });
        // 调用next方法显示下一个字符串
        next(null);
    }
    // 事件处理函数,控制显示下一个字符串
    public void next(View source)
    {
        textSwitcher.setText(strs[curStr++ % strs.length]);
    }
}
ViewFipper的使用:
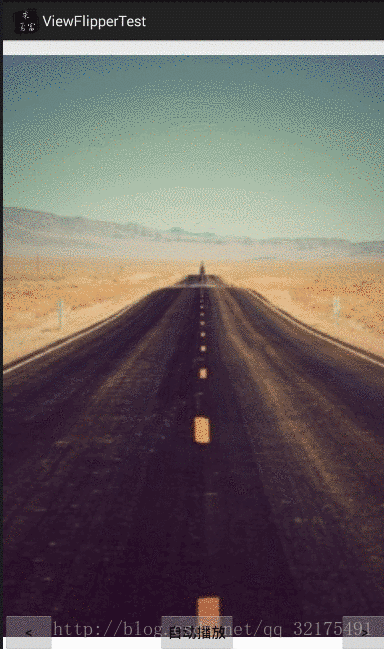
main.xml代码:
xmlns:android="http://schemas.android.com/apk/res/android"
android:layout_width="match_parent"
android:layout_height="match_parent">
<ViewFlipper
android:id="@+id/details"
android:layout_width="match_parent"
android:layout_height="match_parent"
android:flipInterval="1000">
<ImageView
android:src="@drawable/one"
android:layout_width="match_parent"
android:layout_height="match_parent">
</ImageView>
<ImageView
android:src="@drawable/two"
android:layout_width="match_parent"
android:layout_height="match_parent">
</ImageView>
<ImageView
android:src="@drawable/three"
android:layout_width="match_parent"
android:layout_height="match_parent">
</ImageView>
<ImageView
android:src="@drawable/four"
android:layout_width="match_parent"
android:layout_height="match_parent">
</ImageView>
</ViewFlipper>
<Button
android:text="<"
android:onClick="prev"
android:layout_width="wrap_content"
android:layout_height="wrap_content"
android:layout_alignParentBottom="true"
android:layout_alignParentLeft="true"/>
<Button
android:layout_width="wrap_content"
android:layout_height="wrap_content"
android:layout_alignParentBottom="true"
android:layout_centerInParent="true"
android:onClick="auto"
android:text="自动播放"/>
<Button
android:text=">"
android:onClick="next"
android:layout_width="wrap_content"
android:layout_height="wrap_content"
android:layout_alignParentBottom="true"
android:layout_alignParentRight="true"/>
</RelativeLayout>
Acticity代码区:
{
    private ViewFlipper viewFlipper;
    @Override
    public void onCreate(Bundle savedInstanceState)
    {
        super.onCreate(savedInstanceState);
        setContentView(R.layout.main);
        viewFlipper = (ViewFlipper) findViewById(R.id.details);
    }
    public void prev(View source)
    {
        viewFlipper.setInAnimation(this , R.anim.slide_in_right);
        viewFlipper.setOutAnimation(this , R.anim.slide_out_left);
        // 显示上一个组件
        viewFlipper.showPrevious();
        // 停止自动播放
        viewFlipper.stopFlipping();
    }
    public void next(View source)
    {
        viewFlipper.setInAnimation(this , android.R.anim.slide_in_left);
        viewFlipper.setOutAnimation(this , android.R.anim.slide_out_right);
        // 显示下一个组件
        viewFlipper.showNext();
        // 停止自动播放
        viewFlipper.stopFlipping();
    }
    public void auto(View source)
    {
        viewFlipper.setInAnimation(this , android.R.anim.slide_in_left);
        viewFlipper.setOutAnimation(this , android.R.anim.slide_out_right);
        // 开始自动播放
        viewFlipper.startFlipping();
    }
}
此代码主要为了之后自己在编程过程中参考使用,所以陈述语句不是特别多,如果有什么写的不对的地方,或者各位朋友有什么更好的学习方法推荐,可以给我留言。


 2975
2975

 被折叠的 条评论
为什么被折叠?
被折叠的 条评论
为什么被折叠?
 到【灌水乐园】发言


