


用户注册如何接入邮箱验证
背景
在用户注册流程中接入验证是保障账户安全和真实性的重要环节,一般包括短信验证和邮箱验证。但短信验证需要经过国内运营商的审核,需要有企业资质认证才能够发送,并且需要收费。使用邮箱验证相对来说会更加便捷,且是免费的。
接入邮箱/短信验证有不少优点,比如:
- 防止恶意批量注册,造成服务器巨大压力
- 防止机器注册虚假用户
- 利于后续功能支持,例如密码重置、消息通知等
下面以Spring Boot 项目为例
实现方案
方案一:Java Mail
优点:
- 实现简单,无需额外组件
- 适合小型项目或验证需求不高的场景
缺点:
- 同步发送会阻塞主线程,影响接口响应速度
- 没有失败重试机制,邮件可能丢失
方案二:集成消息队列(生产级方案)
核心技术:
- RabbitMQ/Kafka + Redis
- 异步解耦 + 持久化存储
架构流程:
- 用户注册时,生成验证码并存储到 Redis
- 将邮件任务发送到消息队列(如 RabbitMQ)
- 邮件消费者从队列获取任务,调用邮件服务发送
- 失败的邮件任务自动重试(队列支持重试机制)
优点:
- 完全解耦邮件发送逻辑,不影响核心业务
- 支持海量邮件异步处理
- 队列持久化保证邮件不丢失
- 方便扩展(如添加监控、限流)
缺点:
- 架构复杂度高,需要维护消息队列服务
- 开发成本较高,适合中大型项目
方案三:使用第三方邮件服务(简化方案)
核心技术:
-
SendGrid、Mailgun、阿里云邮件推送 等第三方 API
-
优点:
- 无需维护邮件服务器,降低运维成本
- 专业服务商保证发送成功率和送达率
- 提供详细的统计和监控功能
缺点:
- 依赖第三方服务,网络波动可能影响可用性
- 大量发送时可能产生费用(部分服务商有免费额度)
Spring Boot Starter Mail + JavaMail API
JavaMail 是 Java 平台用于发送、接收和处理电子邮件的 API。它提供了一套灵活的框架,支持各种邮件协议(如 SMTP、POP3、IMAP 等),并允许开发者创建、发送和接收不同格式的邮件(文本、HTML、附件等)。实现简单,适合小型项目或验证需求不高的场景。
实现步骤
1、引入依赖
<!-- JavaMail邮件依赖      -->
<dependency>
    <groupId>org.springframework.boot</groupId>
    <artifactId>spring-boot-starter-mail</artifactId>
</dependency>
2、填写配置文件(以QQ邮箱为例)
spring:
  mail:
    host: smtp.qq.com
    port: 587
    username: your_email@qq.com
    password: your_smtp_password  # QQ邮箱需要申请授权码
    properties:
      mail:
        smtp:
          auth: true
          starttls:
            enable: true
            required: true
email:
  verification:
    from: your_email@qq.com  # 发件人邮箱
    subject: "注册验证码"
    template: "您的验证码是:%s,有效期5分钟。"
其中password要填写 QQ邮箱 的授权码,可以通过以下的方式获取:
进入QQ邮箱,点击“设置”
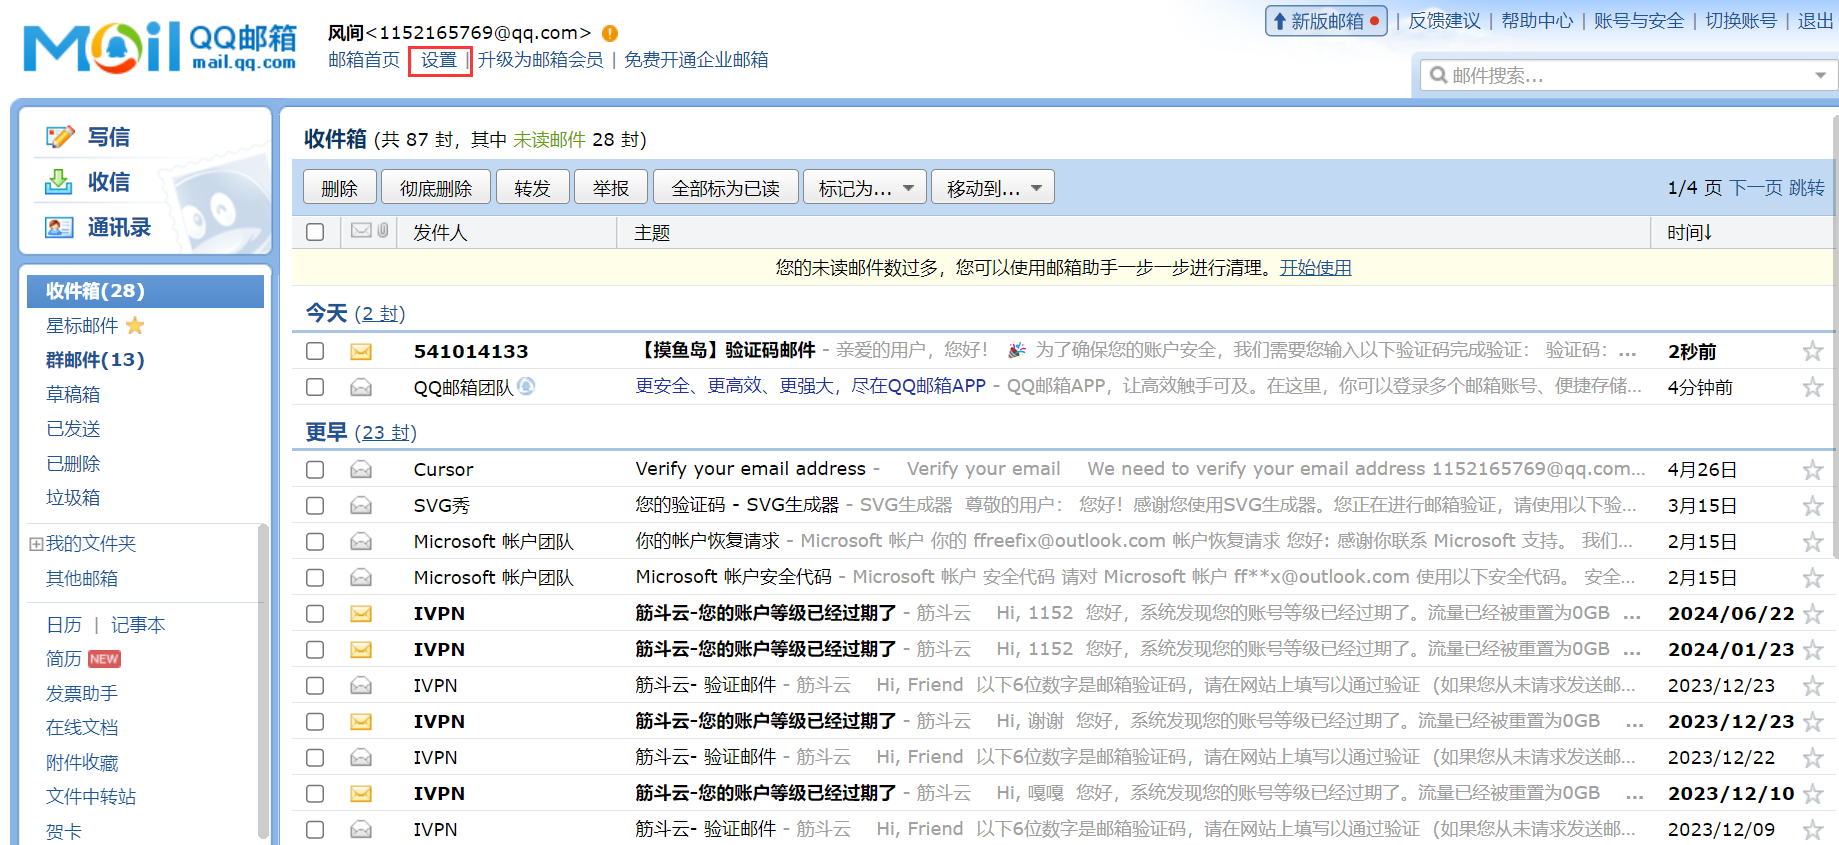
在设置中点击“账号”
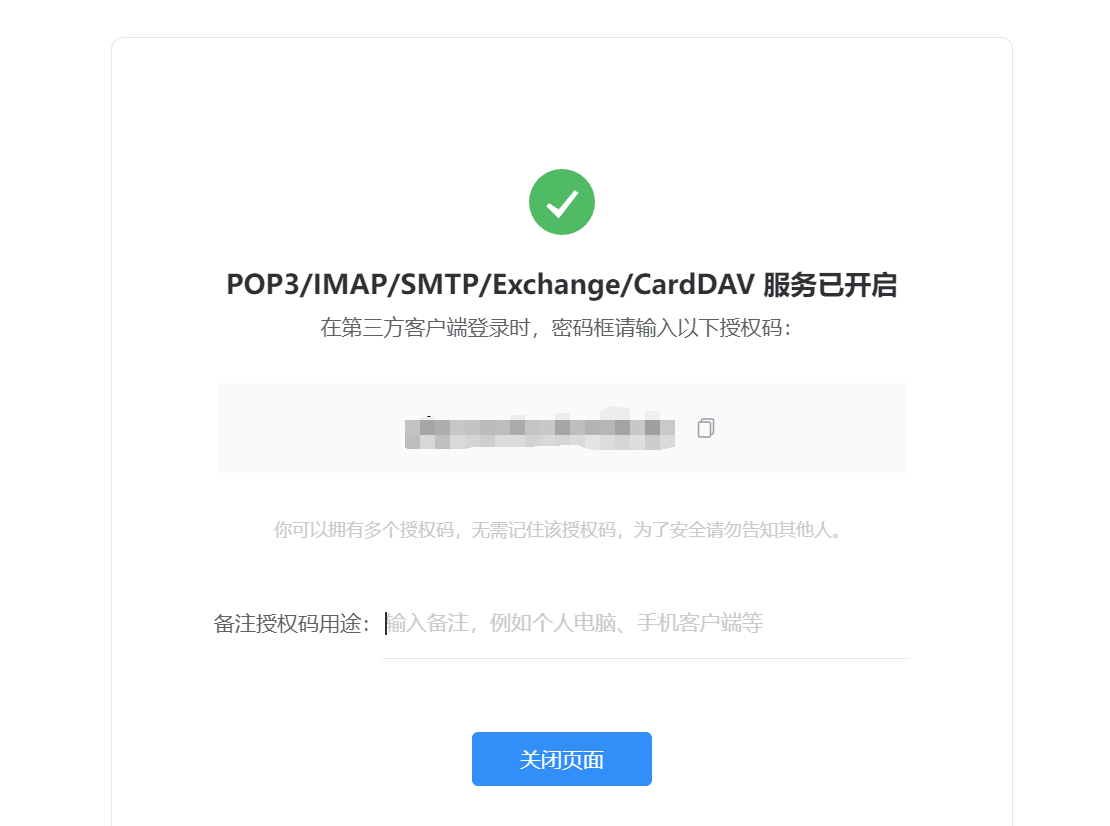
下拉找到 POP3/IMAP… 服务,点击“开启服务”

开启服务需要先绑定手机号,绑定完成后就能获得授权码
3、编写邮件服务类
创建一个邮件服务类EmailService接口
@Service
public interface EmailService {
    /**
     * 发送邮箱验证码
     * @param email
     * @param code
     * @return
     */
    public boolean sendVerificationCode(String email, String code);

    /**
     * 生成验证码
     * @param email
     * @return
     */
    public String generateCode(String email);

    /**
     * 验证邮箱验证码
     * @param email
     * @param code
     * @return
     */
    public boolean verifyCode(String email, String code);


}
实现EmailService接口,核心流程
- 获取配置文件参数
@Slf4j
@Service
public class EmailServiceImpl implements EmailService {

    @Resource
    private JavaMailSender mailSender;

    @Resource
    private InMemoryVerificationCodeStore codeStore;

    @Value("${email.verification.from}")
    private String from;
    @Value("${email.verification.subject}")
    private String subject;
    @Value("${email.verification.template}")
    private String template;

    @Override
    public boolean sendVerificationCode(String email, String code) {
        SimpleMailMessage message = new SimpleMailMessage();
        message.setFrom(from);
        message.setSubject(subject);
        message.setTo(email);
        message.setText(String.format(template,code));
        try{
            mailSender.send(message);
            return true;
        }catch (Exception e){
            log.error("发送邮件失败:",e);
            return false;
        }
    }

    @Override
    public String generateCode(String email) {
            if (!codeStore.canSend(email)) {
                throw new BussinessException(ErrorCode.EMAIL_CODE_FREQUENCY_ERROR,"发送频率过高");
            }

            String code = String.format("%04d", new Random().nextInt(9999));
            codeStore.save(email, code);
            return code;
    }

    @Override
    public boolean verifyCode(String email, String code) {
        return codeStore.validate(email, code);
    }
}
发送文本邮件
接下来是实现发送验证码方法。这里有两种邮件类型,第一种是文本邮件,第二种是HTML邮件,也就是可以自行编写邮件的样式。
首先介绍一下如何发送文本邮件。
实现发送验证码方法,核心流程:
- 构建message(设置发送人、接收人、主题、内容)
- 发送message
@Slf4j
@Service
public class EmailServiceImpl implements EmailService {

    @Resource
    private JavaMailSender mailSender;

    @Resource
    private InMemoryVerificationCodeStore codeStore;

    @Value("${email.verification.from}")
    private String from;
    @Value("${email.verification.subject}")
    private String subject;
    @Value("${email.verification.template}")
    private String template;

    @Override
    public boolean sendVerificationCode(String email, String code) {
        SimpleMailMessage message = new SimpleMailMessage();
        message.setFrom(from);
        message.setSubject(subject);
        message.setTo(email);
        message.setText(String.format(template,code));
        try{
            mailSender.send(message);
            return true;
        }catch (Exception e){
            log.error("发送邮件失败:",e);
            return false;
        }
    }
}
发送HTML邮件
有两种方式编写HTML,第一种是直接在方法里直接拼接HTML字符串,第二种是使用 Thymeleaf 模板引擎,能够更加优雅的管理 HTML 模板,并且支持动态变量注入。推荐第二种实现方式。
1)添加 Thymeleaft 依赖
<dependency>
    <groupId>org.springframework.boot</groupId>
    <artifactId>spring-boot-starter-thymeleaf</artifactId>
</dependency>
2)编写 Thymeleaft 模板引擎
在项目resource包下创建email-template.html文件。具体的样式大家可以自行实现,这里也提供了一个模版
<!DOCTYPE html>
<html xmlns:th="http://www.thymeleaf.org">
<head>
    <meta charset="UTF-8">
    <meta name="viewport" content="width=device-width, initial-scale=1.0">
    <title>Email Template</title>
    <style>
        body {
            font-family: 'Helvetica Neue', Arial, sans-serif;
            line-height: 1.6;
            color: #333333;
            margin: 0;
            padding: 0;
            background-color: #f5f5f5;
        }
        .email-container {
            max-width: 600px;
            margin: 0 auto;
            background-color: #ffffff;
            box-shadow: 0 4px 8px rgba(0, 0, 0, 0.1); /* 初始阴影效果 */
            transition: box-shadow 0.3s ease; /* 过渡效果 */
        }
        .email-container:hover {
            box-shadow: 0 8px 16px rgba(0, 0, 0, 0.2); /* 鼠标悬停时的阴影效果 */
        }
        .email-header {
            background-color: #4f46e5;
            padding: 20px;
            text-align: center;
        }
        .email-header img {
            max-height: 50px;
        }
        .email-body {
            padding: 30px;
        }
        .email-footer {
            background-color: #f9fafb;
            padding: 20px;
            text-align: center;
            font-size: 12px;
            color: #6b7280;
        }
        .button {
            display: inline-block;
            background-color: #4f46e5;
            color: #ffffff!important;
            text-decoration: none;
            padding: 12px 24px;
            border-radius: 4px;
            font-weight: bold;
            margin: 20px 0;
        }
        h1 {
            color: #111827;
            margin-top: 0;
        }
        p {
            margin-bottom: 16px;
        }
        .content-block {
            margin-bottom: 24px;
        }
        @media only screen and (max-width: 600px) {
            .email-container {
                width: 100%!important;
            }
            .email-body {
                padding: 20px!important;
            }
        }
    </style>
</head>
<body>
<table border="0" cellpadding="0" cellspacing="0" width="100%">
    <tr>
        <td align="center" style="background-color: white; padding: 20px 0;">
            <!-- Email Container -->
            <table class="email-container" border="0" cellpadding="0" cellspacing="0" width="600">

                <!-- Body -->
                <tr>
                    <td class="email-body">
                        <div class="content-block">
                            <h1>亲爱的用户,你好!🎊</h1>
                        </div>

                        <div class="content-block">
                            <p>您的验证码如下:</p>
                            <div style="text-align: center; margin: 30px 0;">
                                <div style="display: inline-block; padding: 15px 30px;  border-radius: 8px; ">
                                    <div th:text="${code}" style="font-family: monospace; font-size: 32px; font-weight: bold; letter-spacing: 5px; color: #111827;">123456</div>
                                </div>
                            </div>
                        </div>

                        <div class="content-block">
                            <p>请在5分钟内完成验证。</p>
                            <p>感谢您注册我们的服务。欢迎加入我们,一起开启打卡之旅~</p>
                            <p>如果您未发起此请求,或对操作不感兴趣,请忽略此邮件。</p>
                        </div>
                    </td>
                </tr>

                <!-- Footer -->
                <tr>
                    <td class="email-footer">
                        <p>© 2025 daydayup. 版权所有.</p>
                    </td>
                </tr>
            </table>
        </td>
    </tr>
</table>
</body>
</html>
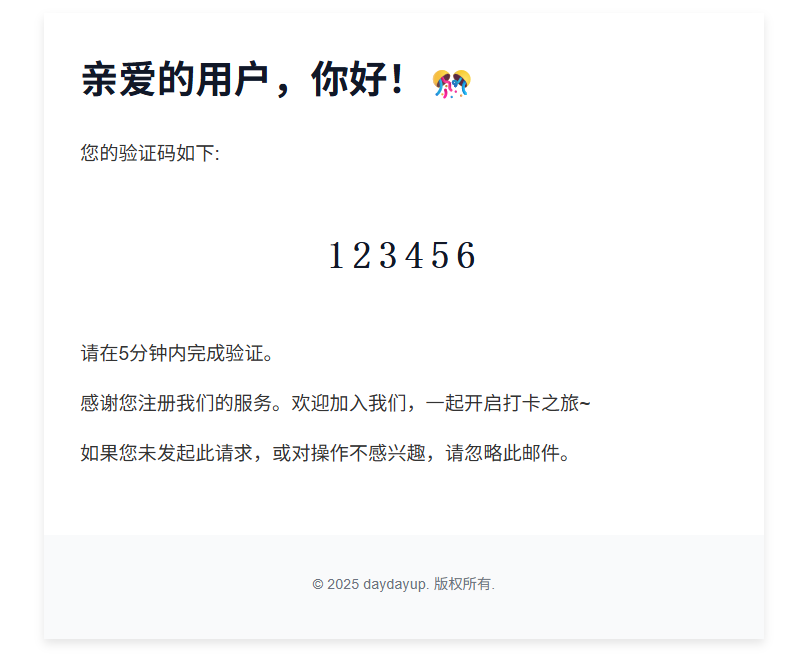
这是该模版呈现的样式
3)实现发送验证码方法
    @Override
    public boolean sendVerificationCode(String email, String code) {
        try {
            // 创建MimeMessage用于发送HTML邮件
            MimeMessage message = mailSender.createMimeMessage();
            MimeMessageHelper helper = new MimeMessageHelper(message, true, "UTF-8");

            // 设置邮件基本信息
            helper.setFrom(from);
            helper.setSubject(subject);
            helper.setTo(email);

            // 使用Thymeleaf模板生成HTML内容
            Context context = new Context();
            context.setVariable("code", code);
            String htmlContent = templateEngine.process("email-template", context);

            // 设置HTML内容,第二个参数true表示启用HTML格式
            helper.setText(htmlContent, true);

            // 发送邮件
            mailSender.send(message);
            return true;
        } catch (Exception e) {
            log.error("发送邮件失败:", e);
            return false;
        }
    }
4、存储验证码
有几种方式存储验证码,可以使用Redis、MySQL数据库、服务器内存。
优缺点对比
| 方案 | 优点 | 缺点 | 适用场景 |
|---|---|---|---|
| 内存 Map | 实现简单,无需外部依赖 | 不支持分布式,重启丢失数据 | 开发环境、小规模单体应用 |
| 数据库 | 数据持久化,支持分布式 | 性能较低,需维护数据表 | 生产环境、需持久化场景 |
| Redis | 高性能,支持分布式和过期 | 需要额外维护 Redis 服务 | 中大型项目 |
下面演示的是使用内存存储验证码
1)创建内存存储类
@Component
public class InMemoryVerificationCodeStore {

    // 存储邮箱验证码的map
    private final Map<String,codeInfo> emailCodeMap = new ConcurrentHashMap<>();

    public void save(String email, String code){
        // 设置五分钟过期
        emailCodeMap.put(email,new codeInfo(code,LocalDateTime.now().plusMinutes(5)));
    }

    /**
     * 验证验证码
     * @param email
     * @param code
     * @return
     */
    public boolean validate(String email, String code){
        codeInfo codeInfo = emailCodeMap.get(email);
        if(codeInfo == null){
            return false;
        }

        boolean isValid = false;
        if(code.equals(codeInfo.getCode()) && LocalDateTime.now().isBefore(codeInfo.getExpireTime())){
            isValid = true;
        }
        if(isValid){
            emailCodeMap.remove(email);
            return true;
        }
        return false;
    }

    /**
     * 判断邮箱是否可发送验证码
     * @param email
     * @return
     */
    public boolean canSend(String email){
        codeInfo codeInfo = emailCodeMap.get(email);
        if(codeInfo != null && LocalDateTime.now().isBefore(codeInfo.getExpireTime())){
            return false;
        }
        return true;
    }

    @Data
    public static class codeInfo {
        // 验证码
        private String code;

        // 过期时间
        private LocalDateTime expireTime;

        // 上一次发送时间
        private LocalDateTime lastSendTime;

        public codeInfo(String code, LocalDateTime expireTime){
            this.code = code;
            this.expireTime = expireTime;
            this.lastSendTime = LocalDateTime.now();
        }
    }
}
5、编写邮件服务类
在EmailServiceImpl中实现以下方法
- 创建验证码
- 验证验证码
	@Override
    public String generateCode(String email) {
            if (!codeStore.canSend(email)) {
                throw new BussinessException(ErrorCode.EMAIL_CODE_FREQUENCY_ERROR,"发送频率过高");
            }

            String code = String.format("%04d", new Random().nextInt(9999));
            codeStore.save(email, code);
            return code;
    }

    @Override
    public boolean verifyCode(String email, String code) {
        return codeStore.validate(email, code);
    }
完整代码
@Slf4j
@Service
public class EmailServiceImpl implements EmailService {

    @Resource
    private JavaMailSender mailSender;

    @Resource
    private InMemoryVerificationCodeStore codeStore;

    @Value("${email.verification.from}")
    private String from;
    @Value("${email.verification.subject}")
    private String subject;
    @Value("${email.verification.template}")
    private String template;

    @Autowired
    public EmailServiceImpl(JavaMailSender mailSender,InMemoryVerificationCodeStore codeStore){
        this.mailSender = mailSender;
        this.codeStore = codeStore;
    }

    @Override
    public boolean sendVerificationCode(String email, String code) {
        SimpleMailMessage message = new SimpleMailMessage();
        message.setFrom(from);
        message.setSubject(subject);
        message.setTo(email);
        message.setText(String.format(template,code));
        try{
            mailSender.send(message);
            return true;
        }catch (Exception e){
            log.error("发送邮件失败:",e);
            return false;
        }
    }

    @Override
    public String generateCode(String email) {
            if (!codeStore.canSend(email)) {
                throw new BussinessException(ErrorCode.EMAIL_CODE_FREQUENCY_ERROR,"发送频率过高");
            }

            String code = String.format("%04d", new Random().nextInt(9999));
            codeStore.save(email, code);
            return code;
    }

    @Override
    public boolean verifyCode(String email, String code) {
        return codeStore.validate(email, code);
    }
}
6、编写邮件发送接口
在接口层中增加发送邮件的接口,注意要检查邮箱是否已被注册,避免重复注册
    @PostMapping("/send-email")
    public BaseResponse<String> sendEmail(@RequestParam("email") String email){
        if(userService.checkEmailExists(email)){
            throw new BussinessException(ErrorCode.PARAMS_ERROR, "邮箱已被注册");
        }
        String code = emailService.generateCode(email);
        emailService.sendVerificationCode(email,code);
        return BaseResponse.success();
    }
7、修改注册逻辑
在注册中增加验证邮箱验证码的逻辑
/**
 * 用户服务实现类
 */
@Service
@Slf4j
public class UserServiceImpl extends ServiceImpl<UserMapper, User> implements UserService {

    @Autowired
    private EmailService emailService;

    @Override
    public User register(String username, String password, String email, String verificationCode) {
        // ......

        // 检查邮箱是否已存在
        if (checkEmailExists(email)) {
            throw new BussinessException(ErrorCode.PARAMS_ERROR, "邮箱已存在");
        }

		// ......
    }

	// ......
}


 被折叠的 条评论
为什么被折叠?
被折叠的 条评论
为什么被折叠?
 到【灌水乐园】发言


