


Android中解析xml前必须生成xml,而生成xml得借用eclipse生成一个xml
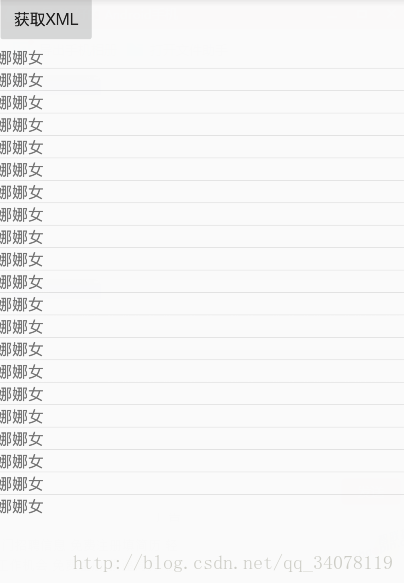
如图:
首先要先在eclipse中生成一个xml,这里我是利用ssh框架进行测试
首先创建一个jsp页面
getData.jsp
<%@ page language="java" contentType="text/html; charset=UTF-8"
    pageEncoding="UTF-8"%>
<!DOCTYPE html PUBLIC "-//W3C//DTD HTML 4.01 Transitional//EN" "http://www.w3.org/TR/html4/loose.dtd">
<html>
<head>
<meta http-equiv="Content-Type" content="text/html; charset=UTF-8">
<title>Insert title here</title>
</head>
<body>
<a href="studentActiongetXML.action">获取xml数据</a>
</body>
</html>
接下来写一个实体类
student.java
private String name;
    private String sex;
    public String getName() {
        return name;
    }
    public void setName(String name) {
        this.name = name;
    }
    public String getSex() {
        return sex;
    }
    public void setSex(String sex) {
        this.sex = sex;
    }
    public Student(String name, String sex) {
        super();
        this.name = name;
        this.sex = sex;
    }
    public Student() {
        super();
        // TODO Auto-generated constructor stub
    }
这里我并没有使用数据库中的表,而是自定义的一个list数组添加数据在StudentAction中
package com.zking.action;

import java.util.ArrayList;
import java.util.List;

import org.apache.struts2.ServletActionContext;

import com.opensymphony.xwork2.ActionSupport;
import com.zking.entity.Student;

import net.sf.json.JSONArray;
import net.sf.json.JSONObject;

public class StudentAction extends ActionSupport{

    public String getXML() throws Exception {
        //查询数据库,得到数据
        List<Student> students=new ArrayList<>();
        for (int i = 0; i <=20; i++) {
            Student student=new Student("娜娜", "女");
                    students.add(student);
        }
        //将对象集合保存到请求域中
                ServletActionContext.getRequest().setAttribute("students", students);
        return "dataResult";
    }
}
因为是使用ssh的框架进行测试,所以需要在Struts.xml中添加一下代码:
<action name="studentAction*" class="com.zking.action.StudentAction" method="{1}">
                <result name="dataResult">dataResult.jsp</result>

            </action>
接下来在eclipse中再写一个jsp代码生成xml,并且这个文件中的代码尽量不要有空格,一面解析出错,格式如同以下代码:
<?xml version="1.0" encoding="UTF-8" ?><%@ page language="java" contentType="text/xml; charset=UTF-8" pageEncoding="UTF-8"%><%@ taglib uri="http://java.sun.com/jsp/jstl/core" prefix="c" %><students><c:forEach items="${students}" var="s">
        <student name="${s.name}">
            <sex>${s.sex}</sex>
        </student>
    </c:forEach>
</students>
以上是在eclipse中生成xml的步骤,接下来是在Androidstudio中实现解析的代码
首先是页面的布局
activity_mian.xml
<?xml version="1.0" encoding="utf-8"?>
<LinearLayout xmlns:android="http://schemas.android.com/apk/res/android"
    xmlns:tools="http://schemas.android.com/tools" android:id="@+id/activity_main"
    android:layout_width="match_parent" android:layout_height="match_parent"
   android:orientation="vertical"
    tools:context="com.example.g150825_class.MainActivity">

    <Button
        android:layout_width="wrap_content"
        android:layout_height="wrap_content"
        android:text="获取XML"
        android:onClick="getXML"
        />
    <ListView
        android:layout_width="match_parent"
        android:layout_height="wrap_content"
        android:id="@+id/lv_main_list"
        ></ListView>

</LinearLayout>
接下来是要将eclipse中的实体类放入Androidstudio中
package com.example.g150825_class;

public class Student {
    private String name;
    private String sex;
    public String getName() {
        return name;
    }
    public void setName(String name) {
        this.name = name;
    }
    public String getSex() {
        return sex;
    }
    public void setSex(String sex) {
        this.sex = sex;
    }
    public Student(String name, String sex) {
        super();
        this.name = name;
        this.sex = sex;
    }
    public Student() {
        super();
        // TODO Auto-generated constructor stub
    }
    @Override
    public String toString() {
        return "Student [name=" + name + ", sex=" + sex + "]";
    }


}
解析xml需要将手机同电脑连接同一个网络,使用cmd得到ipconfig
然后将地址放入MainActivity.java中
package com.example.g150825_class;

import android.app.ProgressDialog;
import android.os.AsyncTask;
import android.support.v7.app.AppCompatActivity;
import android.os.Bundle;
import android.util.Log;
import android.util.Xml;
import android.view.View;
import android.view.ViewGroup;
import android.widget.BaseAdapter;
import android.widget.LinearLayout;
import android.widget.ListView;
import android.widget.TextView;

import org.xmlpull.v1.XmlPullParser;
import org.xmlpull.v1.XmlPullParserException;

import java.io.BufferedReader;
import java.io.IOException;
import java.io.InputStream;
import java.io.InputStreamReader;
import java.net.HttpURLConnection;
import java.net.MalformedURLException;
import java.net.URL;
import java.util.ArrayList;
import java.util.List;

public class MainActivity extends AppCompatActivity {
    List<Student> studentList=new ArrayList<>();
    private ListView lv_main_list;
    private MyAdater myAdater;
    private ProgressDialog progressDialog;
    @Override
    protected void onCreate(Bundle savedInstanceState) {
        super.onCreate(savedInstanceState);
        setContentView(R.layout.activity_main);
        //实例化进度条对话框
        progressDialog = new ProgressDialog(this);
        progressDialog.setMessage("正在加载中.....");


        lv_main_list = (ListView) findViewById(R.id.lv_main_list);

        //实例化适配器
        myAdater = new MyAdater();
        //设置适配器
        lv_main_list.setAdapter(myAdater);
    }
    class MyAdater extends BaseAdapter{

        @Override
        public int getCount() {
            return studentList.size();
        }

        @Override
        public Object getItem(int i) {
            return studentList.get(i);
        }

        @Override
        public long getItemId(int i) {
            return i;
        }

        @Override
        public View getView(int i, View view, ViewGroup viewGroup) {

            LinearLayout layout=new LinearLayout(MainActivity.this);
            layout.setOrientation(LinearLayout.HORIZONTAL);

            TextView textViewName=new TextView(MainActivity.this);
            textViewName.setText(studentList.get(i).getName());
            TextView textViewsex=new TextView(MainActivity.this);
            textViewsex.setText(studentList.get(i).getSex());

            layout.addView(textViewName);
            layout.addView(textViewsex);

            return layout;
        }
    }
    public void getXML(View view){
        new MyTask().execute();
    }


    class MyTask extends AsyncTask{
        private Student student;

        @Override
        protected void onPreExecute() {
            super.onPreExecute();
            progressDialog.show();
        }

        @Override
        protected Object doInBackground(Object[] objects) {
            //获取网络数据XML

            //01.确定网络路径
            String path="http://192.168.43.109:8080/testssh/studentActiongetXML.action";
            try {
                //02.实例化URL
                URL url=new URL(path);
                //03.获取连接对象
                HttpURLConnection connection= (HttpURLConnection) url.openConnection();
                //04.设置请求方式
                connection.setRequestMethod("GET");
                //05.设置请求连接超时的时间(优化)
                connection.setConnectTimeout(5000);

                //06.获取响应吗,结果
                int code=connection.getResponseCode();
                if(code==200){
                    //07.获取服务器返回过来的数据
                    InputStream is=connection.getInputStream();
                    //测试(打印)
                    //缓冲字符流
//                    BufferedReader br=new BufferedReader(new InputStreamReader(is));
//                    String str=null;
//                    while((str=br.readLine())!=null){
//                        Log.i("test",str);
                        Log.i("test","aaa");
//                    }

                    //解析PULL SAX  基于事件驱动
                    XmlPullParser xpp=Xml.newPullParser();
                    try {
                        xpp.setInput(is,"UTF-8");

                        int type=xpp.getEventType();

                        while(type!=XmlPullParser.END_DOCUMENT){
                            switch (type) {
                                case XmlPullParser.START_TAG:
                                    //获取开始标签的名字
                                    String startTagName=xpp.getName();
                                    if("student".equals(startTagName)){
                                        student = new Student();
                                        //获取name属性值
                                        String name=xpp.getAttributeValue(0);
                                        student.setName(name);
                                    }else if("sex".equals(startTagName)){
                                        //获取sex的文本值
                                        String sex=xpp.nextText();
                                        student.setSex(sex);
                                    }
                                    break;
                                case XmlPullParser.END_TAG:
                                    //获取到结束标签的名字
                                    String endTagName=xpp.getName();
                                    if("student".equals(endTagName)){
                                        studentList.add(student);
                                    }
                                    break;
                            }
                            type=xpp.next();
                        }
                    } catch (XmlPullParserException e) {
                        e.printStackTrace();
                    }
                }

            } catch (MalformedURLException e) {
                e.printStackTrace();
            } catch (IOException e) {
                e.printStackTrace();
            }
            return null;
        }

        @Override
        protected void onPostExecute(Object o) {
            super.onPostExecute(o);

            //通知适配器发生改变
            myAdater.notifyDataSetChanged();
            progressDialog.cancel();
        }
    }


}
最后需要在清单文件中加入网络权限
  <!--添加网络权限-->
    <uses-permission android:name="android.permission.INTERNET"></uses-permission>
yi以上是解析xml的代码及思路,如果不理解,可以留言问我,下一篇还有解析json,可以去了解


 1700
1700

 被折叠的 条评论
为什么被折叠?
被折叠的 条评论
为什么被折叠?
 到【灌水乐园】发言


