


这里所说的Transition是在API 19开始加入的,其作用在Material design的引入之后越来越大
下面举一个简单的例子表现一下transition的方便性
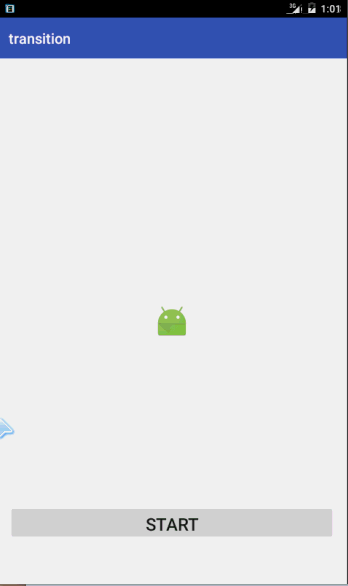
首先先上效果图
实现也十分简单,下面给出具体代码
首先是mainactivity的layout布局
<?xml version="1.0" encoding="utf-8"?>
<RelativeLayout xmlns:android="http://schemas.android.com/apk/res/android"
    xmlns:tools="http://schemas.android.com/tools"
    android:layout_width="match_parent"
    android:layout_height="match_parent"
    android:paddingBottom="@dimen/activity_vertical_margin"
    android:paddingLeft="@dimen/activity_horizontal_margin"
    android:paddingRight="@dimen/activity_horizontal_margin"
    android:paddingTop="@dimen/activity_vertical_margin"
    tools:context="com.saber.transition.MainActivity">
<FrameLayout
    android:layout_width="match_parent"
    android:layout_height="wrap_content"
    android:id="@+id/rootview"
    android:layout_centerVertical="true"
    android:layout_alignParentStart="true">
    <include layout="@layout/scene1"></include>
</FrameLayout>

    <Button
        android:layout_width="match_parent"
        android:layout_height="50dp"
        android:text="start"
        android:textSize="24sp"
        android:id="@+id/button"
        android:gravity="center"
        android:layout_alignParentBottom="true"
        android:layout_alignParentStart="true"
        android:layout_marginBottom="43dp" />

</RelativeLayout>
包括了一个button和一个FrameLayout,这个FrameLayout作为rootview是必须的,transition的动画也是在这个Frame中所进行的
然后由于是动画,必然会有两个关键帧,即起始帧和结束帧
这里记为scene1和scene2
下面给出各自的xml布局代码
首先是scene1
<?xml version="1.0" encoding="utf-8"?>
<LinearLayout xmlns:android="http://schemas.android.com/apk/res/android"
    android:orientation="vertical" android:layout_width="match_parent"
    android:layout_height="match_parent">


    <ImageView
        android:layout_width="wrap_content"
        android:layout_height="wrap_content"
        android:id="@+id/pic1"
        android:src="@mipmap/ic_launcher"
        android:layout_centerVertical="true"
        android:layout_centerHorizontal="true"
        android:layout_gravity="center_horizontal" />

</LinearLayout>
然后是scene2
<?xml version="1.0" encoding="utf-8"?>
<LinearLayout xmlns:android="http://schemas.android.com/apk/res/android"
    android:orientation="vertical" android:layout_width="match_parent"
    android:layout_height="match_parent">

    <ImageView
        android:layout_width="190dp"
        android:layout_height="190dp"
        android:id="@+id/pic1"
        android:src="@mipmap/ic_launcher"
        android:layout_centerVertical="true"
        android:layout_centerHorizontal="true"
        android:layout_gravity="center_horizontal" />
</LinearLayout>
很简单,我们只是改动了其中ImageView的大小而已
接下来给出MainActivity的java代码
package com.saber.transition;

import android.support.v7.app.AppCompatActivity;
import android.os.Bundle;
import android.transition.ChangeBounds;
import android.transition.Scene;
import android.transition.TransitionManager;
import android.view.View;
import android.widget.Button;
import android.widget.FrameLayout;

public class MainActivity extends AppCompatActivity {

    private Button button;
    private FrameLayout rootview;
    @Override
    protected void onCreate(Bundle savedInstanceState) {
        super.onCreate(savedInstanceState);
        setContentView(R.layout.activity_main);
        button= (Button) findViewById(R.id.button);                //初始化button
        rootview= (FrameLayout) findViewById(R.id.rootview);   //初始化FrameLayout
        button.setOnClickListener(new View.OnClickListener() {    //监听button的点击事件
            @Override
            public void onClick(View view) {
                Scene scene2=Scene.getSceneForLayout(rootview,R.layout.scene2,MainActivity.this); //构造场景2,参数分别是根布局,场景2的布局id,以及上下文
                TransitionManager.go(scene2,new ChangeBounds());   //在这里调用TransitionManager的go方法,注意的是第二个参数,这个是表示动画的方式
            }
        });

    }
}
下面我们来看看一些源码,看这种动画究竟是如何实现的
首先我们从scene场景入手
/** * A scene represents the collection of values that various properties in the * View hierarchy(层次) will have when the scene is applied. A Scene can be * configured to automatically run a Transition when it is applied, which will * animate the various property changes that take place during the * scene change. *///从这里可以看出,scene就是一些元素的集合,一个场景可以被配置来自动地运行Transition,//在场景中发生改变的元素将会配上合适的动画效果.public final class Scene { private Context mContext;//上下文 private int mLayoutId = -1;//布局id private ViewGroup mSceneRoot;//根布局(包含View的ViewGroup) private View mLayout; // alternative to layoutId (由id选择的layout) Runnable mEnterAction, mExitAction; //进入和退出的动作(多线程Runnable) /** * Returns a Scene described by the resource file associated with the given * <code>layoutId</code> parameter. If such a Scene has already been created for * the given <code>sceneRoot</code>, that same Scene will be returned. * This caching of layoutId-based scenes enables sharing of common scenes * between those created in code and those referenced by {@link TransitionManager} * XML resource files. * * @param sceneRoot The root of the hierarchy in which scene changes * and transitions will take place.(这个就是我所说的transition必须在一个根布局中发生change) * @param layoutId The id of a standard layout resource file. * @param context The context used in the process of inflating * the layout resource. * @return The scene for the given root and layout id */ public static Scene getSceneForLayout(ViewGroup sceneRoot, int layoutId, Context context) { SparseArray<Scene> scenes = (SparseArray<Scene>) sceneRoot.getTag( //看了一下源码对于SparseArray的介绍,是一种比hashmap高效率的可以map Integers to Objects的Array,核心是折半搜寻函数 com.android.internal.R.id.scene_layoutid_cache); if (scenes == null) { scenes = new SparseArray<Scene>(); //从这可以看出scenes就是一个Map Integers to Scenne的Array sceneRoot.setTagInternal(com.android.internal.R.id.scene_layoutid_cache, scenes); } Scene scene = scenes.get(layoutId); //通过layoutId从Array中得到一个scene if (scene != null) { return scene; } else { scene = new Scene(sceneRoot, layoutId, context); scenes.put(layoutId, scene); return scene; } //最后返回一个Scene的对象} //(可以定义一个scene,不用定义view是怎么改变的,只需要一个根scene) public Scene(ViewGroup sceneRoot) { mSceneRoot = sceneRoot; } /** * Constructs a Scene which, when entered, will remove any (当进入的时候会remove掉根scene所有子对象) * children from the sceneRoot container and will inflate and add * the hierarchy specified by the layoutId resource file. * * <p>This method is hidden because layoutId-based scenes should be * created by the caching factory method {@link Scene#getCurrentScene(View)}.</p> * * @param sceneRoot The root of the hierarchy in which scene changes * and transitions will take place. * @param layoutId The id of a resource file that defines the view * hierarchy of this scene. * @param context The context used in the process of inflating * the layout resource. */private Scene(ViewGroup sceneRoot, int layoutId, Context context) { mContext = context; mSceneRoot = sceneRoot; mLayoutId = layoutId; } /** * Constructs a Scene which, when entered, will remove any * children from the sceneRoot container and add the layout * object as a new child of that container. * * @param sceneRoot The root of the hierarchy in which scene changes * and transitions will take place. * @param layout The view hierarchy of this scene, added as a child * of sceneRoot when this scene is entered. */ public Scene(ViewGroup sceneRoot, View layout) { mSceneRoot = sceneRoot; mLayout = layout; } /** * @deprecated use {@link #Scene(ViewGroup, View)}. */ @Deprecated public Scene(ViewGroup sceneRoot, ViewGroup layout) { mSceneRoot = sceneRoot; mLayout = layout; } /** * Gets the root of the scene, which is the root of the view hierarchy * affected by changes due to this scene, and which will be animated * when this scene is entered. * * @return The root of the view hierarchy affected by this scene. *///得到根Scene public ViewGroup getSceneRoot() { return mSceneRoot; } /** * Exits this scene, if it is the current scene * on the scene's {@link #getSceneRoot() scene root}. The current scene is * set when {@link #enter() entering} a scene. * Exiting a scene runs the {@link #setExitAction(Runnable) exit action} * if there is one. *///退出的方法 public void exit() { if (getCurrentScene(mSceneRoot) == this) { if (mExitAction != null) { mExitAction.run(); } } } /** * Enters this scene, which entails changing all values that * are specified by this scene. These may be values associated * with a layout view group or layout resource file which will * now be added to the scene root, or it may be values changed by * an {@link #setEnterAction(Runnable)} enter action}, or a * combination of the these. No transition will be run when the * scene is entered. To get transition behavior in scene changes, * use one of the methods in {@link TransitionManager} instead. *///进入的方法 public void enter() { // Apply layout change, if any if (mLayoutId > 0 || mLayout != null) { // empty out parent container before adding to it(这一句说明进入的时候会remove掉所有的子View) getSceneRoot().removeAllViews(); if (mLayoutId > 0) { LayoutInflater.from(mContext).inflate(mLayoutId, mSceneRoot); } else { mSceneRoot.addView(mLayout); } } // Notify next scene that it is entering. Subclasses may override to configure scene. if (mEnterAction != null) { mEnterAction.run(); } setCurrentScene(mSceneRoot, this); } /** * Set the scene that the given view is in. The current scene is set only * on the root view of a scene, not for every view in that hierarchy. This * information is used by Scene to determine whether there is a previous * scene which should be exited before the new scene is entered. * * @param view The view on which the current scene is being set *///设置当前场景 static void setCurrentScene(View view, Scene scene) { view.setTagInternal(com.android.internal.R.id.current_scene, scene); } /** * Gets the current {@link Scene} set on the given view. A scene is set on a view * only if that view is the scene root. * * @return The current Scene set on this view. A value of null indicates that * no Scene is currently set. *///获取当前场景 static Scene getCurrentScene(View view) { return (Scene) view.getTag(com.android.internal.R.id.current_scene); } /** * Scenes that are not defined with layout resources or * hierarchies, or which need to perform additional steps * after those hierarchies are changed to, should set an enter * action, and possibly an exit action as well. An enter action * will cause Scene to call back into application code to do * anything else the application needs after transitions have * captured pre-change values and after any other scene changes * have been applied, such as the layout (if any) being added to * the view hierarchy. After this method is called, Transitions will * be played. * * @param action The runnable whose {@link Runnable#run() run()} method will * be called when this scene is entered * @see #setExitAction(Runnable) * @see Scene#Scene(ViewGroup, int, Context) * @see Scene#Scene(ViewGroup, ViewGroup) *///设置进入的动作 public void setEnterAction(Runnable action) { mEnterAction = action; } /** * Scenes that are not defined with layout resources or * hierarchies, or which need to perform additional steps * after those hierarchies are changed to, should set an enter * action, and possibly an exit action as well. An exit action * will cause Scene to call back into application code to do * anything the application needs to do after applicable transitions have * captured pre-change values, but before any other scene changes * have been applied, such as the new layout (if any) being added to * the view hierarchy. After this method is called, the next scene * will be entered, including a call to {@link #setEnterAction(Runnable)} * if an enter action is set. * * @see #setEnterAction(Runnable) * @see Scene#Scene(ViewGroup, int, Context) * @see Scene#Scene(ViewGroup, ViewGroup) *///设置退出动作 public void setExitAction(Runnable action) { mExitAction = action; } /** * Returns whether this Scene was created by a layout resource file, determined * by the layoutId passed into * {@link #getSceneForLayout(android.view.ViewGroup, int, android.content.Context)}. * This is called by TransitionManager to determine whether it is safe for views from * this scene to be removed from their parents when the scene is exited, which is * used by {@link Fade} to fade these views out (the views must be removed from * their parent in order to add them to the overlay for fading purposes). If a * Scene is not based on a resource file, then the impact of removing views * arbitrarily is unknown and should be avoided. */接下来我们来看看TransitionManager的源代码//返回是否创建了一个布局文件为源的Scene boolean isCreatedFromLayoutResource() { return (mLayoutId > 0); } }
我们只看go方法我们来看ChangeScene的方法/** * Convenience method to simply change to the given scene using * the given transition. * * <p>Passing in <code>null</code> for the transition parameter will * result in the scene changing without any transition running, and is * equivalent to calling {@link Scene#exit()} on the scene root's * current scene, followed by {@link Scene#enter()} on the scene * specified by the <code>scene</code> parameter.</p> * * @param scene The Scene to change to * @param transition The transition to use for this scene change. A * value of null causes the scene change to happen with no transition. */ public static void go(Scene scene, Transition transition) {changeScene(scene, sDefaultTransition); //调用了changeScene方法,参数为scene和一个transition }
继续看sceneChangeRunTransition的源码private static void changeScene(Scene scene, Transition transition) { final ViewGroup sceneRoot = scene.getSceneRoot(); //获取根场景 Transition transitionClone = null; if (transition != null) { transitionClone = transition.clone(); transitionClone.setSceneRoot(sceneRoot); } Scene oldScene = Scene.getCurrentScene(sceneRoot); if (oldScene != null && transitionClone != null && oldScene.isCreatedFromLayoutResource()) { transitionClone.setCanRemoveViews(true); } sceneChangeSetup(sceneRoot, transitionClone); scene.enter();//进入方法调用 sceneChangeRunTransition(sceneRoot, transitionClone);//调用sceneChangeRunTransition的方法 }
private static void sceneChangeRunTransition(final ViewGroup sceneRoot, final Transition transition) { if (transition != null && sceneRoot != null) { MultiListener listener = new MultiListener(transition, sceneRoot); sceneRoot.addOnAttachStateChangeListener(listener); sceneRoot.getViewTreeObserver().addOnPreDrawListener(listener); } }
再看一下sceneChangeSetup的源码private static void sceneChangeSetup(ViewGroup sceneRoot, Transition transition) { // Capture current values ArrayList<Transition> runningTransitions = getRunningTransitions().get(sceneRoot); if (runningTransitions != null && runningTransitions.size() > 0) { for (Transition runningTransition : runningTransitions) { runningTransition.pause(sceneRoot); } } if (transition != null) { transition.captureValues(sceneRoot, true); } // Notify previous scene that it is being exited Scene previousScene = Scene.getCurrentScene(sceneRoot); if (previousScene != null) { previousScene.exit(); } }
我们看一下一个方法public boolean onPreDraw() { removeListeners(); sPendingTransitions.remove(mSceneRoot); // Add to running list, handle end to remove it final ArrayMap<ViewGroup, ArrayList<Transition>> runningTransitions = getRunningTransitions(); ArrayList<Transition> currentTransitions = runningTransitions.get(mSceneRoot); ArrayList<Transition> previousRunningTransitions = null; if (currentTransitions == null) { currentTransitions = new ArrayList<Transition>(); runningTransitions.put(mSceneRoot, currentTransitions); } else if (currentTransitions.size() > 0) { previousRunningTransitions = new ArrayList<Transition>(currentTransitions); } currentTransitions.add(mTransition); mTransition.addListener(new Transition.TransitionListenerAdapter() { @Override public void onTransitionEnd(Transition transition) { ArrayList<Transition> currentTransitions = runningTransitions.get(mSceneRoot); currentTransitions.remove(transition); } }); mTransition.captureValues(mSceneRoot, false); if (previousRunningTransitions != null) { for (Transition runningTransition : previousRunningTransitions) { runningTransition.resume(mSceneRoot); } } mTransition.playTransition(mSceneRoot); return true; } };
找到源码/** * Called by TransitionManager to play the transition. This calls * createAnimators() to set things up and create all of the animations and then * runAnimations() to actually start the animations. */ void playTransition(ViewGroup sceneRoot) { mStartValuesList = new ArrayList<TransitionValues>(); mEndValuesList = new ArrayList<TransitionValues>(); matchStartAndEnd(mStartValues, mEndValues); ArrayMap<Animator, AnimationInfo> runningAnimators = getRunningAnimators(); int numOldAnims = runningAnimators.size(); WindowId windowId = sceneRoot.getWindowId(); for (int i = numOldAnims - 1; i >= 0; i--) { Animator anim = runningAnimators.keyAt(i); if (anim != null) { AnimationInfo oldInfo = runningAnimators.get(anim); if (oldInfo != null && oldInfo.view != null && oldInfo.windowId == windowId) { TransitionValues oldValues = oldInfo.values; View oldView = oldInfo.view; TransitionValues startValues = getTransitionValues(oldView, true); TransitionValues endValues = getMatchedTransitionValues(oldView, true); boolean cancel = (startValues != null || endValues != null) && oldInfo.transition.areValuesChanged(oldValues, endValues); if (cancel) { if (anim.isRunning() || anim.isStarted()) { if (DBG) { Log.d(LOG_TAG, "Canceling anim " + anim); } anim.cancel(); } else { if (DBG) { Log.d(LOG_TAG, "removing anim from info list: " + anim); } runningAnimators.remove(anim); } } } } } createAnimators(sceneRoot, mStartValues, mEndValues, mStartValuesList, mEndValuesList); runAnimators(); }


 2878
2878

 被折叠的 条评论
为什么被折叠?
被折叠的 条评论
为什么被折叠?
 到【灌水乐园】发言


