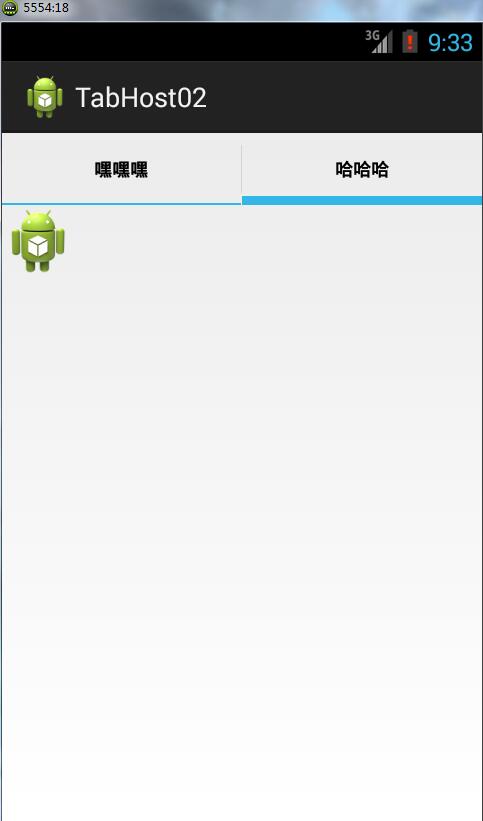
<LinearLayout xmlns:android="http://schemas.android.com/apk/res/android"
    xmlns:tools="http://schemas.android.com/tools"
    android:layout_width="match_parent"
    android:layout_height="match_parent"
    android:orientation="vertical">

    <TabHost
    android:id="@android:id/tabhost"
        android:layout_width="match_parent"
        android:layout_height="wrap_content">
        <LinearLayout
            android:layout_width="match_parent"
            android:layout_height="match_parent"
            android:orientation="vertical">
            <TabWidget
                android:id="@android:id/tabs"
                android:layout_width="match_parent"
                android:layout_height="wrap_content"/>
                <FrameLayout android:id="@android:id/tabcontent"
                    android:layout_width="match_parent"
                    android:layout_height="match_parent">
                   <!--  在这个FrameLayout里面定义各个标签也内容 ,另外也可以在结合代码添加更加灵活-->
                  <!--  第一个标签页tab1 -->
                   <LinearLayout
                       android:id="@+id/tab1"
                       android:layout_width="match_parent"
                       android:layout_height="match_parent"
                       android:orientation="vertical">
                       <ImageView
                           android:layout_width="wrap_content"
                           android:layout_height="wrap_content"
                           android:src="@drawable/icon_banana_5"/>
                   </LinearLayout>
                   <!--  第二个标签页tab2 -->
                   <LinearLayout
                       android:id="@+id/tab2"
                       android:layout_width="match_parent"
                       android:layout_height="match_parent"
                       android:orientation="vertical">
                   </LinearLayout>
                   <!--  第三个标签页tab3 -->
                   <LinearLayout
                       android:id="@+id/tab3"
                       android:layout_width="match_parent"
                       android:layout_height="match_parent"
                       android:orientation="vertical">
                   </LinearLayout>
                </FrameLayout>
        </LinearLayout>
    </TabHost>
</LinearLayout>
package com.test.tabhost;
import java.util.zip.Inflater;
import android.app.Activity;
import android.content.Context;
import android.graphics.drawable.Drawable;
import android.os.Bundle;
import android.view.LayoutInflater;
import android.view.Menu;
import android.view.MenuItem;
import android.view.View;
import android.widget.ImageView;
import android.widget.TabHost;
import android.widget.TabHost.TabSpec;
public class MainActivity extends Activity {
public TabHost tabhost;
@Override
protected void onCreate(Bundle savedInstanceState) {
super.onCreate(savedInstanceState);
setContentView(R.layout.activity_main);
/**
* 创建TabHost有两种方式,
*
* 第一种是继承TabActivity类,
* 然后用getTabHost方法来得到一个TabHost的实例,然后就可以给这个TabHost添加Tab了。
* 用这种方式根本就不用你自定义一个TabHost的组件,在布局文件中TabHost的id也是用系统给定的。 ( android:id="@android:id/tabhost")
* getTabHost方法会自动调用系统默认的布局来帮助你进行显示,所以代码里面使用setContentView是多余的。
*
* 第二种 使用自己定义的id时,必须使用findViewById(R.id.tabhostname);
* setup()或者setup(LocalActivityManager activityGroup)
* 如果使用后者 setContent(android.content.Intent)即setContent参数是一个实例化的Intent时
* 必须使用setup(LocalActivityManager activityGroup),而对应的整个类必须继承ActivityGroup
*
* 使用setup()时,整个类继承的是Activity。
*/
TabHost tabhost=getTabHost();
tabhost.addTab(tabhost.newTabSpec("tab1").setContent(R.id.tab1).setIndicator("黑人", getResources().getDrawable(R.drawable.ic_launcher)));
tabhost.addTab(tabhost.newTabSpec("tab2").setIndicator("标签2",null).setContent(R.id.tab2));
tabhost.addTab(tabhost.newTabSpec("tab3").setIndicator("标签3",null).setContent(R.id.tab3));
}
}第二种方式创建TabHost
使用自己定义的id
<TabHost xmlns:android="http://schemas.android.com/apk/res/android"
    xmlns:tools="http://schemas.android.com/tools"
    android:layout_width="match_parent"
    android:layout_height="match_parent"
    android:id="@+id/tabhost">
    <LinearLayout
        android:layout_width="match_parent"
        android:layout_height="match_parent"
        android:orientation="vertical">
        <TabWidget
            android:layout_width="match_parent"
            android:layout_height="wrap_content"
            android:id="@android:id/tabs">
        </TabWidget>
        <FrameLayout
            android:layout_width="match_parent"
            android:layout_height="match_parent"
            android:id="@android:id/tabcontent">

        </FrameLayout>
    </LinearLayout>
</TabHost>
代码部分
package com.test.tabhost;

import android.app.Activity;
import android.os.Bundle;
import android.view.LayoutInflater;
import android.view.Menu;
import android.view.MenuItem;
import android.widget.TabHost;
import android.widget.TabHost.TabSpec;

public class MainActivity extends Activity {

    @Override
    protected void onCreate(Bundle savedInstanceState) {
        super.onCreate(savedInstanceState);
        setContentView(R.layout.activity_main);
        TabHost tabhost = (TabHost)findViewById(R.id.tabhost);
        tabhost.setup();
        /**
         * 这里提到了LayoutInflater 所以这里简单的查了一点资料
         * 获取 LayoutInflater 实例的三种方式
         *1. LayoutInflater inflater = getLayoutInflater();//调用Activity的getLayoutInflater()
         *2. LayoutInflater inflater = LayoutInflater.from(context);
         *3. LayoutInflater inflater =  (LayoutInflater)context.getSystemService
         *                              (Context.LAYOUT_INFLATER_SERVICE);
         *其实,这三种方式本质是相同的,从源码中可以看出:
         *所以这三种方式最终本质是都是调用的Context.getSystemService()
         */

        /**
         * inflate()的作用就是将一个用xml定义的布局文件查找出来,
         * 注意与findViewById()的区别,inflate是加载一个布局文件,
         * 而findViewById则是从布局文件中查找一个控件。
         *
         * inflate(int resource, ViewGroup root, boolean attachToRoot)方法参数的含义
         *
         * resource:需要加载布局文件的id,意思是需要将这个布局文件中加载到Activity中来操作。
         *
         * ViewGroup root:填充的根视图
         *
         * attachToRoot 是否将载入的视图绑定到根视图中
         */

         /** 另外getSystemService()是Android很重要的一个API,
         * 它是Activity的一个方法,根据传入的NAME来取得对应的Object,
         * 然后转换成相应的服务对象。以下介绍系统相应的服务。
         */
        LayoutInflater inflater = LayoutInflater.from(getApplicationContext());
        //方法getTabContentView(),返回的是Tabhost中的FrameLayout,即将这两个布局注册为tabhost的content。
        inflater.inflate(R.layout.tab1, tabhost.getTabContentView());
        inflater.inflate(R.layout.tab2, tabhost.getTabContentView());
        tabhost.addTab(tabhost.newTabSpec("tab1").setIndicator("嘿嘿嘿").setContent(R.id.tab1));
        tabhost.addTab(tabhost.newTabSpec("tab2").setIndicator("哈哈哈").setContent(R.id.tab2));
    }
}


 663
663

 被折叠的 条评论
为什么被折叠?


