


概述
本篇文章介绍如何使用STM32HAL库,“以马达转动的状态示例”来说明,项目中使用的状态模式。参考该文章链接,比较懒,基本都是照搬框架。这种写法确实在项目后续新增功能时,方便不少,还是值得学习,这样的思路。加油!技术同仁们 ^_^。
硬件:STM32F103C8T6最小系统板
软件:Keil 5.29 + STM32CubeMX6.2.1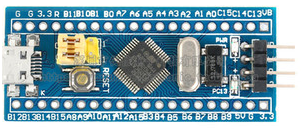
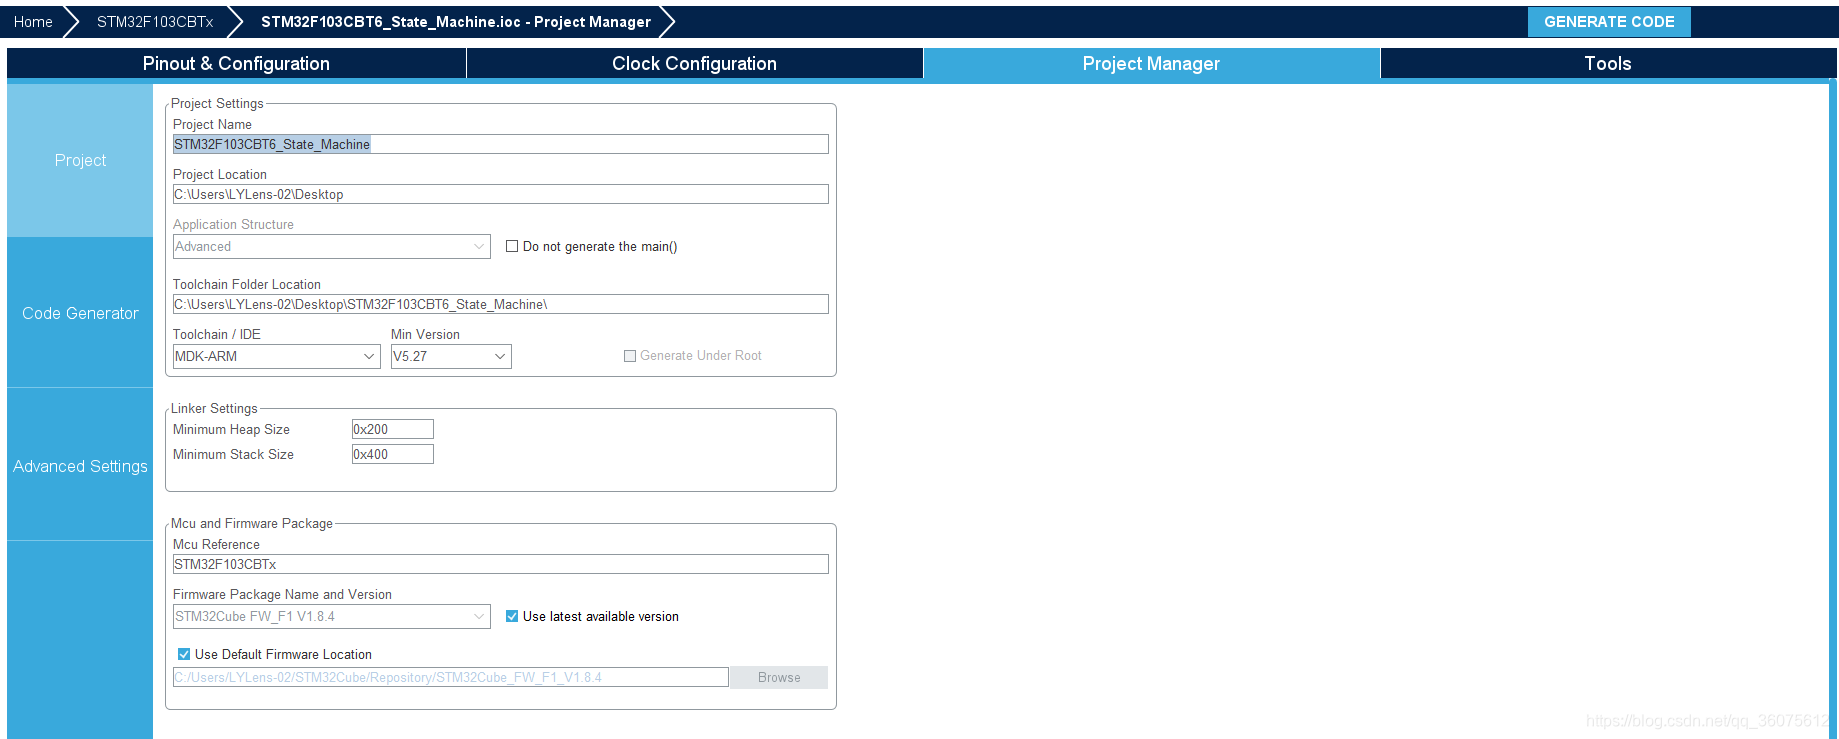
一、STM32CubeMx配置

二、编码
1、usart.c文件
.
.
.
/* USER CODE BEGIN 1 */
#include "stdio.h"

#ifdef __GNUC__
  /* With GCC/RAISONANCE, small printf (option LD Linker->Libraries->Small printf
     set to 'Yes') calls __io_putchar() */
  #define PUTCHAR_PROTOTYPE int __io_putchar(int ch)
#else
  #define PUTCHAR_PROTOTYPE int fputc(int ch, FILE *f)
#endif /* __GNUC__ */
/**
  * @brief  Retargets the C library printf function to the USART.
  * @param  None
  * @retval None
  */
PUTCHAR_PROTOTYPE
{
  /* Place your implementation of fputc here */
  /* e.g. write a character to the EVAL_COM1 and Loop until the end of transmission */
  HAL_UART_Transmit(&huart1, (uint8_t *)&ch, 1, 0xFFFF);

  return ch;
}
/* USER CODE END 1 */
2、main.c文件
/* USER CODE BEGIN Header */
/**
******************************************************************************
* @file : main.c
* @brief : Main program body
******************************************************************************
* @attention
*
* <h2><center>© Copyright (c) 2021 STMicroelectronics.
* All rights reserved.</center></h2>
*
* This software component is licensed by ST under BSD 3-Clause license,
* the "License"; You may not use this file except in compliance with the
* License. You may obtain a copy of the License at:
* opensource.org/licenses/BSD-3-Clause
*
******************************************************************************
*/
/* USER CODE END Header */
/* Includes ------------------------------------------------------------------*/
#include "main.h"
#include "usart.h"
#include "gpio.h"
/* Private includes ----------------------------------------------------------*/
/* USER CODE BEGIN Includes */
/* USER CODE END Includes */
/* Private typedef -----------------------------------------------------------*/
/* USER CODE BEGIN PTD */
/* USER CODE END PTD */
/* Private define ------------------------------------------------------------*/
/* USER CODE BEGIN PD */
/* USER CODE END PD */
/* Private macro -------------------------------------------------------------*/
/* USER CODE BEGIN PM */
/* USER CODE END PM */
/* Private variables ---------------------------------------------------------*/
/* USER CODE BEGIN PV */
/* USER CODE END PV */
/* Private function prototypes -----------------------------------------------*/
void SystemClock_Config(void);
/* USER CODE BEGIN PFP */
/* USER CODE END PFP */
/* Private user code ---------------------------------------------------------*/
/* USER CODE BEGIN 0 */
#include <stdio.h>
/***********************************************
1、定义状态接口,以电机工作的状态接口为例,每种状态下都可能发生
两种按键动作。
************************************************/
typedef struct State{
void (* stop)();
void (* runOrPause)();
}State;
/***********************************************
2、定义系统当前状态指针,保存系统的当前状态
************************************************/
State * pCurrentState;
/***********************************************
3、定义具体状态,根据状态迁移图来实现具体功能和状态切换。
************************************************/
void ignore(void);
void startRun(void);
void stopRun(void);
void pauseRun(void);
void resumeRun(void);
//空闲状态时,stop键操作无效,run/pause会开始转动
State IDLE = {
ignore,
startRun
};
//转动状态时,stop键会停止转动,run/pause会暂停
State RUN = {
stopRun,
pauseRun
};
//暂停状态时,stop键会停止转动,run/pause会恢复
State PAUSE = {
stopRun,
resumeRun
};
void ignore(void)
{
//空函数,不进行操作
}
void startRun(void)
{
//实现具体功能
printf("开始\n");
//进入转动状态
pCurrentState = &RUN;
}
void stopRun(void)
{
//实现具体功能
printf("停止\n");
//进入空闲状态
pCurrentState = &IDLE;
}
void pauseRun(void)
{
//实现具体功能
printf("暂停\n");
//进入暂停状态
pCurrentState = &PAUSE;
}
void resumeRun(void)
{
//实现具体功能
printf("恢复\n");
//进入转动状态
pCurrentState = &RUN;
}
/***********************************************
4、定义主程序上下文操作接口,主程序只关心当前状态,不关心状态之间
是怎么变化的。
************************************************/
void onStop(State *p);
void onRunOrPause(State *p);
State context = {
onStop,
onRunOrPause
};
void onStop(State *pThis)
{
pCurrentState->stop(pThis);
printf("pCurrentState->stop(pThis);\r\n");
}
void onRunOrPause(State *pThis)
{
pCurrentState->runOrPause(pThis);
printf("pCurrentState->runOrPause(pThis);\r\n");
}
/***********************************************
5、初始化系统当前状态指针,其实就是指定系统的起始状态
************************************************/
void init(void)
{
pCurrentState = &IDLE;
}
/***********************************************
6、主程序通过上下文操作接口来控制系统当前状态的变化
************************************************/
//void main()
//{
// init();
// context.runOrPause();//转动
// context.runOrPause();//暂停
// context.runOrPause();//转动
// context.stop();//停止
//}
/* USER CODE END 0 */
/**
* @brief The application entry point.
* @retval int
*/
int main(void)
{
/* USER CODE BEGIN 1 */
/* USER CODE END 1 */
/* MCU Configuration--------------------------------------------------------*/
/* Reset of all peripherals, Initializes the Flash interface and the Systick. */
HAL_Init();
/* USER CODE BEGIN Init */
/* USER CODE END Init */
/* Configure the system clock */
SystemClock_Config();
/* USER CODE BEGIN SysInit */
/* USER CODE END SysInit */
/* Initialize all configured peripherals */
MX_GPIO_Init();
MX_USART1_UART_Init();
/* USER CODE BEGIN 2 */
printf("state machine!!!\n");
init();
/* USER CODE END 2 */
/* Infinite loop */
/* USER CODE BEGIN WHILE */
while (1)
{
/* USER CODE END WHILE */
/* USER CODE BEGIN 3 */
}
/* USER CODE END 3 */
}
/**
* @brief System Clock Configuration
* @retval None
*/
void SystemClock_Config(void)
{
RCC_OscInitTypeDef RCC_OscInitStruct = {0};
RCC_ClkInitTypeDef RCC_ClkInitStruct = {0};
/** Initializes the RCC Oscillators according to the specified parameters
* in the RCC_OscInitTypeDef structure.
*/
RCC_OscInitStruct.OscillatorType = RCC_OSCILLATORTYPE_HSE;
RCC_OscInitStruct.HSEState = RCC_HSE_ON;
RCC_OscInitStruct.HSEPredivValue = RCC_HSE_PREDIV_DIV1;
RCC_OscInitStruct.HSIState = RCC_HSI_ON;
RCC_OscInitStruct.PLL.PLLState = RCC_PLL_ON;
RCC_OscInitStruct.PLL.PLLSource = RCC_PLLSOURCE_HSE;
RCC_OscInitStruct.PLL.PLLMUL = RCC_PLL_MUL9;
if (HAL_RCC_OscConfig(&RCC_OscInitStruct) != HAL_OK)
{
Error_Handler();
}
/** Initializes the CPU, AHB and APB buses clocks
*/
RCC_ClkInitStruct.ClockType = RCC_CLOCKTYPE_HCLK|RCC_CLOCKTYPE_SYSCLK
|RCC_CLOCKTYPE_PCLK1|RCC_CLOCKTYPE_PCLK2;
RCC_ClkInitStruct.SYSCLKSource = RCC_SYSCLKSOURCE_PLLCLK;
RCC_ClkInitStruct.AHBCLKDivider = RCC_SYSCLK_DIV1;
RCC_ClkInitStruct.APB1CLKDivider = RCC_HCLK_DIV2;
RCC_ClkInitStruct.APB2CLKDivider = RCC_HCLK_DIV1;
if (HAL_RCC_ClockConfig(&RCC_ClkInitStruct, FLASH_LATENCY_2) != HAL_OK)
{
Error_Handler();
}
}
/* USER CODE BEGIN 4 */
void HAL_GPIO_EXTI_Callback(uint16_t GPIO_Pin)
{
// if(GPIO_Pin==KEY1_Pin)
// {
// for(long i = 1;i<72000;i++){}; //消除抖动
// if(HAL_GPIO_ReadPin(KEY1_GPIO_Port,KEY1_Pin)==1)
// {
// //context.stop();//停止
// }
// //__HAL_GPIO_EXTI_CLEAR_IT(KEY1_Pin);
// }
// else
if(GPIO_Pin==KEY2_Pin)
{
for(long i = 1;i<72000;i++){};
if(HAL_GPIO_ReadPin(KEY2_GPIO_Port,KEY2_Pin)==0)
{
context.runOrPause();//转动、暂停
}
//__HAL_GPIO_EXTI_CLEAR_IT(KEY2_Pin);
}
else if(GPIO_Pin==KEY3_Pin)
{
for(long i = 1;i<72000;i++){};
if(HAL_GPIO_ReadPin(KEY3_GPIO_Port,KEY3_Pin)==0)
{
context.stop();//停止
}
//__HAL_GPIO_EXTI_CLEAR_IT(KEY3_Pin);
}
__HAL_GPIO_EXTI_CLEAR_IT(GPIO_Pin);
}
/* USER CODE END 4 */
/**
* @brief This function is executed in case of error occurrence.
* @retval None
*/
void Error_Handler(void)
{
/* USER CODE BEGIN Error_Handler_Debug */
/* User can add his own implementation to report the HAL error return state */
__disable_irq();
while (1)
{
}
/* USER CODE END Error_Handler_Debug */
}
#ifdef USE_FULL_ASSERT
/**
* @brief Reports the name of the source file and the source line number
* where the assert_param error has occurred.
* @param file: pointer to the source file name
* @param line: assert_param error line source number
* @retval None
*/
void assert_failed(uint8_t *file, uint32_t line)
{
/* USER CODE BEGIN 6 */
/* User can add his own implementation to report the file name and line number,
ex: printf("Wrong parameters value: file %s on line %d\r\n", file, line) */
/* USER CODE END 6 */
}
#endif /* USE_FULL_ASSERT */
/************************ (C) COPYRIGHT STMicroelectronics *****END OF FILE****/
三、运行结果
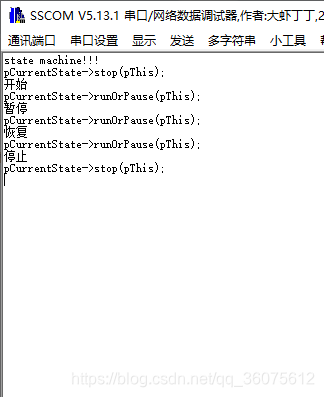
代码->链接
四、总结
这种状态机模式,在开发产品经常使用到该模式。


 1289
1289

 被折叠的 条评论
为什么被折叠?
被折叠的 条评论
为什么被折叠?
 到【灌水乐园】发言


