


Spring Boot 2.2.2.RELEASE
Spring Security是一个功能强大且高度可定制的身份验证和访问控制框架,它是用于保护基于Spring的应用程序的实际标准。
Spring Security为Java应用程序提供身份验证和授权,可以轻松扩展以满足自定义要求。
1. 使用内存保存用户信息
<dependency>
    <groupId>org.springframework.boot</groupId>
    <artifactId>spring-boot-starter-web</artifactId>
</dependency>
<dependency>
    <groupId>org.springframework.boot</groupId>
    <artifactId>spring-boot-starter-security</artifactId>
</dependency>
<dependency>
    <groupId>org.springframework.boot</groupId>
    <artifactId>spring-boot-starter-thymeleaf</artifactId>
</dependency>
home.html
有无权限都可访问
<!DOCTYPE html>
<html xmlns="http://www.w3.org/1999/xhtml" xmlns:th="https://www.thymeleaf.org">
<head>
    <title>Spring Security Test</title>
</head>
<body>
<h1>home.html</h1>
<p><a th:href="@{/user}">点击跳转 user.html</a></p>
</body>
</html>
loginPage.html
获取用户名和密码并将其发布到/login的表单
根据配置,Spring Security提供了UsernamePasswordAuthenticationFilter来拦截该请求并验证用户身份。
如果用户认证失败,页面将被重定向到/login?error,并且我们的页面将显示相应的登录错误消息。
如果用户认证成功,成功注销后,会默认重定向到/login?logout,并且我们的页面将显示相应的登出成功消息。
<!DOCTYPE html>
<html xmlns="http://www.w3.org/1999/xhtml" xmlns:th="https://www.thymeleaf.org">
<head>
    <title>Spring Security Test</title>
</head>
<body>
<h1>login.html</h1>
<p>权限 USER: user user</p>
<p>权限 ADMIN: admin admin</p>
<div th:if="${param.error}">
    账号密码错误
</div>
<div th:if="${param.logout}">
    你已登出
</div>
<form th:action="@{/login}" method="post">
    <div><label> User Name : <input type="text" name="login_user"/> </label></div>
    <div><label> Password: <input type="password" name="login_password"/> </label></div>
    <div><input type="submit" value="登录"/></div>
</form>
</body>
</html>
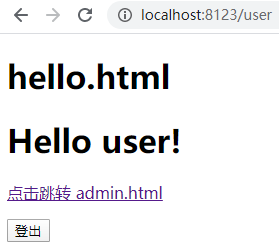
user.html
需要USER权限
注销表单将POST提交到 /logout
成功注销后,如果未修改过登录url,它将把用户默认重定向到 /login?logout
<!DOCTYPE html>
<html xmlns="http://www.w3.org/1999/xhtml" xmlns:th="https://www.thymeleaf.org">
<head>
    <title>Spring Security Test</title>
</head>
<body>
<h1>hello.html</h1>
<h1>Hello [[${#httpServletRequest.remoteUser}]]!</h1>
<p><a th:href="@{/admin}">点击跳转 admin.html</a></p>

<form th:action="@{/logout}" method="post">
    <input type="submit" value="登出"/>
</form>
</body>
</html>
admin.html
需要ADMIN权限
<!DOCTYPE html>
<html xmlns="http://www.w3.org/1999/xhtml" xmlns:th="https://www.thymeleaf.org">
<head>
    <title>Spring Security Test</title>
</head>
<body>
<h1>admin.html</h1>
<h1>Hello [[${#httpServletRequest.remoteUser}]]!</h1>
<p><a th:href="@{/user}">点击跳转 user.html</a></p>

<form th:action="@{/logout}" method="post">
    <input type="submit" value="登出"/>
</form>
</body>
</html>
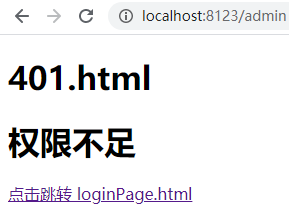
401.html
权限不足
<!DOCTYPE html>
<html xmlns="http://www.w3.org/1999/xhtml" xmlns:th="https://www.thymeleaf.org">
<head>
    <title>Spring Security Test</title>
</head>
<body>
<h1>401.html</h1>
<h1>权限不足</h1>
<p><a th:href="@{/loginPage}">点击跳转 loginPage.html</a></p>
</body>
</html>
TestController
页面控制器
@Controller
public class TestController {
    @RequestMapping(path = {"/", "/home"})
    public ModelAndView home() {
        return new ModelAndView("home");
    }

    @RequestMapping("/loginPage")
    public ModelAndView loginPage() {
        return new ModelAndView("loginPage");
    }

    @RequestMapping("/user")
    public ModelAndView user() {
        return new ModelAndView("user");
    }

    @RequestMapping("/admin")
    public ModelAndView admin() {
        return new ModelAndView("admin");
    }

    @RequestMapping("/401")
    public ModelAndView error401() {
        return new ModelAndView("error/401");
    }
}
WebSecurityConfig 继承 WebSecurityConfigurerAdapter 配置类,然后重写了它的config(HttpSecurity)方法和configure(WebSecurity)方法, 来实现过滤器链的配置,HttpSecurity完成相应配置完成过滤器链的构建,然后由 WebSecurity 将它们放到 FilterChainProxy 实例中返回。
@Configuration
@EnableWebSecurity
public class WebSecurityConfig extends WebSecurityConfigurerAdapter {

    /**
     * 认证管理器配置,用于信息获取来源(UserDetails)以及密码校验规则(PasswordEncoder)
     * @param auth
     * @throws Exception
     */
    @Override
    protected void configure(AuthenticationManagerBuilder auth) throws Exception {
        auth
                // 使用内存认证,在内存中保存两个用户
                .inMemoryAuthentication()
                .passwordEncoder(passwordEncoder())
                // admin 拥有ADMIN和USER的权限
                .withUser("admin").password(passwordEncoder().encode("admin")).roles("ADMIN", "USER")
                .and()
                // user 拥有USER的权限
                .withUser("user").password(passwordEncoder().encode("user")).roles("USER");
    }

    /**
     * 核心过滤器配置,更多使用ignoring()用来忽略对静态资源的控制
     * @param web
     * @throws Exception
     */
    @Override
    public void configure(WebSecurity web) throws Exception {
        web
                .ignoring()
                .antMatchers("/image/**");
    }

    /**
     * 安全过滤器链配置,自定义安全访问策略
     * @param http
     * @throws Exception
     */
    @Override
    protected void configure(HttpSecurity http) throws Exception {
        http
                .authorizeRequests()
                // / 和 /home 路径配置为不需要任何身份验证,其他所有路径必须经过验证
                .antMatchers("/", "/home").permitAll()
                // /hello 需要USER的权限
                .antMatchers("/user").hasRole("USER")
                // /admin 需要ADMIN的权限
                .antMatchers("/admin").hasRole("ADMIN")
                // 其他请求都需要已认证
                .anyRequest().authenticated()
                .and()
                // 使用表单登录
                .formLogin()
                // 自定义username 和password参数
                .usernameParameter("login_user")
                .passwordParameter("login_password")
                // 自定义登录页地址
                .loginPage("/loginPage")
                // 验证表单的地址,由过滤器 UsernamePasswordAuthenticationFilter 拦截处理
                .loginProcessingUrl("/login").permitAll()
                .and()
                // 默认为 /logout ,登出后默认跳转到 /login?logout ,上面修改了登录页地址后回跳到 /loginPage?logout
                .logout().permitAll()
                .and()
                // 权限不足跳转 /401
                .exceptionHandling().accessDeniedPage("/401")
                .and()
                .csrf().disable();
    }

    /**
     * 更改密码加密方式,使用BCrypt加密
     * @return
     */
    @Bean
    public static BCryptPasswordEncoder passwordEncoder() {
        return new BCryptPasswordEncoder();
    }
}
测试
/ /home 有无权限都可访问,访问 / /home 不受security保护,
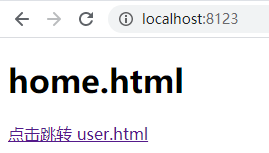
点击跳转到 user.html ,需要USER权限,目前未登录,跳到登录页
访问 /user /admin 因为需要认证信息等,没有认证会跳到登录页 /loginPage
默认spring security使用 /login 为表单提交地址,
被过滤器 UsernamePasswordAuthenticationFilter 拦截处理,进行验证等

user 登录,验证成功,会跳回原请求地址
点击跳转 admin.html,权限不足而跳转401
登出
登出url默认为 /logout ,登出后默认跳转到 /login?logout ,
上面修改了登录页地址,所以会跳到 /loginPage?logout

admin登录
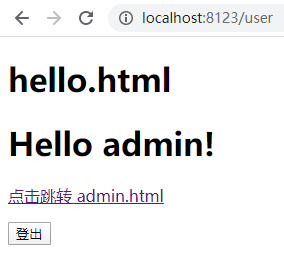
admin有权限,未跳到401

2. 使用数据库保存用户信息
修改pom.xml
添加
<dependency>
 <groupId>org.mybatis.spring.boot</groupId>
    <artifactId>mybatis-spring-boot-starter</artifactId>
    <version>2.1.0</version>
</dependency>
<dependency>
    <groupId>mysql</groupId>
    <artifactId>mysql-connector-java</artifactId>
    <version>5.1.47</version>
    <scope>runtime</scope>
</dependency>
<dependency>
    <groupId>org.projectlombok</groupId>
    <artifactId>lombok</artifactId>
    <version>1.18.4</version>
    <scope>provided</scope>
</dependency>
User
实现UserDetails,保存用户信息
@Data
public class User implements UserDetails, Serializable {

    private Integer id;

    private String username;

    private String password;

    private List<Role> authorities;

    @Override
    public Collection<? extends GrantedAuthority> getAuthorities() {
        return authorities;
    }

    @Override
    public String getPassword() {
        return password;
    }

    @Override
    public String getUsername() {
        return username;
    }

    @Override
    // 是否账户没有过期
    public boolean isAccountNonExpired() {
        return true;
    }

    @Override
    // 是否账户没有锁定
    public boolean isAccountNonLocked() {
        return true;
    }

    @Override
    // 是否密码没有过期
    public boolean isCredentialsNonExpired() {
        return true;
    }

    @Override
    // 是否账户可用
    public boolean isEnabled() {
        return true;
    }
}
Role
实现 GrantedAuthority,保存角色信息
@Data
public class Role implements GrantedAuthority {

    private Integer id;

    // authority 需要加上前缀 ROLE_
    private String name;

    @Override
    public String getAuthority() {
        return name;
    }
}
创建user,role和user_role的关联表
CREATE TABLE `user`  (
  `id` int(11) NOT NULL AUTO_INCREMENT,
  `username` varchar(255) CHARACTER SET utf8 COLLATE utf8_general_ci NULL DEFAULT NULL,
  `password` varchar(255) CHARACTER SET utf8 COLLATE utf8_general_ci NULL DEFAULT NULL,
  PRIMARY KEY (`id`) USING BTREE
) ENGINE = InnoDB AUTO_INCREMENT = 3 CHARACTER SET = utf8 COLLATE = utf8_general_ci ROW_FORMAT = Dynamic;

CREATE TABLE `role`  (
  `id` int(11) NOT NULL AUTO_INCREMENT,
  `name` varchar(255) CHARACTER SET utf8 COLLATE utf8_general_ci NULL DEFAULT NULL,
  PRIMARY KEY (`id`) USING BTREE
) ENGINE = InnoDB AUTO_INCREMENT = 3 CHARACTER SET = utf8 COLLATE = utf8_general_ci ROW_FORMAT = Dynamic;

CREATE TABLE `user_role`  (
  `id` int(11) NOT NULL AUTO_INCREMENT,
  `user_id` int(11) NULL DEFAULT NULL,
  `role_id` int(11) NULL DEFAULT NULL,
  PRIMARY KEY (`id`) USING BTREE
) ENGINE = InnoDB AUTO_INCREMENT = 4 CHARACTER SET = utf8 COLLATE = utf8_general_ci ROW_FORMAT = Dynamic;
user的密码使用 passwordEncoder.encode() 加密
INSERT INTO `role` VALUES (1, 'ROLE_USER');
INSERT INTO `role` VALUES (2, 'ROLE_ADMIN');

INSERT INTO `user` VALUES (1, 'user', '$2a$10$8vuNY0RolfwVQSwN1inFquPGA8pWK5CZVVwWih4ZO8m97IK9/d5ni');
INSERT INTO `user` VALUES (2, 'admin', '$2a$10$/ZTGd1HMcIHYfafdqiSuUOLPgSf0dcfModVH/QWiP43jO8WtUZPA.');

INSERT INTO `user_role` VALUES (1, 1, 1);
INSERT INTO `user_role` VALUES (2, 2, 1);
INSERT INTO `user_role` VALUES (3, 2, 2);
创建mapper,service及实现类等
UserMapper
<select id="getByUsername" resultMap="UserResultMap">
    select * from `user` where username = #{username}
</select>
RoleMapper
<select id="getByUserId" resultMap="RoleResultMap">
    select role.* from role
    left join user_role on user_role.role_id = role.id
    where user_id = #{userId}
</select>
实现 UserDetailsService ,该接口定义根据用户名获取用户所有信息,包括用户和权限
@Service("userDetailsService")
public class UserDetailsServiceImpl implements UserDetailsService {

    @Autowired
    private UserService userService;

    @Autowired
    private RoleService roleService;

    @Override
    public UserDetails loadUserByUsername(String username) throws UsernameNotFoundException {
        User user = userService.getByUsername(username);
        user.setAuthorities(roleService.getByUserId(user.getId()));

        return user;
    }
}
修改 WebSecurityConfig
@Autowired
private UserDetailsService userDetailsService;

@Override
protected void configure(AuthenticationManagerBuilder auth) throws Exception {
    auth
            .userDetailsService(userDetailsService)
            .passwordEncoder(passwordEncoder());
}
效果与使用内存保存用户信息一致
3. 开启方法级别保护
需要
修改 WebSecurityConfig
@Configuration
@EnableWebSecurity
// 开启方法级别保护
@EnableGlobalMethodSecurity(prePostEnabled = true)
public class WebSecurityConfig extends WebSecurityConfigurerAdapter
注释掉
//.antMatchers("/user").hasRole("USER")
//.antMatchers("/admin").hasRole("ADMIN")
修改TestController,
hasRole 不需要加前缀 ROLE_
hasAuthority 需要加前缀 ROLE_
// 需要开启方法级别保护
@PreAuthorize("hasRole('USER')")
@RequestMapping("/user")
public ModelAndView user() {
    return new ModelAndView("user");
}

// 需要开启方法级别保护
@PreAuthorize("hasRole('ADMIN')")
@RequestMapping("/admin")
public ModelAndView admin() {
    return new ModelAndView("admin");
}
参考:
Spring Security 文档
《深入理解Spring Cloud与微服务构建》的源码
Spring Security 实战干货:用户信息UserDetails相关入门
Spring Security 实战干货:如何保护用户密码
Spring Security 实战干货:自定义配置类入口WebSecurityConfigurerAdapter
Spring Security 实战干货: 玩转自定义登录
Spring Security 实战干货:内置 Filter 全解析
Spring Security 实战干货:RBAC权限控制概念的理解
Spring Security 实战干货:基于注解的接口角色访问控制


 3934
3934


 被折叠的 条评论
为什么被折叠?
被折叠的 条评论
为什么被折叠?
 到【灌水乐园】发言


