


说明
只需要操作两个容器
a. gateway(镜像如:apache/apisix:2.14.1-alpine)
b. dashboard(镜像如:apache/apisix-dashboard:2.13-alpine)
步骤
- 准备插件:xm-http-check.lua
local core = require("apisix.core")
local plugin_name = "xm-http-check"
local schema = {
type = "object",
properties = {
reqProp = {
type = "object"
}
}
}
local _M = {
version = 0.2,
priority = 100,
name = plugin_name,
schema = schema,
}
function _M.check_schema(conf, schema_type)
return core.schema.check(schema, conf)
end
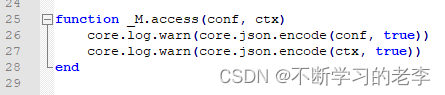
function _M.access(conf, ctx)
core.log.warn(core.json.encode(conf, true))
core.log.warn(core.json.encode(ctx, true))
end
function _M.body_filter(conf, ctx)
end
function _M.log(conf, ctx)
local headers = ngx.req.get_headers()
core.log.warn("headers: ", core.json.encode(headers))
local uriArgs = ngx.req.get_uri_args()
core.log.warn("uriArgs: ",core.json.encode(uriArgs))
for field, value in pairs(uriArgs) do
core.log.warn("field: ", field)
core.log.warn("value: ", value)
end
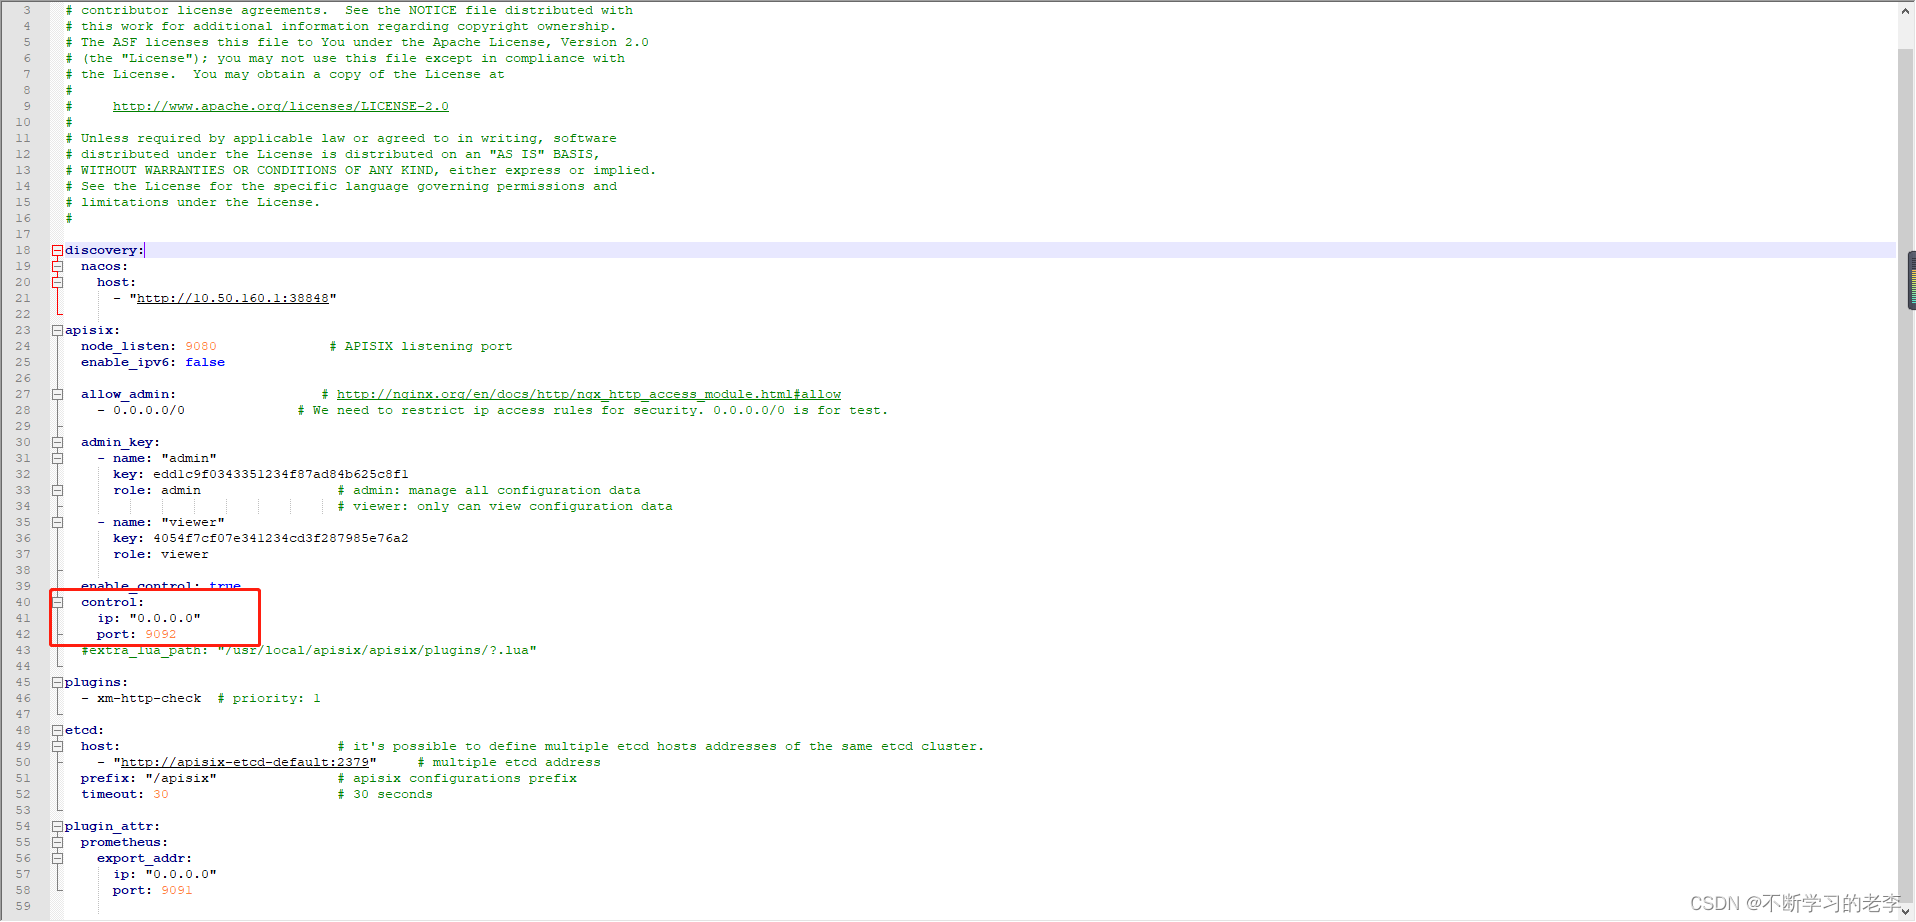
end
return _M
-
进入gateway容器
-
将xm-http-check.lua挂载到gateway容器,路径 /usr/local/apisix/apisix/plugins/xm-http-check.lua
-
修改gateway容器配置,路径 /usr/local/apisix/conf/config.yaml,如下图添加插件。
也可以修改默认配置(官方不建议),路径 /usr/local/apisix/conf/config-default.yaml,文件声明了许多内置插件plugins: - xm-http-check # 说明:这里的xm-http-check对应lua内容的plugin_name # 如果需要使用系统内置插件,还需要参考config-default.yaml,将内置的插件写入到这里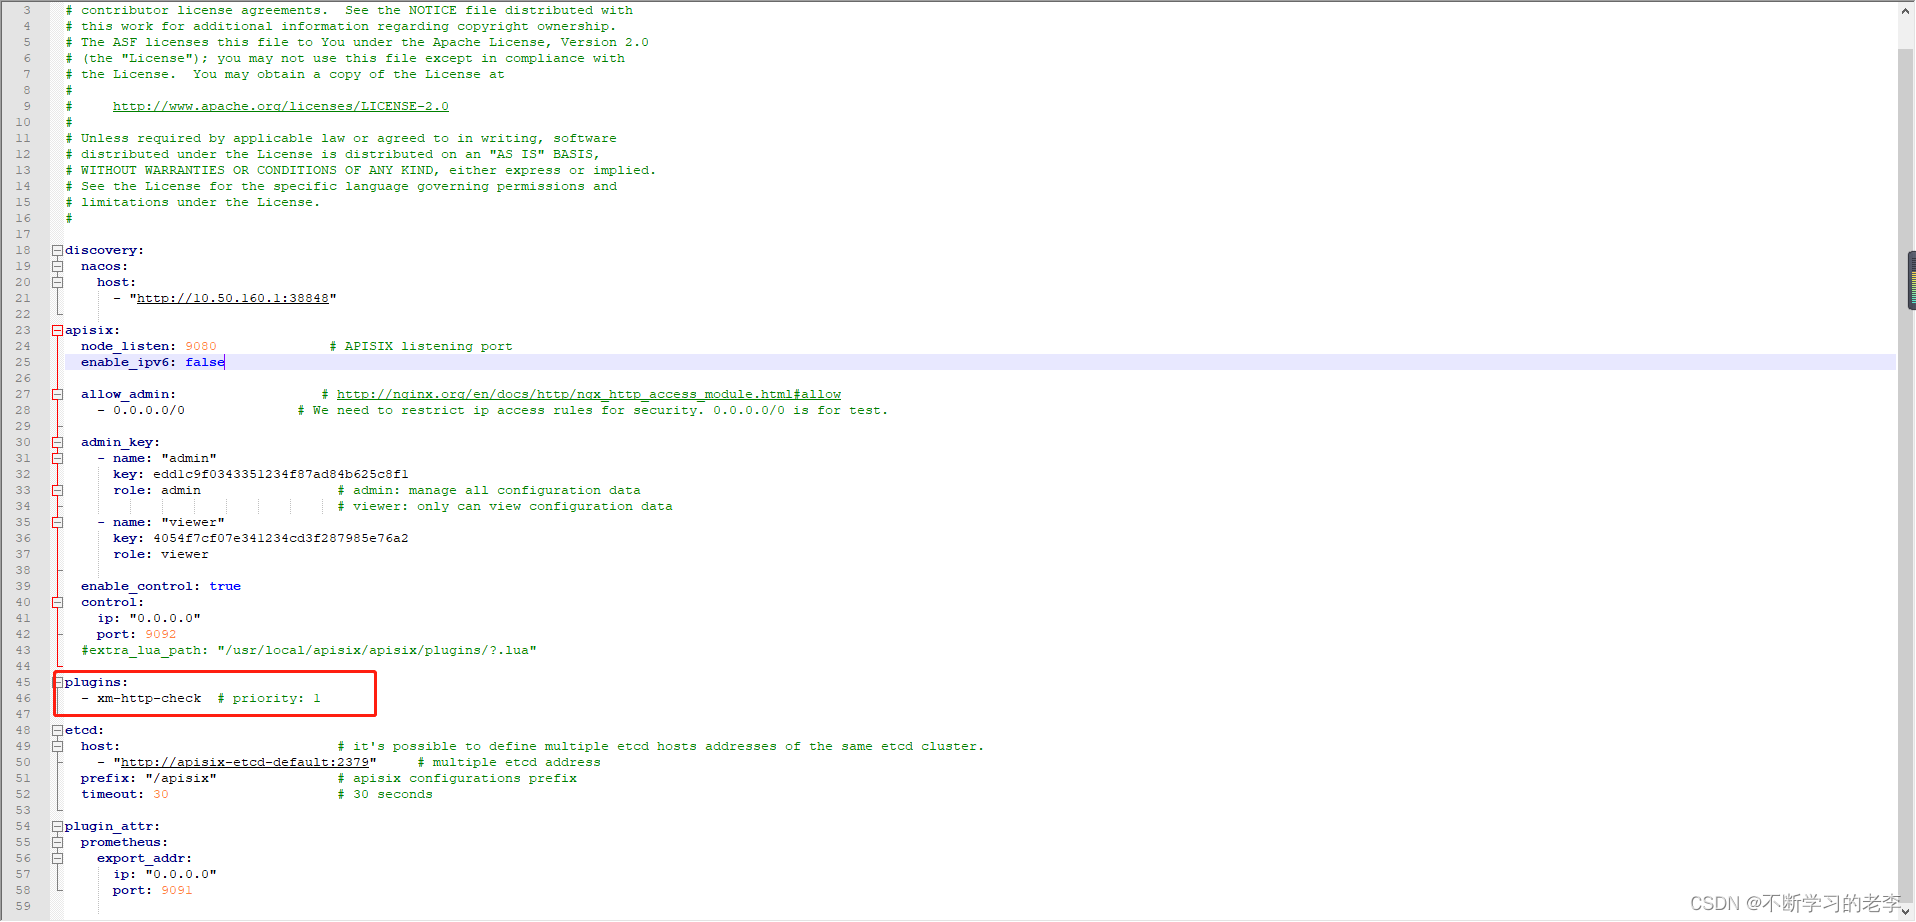
-
重启gateway容器,刚才操作的文件记得映射到主机防止还原
-
再次进入容器,在容器任意位置,输入命令
curl localhost:9092/v1/schema > schema.json
这里的9092是配置的control端口,默认为9092
-
将当前目录生成的schema.json导出到主机
-
进入dashboard容器,进入 /usr/local/apisix-dashboard/conf,将刚才导出的schema.json覆盖当前目录下的schema.json
说明:schema.json内容是声明了所有插件的约束,所以需要将最新的插件信息同步到dashboard中,才能在页面查看到最新的插件
-
重启dashboard容器,同样需要注意映射文件到主机
-
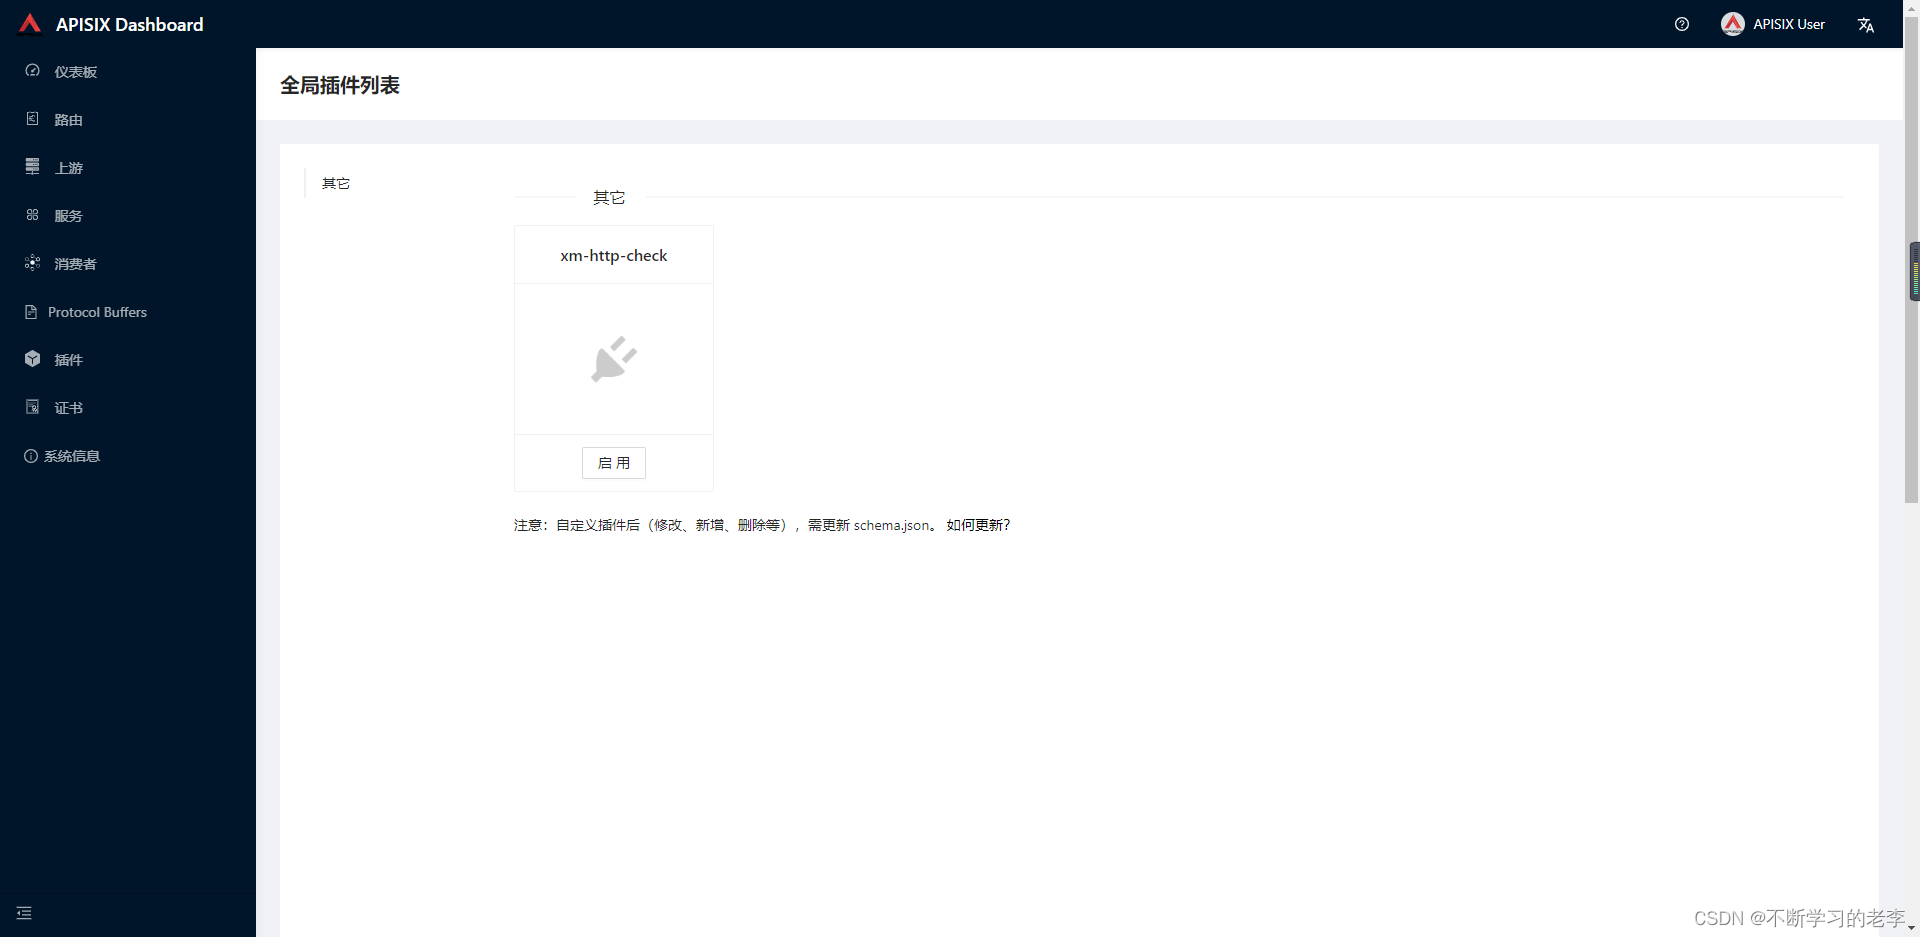
进入APISIX的页面,即可看到我们自定义的插件
在这里没有其他插件,因为gateway中的config.yaml覆盖了config-default.yaml的插件配置,如果需要内置插件,可复制参考config-default.yaml中的插件内容
-
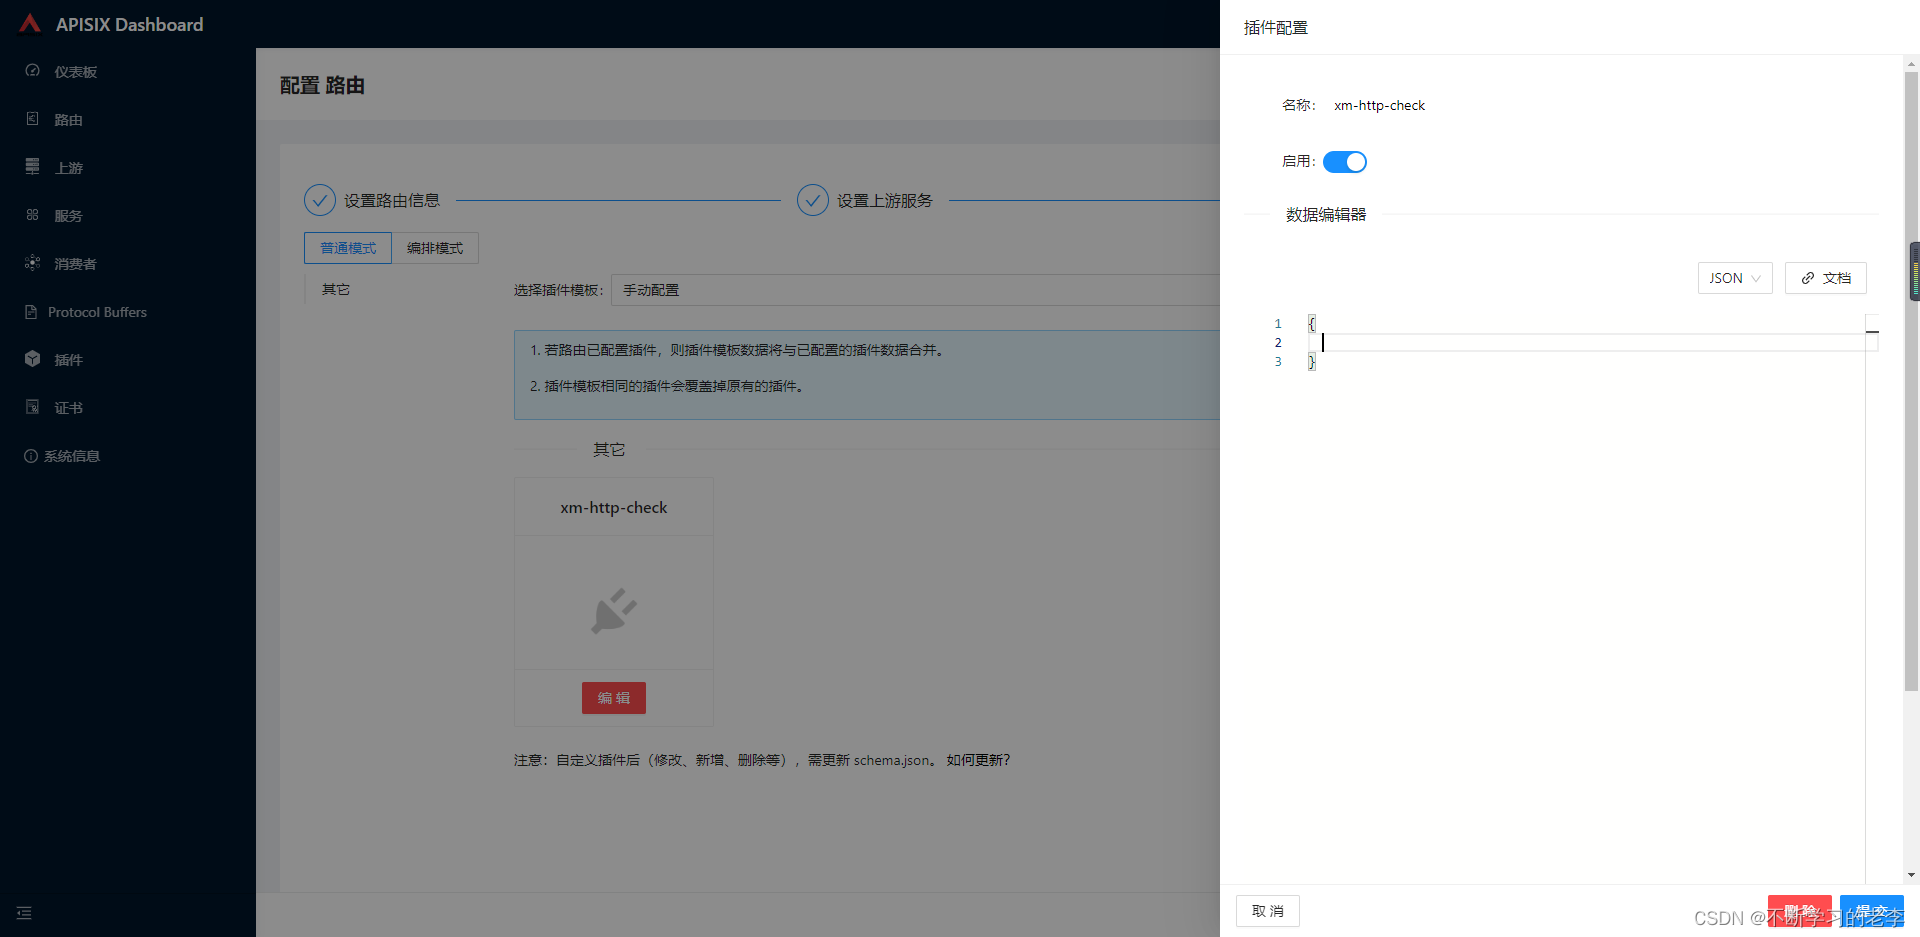
创建路由,选择启用刚才自建插件,插件内容不需要写,没有进行校验。
-
访问该路由,可以看到我们的插件,第26行、27行输出的log


 1010
1010


 被折叠的 条评论
为什么被折叠?
被折叠的 条评论
为什么被折叠?
 到【灌水乐园】发言


