


主要内容:mqtt的连接,组件之间传参,加入echarts表格
目录
主要内容:mqtt的连接,组件之间传参,加入echarts表格
1.mqtt连接:
mqtt的连接较为简单,主要使用以下页面的内容即可,为了以防万一在这里存入一份
如何在 Vue 项目中使用 MQTT | EMQ (emqx.com)
安装 MQTT 客户端库
以下 2,3 方法更适用于通过直接引用 Vue.js 创建的 Vue 项目。
-
通过命令行安装,可以使用 npm 或 yarn 命令(二者选一)选择下载4.3.7版本
-
npm install mqtt --saveyarn add mqtt -
通过 CDN 引入
<script src="https://unpkg.com/mqtt/dist/mqtt.min.js"></script> -
下载到本地,然后使用相对路径引入
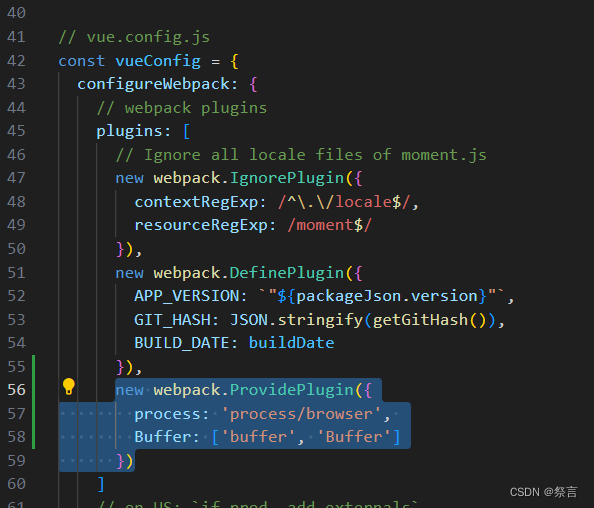
<script src="/your/path/to/mqtt.min.js"></script>引入后要在vue.config.js中添加:
MQTT 的使用
连接 MQTT 服务器
连接关键代码:
<script>
import mqtt from "mqtt";

export default {
  data() {
    return {
      connection: {
        protocol: "ws",
        host: "broker.emqx.io",
        // ws: 8083; wss: 8084
        port: 8083,
        endpoint: "/mqtt",
        // for more options, please refer to https://github.com/mqttjs/MQTT.js#mqttclientstreambuilder-options
        clean: true,
        connectTimeout: 30 * 1000, // ms
        reconnectPeriod: 4000, // ms
        clientId: "emqx_vue_" + Math.random().toString(16).substring(2, 8),
        // auth
        username: "emqx_test",
        password: "emqx_test",
      },
      subscription: {
        topic: "topic/mqttx",
        qos: 0,
      },
      publish: {
        topic: "topic/browser",
        qos: 0,
        payload: '{ "msg": "Hello, I am browser." }',
      },
      receiveNews: "",
      qosList: [0, 1, 2],
      client: {
        connected: false,
      },
      subscribeSuccess: false,
      connecting: false,
      retryTimes: 0,
    };
  },

  methods: {
    initData() {
      this.client = {
        connected: false,
      };
      this.retryTimes = 0;
      this.connecting = false;
      this.subscribeSuccess = false;
    },
    handleOnReConnect() {
      this.retryTimes += 1;
      if (this.retryTimes > 5) {
        try {
          this.client.end();
          this.initData();
          this.$message.error("Connection maxReconnectTimes limit, stop retry");
        } catch (error) {
          this.$message.error(error.toString());
        }
      }
    },
    createConnection() {
      try {
        this.connecting = true;
        const { protocol, host, port, endpoint, ...options } = this.connection;
        const connectUrl = `${protocol}://${host}:${port}${endpoint}`;
        this.client = mqtt.connect(connectUrl, options);
        if (this.client.on) {
          this.client.on("connect", () => {
            this.connecting = false;
            console.log("Connection succeeded!");
          });
          this.client.on("reconnect", this.handleOnReConnect);
          this.client.on("error", (error) => {
            console.log("Connection failed", error);
          });
          this.client.on("message", (topic, message) => {
            this.receiveNews = this.receiveNews.concat(message);
            console.log(`Received message ${message} from topic ${topic}`);
          });
        }
      } catch (error) {
        this.connecting = false;
        console.log("mqtt.connect error", error);
      }
    },
  },
};
</script>
订阅主题
doSubscribe() {
  const { topic, qos } = this.subscription
  this.client.subscribe(topic, { qos }, (error, res) => {
    if (error) {
      console.log('Subscribe to topics error', error)
      return
    }
    this.subscribeSuccess = true
    console.log('Subscribe to topics res', res)
  })
}
取消订阅
doUnSubscribe() {
  const { topic } = this.subscription
  this.client.unsubscribe(topic, error => {
    if (error) {
      console.log('Unsubscribe error', error)
    }
  })
}
消息发布
doPublish() {
  const { topic, qos, payload } = this.publish
  this.client.publish(topic, payload, { qos }, error => {
    if (error) {
      console.log('Publish error', error)
    }
  })
}
断开连接
destroyConnection() {
  if (this.client.connected) {
    try {
      this.client.end(false, () => {
        this.initData()
        console.log('Successfully disconnected!')
      })
    } catch (error) {
      console.log('Disconnect failed', error.toString())
    }
  }
}
2.组件之间相互传参:
这个也是我在网上找到的方法,把链接放在这里
(19条消息) vue任意两个组件的传值(事件总线)_jaykeler的博客-CSDN博客
总结一下就是
先在main.js加入:
var bus = new Vue()//新创建一个实例,用以传值
Vue.prototype.bus = bus//挂载在vue的原型上
在需要传值的页面的method放入:
sendTo () {
      this.bus.$emit('sendTo', this.name)//注册事件,传值
    }
接收页面的mounted或者created放入:
this.bus.$on('sendTo', name=> {
      this.a= name
    })
两个sendTo只要相同就可以进行接收
3.加入echarts表格
首先将组件进行添加:
npm install echarts --save然后在main.js中注册
import * as echarts from 'echarts'

Vue.prototype.$echarts = echarts
然后在template组件中
    <div class="datamap">
      <div id="one"></div>
    </div>
在script中
export default {
name: 'dataview',
data() {
return {}
},
mounted() {
this.init()
},
methods: {
init() {
setTimeout(() => {
this.initCharOne()
}, 1000)
},
//两个图标的生成函数
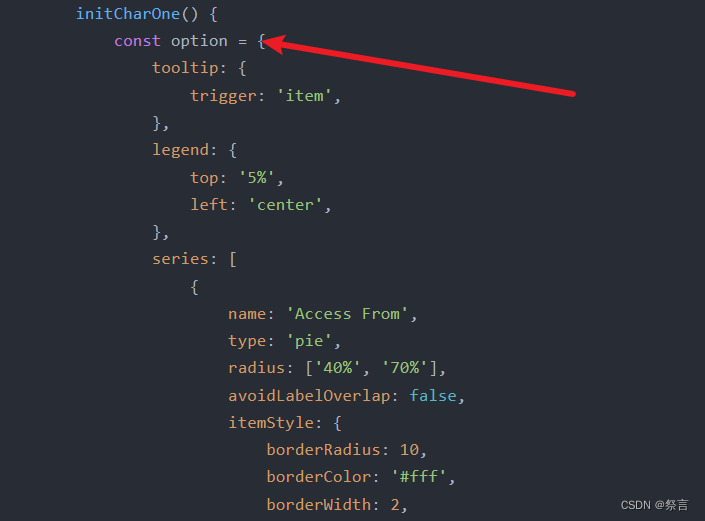
initCharOne() {
const option = {
tooltip: {
trigger: 'item',
},
legend: {
top: '5%',
left: 'center',
},
series: [
{
name: 'Access From',
type: 'pie',
radius: ['40%', '70%'],
avoidLabelOverlap: false,
itemStyle: {
borderRadius: 10,
borderColor: '#fff',
borderWidth: 2,
},
label: {
show: false,
position: 'center',
},
emphasis: {
label: {
show: true,
fontSize: 40,
fontWeight: 'bold',
},
},
labelLine: {
show: false,
},
data: [
{ value: 1000, name: '优' },
{ value: 735, name: '良' },
{ value: 580, name: '中' },
{ value: 484, name: '差' },
],
},
],
}
var myChartOne = this.$echarts.init(document.getElementById('one')) //图标初始化\
myChartOne.setOption(option)
window.onresize = function () {
myChartOne.resize()
}
},
}注意:
当你需要什么图表的时候就去echarts官网找,然后将option的按上面的代码进行修改即可;

改为:

这一部分内容也记得需要更改,其中one就是上面容器中的one,需要与容器进行对应
在style中:
<style scoped>
.datamap #one {
    height: 500px;
}


</style>


 773
773


 被折叠的 条评论
为什么被折叠?
被折叠的 条评论
为什么被折叠?
 到【灌水乐园】发言


