


遗留问题
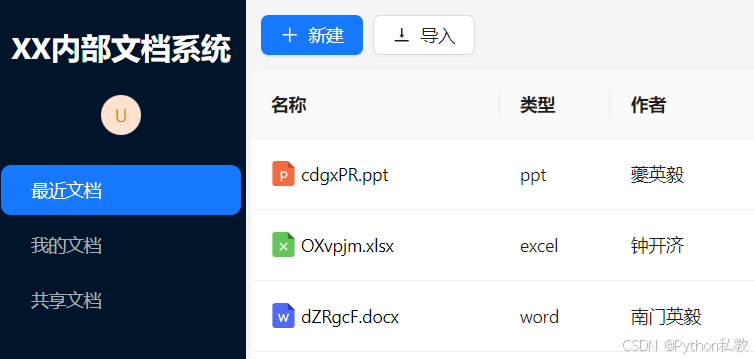
1、增加新建和导入按钮,有按钮了,但是还没有完善,图标还不对,需要解决
2、登录功能
3、用户管理
4、角色管理
5、权限管理
6、分享功能
解决新建和导入的图标问题
解决代码:
<a-button type="primary"
          :icon="h(PlusOutlined)"
          style="display: flex; align-items: center;">
  新建
</a-button>
<a-button
    :icon="h(VerticalAlignBottomOutlined)"
    style="display: flex; align-items: center;">
  导入
</a-button>
遗留的问题
1、登录功能
2、用户管理
3、角色管理
4、权限管理
5、分享功能
登录功能
先分析要做什么,怎么做?
- 1、添加登录页面
- 2、设计登录界面的基本布局
- 3、添加登录表单
- 4、给登录按钮绑定事件,点击时获取登录信息
- 5、设计登录的接口
- 6、前后端联调,实现登录功能
- 7、要记录登录的Token和用户名,跳转到首页
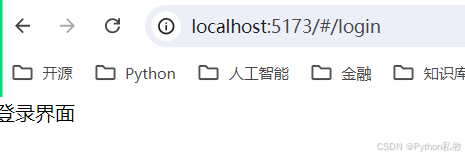
1、添加登录页面
加一个vue文件,然后在vue-router中注册,浏览器访问。
<script setup>

</script>

<template>
  <h1>登录界面</h1>
</template>

<style scoped>

</style>
{
    path: '/login',
    component: () => import("../page/auth/login.vue"),
},
2、设计登录界面的基本布局
布局的基本设计:

代码的基本实现:
<template>
  <div class="flex h-screen">
    <div class="left w-8/12 bg-red-300">
      左边
    </div>
    <div class="right w-4/12 bg-teal-200">
      右边
    </div>
  </div>
</template>
预览:

3、添加登录表单
代码:
<script setup>
import { reactive } from 'vue';
const formState = reactive({
  username: '',
  password: '',
  remember: true,
});
const onFinish = values => {
  console.log('Success:', values);
};
const onFinishFailed = errorInfo => {
  console.log('Failed:', errorInfo);
};
</script>

<template>
  <div class="flex h-screen">
    <div class="w-8/12 bg-purple-500 flex justify-center items-center flex-col">
      <h1 class="text-white font-bold text-5xl">xx文档管理系统</h1>
      <h3 class="text-gray-200 text-2xl mt-3">欢迎登录本系统</h3>
    </div>
    <div class="w-4/12 bg-blue-500 flex justify-center items-center">
      <a-card style="width: 60%">
        <a-form
            :model="formState"
            :label-col="{ span: 8 }"
            :wrapper-col="{ span: 16 }"
            autocomplete="off"
            @finish="onFinish"
        >
          <a-form-item
              label="账号"
              name="username"
              :rules="[{ required: true, message: '账号不能为空' }]"
          >
            <a-input v-model:value="formState.username" />
          </a-form-item>

          <a-form-item
              label="密码"
              name="password"
              :rules="[{ required: true, message: '密码不能为空' }]"
          >
            <a-input-password v-model:value="formState.password" />
          </a-form-item>
          <a-form-item :wrapper-col="{ offset: 8, span: 16 }">
            <a-button type="primary" html-type="submit">立即登录</a-button>
          </a-form-item>
        </a-form>
      </a-card>
    </div>
  </div>
</template>

<style scoped>

</style>
预览:

添加验证码
准备验证码的静态图片:

导入:
import pngCaptcha from "../../assets/img/captcha.png"
使用:
<img :src="pngCaptcha">
完整代码:
<script setup>
import {reactive} from 'vue';
import pngCaptcha from "../../assets/img/captcha.png"

const formState = reactive({
  username: '',
  password: '',
  captcha: '',
});
const onFinish = values => {
  console.log('Success:', values);
};
const onFinishFailed = errorInfo => {
  console.log('Failed:', errorInfo);
};
</script>

<template>
  <div class="flex h-screen">
    <div class="w-8/12 bg-purple-500 flex justify-center items-center flex-col">
      <h1 class="text-white font-bold text-5xl">xx文档管理系统</h1>
      <h3 class="text-gray-200 text-2xl mt-3">欢迎登录本系统</h3>
    </div>
    <div class="w-4/12 bg-blue-500 flex justify-center items-center">
      <a-card style="width: 60%">
        <a-form
            :model="formState"
            :label-col="{ span: 8 }"
            :wrapper-col="{ span: 16 }"
            autocomplete="off"
            @finish="onFinish"
        >
          <a-form-item
              label="账号"
              name="username"
              :rules="[{ required: true, message: '账号不能为空' }]"
          >
            <a-input v-model:value="formState.username"/>
          </a-form-item>

          <a-form-item
              label="密码"
              name="password"
              :rules="[{ required: true, message: '密码不能为空' }]"
          >
            <a-input-password v-model:value="formState.password"/>
          </a-form-item>
          <a-form-item
              label="验证码"
              name="captcha"
              :rules="[{ required: true, message: '验证码不能为空' }]"
          >
            <a-input-password v-model:value="formState.captcha"/>
            <img :src="pngCaptcha"
                 style="width: 100%; height: 50px; margin-top: 10px">
          </a-form-item>
          <a-form-item :wrapper-col="{ offset: 8, span: 16 }">
            <a-button type="primary" html-type="submit">立即登录</a-button>
          </a-form-item>
        </a-form>
      </a-card>
    </div>
  </div>
</template>

<style scoped>

</style>
效果预览:

4、给登录按钮绑定事件,点击时获取登录信息
之前的代码已经具备了这样的功能:

5、设计登录的接口
zdppy框架有一个非常强大的权限组件模块,提供完整登录,注册,权限管理等相关的功能,我们不需要重新编写接口,只需要引入并使用即可。
- 6、前后端联调,实现登录功能
- 7、要记录登录的Token和用户名,跳转到首页
遗留的问题
1、登录功能
- 5、设计登录的接口
- 6、前后端联调,实现登录功能
- 7、要记录登录的Token和用户名,跳转到首页
2、注册功能
3、用户管理
4、角色管理
5、权限管理
6、分享功能
tb_user拆成基本信息和详细信息两张表。


 1万+
1万+

 被折叠的 条评论
为什么被折叠?
被折叠的 条评论
为什么被折叠?
 到【灌水乐园】发言


