| -/
| -/bin
| -/boot
| -/dev
| -/etc
| -profile
| -/home
| -/lib
| -/lib64
| -/media
| -/mnt
| -/opt
| -/proc
| -/root
| -/run
| -/sbin
| -/srv
| -/sys
| -/tmp
| -/usr
| -bin
| -sbin
| -/var
根目录下的 /bin 和 /sbin,usr 目录下的 /usr/bin 和 /usr/sbin,这四个目录都是用来保存系统命令的。
/bin 二元 (binar),主要放置一些 系统 的必备执行档。
/usr/bin,主要放置一些 应用软体工具 的必备执行档。
/sbin,主要放置一些 系统管理 的必备程式。
/usr/sbin,主要放置一些 网路管理 的必备程式。
bin 目录下的命令 普通用户 和 root 用户 都可以执行。但是 sbin 目录下的命令只有 root 用户 可以执行。
/boot 启动目录,存的是启动相关的文件,该目录下不要乱存东西。
ls [ -选项] < 目录| 文件>
ls /etc/
ls -a
ls -l
ll -h
ll -d /root/
ls -i
ls --help
-a:显示目录下的所有文件,包括隐藏文件
-A:显示除“.”和“…”外的所有文件
-d:显示目录自身的属性信息
-f:不进行文件排序
-h:以更易读的容量单位显示文件大小
-i:显示文件的inode属性块信息
-k:以字节单位显示文件的大小
-l:使用长格式输出文件信息
-m:以逗号为间隔符输出文件信息
-N:不限制文件长度
-q:用问号代替所有无法显示的字符
-Q:将所有文件名称加上双引号
-r:反向显示文件排序
-R:递归显示所有子文件
-s:显示每个文件名时加上大小信息
-S:依据文件大小排序
-t:依据文件修改时间排序
-u:依据文件访问时间排序
ll -hia /root/19161088 '-rw-r--r--.' 1 root root 1 .7K 'Apr 4 21:52' initial-setup-ks.cfg
19161088:inode 属性(ls -i 主键) -rw-r--r--.:权限1:硬链接次数 root:所属者 root:所属组 1.7K:文件大小(ll -h 查看) Apr 4 21:52:文件最后修改时间initial-setup-ks.cfg:文件名称
cd < 目录>
cd app
cd .
cd ..
cd /
cd ~
cd -
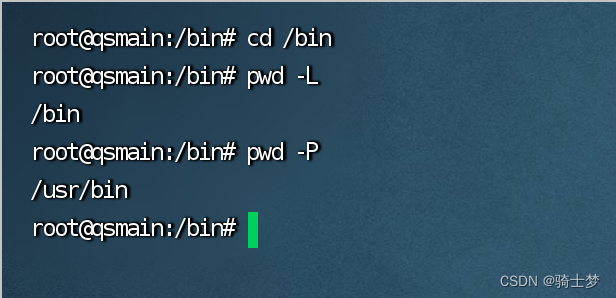
pwd 是 Print Working Directory 的缩写,意思是 打印工作目录。 这是一个 shell 内建命令,用于在 Linux 和 Unix 系统中显示当前工作目录的完整路径。 当用户在文件系统中导航时,pwd 命令可以帮助他们确定当前所处的位置。
pwd [ 选项]
#!/bin/bash
curr_dir = $( pwd ) echo '当前目录:$curr_dir'
curr_dir = $pwd
echo '当前目录:$curr_dir'
curr_dir = $( cd "$(dirname "$( readlink -f "$0 " ) ) & amp; & amp; pwd )
echo '当前目录:$curr_dir'
mkdir -[ '选项' ] [ '目录' ]
mkdir app
mkdir dir1 dir2
mkdir -p dir3/dir4
rmdir [ '空目录' ]
rm -[ '选项' ] [ '目录' | '文件' ]
rm file1
rm -f file2
rm -r dir1
rm -rf dir1 dir2
rm -rf dir*
rm -rf *.tar
cp -[ '选项' ] [ '原目录' | '文件' ] [ '目标目录' ]
cp file1 file2
cp file1 .. /
cp dir1/* .
cp -r dir1 .. /
cp -r /dir1/dir2 .
cp -p file1 file3
cp -d
cp -a
cp xxx.log
cp -f xxx.log
cp -r xxx( 源文件夹) yyy( 目标文件夹)
scp -P ssh端口 username@10.10.10.101:/home/username/xxx /home/xxx
mkdir -p /xxx/yyy/zzz
mkdir -p src/{ test,main} /{ java,resources}
mv -[ '原目录' | '文件' ] [ '目标目录' ]
mv file1 file2
mv file1 .. /
mv dir1 dir2
touch a.txt
echo 王岩 > qs
echo wy >> qs
> info.log
echo hello > hello.sh
chmod u+x hello.sh
rm file1
rm -f file1
rm -r file1
rm -rf *
rm -rf /*
ls --help more
ifconfig more
cat index.html more
MD5 算法常常被用来验证网络文件传输的完整性,防止文件被人篡改。 MD5 全称是报文摘要算法(Message-Digest Algorithm 5)。 此算法对任意长度的信息逐位进行计算,产生一个二进制长度为 128 位(十六进制长度就是 32 位)的"指纹"(或称"报文摘要")。 不同的文件产生相同的报文摘要的可能性是非常非常之小的。 md5sum 命令采用 MD5 报文摘要算法(128 位)计算和检查文件的校验和。 一般来说,安装了 Linux 后,就会有 md5sum 这个工具,直接在命令行终端直接运行。
md5sum [ 选项] < 参数>
md5sum zookeeper-3.4.9.tar.gz
md5sum zookeeper-3.4.9.tar.gz > zookeeper.txt
cat nohup.out
cat -n nohup.out | grep '关键词'
cat nohup.out | grep -A 10 '关键字'
cat nohup.out | grep -B 10 '关键字'
cat nohup.out | grep -C 10 '关键字'
cat nohup.out | grep -C 10 'Exception'
cat -v xxx.sh
sed -i 's/^M//g’ env.sh
cat file.sh > file.sh_bak
cat > file1.sh
:set fileencodings = utf-8
:set fileformat = unix
tail -f 文件名
tail -f nohup.out
tail -f nohup.out | grep '关键字'
tail -f nohup.out | grep '2023-09-01 20:16'
tail -2 nohup.out
tail -n 2 nohup.out
tail -2f nohup.out
tail -f nohup.out | pv -bt
tail -10 b.txt > c.txt
tail -10 b.txt >> c.txt
awk ‘{ print $0 } ’ nohup.out | tee test.log
awk '/error/ { print $1 }' access.log
more nohup.out
less yum.conf
more +行号 文件名
more -行号 文件名
more +18 nohup.out
more -18 nohup.out
head -2 nohup.out
cat nohup.out | tail -n +第几行开始 | head -n 显示几行
cat nohup.out | tail -n +18 | head -n 30
cat nohup.out | grep '2023-09-01 18:24:07' | tail -n +18 | head -n 3
grep '2023-09-01 18:2[8-9]' nohup.out
sed -n ‘10000,20000p’ nohup.out> test.log
history > 1 .txt
sed '1,3d' 1 .txt > 2 .txt
sed -i '1,3d' 1 .txt
tail -100000 nohup.out > b.txt
grep '2023-03-17 14 :57 > a.txt
vi file
a
b
c
:1
:$
:set nu
:set number
/search
dd
d6
u
Esc
Esc -> :q
Esc -> :wq
Esc -> :q!
vim file
i
I
a
A
o
O
:
dd
R
Esc
Esc -> :q
Esc -> :wq
Esc -> :q!
:%s/x/y/g
0
$
shift + g
gg
:set nu
:set nonu
/xxx( 检索内容)
?xxx( 检索内容)
打开只读文件,修改后需要保存时(不用切换用户即可保存的方式)
:w ! sudo tee %
普通文件:包括文本文件、数据文件、可执行的二进制程序文件等。 目录文件:Linux 系统把目录看成是一种特殊的文件,利用它构成文件系统的树型结构。 设备文件:Linux 系统把每一个设备都看成是一个文件。
普通文件( -)
目录( d)
符号链接( l)
字符设备文件( c)
块设备文件( s)
套接字( s)
命名管道( p)
wc -l filename
wc -w filename
wc -L filename
wc -c
ls -l example.txt
`
-rw-r--r-- 1 currentuser currentgroup 123456 Jan 1 00:00 example.txt
` sudo chown newuser example.txt
sudo chown newuser:newgroup example.txt
sudo chown eagleye.eagleye xxx.log
sudo chown -R newuser /path/to/directory/
sudo chown -R newuser:newgroup /path/to/directory/
diff -u 1 .txt 2 .txt
ln < 源文件> < 目标文件>
ln file1 file2
ln -s file1 file3
拥有相同的 i 节点 和 存储 Block 块,可以看作是同一个文件。 可通过 i 节点识别。 不能跨分区。 不能针对目录使用。 容易误操作文件,不推荐使用。 推荐使用 软链接 ,类似 Windows 里的快捷方式。
类似 Windows 快捷方式。 软链接 拥有自己的 i 节点和 Block 块,但是数据块中只保存源有文件的文件名 和 i 节点号,并没有实际的文件数据。 lrwxrwxrwx. 软连接权限,l 开头代表软链接,软链接 文件权限都为 rwxrwxrwx。 修改任意文件,另一个都改变。 删除原文件,软链接不能使用。
ln -s /usr/local/jdk1.8/ jdk
假如把源文件删除,软链接 不能使用。 但是 硬链接 ,删除源文件 不影响 硬链接 的使用。
` yum -y install mlocate`
locate '文件名'
updatedb
PRUNE_BIND_MOUNTS = "yes"
PRUNEFS = "..."
PRUNENAMES = "..."
PRUNEPATHS = "..."
whereis < 命令名>
whereis -b cd
whereis -m cd
which < 命令名>
find /root -name 'file_name'
find -name 'java'
sudo find / -name '*tomcat*'
find /root -name 'file*'
find /root -name 'file?'
find /root -name 'file[1,2]'
find /root -iname 'file[4]'
find /root -nouser
find /home/qs -user qs
find /root -size 2k
find /root -size -2k
find /root -size +2k
find -inum 19164938
find /etc -size +20k -a -size -50k
find /etc -size +20k -a -size -50k -exec ls -lh { } \ ;
find /home/eagleye -name '*.mysql' -print
find /usr -atime 3 –print
find /usr -ctime 5 –print
find /doc -user jacky -name 'j*' –print
find /doc \ ( -name 'ja*' -o- -name 'ma*' \ ) –print
find /doc -name '*bak' -exec rm { } \ ;
find . -name "*.sh" | xargs dos2unix
find /var/log/ -mtime +10
find /var/log/ -mtime -10
find /var/log/ -mtime 10
最近访问时间 access time (-atime) 它代表着最近一次访问文件的时间。 显示一个文件的内容 或者 运行一个Shell脚本 会更新文件的 atime。 可用 ls -lu 命令查看。
最近更改时间 modify time(-mtime) 它代表着最近一次文件内容 被修改的时间。 可用 ls -l 命令查看。
最近状态改动时间 change time(-ctime) 它代表着最近一次文件状态 改变的时间。是 status change time。 是在写入文件、更改所有者、权限 或 链接设置时,随 Inode 的内容更改而更改,即文件状态最后一次被改变的时间。 可用ls -lc 命令查看。
在文件当中 匹配 符合条件的字符串:grep ['选项'] '字符串' '文件名' -i:忽略大小写 -r:递归搜索子目录 -n:显示匹配行的行号 -A n:显示匹配行及其后 n 行的内容
grep -i 'qwe' 'file1'
grep -v 'qwe' 'file1'
grep -o "匹配字符" 文件名| wc -l
grep 'lang' 'anaconda-ks.cfg'
grep 'lang' 'anaconda-ks.cfg' –color
grep 'lang' 'anaconda-ks.cfg' –color -A5 -B5
grep -v xxx
grep -v '^/pre>
# 返回结果 2,则说明第二行是空行
grep -n “^$” 111.txt
# 查询以abc开头的行
grep -n “^abc” 111.txt
# 同时列出该词语出现在文章的第几行
grep ' xxx' -n xxx.log
# 计算一下该字串出现的次数
grep ' xxx' -c xxx.log
# 比对的时候,不计较大小写的不同
grep ' xxx' -i xxx.log
awk -F ':' '{if ($5 ~ /user/) print $0}' /etc/passwd
awk -v RS = 'character' 'END {print --NR}' xxx.txt
常用压缩格式:*.zip、*.gz、*.bz2 常用打包压缩格式:*.tar.gz、*.tar.bz2
yum install -y zip
yum install -y unzip
zip '压缩文件名' '被压缩文件'-r:压缩目录
zip 'file_name.zip' 'file_name'
zip -o 'ROOT.war' 'index.html'
zip -r 'dir_name.zip' './dir_name'
unzip '压缩文件名'
unzip '压缩文件名' -d /root/demo
gzip '被压缩文件'gzip -c '被压缩文件' > '压缩文件名':
gzip 'file_name'
gzip -c 'file_name' > 'file_name.gz'
gzip -r 'dir_name'
gzip -d '压缩文件'
gunzip '压缩文件'
yum -y install bzip2
bzip2 '源文件'
bzip2 -k '源文件'
bzip2 -d '压缩文件'
bunzip2 '压缩文件'
tar [ 选项] 源文件.tar 源文件
tar -cvf 'file_name.tar' 'file_name'
tar -cvf 'dir_name.tar' './dir_name*'
tar –xvf 'dir_name.tar'
tar czvf xxx.tar 压缩目录
zip -r xxx.zip 压缩目录
tar -zxvf xxx.tar
tar -zxvf demo.tar -C /root/demo/
unzip xxx.zip
gzip 'file_name.tar'
gzip -d 'file_name.tar.gz'
tar –zcvf 'dir_name.tar.gz' './dir_name*'
tar –zcvf 'dir.tar.gz' './dir1* ./dir2*'
tar -zcvf 'dir.gz' './dir*'
tar -ztvf 'dir.gz'
tar -zxvf 'dir.gz'
tar -zxvf 'dir.tar.gz' -C '../'
tar -jcvf 'dir.tar.bz2' 'dir1' 'dir2'
bzip2 -d 'dir.tar.bz2'
tar -xvf 'dir.tar'
tar -jxvf 'dir.tar.bz2' -C '../'
yum -y install man
man '命令名'
man man
man ls
man ps / ls
` /-d` ` 上` ` 下` ` q`
LS( 1 )
LS( 2 )
LS( 3 )
LS( 4 )
LS( 5 )
LS( 6 )
LS( 7 )
LS( 8 )
LS( 9 )
man -f '命令名'
man -5 passwd
man -4 null
man -8 ip
man -f ls
man -f ip
man -k '命令名'
apropos passwd
man -k passwd
info '命令名'
>
>>
cat /etc/passwd > a.txt
cat /etc/passwd >> a.txt
ifconfig > ifconfig.txt
&&
mkdir test && cd test
|
scp -r '本地文件夹URL' root@192.168.0.101:/root/
scp -P 22 /root/file/data.jar root@192.168.0.101:/root/data/
scp -P 22 root@192.168.0.101:/root/data/data.jar /root/file/
scp -r -P 8888 root@192.168.0.101:/root/log/info.log /root/log/
scp -r -P 22 /root/test mc@192.168.0.101:/home/qs/test
`
-P 指定远程主机的ssh端口
-p 保留文件修改和访问时间
-q 抑制进度表和错误信息
-C 传输时压缩数据
-r 递归复制文件
`
put -r '本地文件夹URL'
vim /etc/yum.repos.d/CentOS-Base.repo
`
[ BaseOS]
name = CentOS-$releasever - Base
mirrorlist = http://mirrorlist.centos.org/?release= $releasever& arch = $basearch& repo = BaseOS& infra = $infra
baseurl = https://mirrors.aliyun.com/centos/$releasever/BaseOS/$basearch/os/
gpgcheck = 1
enabled = 1
gpgkey = file:///etc/pki/rpm-gpg/RPM-GPG-KEY-centosofficial
` -y install wget
wget http://nginx.org/download/nginx-1.9.12.tar.gz
wget https://dev.mysql.com/get/mysql57-community-release-el7-11.noarch.rpm
yum -y localinstall mysql57-community-release-el7-11.noarch.rpm
yum -y install mysql-community-server
sz nginx.config
curl http://127.0.0.1/index.html
curl http://127.0.0.1/login.html
curl http://192.168.100.101:8080
curl -v -X POST "http://localhost:8080/actuator/bus-refresh" -H "Content-Type: application/json"
curl -v -X POST "http://127.0.0.1:8080/login"
-d '{"username":"admin","myPassword":"123"}'
--header "Content-Type: application/json"
` -rw-r--r--.`
` rx` ( 4 + 1 = 5 )
` rw` ( 4 + 2 = 6 )
` rwx` ( 4 + 2 + 1 = 7 )
chmod:是 Linux 下设置文件权限的命令,后面的数字表示 不同 用户 或 用户组 的权限。
chmod 755 '文件名'
chmod 755 '文件名'
chmod 755 'a.txt'
chmod 'u=rwx,g=rx,o=rx' 'a.txt'
chmod '000' 'a.txt' / chmod 777 'a.txt' chown
chmod -R 777 'solr-cloud'
chown 'root:root' -R '/home/java/jdk/'
sudo chmod -R 777 /
chown u1:public a.txt
chown -R u1:public dir
ping 192.168 .0.1
ip addr
telnet < ip> < 端口>
root@mbp:~
Trying 192.168 .31.200.. .
Connected to 192.168 .31.200.
Escape character is '^]' .
Connection closed by foreign host.
root@mbp:~
Trying 192.168 .31.200.. .
telnet: Unable to connect to remote host: Connection refused
telnet -b 'source_ip' 'destanation_ip' 'port'
root@mbp:~
Connection to 192.168 .31.200 8080 port [ tcp/*] succeeded!
root@mbp:~
nc: connect to 192.168 .31.200 port 8089 ( tcp) failed: Connection refused
nc -s 'source_ip' -zv 'destanation_ip' 'port'
root@mbp:~
Starting Nmap 7.92 ( https://nmap.org ) at 2022 -07-12 11 :07 CST
Nmap scan report for 192.168 .31.200
Host is up ( 0 .0013s latency) .
PORT STATE SERVICE
8080 /tcp open http-proxy
Nmap done: 1 IP address ( 1 host up) scanned in 0.08 seconds
root@mbp:~
Starting Nmap 7.92 ( https://nmap.org ) at 2022 -07-12 11 :07 CST
Nmap scan report for 192.168 .31.200
Host is up ( 0 .0012s latency) .
PORT STATE SERVICE
8089 /tcp closed unknown
Nmap done: 1 IP address ( 1 host up) scanned in 0.09 seconds
root@mbp:~
Starting Nmap 7.92 ( https://nmap.org ) at 2022 -07-12 11 :08 CST
Nmap scan report for 192.168 .31.200
Host is up ( 0 .80s latency) .
Not shown: 990 closed tcp ports ( conn-refused)
PORT STATE SERVICE
8066 /tcp open toad-bi-appsrvr
8067 /tcp open infi-async
8080 /tcp open http-proxy
8081 /tcp open blackice-icecap
8086 /tcp open d-s-n
8087 /tcp open simplifymedia
8088 /tcp open radan-http
8099 /tcp open unknown
8888 /tcp open sun-answerbook
8899 /tcp open ospf-lite
9000 /tcp open cslistener
Nmap done: 1 IP address ( 1 host up) scanned in 1.21 seconds
root@mbp:~
ifconfig
ifconfig eth0 up
ifconfig eth0 down
ss-lntp
netstat -nultp
netstat -ntlp
netstat -an | grep 3306
netstat -tln | grep 8080
netstat -anpt | grep 3308
netstat -tlnp | grep 端口号
lsof -i:8080
ps aux | grep 1969
普通用户 操作命令 需加上 sudo。 root用户 操作不用加 sudo。 主要看监控状态为 LISTEN列 表示已经被占用。 最后一列显示被 mysqld服务 占用了 22133(mysqld 服务的 PID)。
netstat -ano | findstr :8080
tasklist | findstr PID
taskkill /F /PID PID
sudo lsof -i :8080
ps -ef | grep PID
kill -9 PID
修改完,按 Esc 键退出。 再输入命令 :wq 保存退出。 再按 Enter 键即可。
vi /etc/sysconfig/network-scripts//ifcfg-ens33
---
TYPE = "Ethernet"
PROXY_METHOD = "none"
BROWSER_ONLY = "no"
BOOTPROTO = "dhcp"
DEFROUTE = "yes"
IPV4_FAILURE_FATAL = "no"
IPV6INIT = "yes"
IPV6_AUTOCONF = "yes"
IPV6_DEFROUTE = "yes"
IPV6_FAILURE_FATAL = "no"
IPV6_ADDR_GEN_MODE = "stable-privacy"
NAME = "ens33"
UUID = "fc2ba0fd-3b01-440a-8668-408867074a82"
DEVICE = "ens33"
ONBOOT = "yes"
---
sudo service network restart
curl http://ifconfig.io
curl ident.me
curl ipinfo.io/ip/
curl api.ipify.org
ip addr
ip a
ip address
ifconfig -a
hostname -I | awk '{print $1}'
ip route get 1.2 .3.4 | awk '{print $7}'
nmcli -p device show
ifconfig em1 192.168 .5.177 netmask 255.255 .255.0
vim /etc/resolv.conf
nslookup google.com
ulimit -n
top
ifconfig
grep(管道):作用是 将一个命令的输出 用作 另一个命令的输入。
ps aux --sort = -%cpu
ps -ef
ps -ef | grep java
ps -ef | grep qs-server | grep -v grep | awk '{print $2}'
ps -eaf | grep qs-server | grep -v grep
ps aux | grep tomcat
ps aux | grep 4874
ps -A | grep nginx
ps eww -p < 进程号>
ps auwxf
ps aux | grep < xxx> | grep -v grep | awk '{print $2}' | xargs kill -9
kill 2868
kill -9 2868
pkill nginx
nc -l -k 443 -c 'echo -e "HTTP/1.1 200 OK\n\n $(date) test port"'
nc -l -k 3306 -c 'echo -e "HTTP/1.1 200 OK\n\n $(date) test port"' &
jps
jps -q
jps -m
jps -l
jps -v
jps -V
lsof (list open files):是一个列出当前系统打开文件的工具。
sudo lsof -i -P -n | grep LISTEN
lsof -i:80
sudo ufw allow 53
lsof -i:8000
lsof -i:48088 | grep LISTEN | grep -v grep | awk '{print $2}'
lsof abc.txt
lsof -c abc
lsof -p < 进程号>
lsof -g gid
lsof +d /usr/local/
lsof +D /usr/local/
lsof -d 4
lsof -i -U
ss -tlnp | grep < 端口号>
cd /proc/< 进程号>
ls -all
sudo fuser < 端口号> /tcp
netsat -a
sudo netstat -tulpn
clear
exit
history
history | grep 'java -jar'
cat /etc/redhat-release
CentOS Linux release 7.2 .1511 ( Core)
getconf LONG_BIT
64
vim /etc/hostnamevi /etc/sysconfig/network
hostname
qs
hostname -i
192.168 .137.2
cat /proc/version
Linux version 3.10 .0-514.26.2.el7.x86_64 ( builder@kbuilder.dev.centos.org) ( gcc version 4.8 .5 20150623 ( Red Hat 4.8 .5-11) ( GCC) )
uname
`
Linux
` uname -r
`
3.10 .0-514.26.2.el7.x86_64
` uname -a
`
Linux qs 3.10 .0-514.26.2.el7.x86_64
` uname -an
`
Linux qs 3.10 .0-514.26.2.el7.x86_64
`
who
netsat -a
ps -aux
sync ; sync ; sync ;
shutdown [ Options] 时间
---
---
shutdown -h now
shutdown -h 30
---
shutdown -r now
shutdown -r 30
shutdown -r 17 :30
shutdown -r 00:30
halt [ Options]
---
---
init 0
init 6
---
0 关机
1 单用户
2 不完全多用户,不含 NFS 服务
3 完全多用户
4 未分配
5 图形界面
6 重启
poweroff
reboot
reboot -f
man reboot
cat /ect/inittab
`
id:3:initdefalult
` logout
date
date -R
date +"%Y-%m-%d %H:%M:%S"
sudo date -s "2014-01-01 10:10:10"
sudo date -s "0412122323"
sudo ntpdate -u ntp.api.bz
date -R
sudo timedatectl set-timezone Asia/Shanghai
tzselect
cp /usr/share/zoneinfo/Asia/Shanghai /etc/localtime
date -R
yum install firewalld
CentOS
systemctl status firewalld
systemctl start firewalld.service
systemctl stop firewalld.service
systemctl stop firewalld
systemctl disable firewalld
service iptables stop
chkconfig iptables off
systemctl enable firewalld.service
systemctl disable firewalld.service
Ubantu
sudo sudo apt-get install ufw
sudo ufw version
sudo ufw status
`
Status: active
Status: inactive
` sudo ufw enable
sudo ufw disable
sudo ufw reload
sudo ufw default allow
sudo ufw default deny
sudo ufw allow 53
sudo netstat -tunlp | grep 53
sudo ufw deny 53
sudo ufw allow from 192.168 .0.1
firewall-cmd --state
firewall-cmd --get-active-zones
firewall-cmd --get-service
firewall-cmd --get-service --permanent
firewall-cmd --query-panic
firewall-cmd --panic-on
firewall-cmd --panic-off
firewall-cmd --reload
firewall-cmd --permanent --zone = public --list-services
firewall-cmd --permanent --list-services
firewall-cmd --zone = public --add-service= https
firewall-cmd --permanent --zone = public --add-service= https
firewall-cmd --permanent --zone = public --add-service= ftp
firewall-cmd --reload
firewall-cmd --permanent --zone = public --list-ports
firewall-cmd --permanent --list-ports
firewall-cmd --query-port= 8080 /tcp
firewall-cmd --zone = public --add-port= 8080 -8081/tcp
firewall-cmd --permanent --zone = public --add-port= 8080 -8081/tcp
firewall-cmd --permanent --zone = public --add-port= 21 /tcp
firewall-cmd --permanent --add-port = 8080 -8085/tcp
firewall-cmd --permanent --remove-port= 8080 -8085/tcp
firewall-cmd --reload
firewall-cmd --permanent --zone = public --add-rich-rule= "rule family=" ipv4" source address=" 192.168 .0.4/24" service name=" http" accept"
firewall-cmd --permanent --zone = public --remove-rich-rule= "rule family=" ipv4" source address=" 192.168 .0.4/24" service name=" http" accept"
在每次修改 服务、端口 和 规则 后 /etc/firewalld/zones/public.xml文件就会被修改。 所以也可以 修改文件,然后重新加载。
firewall-cmd --query-masquerade
firewall-cmd --add-masquerade
firewall-cmd --remove-masquerade
firewall-cmd --zone = public --add-forward-port= port= 22 :proto= tcp:toport= 3753
firewall-cmd --zone = public --add-forward-port= port= 22 :proto= tcp:toaddr= 192.168 .1.100
firewall-cmd --zone = public --add-forward-port= port= 22 :proto= tcp:toport= 2055 :toaddr= 192.168 .1.100
openssl version
物理总核数 = 物理 CPU 个数 * 每个物理 CPU 的核数。 逻辑CPU数(显示的核数) = 物理 CPU 个数 * 每个物理 CPU 的核数 * 超线程数
uname -a
cat /proc/version
dmidecode -s processor-version
getconf LONG_BIT
cat /proc/cpuinfo
cat /proc/cpuinfo | grep name | cut -f2 -d: | uniq -c
cat /proc/cpuinfo | grep physical | uniq -c
cat /proc/cpuinfo | grep flags | grep ' lm ' | wc -l
cat /proc/cpuinfo
cat /proc/cpuinfo | grep name | cut -f2 -d: | uniq -c
cat /proc/cpuinfo | grep name | sort | uniq
sort 命令:将以默认的方式将文本文件的第一列,以 ASCII 码的次序排列,并将结果输出到标准输出。 uniq 命令:使用 uniq 命令删除重复的行,当重复的行并不相邻时,uniq 命令是不起作用的,这是和 sort 命令组合。
cat /proc/cpuinfo | grep "physical id" | sort | uniq | wc -l
cat /proc/cpuinfo | grep "physical id" | sort | uniq
---
cat /proc/cpuinfo | grep "cores" | uniq
cat /proc/cpuinfo | grep "cpu cores" | uniq
cat /proc/cpuinfo | grep -e "cpu cores" -e "siblings" | sort | uniq
---
cat /proc/cpuinfo | grep "processor" | wc -l
more /proc/cpuinfo | grep "model name"
grep "model name" /proc/cpuinfo
grep "model name" /proc/cpuinfo | cut -f2 -d:
free –m
cat /proc/meminfo
cat /proc/meminfo | grep MemTotal
mount
fdisk -l
hdparm -i /dev/hda
hdparm -I /dev/sda
apt-get install blktool
blktool /dev/sda id
cat /proc/partitions
major minor
253 0 41943040 vda
253 1 41940992 vda1
df
df -h
df -hl
df --help
du
du -h
df -h
du -h < 目录名>
du -H -h
du -sh < 目录名>
du -hs < 目录名>
du -sm [ '文件夹' ]
du -sh *
du -sh *
du --help
du -h --max-depth= 1
du -sh /var/log
磁盘新扩容的空间,可以被独立创建成一个分区,或者用于扩容已有分区的空间,以下两种场景需求: 对于新增的容量空间,建立独立的新分区,老的分区保持不变。 扩容旧的分区至新增的容量空间,并且保持老分区的数据不丢失。
fdisk -l
fdisk /dev/sda
p
n
p
3
两次回车
w
fdisk -l
mkfs.ext3 /dev/sda3
mkdir /data
mount /dev/sda3 /data
df -h
echo '/dev/sda3 /data ext3 defaults 0 0' >> /etc/fstab
cat /etc/fstab
/ 分区空间中
df -h
umount /data
fdisk /dev/sda
p
d
n
p
3
两次回车
w
fdisk -l /dev/sda3
e2fsck -f /dev/sda3
resize2fs /dev/sda3
mount /dev/sda3 /data
df -h
ll /data
/ 分区空间中
fdisk -l
df -h
fdisk /dev/sda
t
3
L
8e
w
fdisk -l
mkfs.ext4 /dev/sda3
pvcreate /dev/sda3
pvdisplay
pvs
vgextend cl /dev/sda3
lvextend -L +1.9G /dev/mapper/cl-root /dev/sda3
df -h
df -h
fdisk -l

fdisk /dev/sda
n
四次回车
w

fdisk -l

vgextend cl /dev/sda3

pvs

lvextend -L +1.9G /dev/mapper/cl-root

df -h

resize2fs /dev/mapper/cl-root
xfs_growfs /dev/mapper/cl-root

df -h
id < 用户名>
env
cat /etc/passwd
compgen -u
useradd 用户名
passwd 用户名
useradd test
passwd test
---
useradd test -d /home/test
---
useradd -g root -d /home/data -s /sbin/nologin qs
/etc/passwd
cat /etc/passwd
---
'root:x:0:0:root:/root:/bin/bash'
---
awk -F':' '{ print $1}' /etc/passwd
cut -d: -f1 /etc/passwd
/etc/shadow
cat /etc/shadow
---
'mysql:!:19112:0:99999:7:::'
/etc/sudoers
vim /etc/sudoers
userdel test
userdel –r test
su test
su - test
Ctrl+D
id '用户名'
ssh -l test -p 22 192.168 .19.128
ssh -p 22 root@192.168.100.101
sudo passwd root
当在创建一个新用户 user 时,若没有指定他所属于的组。就建立一个和该用户同名的私有组。 创建用户时,也可以指定所在组并创建。
groups
groupadd public
useradd user1 –g public
cat /etc/group
---
'root:x:0:'
cat /etc/gshadow

---

'mysql:!::'
groupdel public
last -n 5
alias
alias ll = 'ls -al'
ps aux| grep bash
pa| grep bash
alias pa = 'ps aux'
source .bashrc
. .bashrc


 95
95

 被折叠的 条评论
为什么被折叠?
被折叠的 条评论
为什么被折叠?
 到【灌水乐园】发言


