


 本博客探讨使用YOLOv8目标分割模型进行推理,涵盖图片、视频及摄像头实时分割,特别是ONNX在不同大小模型上的实验。介绍了环境配置,包括安装Python库和验证安装;说明了权重下载方式;给出代码实现流程;最后展示推理结果,呈现完整的图像分割流程。
基于COCO数据集的YOLOv8目标分割onnx模型推理
在本博客中,我们将探讨如何使用YOLOv8目标分割模型进行推理,包括图片,视频文件,摄像头实时分割,特别是ONNX在不同大小(YOLOv8n, YOLOv8s, YOLOv8m, YOLOv8l, YOLOv8x)的模型上进行的实验。我们还将讨论所需的环境配置,代码实现,以及如何展示推理结果。
环境配置
在详细描述环境配置和安装步骤之前,请确保您的系统已经安装了Python和pip。下面是详细的环境配置步骤,适用于基于YOLOv8模型进行目标分割的项目。
1. 安装必要的Python库
pip install onnxruntime-gpu==1.13.1 opencv-python==4.7.0.68 numpy==1.24.1 -i https://pypi.tuna.tsinghua.edu.cn/simple/
如果您没有GPU或者不打算使用GPU,可以安装onnxruntime而不是onnxruntime-gpu:
pip install onnxruntime==1.13.1 opencv-python==4.7.0.68 numpy==1.24.1 -i https://pypi.tuna.tsinghua.edu.cn/simple/
2. 验证安装
安装完成后,您可以通过运行Python并尝试导入安装的包来验证是否成功安装了所有必要的库:
import onnxruntime
import cv2
import numpy
如果上述命令没有引发任何错误,那么恭喜您,您已成功配置了运行环境。
小贴士
- 如果您在安装过程中遇到任何问题,可能需要更新pip到最新版本:
pip install --upgrade pip。 - 对于使用NVIDIA GPU的用户,确保您的系统已安装CUDA和cuDNN。
onnxruntime-gpu要求系统预装这些NVIDIA库以利用GPU加速。
按照这些步骤,您应该能够成功配置环境并运行基于YOLOv8的目标分割项目了。
权重下载
YOLOv8分割模型的权重可以通过以下百度网盘链接下载:
- 链接:YOLOv8 onnx权重
- 提取码:3zjm
请确保下载适合您需求的模型版本。
代码实现
以下是进行目标分割的整体代码流程,包括模型加载、图像预处理、推理执行、后处理及结果展示的步骤。
import cv2
import numpy as np
import onnxruntime as ort
import time

classes = {0: 'person', 1: 'bicycle', 2: 'car', 3: 'motorcycle', 4: 'airplane', 5: 'bus', 6: 'train', 7: 'truck',
           8: 'boat', 9: 'traffic light', 10: 'fire hydrant', 11: 'stop sign', 12: 'parking meter', 13: 'bench',
           14: 'bird', 15: 'cat', 16: 'dog', 17: 'horse', 18: 'sheep', 19: 'cow', 20: 'elephant', 21: 'bear',
           22: 'zebra', 23: 'giraffe', 24: 'backpack', 25: 'umbrella', 26: 'handbag', 27: 'tie', 28: 'suitcase',
           29: 'frisbee', 30: 'skis', 31: 'snowboard', 32: 'sports ball', 33: 'kite', 34: 'baseball bat',
           35: 'baseball glove', 36: 'skateboard', 37: 'surfboard', 38: 'tennis racket', 39: 'bottle',
           40: 'wine glass', 41: 'cup', 42: 'fork', 43: 'knife', 44: 'spoon', 45: 'bowl', 46: 'banana', 47: 'apple',
           48: 'sandwich', 49: 'orange', 50: 'broccoli', 51: 'carrot', 52: 'hot dog', 53: 'pizza', 54: 'donut',
           55: 'cake', 56: 'chair', 57: 'couch', 58: 'potted plant', 59: 'bed', 60: 'dining table', 61: 'toilet',
           62: 'tv', 63: 'laptop', 64: 'mouse', 65: 'remote', 66: 'keyboard', 67: 'cell phone', 68: 'microwave',
           69: 'oven', 70: 'toaster', 71: 'sink', 72: 'refrigerator', 73: 'book', 74: 'clock', 75: 'vase',
           76: 'scissors', 77: 'teddy bear', 78: 'hair drier', 79: 'toothbrush'}

class Colors:
    """
    This class provides methods to work with the Ultralytics color palette, including converting hex color codes to
    RGB values.

    Attributes:
        palette (list of tuple): List of RGB color values.
        n (int): The number of colors in the palette.
        pose_palette (np.array): A specific color palette array with dtype np.uint8.
    """

    def __init__(self):
        """Initialize colors as hex = matplotlib.colors.TABLEAU_COLORS.values()."""
        hexs = ('FF3838', 'FF9D97', 'FF701F', 'FFB21D', 'CFD231', '48F90A', '92CC17', '3DDB86', '1A9334', '00D4BB',
                '2C99A8', '00C2FF', '344593', '6473FF', '0018EC', '8438FF', '520085', 'CB38FF', 'FF95C8', 'FF37C7')
        self.palette = [self.hex2rgb(f'#{c}') for c in hexs]
        self.n = len(self.palette)
        self.pose_palette = np.array([[255, 128, 0], [255, 153, 51], [255, 178, 102], [230, 230, 0], [255, 153, 255],
                                      [153, 204, 255], [255, 102, 255], [255, 51, 255], [102, 178, 255], [51, 153, 255],
                                      [255, 153, 153], [255, 102, 102], [255, 51, 51], [153, 255, 153], [102, 255, 102],
                                      [51, 255, 51], [0, 255, 0], [0, 0, 255], [255, 0, 0], [255, 255, 255]],
                                     dtype=np.uint8)

    def __call__(self, i, bgr=False):
        """Converts hex color codes to RGB values."""
        c = self.palette[int(i) % self.n]
        return (c[2], c[1], c[0]) if bgr else c

    @staticmethod
    def hex2rgb(h):
        """Converts hex color codes to RGB values (i.e. default PIL order)."""
        return tuple(int(h[1 + i:1 + i + 2], 16) for i in (0, 2, 4))


class YOLOv8Seg:
    """YOLOv8 segmentation model."""

    def __init__(self, onnx_model):
        """
        Initialization.

        Args:
            onnx_model (str): Path to the ONNX model.
        """

        # Build Ort session
        self.session = ort.InferenceSession(onnx_model,
                                            providers=['CUDAExecutionProvider', 'CPUExecutionProvider']
                                            if ort.get_device() == 'GPU' else ['CPUExecutionProvider'])

        # Numpy dtype: support both FP32 and FP16 onnx model
        self.ndtype = np.half if self.session.get_inputs()[0].type == 'tensor(float16)' else np.single

        # Get model width and height(YOLOv8-seg only has one input)
        self.model_height, self.model_width = [x.shape for x in self.session.get_inputs()][0][-2:]

        # Load COCO class names
        self.classes = classes

        # Create color palette
        self.color_palette = Colors()

    def __call__(self, im0, conf_threshold=0.4, iou_threshold=0.45, nm=32):
        """
        The whole pipeline: pre-process -> inference -> post-process.

        Args:
            im0 (Numpy.ndarray): original input image.
            conf_threshold (float): confidence threshold for filtering predictions.
            iou_threshold (float): iou threshold for NMS.
            nm (int): the number of masks.

        Returns:
            boxes (List): list of bounding boxes.
            segments (List): list of segments.
            masks (np.ndarray): [N, H, W], output masks.
        """

        # Pre-process
        im, ratio, (pad_w, pad_h) = self.preprocess(im0)

        # Ort inference
        preds = self.session.run(None, {self.session.get_inputs()[0].name: im})

        # Post-process
        boxes, segments, masks = self.postprocess(preds,
                                                  im0=im0,
                                                  ratio=ratio,
                                                  pad_w=pad_w,
                                                  pad_h=pad_h,
                                                  conf_threshold=conf_threshold,
                                                  iou_threshold=iou_threshold,
                                                  nm=nm)
        return boxes, segments, masks

    def preprocess(self, img):
        """
        Pre-processes the input image.

        Args:
            img (Numpy.ndarray): image about to be processed.

        Returns:
            img_process (Numpy.ndarray): image preprocessed for inference.
            ratio (tuple): width, height ratios in letterbox.
            pad_w (float): width padding in letterbox.
            pad_h (float): height padding in letterbox.
        """

        # Resize and pad input image using letterbox() (Borrowed from Ultralytics)
        shape = img.shape[:2]  # original image shape
        new_shape = (self.model_height, self.model_width)
        r = min(new_shape[0] / shape[0], new_shape[1] / shape[1])
        ratio = r, r
        new_unpad = int(round(shape[1] * r)), int(round(shape[0] * r))
        pad_w, pad_h = (new_shape[1] - new_unpad[0]) / 2, (new_shape[0] - new_unpad[1]) / 2  # wh padding
        if shape[::-1] != new_unpad:  # resize
            img = cv2.resize(img, new_unpad, interpolation=cv2.INTER_LINEAR)
        top, bottom = int(round(pad_h - 0.1)), int(round(pad_h + 0.1))
        left, right = int(round(pad_w - 0.1)), int(round(pad_w + 0.1))
        img = cv2.copyMakeBorder(img, top, bottom, left, right, cv2.BORDER_CONSTANT, value=(114, 114, 114))

        # Transforms: HWC to CHW -> BGR to RGB -> div(255) -> contiguous -> add axis(optional)
        img = np.ascontiguousarray(np.einsum('HWC->CHW', img)[::-1], dtype=self.ndtype) / 255.0
        img_process = img[None] if len(img.shape) == 3 else img
        return img_process, ratio, (pad_w, pad_h)

    def postprocess(self, preds, im0, ratio, pad_w, pad_h, conf_threshold, iou_threshold, nm=32):
        """
        Post-process the prediction.

        Args:
            preds (Numpy.ndarray): predictions come from ort.session.run().
            im0 (Numpy.ndarray): [h, w, c] original input image.
            ratio (tuple): width, height ratios in letterbox.
            pad_w (float): width padding in letterbox.
            pad_h (float): height padding in letterbox.
            conf_threshold (float): conf threshold.
            iou_threshold (float): iou threshold.
            nm (int): the number of masks.

        Returns:
            boxes (List): list of bounding boxes.
            segments (List): list of segments.
            masks (np.ndarray): [N, H, W], output masks.
        """
        x, protos = preds[0], preds[1]  # Two outputs: predictions and protos

        # Transpose the first output: (Batch_size, xywh_conf_cls_nm, Num_anchors) -> (Batch_size, Num_anchors, xywh_conf_cls_nm)
        x = np.einsum('bcn->bnc', x)

        # Predictions filtering by conf-threshold
        x = x[np.amax(x[..., 4:-nm], axis=-1) > conf_threshold]

        # Create a new matrix which merge these(box, score, cls, nm) into one
        # For more details about `numpy.c_()`: https://numpy.org/doc/1.26/reference/generated/numpy.c_.html
        x = np.c_[x[..., :4], np.amax(x[..., 4:-nm], axis=-1), np.argmax(x[..., 4:-nm], axis=-1), x[..., -nm:]]
        # NMS filtering
        x = x[cv2.dnn.NMSBoxes(x[:, :4], x[:, 4], conf_threshold, iou_threshold)]

        # Decode and return
        if len(x) > 0:

            # Bounding boxes format change: cxcywh -> xyxy
            x[..., [0, 1]] -= x[..., [2, 3]] / 2
            x[..., [2, 3]] += x[..., [0, 1]]

            # Rescales bounding boxes from model shape(model_height, model_width) to the shape of original image
            x[..., :4] -= [pad_w, pad_h, pad_w, pad_h]
            x[..., :4] /= min(ratio)

            # Bounding boxes boundary clamp
            x[..., [0, 2]] = x[:, [0, 2]].clip(0, im0.shape[1])
            x[..., [1, 3]] = x[:, [1, 3]].clip(0, im0.shape[0])

            # Process masks
            masks = self.process_mask(protos[0], x[:, 6:], x[:, :4], im0.shape)

            # Masks -> Segments(contours)
            segments = self.masks2segments(masks)
            return x[..., :6], segments, masks  # boxes, segments, masks
        else:
            return [], [], []

    @staticmethod
    def masks2segments(masks):
        """
        It takes a list of masks(n,h,w) and returns a list of segments(n,xy)
        Args:
            masks (numpy.ndarray): the output of the model, which is a tensor of shape (batch_size, 160, 160).

        Returns:
            segments (List): list of segment masks.
        """
        segments = []
        for x in masks.astype('uint8'):
            c = cv2.findContours(x, cv2.RETR_EXTERNAL, cv2.CHAIN_APPROX_NONE)[0]  # CHAIN_APPROX_SIMPLE
            if c:
                c = np.array(c[np.array([len(x) for x in c]).argmax()]).reshape(-1, 2)
            else:
                c = np.zeros((0, 2))  # no segments found
            segments.append(c.astype('float32'))
        return segments

    @staticmethod
    def crop_mask(masks, boxes):
        """
        It takes a mask and a bounding box, and returns a mask that is cropped to the bounding box.
        Args:
            masks (Numpy.ndarray): [n, h, w] tensor of masks.
            boxes (Numpy.ndarray): [n, 4] tensor of bbox coordinates in relative point form.

        Returns:
            (Numpy.ndarray): The masks are being cropped to the bounding box.
        """
        n, h, w = masks.shape
        x1, y1, x2, y2 = np.split(boxes[:, :, None], 4, 1)
        r = np.arange(w, dtype=x1.dtype)[None, None, :]
        c = np.arange(h, dtype=x1.dtype)[None, :, None]
        return masks * ((r >= x1) * (r < x2) * (c >= y1) * (c < y2))

    def process_mask(self, protos, masks_in, bboxes, im0_shape):
        """
        Takes the output of the mask head, and applies the mask to the bounding boxes. This produces masks of higher quality
        but is slower.
        Args:
            protos (numpy.ndarray): [mask_dim, mask_h, mask_w].
            masks_in (numpy.ndarray): [n, mask_dim], n is number of masks after nms.
            bboxes (numpy.ndarray): bboxes re-scaled to original image shape.
            im0_shape (tuple): the size of the input image (h,w,c).

        Returns:
            (numpy.ndarray): The upsampled masks.
        """
        c, mh, mw = protos.shape
        masks = np.matmul(masks_in, protos.reshape((c, -1))).reshape((-1, mh, mw)).transpose(1, 2, 0)  # HWN
        masks = np.ascontiguousarray(masks)
        masks = self.scale_mask(masks, im0_shape)  # re-scale mask from P3 shape to original input image shape
        masks = np.einsum('HWN -> NHW', masks)  # HWN -> NHW
        masks = self.crop_mask(masks, bboxes)
        return np.greater(masks, 0.5)

    @staticmethod
    def scale_mask(masks, im0_shape, ratio_pad=None):
        """
        Takes a mask, and resizes it to the original image size.
        Args:
            masks (np.ndarray): resized and padded masks/images, [h, w, num]/[h, w, 3].
            im0_shape (tuple): the original image shape.
            ratio_pad (tuple): the ratio of the padding to the original image.

        Returns:
            masks (np.ndarray): The masks that are being returned.
        """
        im1_shape = masks.shape[:2]
        if ratio_pad is None:  # calculate from im0_shape
            gain = min(im1_shape[0] / im0_shape[0], im1_shape[1] / im0_shape[1])  # gain  = old / new
            pad = (im1_shape[1] - im0_shape[1] * gain) / 2, (im1_shape[0] - im0_shape[0] * gain) / 2  # wh padding
        else:
            pad = ratio_pad[1]

        # Calculate tlbr of mask
        top, left = int(round(pad[1] - 0.1)), int(round(pad[0] - 0.1))  # y, x
        bottom, right = int(round(im1_shape[0] - pad[1] + 0.1)), int(round(im1_shape[1] - pad[0] + 0.1))
        if len(masks.shape) < 2:
            raise ValueError(f'"len of masks shape" should be 2 or 3, but got {len(masks.shape)}')
        masks = masks[top:bottom, left:right]
        masks = cv2.resize(masks, (im0_shape[1], im0_shape[0]),
                           interpolation=cv2.INTER_LINEAR)  # INTER_CUBIC would be better
        if len(masks.shape) == 2:
            masks = masks[:, :, None]
        return masks

    def draw_and_visualize(self, im, bboxes, segments, vis=True, save=False):
        """
        Draw and visualize results.

        Args:
            im (np.ndarray): original image, shape [h, w, c].
            bboxes (numpy.ndarray): [n, 4], n is number of bboxes.
            segments (List): list of segment masks.
            vis (bool): imshow using OpenCV.
            save (bool): save image annotated.

        Returns:
            None
        """

        # Draw rectangles and polygons
        im_canvas = im.copy()
        for (*box, conf, cls_), segment in zip(bboxes, segments):
            # draw contour and fill mask
            cv2.polylines(im, np.int32([segment]), True, (255, 255, 255), 2)  # white borderline
            cv2.fillPoly(im_canvas, np.int32([segment]), self.color_palette(int(cls_), bgr=True))

            # draw bbox rectangle
            cv2.rectangle(im, (int(box[0]), int(box[1])), (int(box[2]), int(box[3])),
                          self.color_palette(int(cls_), bgr=True), 1, cv2.LINE_AA)
            cv2.putText(im, f'{self.classes[cls_]}: {conf:.3f}', (int(box[0]), int(box[1] - 9)),
                        cv2.FONT_HERSHEY_SIMPLEX, 0.7, self.color_palette(int(cls_), bgr=True), 2, cv2.LINE_AA)

        # Mix image
        im = cv2.addWeighted(im_canvas, 0.3, im, 0.7, 0)
        return im

if __name__ == '__main__':
    # 模型路径
    model_path = "yolov8n-seg.onnx"
    # 实例化模型
    model = YOLOv8Seg(model_path)
    conf = 0.35
    iou = 0.45
    # 三种模式 1为图片预测,并显示结果图片;2为摄像头检测,并实时显示FPS
    mode = 1
    if mode == 1:
        # opencv 读取图片
        img = cv2.imread('street.jpg')
        # 推理
        boxes, segments, _ = model(img, conf_threshold=conf, iou_threshold=iou)
        # 画图
        if len(boxes) > 0:
            output_image = model.draw_and_visualize(img, boxes, segments, vis=False, save=True)
        else:
            output_image = img
        print("图片完成检测")
        cv2.imshow("seg", output_image)
        cv2.imwrite('image_seg.jpg', output_image)
        cv2.waitKey(0)
        cv2.destroyAllWindows()
    elif mode == 2:
        # 摄像头图像分割
        cap = cv2.VideoCapture(0)
        # 返回当前时间
        start_time = time.time()
        counter = 0
        while True:
            # 从摄像头中读取一帧图像
            ret, frame = cap.read()
            # 推理
            boxes, segments, _ = model(frame, conf_threshold=conf, iou_threshold=iou)
            # 画图
            if len(boxes) > 0:
                output_image = model.draw_and_visualize(frame, boxes, segments, vis=False, save=True)
            else:
                output_image = frame
            counter += 1  # 计算帧数
            # 实时显示帧数
            if (time.time() - start_time) != 0:
                cv2.putText(output_image, "FPS:{0}".format(float('%.1f' % (counter / (time.time() - start_time)))), (5, 30), cv2.FONT_HERSHEY_SIMPLEX, 0.75, (255, 255, 255), 1)
                # 显示图像
                cv2.imshow('seg', output_image)
            if cv2.waitKey(1) & 0xFF == ord('q'):
                break
        # 释放资源
        cap.release()
        cv2.destroyAllWindows()
    elif mode == 3:
        # 输入视频路径
        input_video_path = 'kun.mp4'
        # 输出视频路径
        output_video_path = 'kun_seg.mp4'
        # 打开视频文件
        cap = cv2.VideoCapture(input_video_path)
        # 检查视频是否成功打开
        if not cap.isOpened():
            print("Error: Could not open video.")
            exit()
        # 读取视频的基本信息
        frame_width = int(cap.get(3))
        frame_height = int(cap.get(4))
        fps = cap.get(cv2.CAP_PROP_FPS)
        # 定义视频编码器和创建VideoWriter对象
        fourcc = cv2.VideoWriter_fourcc(*'mp4v')  # 根据文件名后缀使用合适的编码器
        out = cv2.VideoWriter(output_video_path, fourcc, fps, (frame_width, frame_height))
        # 初始化帧数计数器和起始时间
        frame_count = 0
        start_time = time.time()
        while True:
            ret, frame = cap.read()
            if not ret:
                print("Info: End of video file.")
                break
            # 推理
            boxes, segments, _ = model(frame, conf_threshold=conf, iou_threshold=iou)
            # 画图
            if len(boxes) > 0:
                output_image = model.draw_and_visualize(frame, boxes, segments, vis=False, save=True)
            else:
                output_image = frame
            # 计算并打印帧速率
            frame_count += 1
            end_time = time.time()
            elapsed_time = end_time - start_time
            if elapsed_time > 0:
                fps = frame_count / elapsed_time
                print(f"FPS: {fps:.2f}")
            # 将处理后的帧写入输出视频
            out.write(output_image)
            # (可选)实时显示处理后的视频帧
            # cv2.imshow("Output Video", output_image)
            # if cv2.waitKey(1) & 0xFF == ord('q'):
            #     break
        # 释放资源
        cap.release()
        out.release()
        cv2.destroyAllWindows()
    else:
        print("输入错误,请检查mode的赋值")
请根据您的需求调整置信度阈值、IOU阈值以及模型和mode的值(1为图片预测;2为摄像头实时分割; 3为视频分割)。
结果展示
推理完成后,您可以查看处理后的图像,如下所示:
-
原始图片:
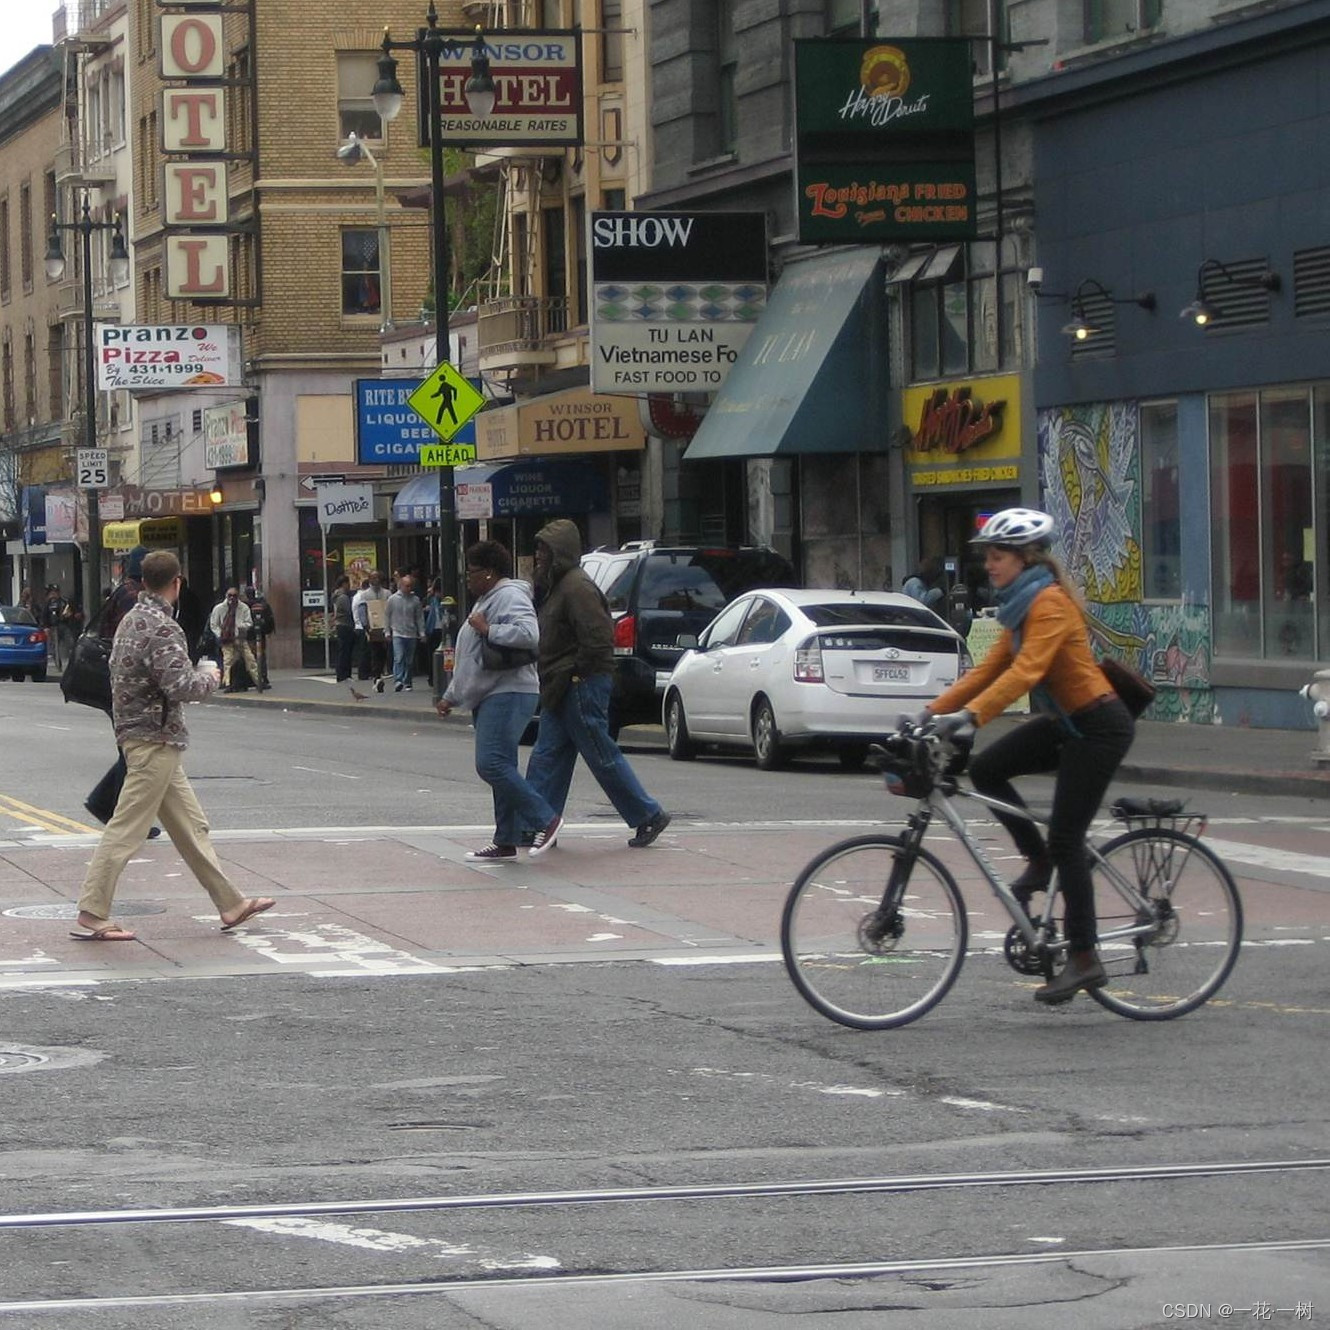
-
分割后的图片:
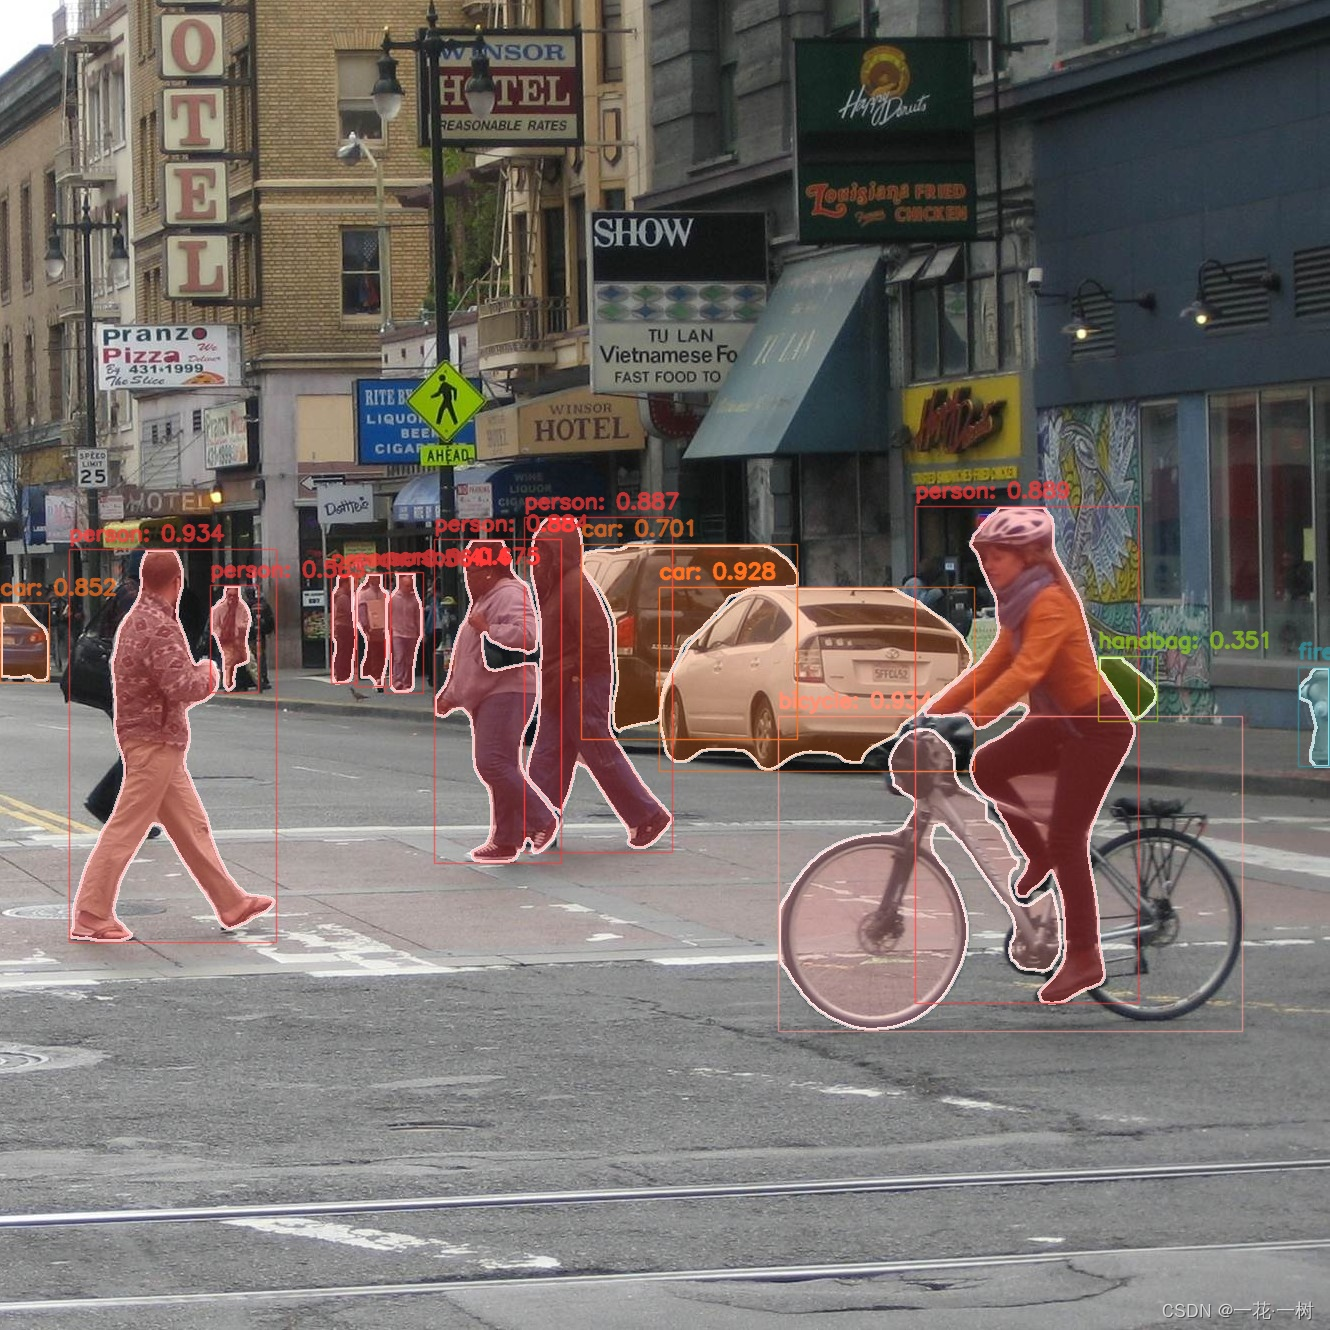
请替换为您自己的图像路径来查看效果;或者其他两种模式(摄像头实时分割、视频文件分割)进行尝试。
总结
通过以上步骤,我们展示了如何使用YOLOv8进行图像分割的完整流程,从环境配置到代码实现和结果展示。此过程适用于YOLOv8目标分割任意模型进行分割任务。
希望这篇博客能够帮助您理解和实现基于YOLOv8的目标分割项目。如果有任何问题或需要进一步的帮助,请随时留言讨论。


 1307
1307

 被折叠的 条评论
为什么被折叠?
被折叠的 条评论
为什么被折叠?
 到【灌水乐园】发言


