


Response对象(下)
一、服务器输出字符数据到浏览器步骤如下
1.获取字符流输出
2.输出数据
新建Servlet“ResponseDemo4”
@WebServlet("/ResponseDemo4")
public class ResponseDemo4 extends HttpServlet {
protected void doPost(HttpServletRequest request, HttpServletResponse response) throws ServletException, IOException {
// 1、获取字符输出流
PrintWriter printWriter = response.getWriter();
// 2、输出数据
printWriter.write("hello response");
}

protected void doGet(HttpServletRequest request, HttpServletResponse response) throws ServletException, IOException {
this.doPost(request,response);
}
}
测试结果:

如果想让输出字符变成一级标题加粗,则在输出中加标签<h1></h1>
@WebServlet("/ResponseDemo4")
public class ResponseDemo4 extends HttpServlet {
protected void doPost(HttpServletRequest request, HttpServletResponse response) throws ServletException, IOException {
// 1、获取字符输出流
PrintWriter printWriter = response.getWriter();
// 2、输出数据
printWriter.write("<h1>hello response</h1>");
}

protected void doGet(HttpServletRequest request, HttpServletResponse response) throws ServletException, IOException {
this.doPost(request,response);
}
}
测试结果:

注意:
但是出现输出中文有乱码怎么办?
一般出现乱码的原因:编解码使用的字符集不一致
printWriter.write("<h1>你好, response</h1>");

解决:
在获取流对象之前,设置流的默认编码:ISO-8859-1 设置为:GBK
@WebServlet("/ResponseDemo4")
public class ResponseDemo4 extends HttpServlet {
protected void doPost(HttpServletRequest request, HttpServletResponse response) throws ServletException, IOException {
// 获取流之前,要将流的默认编码:ISO-8859-1,设置为GBK
response.setCharacterEncoding("GBK");
// 1、获取字符输出流
PrintWriter printWriter = response.getWriter();
// 2、输出数据
printWriter.write("<h1>你好, response</h1>");
}
输出结果:

仅仅是这一步还不行,需要告诉浏览器,服务器发送的消息体数据的编码,建议浏览器使用该编码解码.
@WebServlet("/ResponseDemo4")
public class ResponseDemo4 extends HttpServlet {
protected void doPost(HttpServletRequest request, HttpServletResponse response) throws ServletException, IOException {
// 获取流之前,要将流的默认编码:ISO-8859-1,设置为GBK
response.setCharacterEncoding("utf-8");
// 告诉浏览器,服务器发送的消息体数据的编码,建议浏览器使用该编码解码
response.setHeader("content-type","text/html;charset=utf-8");// 不区分大小写,告诉浏览器,我使用的是"utf-8"
// 1、获取字符输出流
PrintWriter printWriter = response.getWriter();
// 2、输出数据
printWriter.write("<h1>你好, response</h1>");
}

protected void doGet(HttpServletRequest request, HttpServletResponse response) throws ServletException, IOException {
this.doPost(request,response);
}
}
测试结果:

或者用简单的格式:
@WebServlet("/ResponseDemo4")
public class ResponseDemo4 extends HttpServlet {
protected void doPost(HttpServletRequest request, HttpServletResponse response) throws ServletException, IOException {
// 获取流之前,要将流的默认编码:ISO-8859-1,设置为GBK

// 使用更简单的形式,设置编码
response.setContentType("text/html;charset=utf-8");
// 1、获取字符输出流
PrintWriter printWriter = response.getWriter();
// 2、输出数据
printWriter.write("<h1>你好吗? response</h1>");
}

protected void doGet(HttpServletRequest request, HttpServletResponse response) throws ServletException, IOException {
this.doPost(request,response);
}
}
测试结果:

二、服务器输出字节数据到浏览器
步骤如下:
1.获取字节流输出
2.输出数据
@WebServlet("/ResponseDemo5")
public class ResponseDemo5 extends HttpServlet {
protected void doPost(HttpServletRequest request, HttpServletResponse response) throws ServletException, IOException {
// 1.获取字节输出流
ServletOutputStream servletOutputStream = response.getOutputStream();
// 2.输出数据
servletOutputStream.write("<h1>hello</h1>".getBytes());
}

protected void doGet(HttpServletRequest request, HttpServletResponse response) throws ServletException, IOException {
this.doPost(request,response);
}
}
测试结果:

同样出现乱码情况的解决
@WebServlet("/ResponseDemo5")
public class ResponseDemo5 extends HttpServlet {
protected void doPost(HttpServletRequest request, HttpServletResponse response) throws ServletException, IOException {
// 告诉浏览器,服务器发送的消息体数据的编码,建议浏览器使用该编码解码
response.setContentType("text/html;charset=utf-8");
// 1.获取字节输出流
ServletOutputStream servletOutputStream = response.getOutputStream();
// 2.输出数据
servletOutputStream.write("<h1>你现在怎么样?</h1>".getBytes("utf-8"));
}

protected void doGet(HttpServletRequest request, HttpServletResponse response) throws ServletException, IOException {
this.doPost(request,response);
}
}
三、验证码
1.本质:图片
@WebServlet("/checkCodeServlet")
public class checkCodeServlet extends HttpServlet {
protected void doPost(HttpServletRequest request, HttpServletResponse response) throws ServletException, IOException {
int width = 100;
int height = 50;
// 1.创建对象,在内存中画图(验证码的图片对象)
BufferedImage image = new BufferedImage(width,height,BufferedImage.TYPE_INT_RGB);
// 2.美化图片
// 2.1 填充背景
Graphics g = image.getGraphics();// 画笔对象
g.setColor(Color.PINK);// 设置笔画颜色
g.fillRect(0,0,width,height);
// 3.图片输出
ImageIO.write(image,"jpg",response.getOutputStream());
}

protected void doGet(HttpServletRequest request, HttpServletResponse response) throws ServletException, IOException {
this.doPost(request,response);
}
}
测试结果:

进一步设置:
@WebServlet("/checkCodeServlet")
public class checkCodeServlet extends HttpServlet {
protected void doPost(HttpServletRequest request, HttpServletResponse response) throws ServletException, IOException {
int width = 100;
int height = 50;
// 1.创建对象,在内存中画图(验证码的图片对象)
BufferedImage image = new BufferedImage(width,height,BufferedImage.TYPE_INT_RGB);
// 2.美化图片
// 2.1 填充背景
Graphics g = image.getGraphics();// 画笔对象
g.setColor(Color.PINK);// 设置笔画颜色
g.fillRect(0,0,width,height);
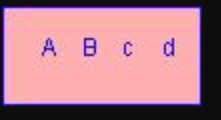
// 2.2 画边框
g.setColor(Color.BLUE);
g.drawRect(0,0,width-1,height-1);
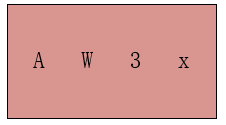
// 2.3 写验证码
g.drawString("A",20,25);
g.drawString("B",40,25);
g.drawString("c",60,25);
g.drawString("d",80,25);
// 3.图片输出
ImageIO.write(image,"jpg",response.getOutputStream());
}
protected void doGet(HttpServletRequest request, HttpServletResponse response) throws ServletException, IOException {
this.doPost(request,response);
}
}
测试结果:
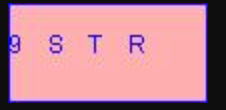
如何让验证码随机生成?
在原来代码的基础上加上以下代码:
String str = "ABCDEFGHIJKLMNOPQRSTUVWXYZabcdefghijklmnopqrstuvwxyz0123456789"; // 列出验证码所有可能出现的情况

// 生成随机角标
Random ran = new Random();
for(int i = 0 ; i < 4;i++){
int index = ran.nextInt(str.length());
// 获取字符
char ch = str.charAt(index); // 随机字符
// 2.3 写验证码
g.drawString(ch+"",width/5*i,height/2);// 验证码字母的位置 20/40/60/80
}
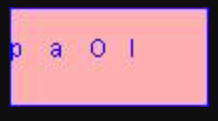
加上干扰:
// 画干扰线
g.setColor(Color.GREEN);
// 随机生成坐标点
for(int i = 0 ;i< 10;i++){
int i0 = ran.nextInt(width);
int i1 = ran.nextInt(width);
int i2 = ran.nextInt(width);
int i3 = ran.nextInt(width);
g.drawLine(i0,i1,i2,i3);
}
2.验证码的切换
新建register.html
<!DOCTYPE html>
<html lang="en">
<head>
<meta charset="UTF-8">
<title>Title</title>
<script>
window.onload = function(){
// 获取图片对象
var img = document.getElementById("checkCode");
// 绑定单击事件
img.onclick = function(){
// 加一个时间戳
var date = new Date().getTime();

img.src = "/day04/checkCodeServlet?"+date;
}
}
</script>
</head>
<body>
<img id = "checkCode" src="/day04/checkCodeServlet" />
<a id = "change" href="">看不清换一张?</a>

</body>
</html>
以下,点击即可切换验证码


 291
291


 被折叠的 条评论
为什么被折叠?
被折叠的 条评论
为什么被折叠?
 到【灌水乐园】发言


