


首先安装显卡对应的CUDA版本,关键点在于区别显卡支持的CUDA最高版本和运行版本
1、查看当前显卡支持的最高版本,有两种方式:
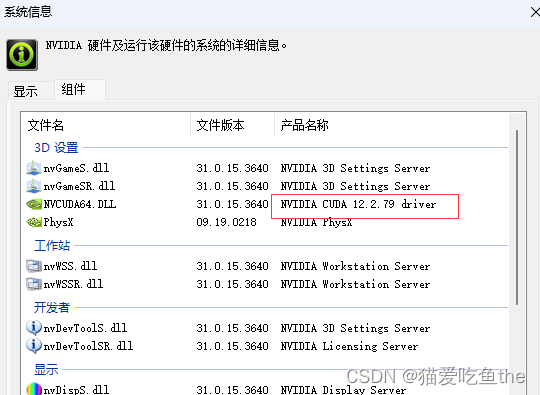
1)NVIDIA控制面板—>帮助—>系统信息—>组件—>NVCUDA.dll对应版本
请注意,12.2为本机CUDA支持的最高版本
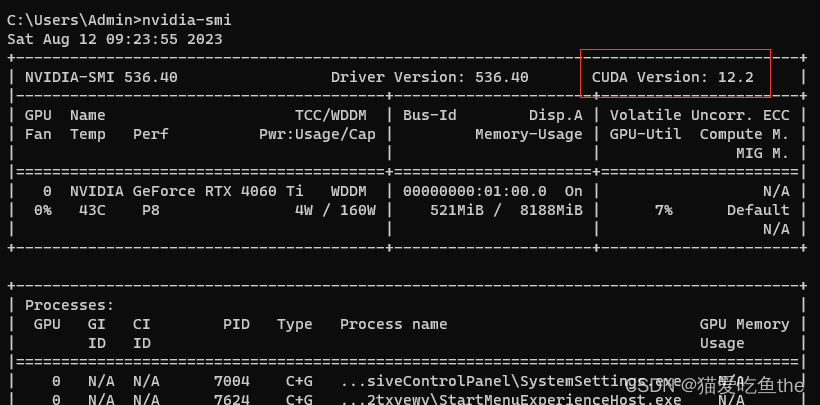
nvidia-smi
nvidia-smi显示的同上,也表示cuda支持的最高版本
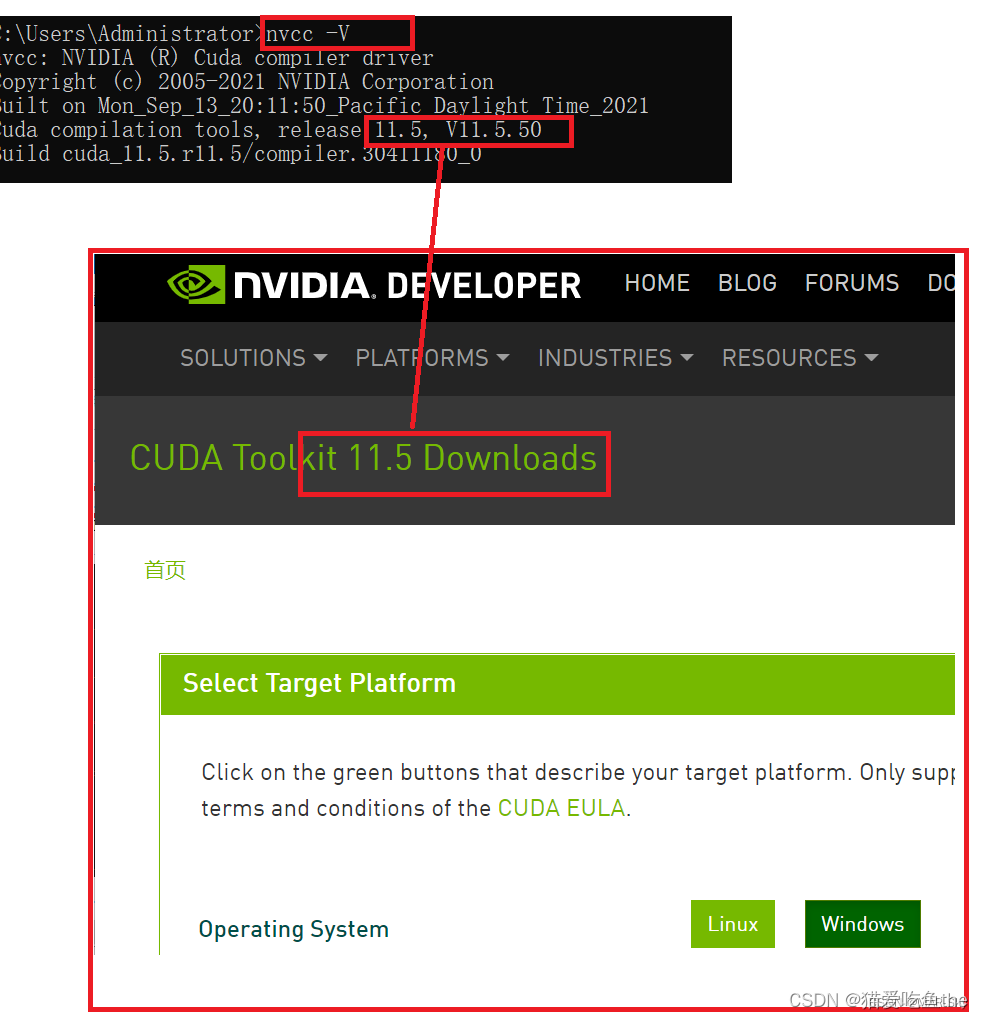
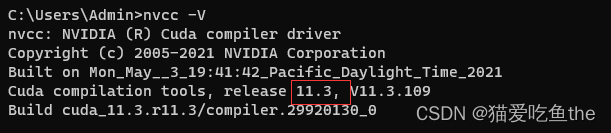
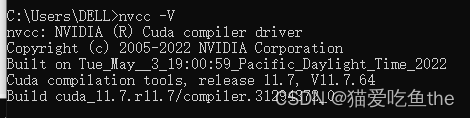
安装cuda后在cmd窗口使用nvcc -V命令看到的是自己安装的cuda版本,这个安装后不会修改自己nvidia显卡控制台上的版本,但这个版本要低于nvidia显卡控制台上显示的版本
安装对应CUDA版本并查看
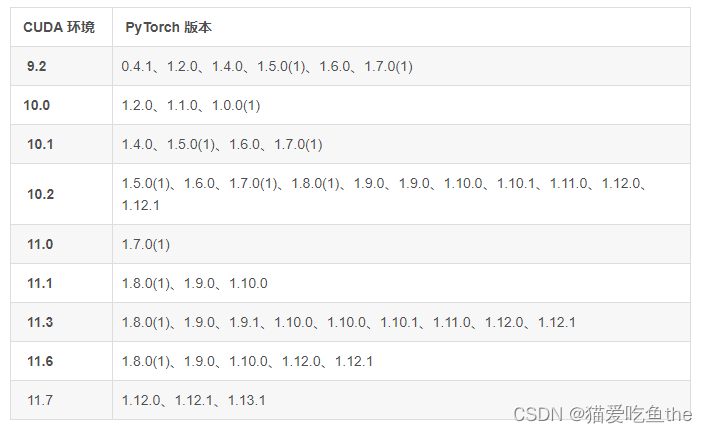
按照CUDA时需要对应torch的版本,官方推荐的cuda版本为10.2和11.3,这两种 cuda 支持大多数的 pytorch 版本。
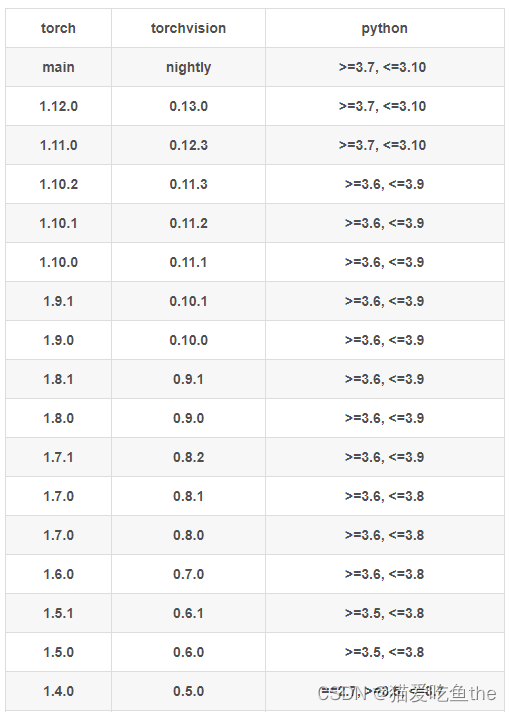
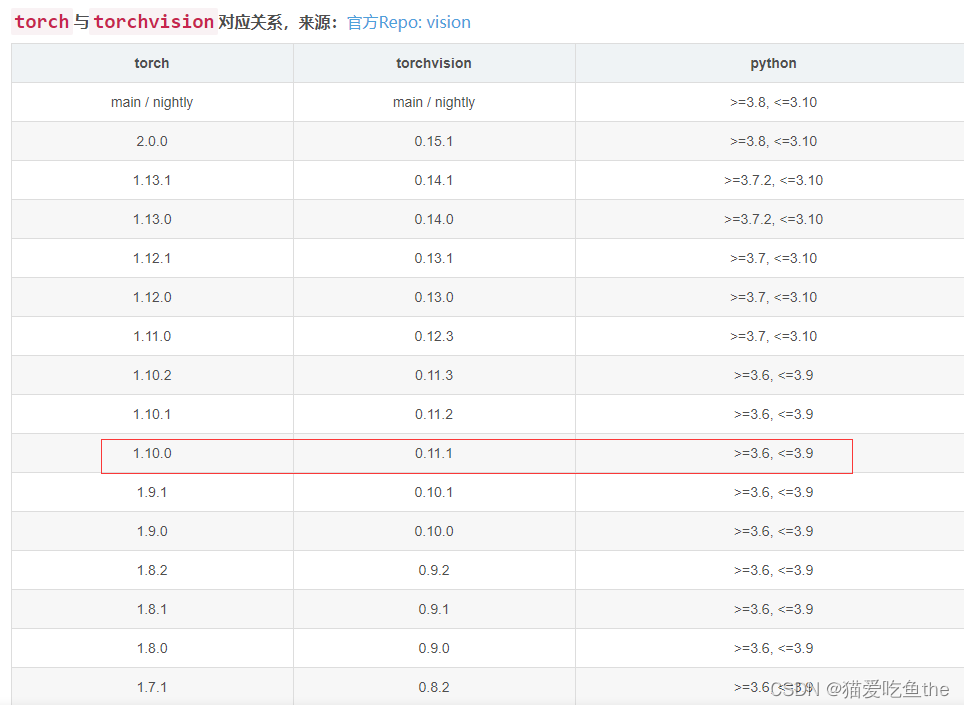
1、以下是Pytorch和CUDA对应的版本
2、以下是Pytorch和Python对应的版本
3、安装CUDA 11.3版本
1)CUDA 安装包官网

下载对应安装包并默认按照即可,安装效果如下:
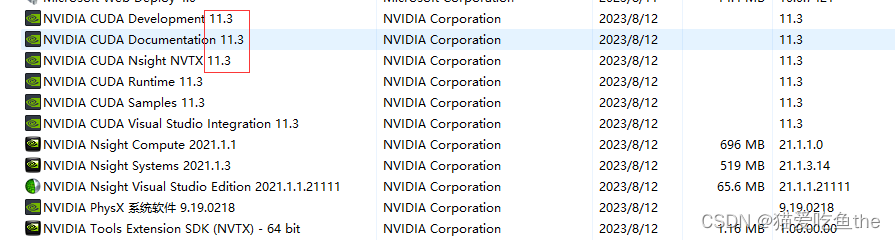 上述11.3即对应的cuda版本
ncvv -V #查看并检查电脑对应cuda版本
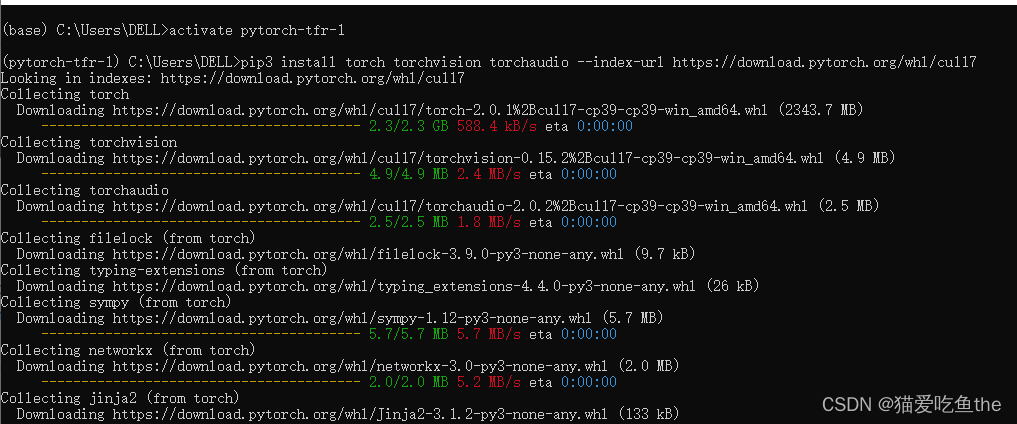
环境配置方法1,2023最新pytorch2.0 gpu cuda安装教程
# 分割线,2023最新pytorch2.0 gpu cuda安装教程
两种方法:从官网选择用cuda命令或者pip命令,官方直达
pip3 install torch torchvision torchaudio --index-url https://download.pytorch.org/whl/cu113  #cu113表示cuda是11.3版本
# torch链接,用上面的命令会自动选择cuda11.3对应的torch gpu版本 https://pytorch.org/get-started/locally/
接着创建anaconda环境并按照gpu版本的pytorch
1、首先创建环境
conda create -n pytorch python=3.7
2、接着在安装torch时,先配置好anaconda的镜像源。由于刚开始c盘并没有配置镜像源的文件,《C:\Users\Admin.condarc》,安装anaconda时关于windows系统没有.condarc文件的处理
conda config --set show_channel_urls yes
同时配置清华镜像源
show_channel_urls: true
ssl_verify: true
remote_read_timeout_secs: 100000.0
channels:
  - http://mirrors.tuna.tsinghua.edu.cn/anaconda/pkgs/free/win-64
  - http://mirrors.tuna.tsinghua.edu.cn/anaconda/pkgs/free/
  - http://mirrors.tuna.tsinghua.edu.cn/anaconda/pkgs/main/
  - http://mirrors.tuna.tsinghua.edu.cn/anaconda/cloud/conda-forge/
  - http://mirrors.tuna.tsinghua.edu.cn/anaconda/cloud/msys2/
  - http://mirrors.tuna.tsinghua.edu.cn/anaconda/cloud/bioconda/
  - http://mirrors.tuna.tsinghua.edu.cn/anaconda/cloud/menpo/
  - http://mirrors.tuna.tsinghua.edu.cn/anaconda/cloud/pytorch/
  - https://mirrors.tuna.tsinghua.edu.cn/anaconda/cloud/pytorch/
  - https://mirrors.tuna.tsinghua.edu.cn/anaconda/cloud/menpo/
  - https://mirrors.tuna.tsinghua.edu.cn/anaconda/cloud/bioconda/
  - https://mirrors.tuna.tsinghua.edu.cn/anaconda/cloud/msys2/
  - https://mirrors.tuna.tsinghua.edu.cn/anaconda/cloud/conda-forge/
  - https://mirrors.tuna.tsinghua.edu.cn/anaconda/pkgs/main/
  - https://mirrors.tuna.tsinghua.edu.cn/anaconda/pkgs/free/
  - defaults
  - conda-forge
report_errors: true
3、安装gpu版本的torch有以下教程,最简单的是直接使用下面这条命令
conda install pytorch torchvision torchaudio cudatoolkit=11.3
但是,安装的总是cpu版本的torch,主要是因为不能同时匹配cuda对用的gpu版torch,conda按照总是体术pytorch对应的cpu版本,如下图:
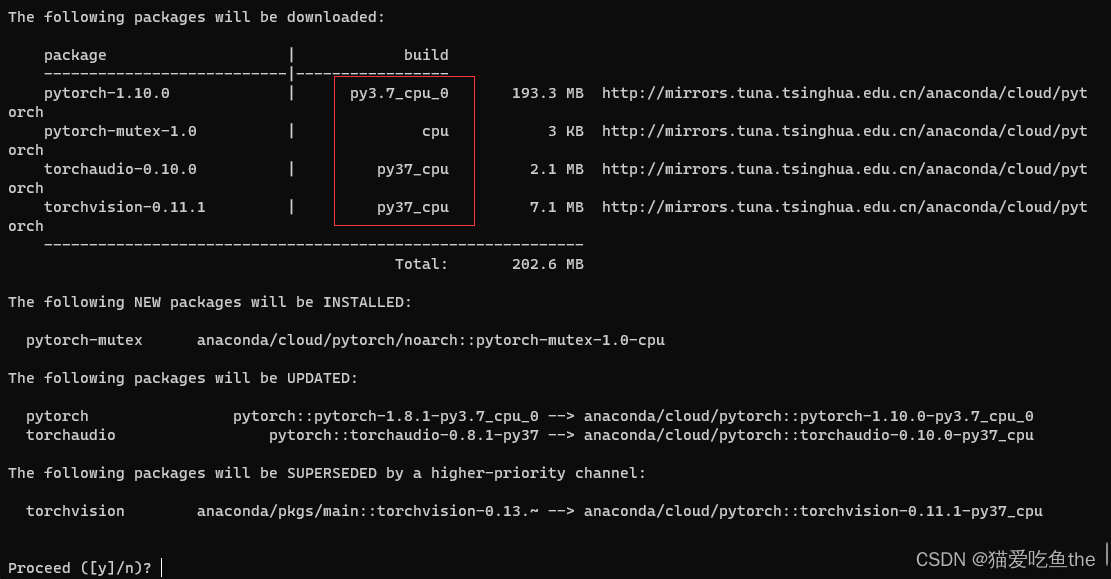
conda安装GPU版pytorch,结果却是cpu版本[找到问题根源,从容解决。
上述解决方法从根本上解决版本不对应问题,主要通过先查看清华镜像源的方式。
1)先看清华镜像源cuda对应的安装包版本,清华镜像源
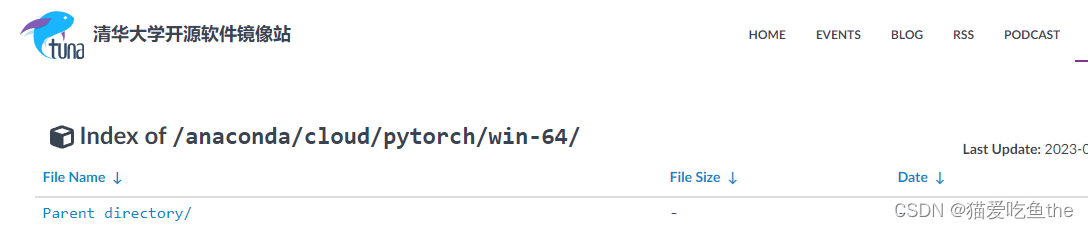
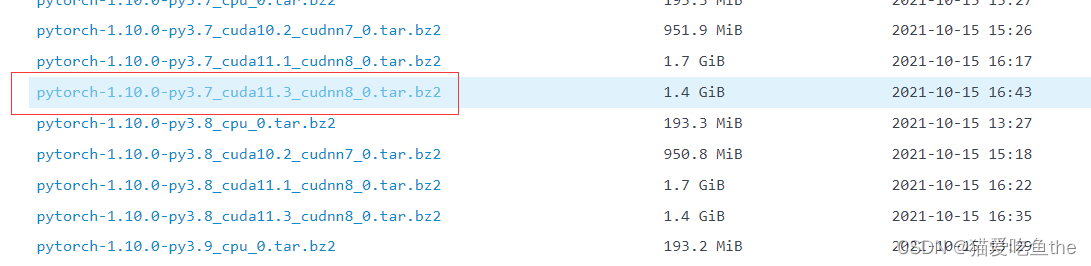
以cuda 11.3为例,其对应的torch==1.10.0,cudnn=8.0,进一步需查看torch对应的torchvision版本,链接详情如下:
至此,准备工作结束!
4、使用以下命令先安装cudatoolkit,接着cudnn,最后pytorch、torchvision。
1)安装 cudatoolkit,其实环境里面的
conda install cudatoolkit=11.3 # 安装 cuda

2)安装 cudnn
conda install cudnn=8.0 # 安装cudnn
3)安装 pytorch
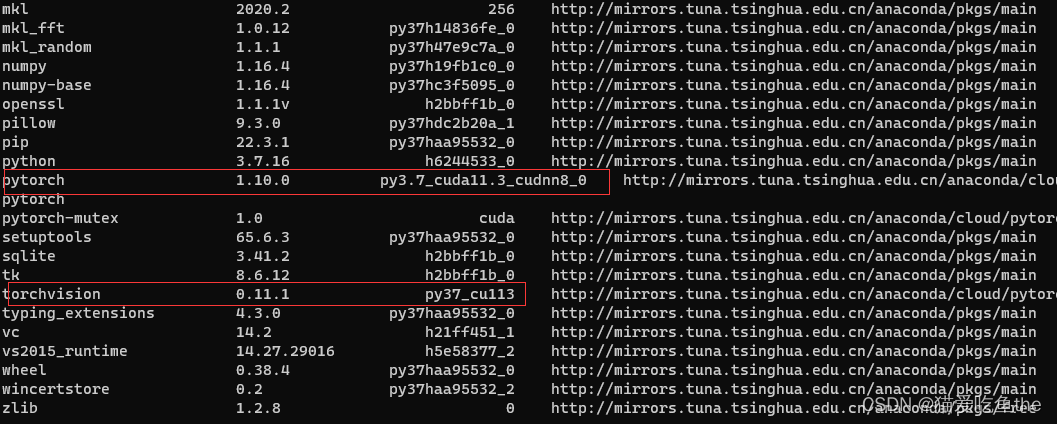
conda install pytorch==1.10.0 torchvision==0.11.1 cudatoolkit=11.3
- 检查
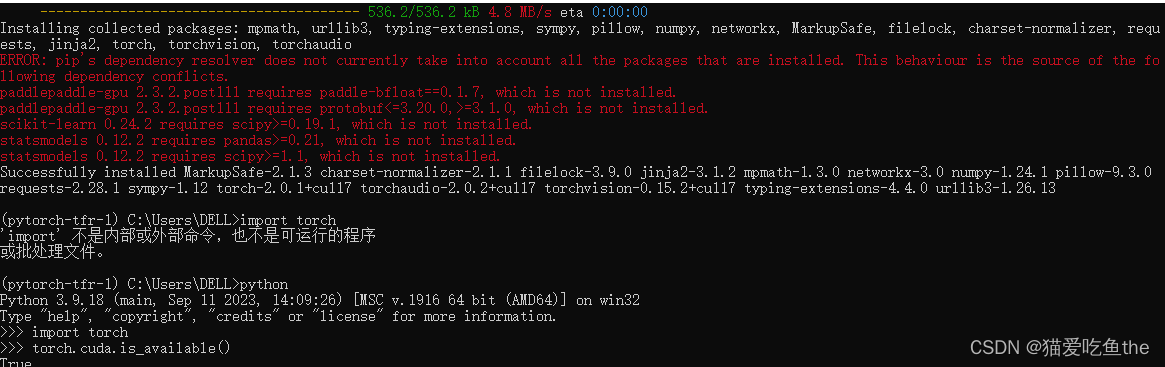
- 测试
import torch
print(torch.__version__)  #注意是双下划线
print(torch.version.cuda)
print(torch.cuda.is_available())
print(torch.cuda.get_device_name())


 221
221

 被折叠的 条评论
为什么被折叠?
被折叠的 条评论
为什么被折叠?
 到【灌水乐园】发言


