


硅谷课堂-智慧星球 Day 9~Day 10——尚硅谷项目笔记 2022 年
文章目录
Day 9-点播管理模块(三)
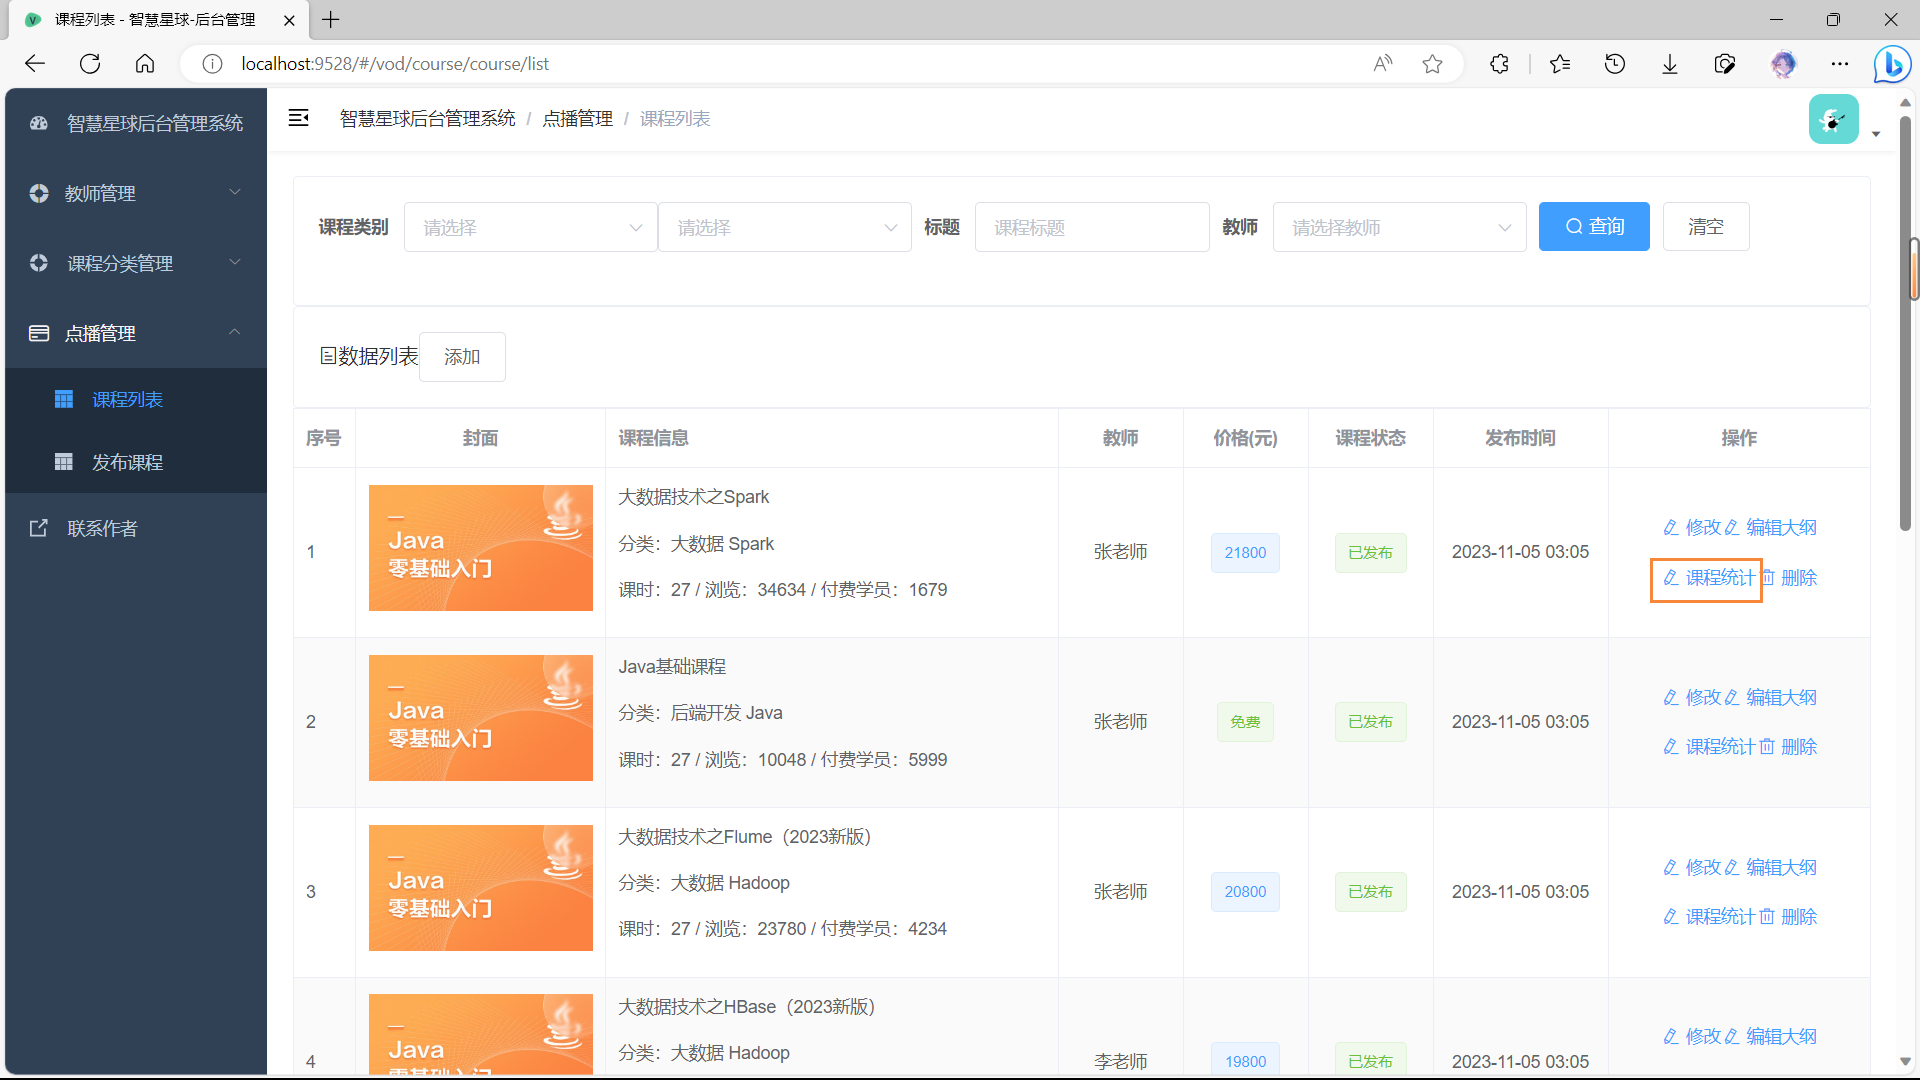
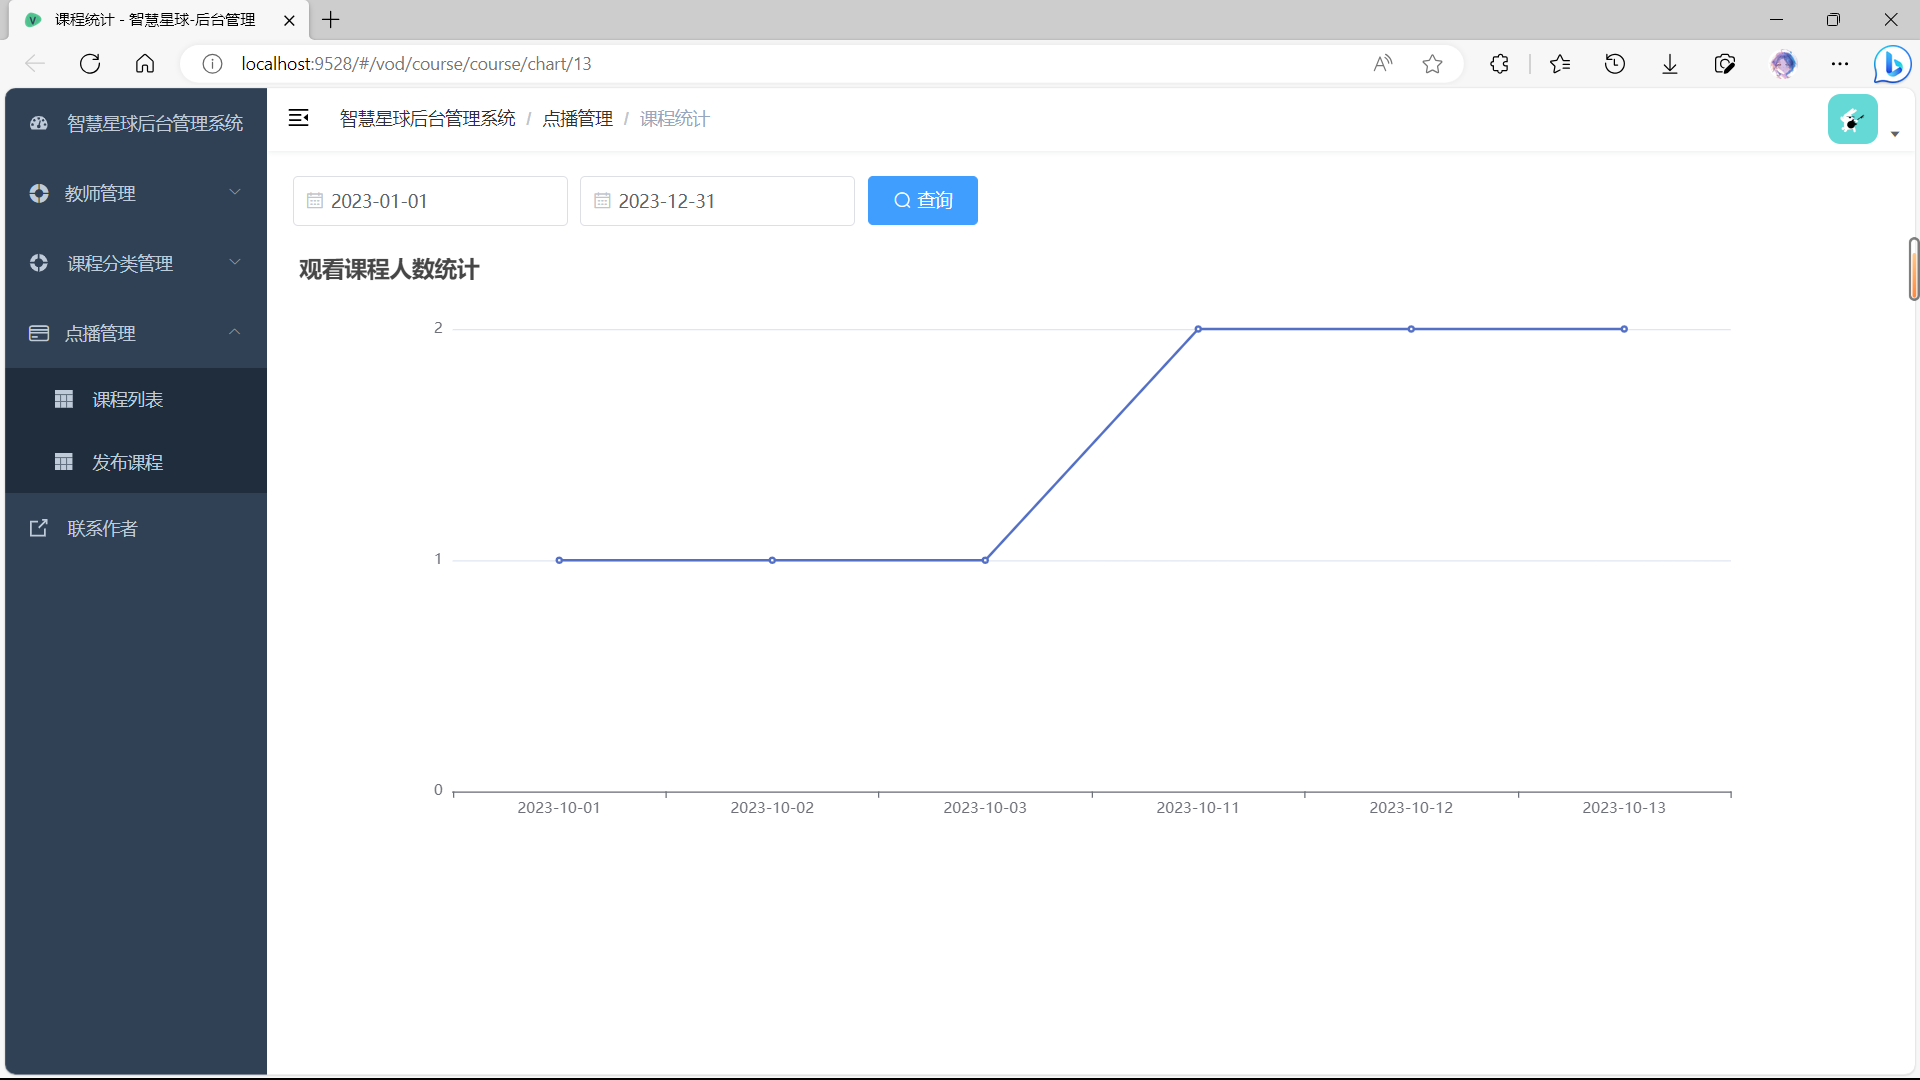
一、点播管理模块-课程统计
1、课程统计需求
2、课程统计接口
2.1、创建相关代码
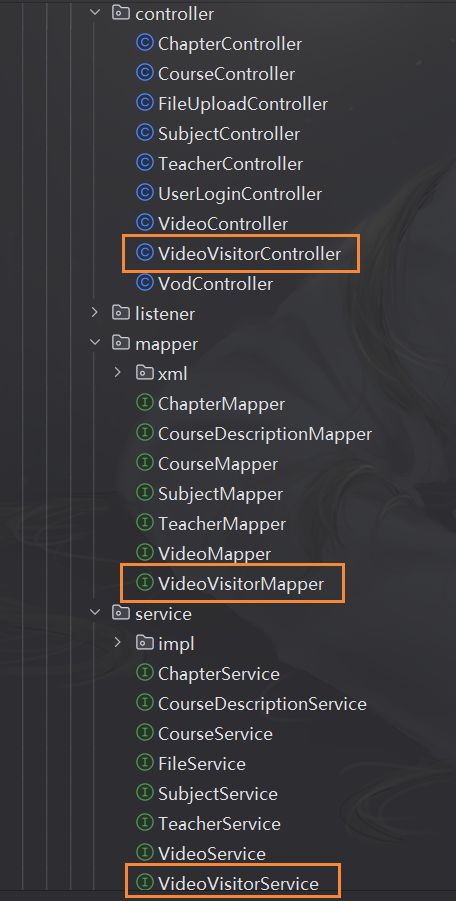
2.2、编写 Controller
VideoVisitorController
package com.myxh.smart.planet.vod.controller;

import com.myxh.smart.planet.result.Result;
import com.myxh.smart.planet.vod.service.VideoVisitorService;
import io.swagger.v3.oas.annotations.Operation;
import io.swagger.v3.oas.annotations.Parameter;
import io.swagger.v3.oas.annotations.tags.Tag;
import org.springframework.beans.factory.annotation.Autowired;
import org.springframework.web.bind.annotation.GetMapping;
import org.springframework.web.bind.annotation.RequestMapping;
import org.springframework.web.bind.annotation.RestController;

import java.util.Map;

/**
 * @author MYXH
 * @date 2023/10/10
 *
 * <p>
 * 视频来访者记录 前端控制器
 * </p>
 */
@Tag(name = "视频来访者记录接口", description = "视频来访者记录管理接口")
@RestController
@RequestMapping("admin/vod/video/visitor")
@CrossOrigin
public class VideoVisitorController
{
    @Autowired
    private VideoVisitorService videoVisitorService;

    /**
     * 显示课程统计数据
     *
     * @param courseId  课程 id
     * @param startDate 开始时间
     * @param endDate   结束时间
     * @return Result 全局统一返回结果
     */
    @Operation(summary = "显示课程统计数据", description = "显示课程统计数据")
    @GetMapping("find/count/{courseId}/{startDate}/{endDate}")
    public Result<Map<String, Object>> showChart(
            @Parameter(name = "courseId", description = "课程ID") @PathVariable("courseId") Long courseId,
            @Parameter(name = "startDate", description = "开始时间") @PathVariable("startDate") String startDate,
            @Parameter(name = "endDate", description = "结束时间") @PathVariable("endDate") String endDate)
    {
        Map<String, Object> countMap = videoVisitorService.findCount(courseId, startDate, endDate);

        return Result.ok(countMap);
    }
}
2.3、编写 Service 和实现
VideoVisitorService 和 VideoVisitorServiceImpl。
package com.myxh.smart.planet.vod.service.impl;

import com.baomidou.mybatisplus.extension.service.impl.ServiceImpl;
import com.myxh.smart.planet.model.vod.VideoVisitor;
import com.myxh.smart.planet.vo.vod.VideoVisitorCountVo;
import com.myxh.smart.planet.vod.mapper.VideoVisitorMapper;
import com.myxh.smart.planet.vod.service.VideoVisitorService;
import org.springframework.stereotype.Service;

import java.util.HashMap;
import java.util.List;
import java.util.Map;
import java.util.stream.Collectors;

/**
 * @author MYXH
 * @date 2023/10/10
 *
 *
 * <p>
 * 视频来访者记录 服务实现类
 * </p>
 */
@Service
public class VideoVisitorServiceImpl extends ServiceImpl<VideoVisitorMapper, VideoVisitor> implements VideoVisitorService
{
    /**
     * 显示课程统计数据
     *
     * @param courseId  课程 id
     * @param startDate 开始时间
     * @param endDate   结束时间
     * @return countMap 课程统计数据
     */
    @Override
    public Map<String, Object> findCount(Long courseId, String startDate, String endDate)
    {
        // 调用 mapper 的方法
        List<VideoVisitorCountVo> videoVisitorVoList = baseMapper.findCount(courseId, startDate, endDate);

        // 创建 countMap 集合
        Map<String, Object> countMap = new HashMap<>();

        // 创建两个 list 集合,一个代表所有日期,一个代表日期对应数量
        // 代表所有日期
        List<String> dateList = videoVisitorVoList.stream().map(VideoVisitorCountVo::getJoinTime)
                .collect(Collectors.toList());

        // 代表日期对应数量
        List<Integer> countList = videoVisitorVoList.stream().map(VideoVisitorCountVo::getUserCount)
                .collect(Collectors.toList());

        // 放到 countMap 集合
        countMap.put("xData", dateList);
        countMap.put("yData", countList);

        return countMap;
    }
}
2.4、编写 Mapper
(1)VideoVisitorMapper
package com.myxh.smart.planet.vod.mapper;

import com.baomidou.mybatisplus.core.mapper.BaseMapper;
import com.myxh.smart.planet.model.vod.VideoVisitor;
import com.myxh.smart.planet.vo.vod.VideoVisitorCountVo;
import org.apache.ibatis.annotations.Param;

import java.util.List;

/**
 * @author MYXH
 * @date 2023/10/10
 *
 * <p>
 * 视频来访者记录 Mapper 接口
 * </p>
 */
public interface VideoVisitorMapper extends BaseMapper<VideoVisitor>
{
    /**
     * 显示课程统计数据
     *
     * @param courseId  课程 id
     * @param startDate 开始时间
     * @param endDate   结束时间
     * @return countMap 课程统计数据
     */
    List<VideoVisitorCountVo> findCount(
            @Param("courseId") Long courseId,
            @Param("startDate") String startDate,
            @Param("endDate") String endDate);
}
(2)VideoVisitorMapper.xml 文件。
<?xml version="1.0" encoding="UTF-8"?>
<!DOCTYPE mapper PUBLIC "-//mybatis.org//DTD Mapper 3.0//EN" "http://mybatis.org/dtd/mybatis-3-mapper.dtd">
<mapper namespace="com.myxh.smart.planet.vod.mapper.VideoVisitorMapper">
<select id="findCount" resultType="com.myxh.smart.planet.vo.vod.VideoVisitorCountVo">
SELECT
DATE(join_time) AS joinTime,
COUNT(*) AS userCount
FROM video_visitor
<where>
<if test="startDate != null and startDate != ''">
AND DATE(join_time) >= #{startDate}
</if>
<if test="endDate != null and endDate != ''">
AND DATE(join_time) <= #{endDate}
</if>
AND course_id=#{courseId}
</where>
GROUP BY DATE(join_time)
ORDER BY DATE(join_time)
</select>
</mapper>
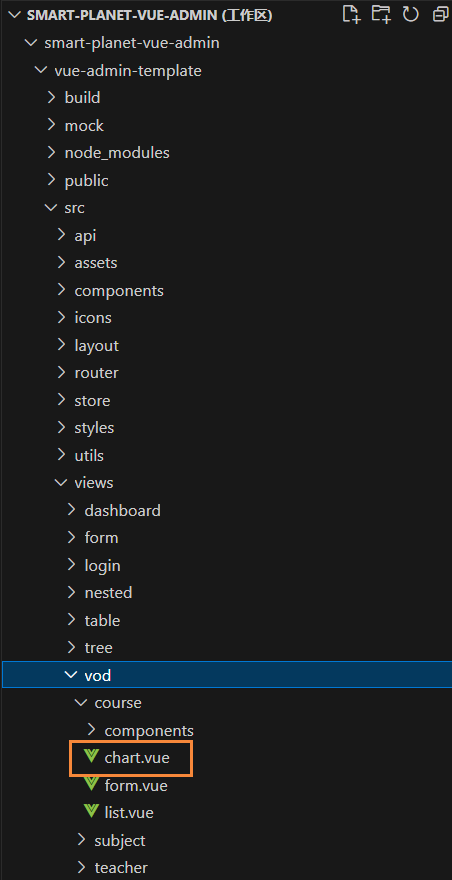
3、课程统计前端
3.1、定义接口
创建 videoVisitor.js 定义接口。
import request from "@/utils/request";

const VIDEO_VISITOR_API = "/admin/vod/video/visitor";

export default {
  /**
   * 显示课程统计数据
   *
   * @param {number} courseId  课程 id
   * @param {String} startDate 开始时间
   * @param {String} endDate   结束时间
   * @returns {Promise} 返回一个 Promise 对象,表示操作的异步结果
   */
  findCount(courseId, startDate, endDate) {
    return request({
      url: `${VIDEO_VISITOR_API}/find/count/${courseId}/${startDate}/${endDate}`,
      method: "get",
    });
  },
};
3.2、安装 ECharts 组件
ECharts 是百度的一个项目,后来百度把 Echart 捐给 apache,用于图表展示,提供了常规的折线/面积图、散点(气泡)图、饼图、K 线图,用于统计的箱形图,用于地理数据可视化的地图、热力图、路径图,用于关系数据可视化的关系图、Treemap、旭日图,多维数据可视化的平行坐标图,还有用于 BI 的漏斗图,仪表盘,并且支持图与图之间的混搭。
官方网站:https://echarts.apache.org/zh/index.html
npm install --save echarts@5.4.3
3.3、编写页面
创建 chart.vue 页面。
<template>
  <div class="app-container">
    <!-- 表单 -->
    <el-form :inline="true" class="demo-form-inline">
      <el-form-item>
        <el-date-picker
          v-model="startDate"
          type="date"
          placeholder="选择开始日期"
          value-format="yyyy-MM-dd"
        />
      </el-form-item>
      <el-form-item>
        <el-date-picker
          v-model="endDate"
          type="date"
          placeholder="选择截止日期"
          value-format="yyyy-MM-dd"
        />
      </el-form-item>
      <el-button
        :disabled="btnDisabled"
        type="primary"
        icon="el-icon-search"
        @click="showChart()"
        >查询</el-button
      >
    </el-form>
    <div id="chart" class="chart" style="height: 500px" />
  </div>
</template>

<script>
  import * as echarts from "echarts";
  import videoVisitorAPI from "@/api/vod/videoVisitor";

  export default {
    data() {
      return {
        courseId: "",
        startDate: "",
        endDate: "",
        btnDisabled: false,
      };
    },

    created() {
      this.courseId = this.$route.params.id;

      // 初始化最近十天数据
      let currentDate = new Date();
      this.startDate = this.dateFormat(
        new Date(currentDate.getTime() - 7 * 24 * 3600 * 1000)
      );

      this.endDate = this.dateFormat(currentDate);
      this.showChart();
    },

    methods: {
      showChart() {
        videoVisitorAPI
          .findCount(this.courseId, this.startDate, this.endDate)
          .then((response) => {
            this.setChartData(response.data);
          });
      },

      setChartData(data) {
        // 基于准备好的 dom,初始化 echarts 实例
        let myChart = echarts.init(document.getElementById("chart"));

        // 指定图表的配置项和数据
        let option = {
          title: {
            text: "观看课程人数统计",
          },

          xAxis: {
            data: data.xData,
          },

          yAxis: {
            minInterval: 1,
          },

          series: [
            {
              type: "line",
              data: data.yData,
            },
          ],
        };

        // 使用刚指定的配置项和数据显示图表。
        myChart.setOption(option);
      },

      dateFormat(date) {
        let fmt = "YYYY-mm-dd";
        let ret;

        const opt = {
          // 年
          "Y+": date.getFullYear().toString(),
          // 月
          "m+": (date.getMonth() + 1).toString(),
          // 日
          "d+": date.getDate().toString(),
          // 时
          "H+": date.getHours().toString(),
          // 分
          "M+": date.getMinutes().toString(),
          // 秒
          "S+": date.getSeconds().toString(),
          // 有其他格式化字符需求可以继续添加,必须转化成字符串
        };

        for (let k in opt) {
          ret = new RegExp("(" + k + ")").exec(fmt);

          if (ret) {
            fmt = fmt.replace(
              ret[1],
              ret[1].length == 1 ? opt[k] : opt[k].padStart(ret[1].length, "0")
            );
          }
        }

        return fmt;
      },
    },
  };
</script>
二、整合腾讯云点播
1、功能需求介绍
1.1、上传视频
在发布课程时候,需要添加课时并且上传课程视频,这个时候需要使用到腾讯云点播服务进行上传视频管理。
1.2、删除视频
(1)添加小节,上传课程视频。
(2)删除小节时候,需要删除视频。
(3)删除章节时候,需要删除章节,小节和视频。
(4)删除课程时候,需要删除课程,章节,小节和视频。
1.3、视频播放(后续完成)
2、腾讯云点播介绍
腾讯云点播(Video on Demand,VOD)基于腾讯多年技术积累与基础设施建设,为有音视频应用相关需求的客户提供包括音视频存储管理、音视频转码处理、音视频加速播放和音视频通信服务的一站式解决方案。
文档中心:https://cloud.tencent.com/document/product/266
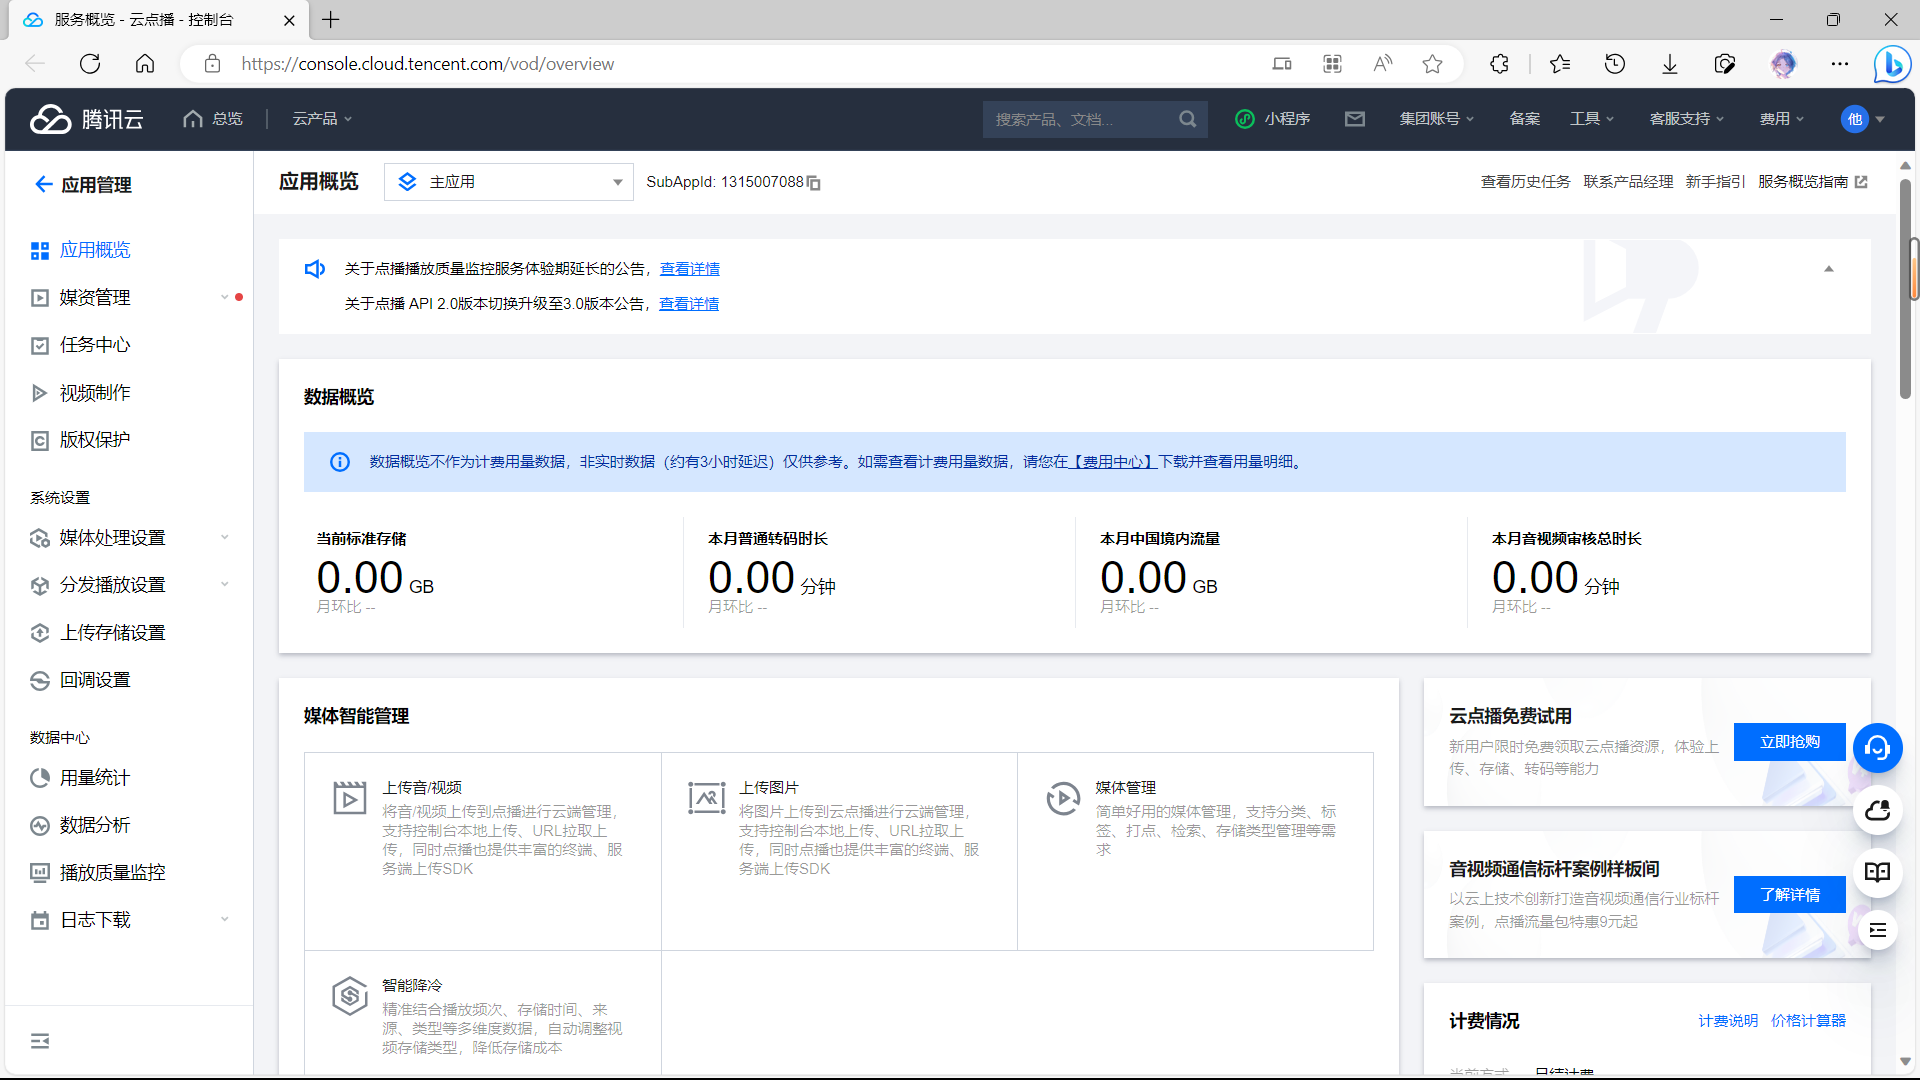
2.1、开通"云点播"服务
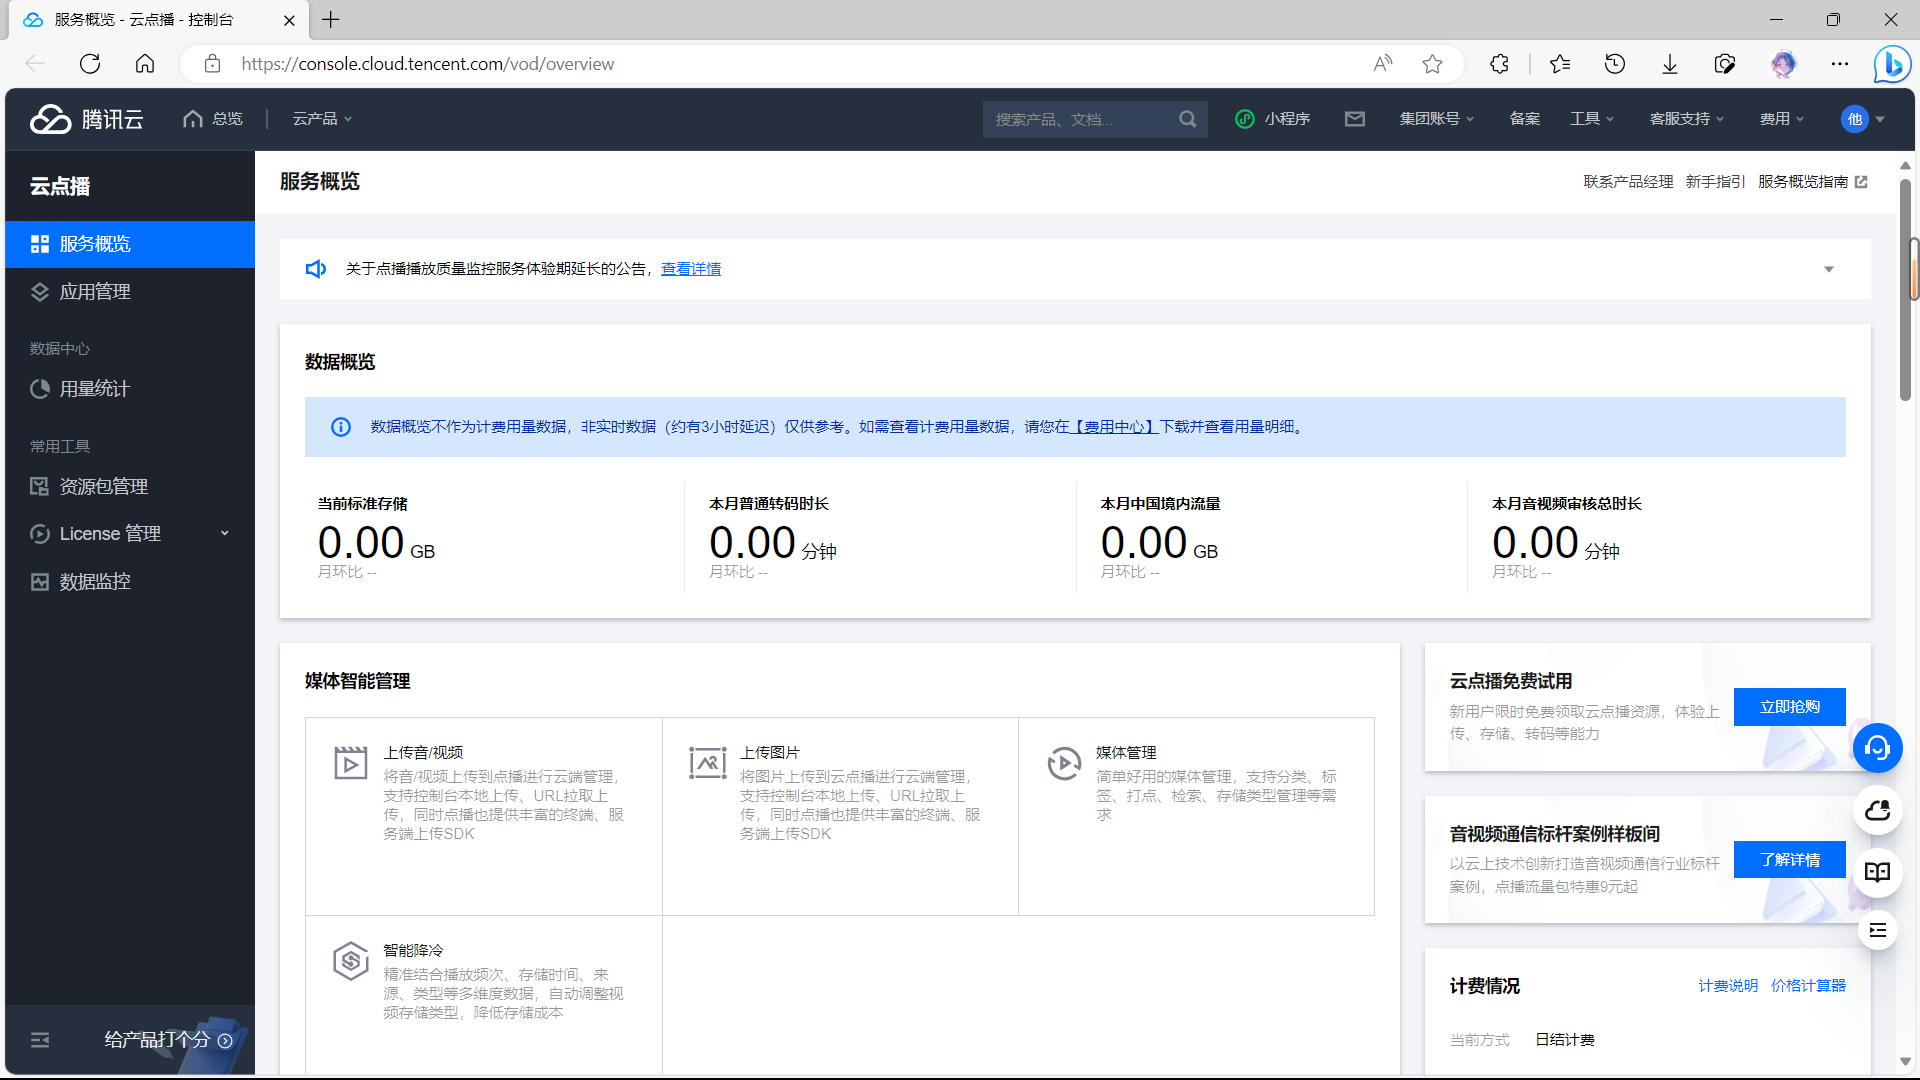
2.2、管理控制台
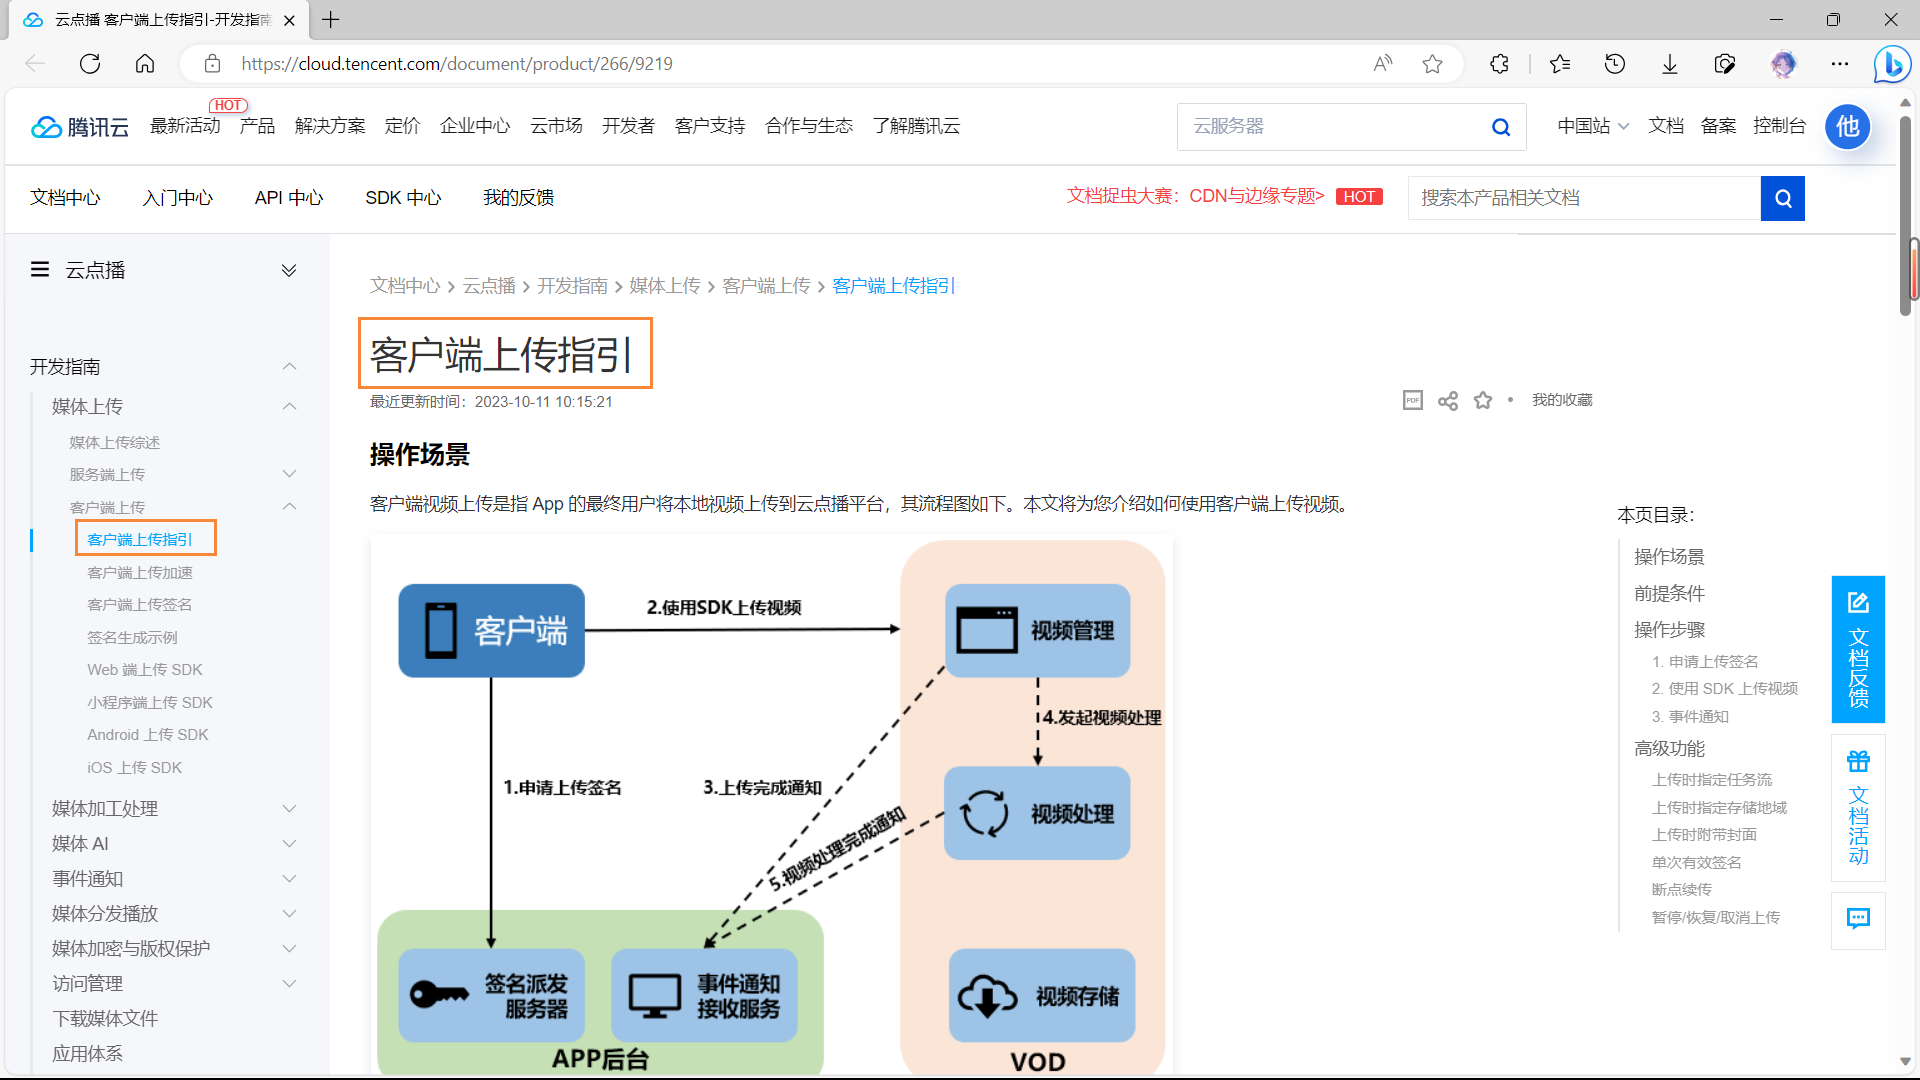
2.3、上传视频
上传视频可将视频上传到云点播的存储中,以进行后续的处理和分发等。
-
单击左侧菜单栏【媒资管理 > 视频管理】,默认展示【已上传】标签页;
-
点击【上传视频】按钮;
-
单击【选择视频】,选择本地视频文件;
-
单击【开始上传】;
-
页面将自动跳转至【正在上传】标签页, 本地文件所在行【状态】栏为“上传成功”时,单击【已上传】标签页,可见完成上传的视频;

-
单击【管理】,可以查看视频详情。
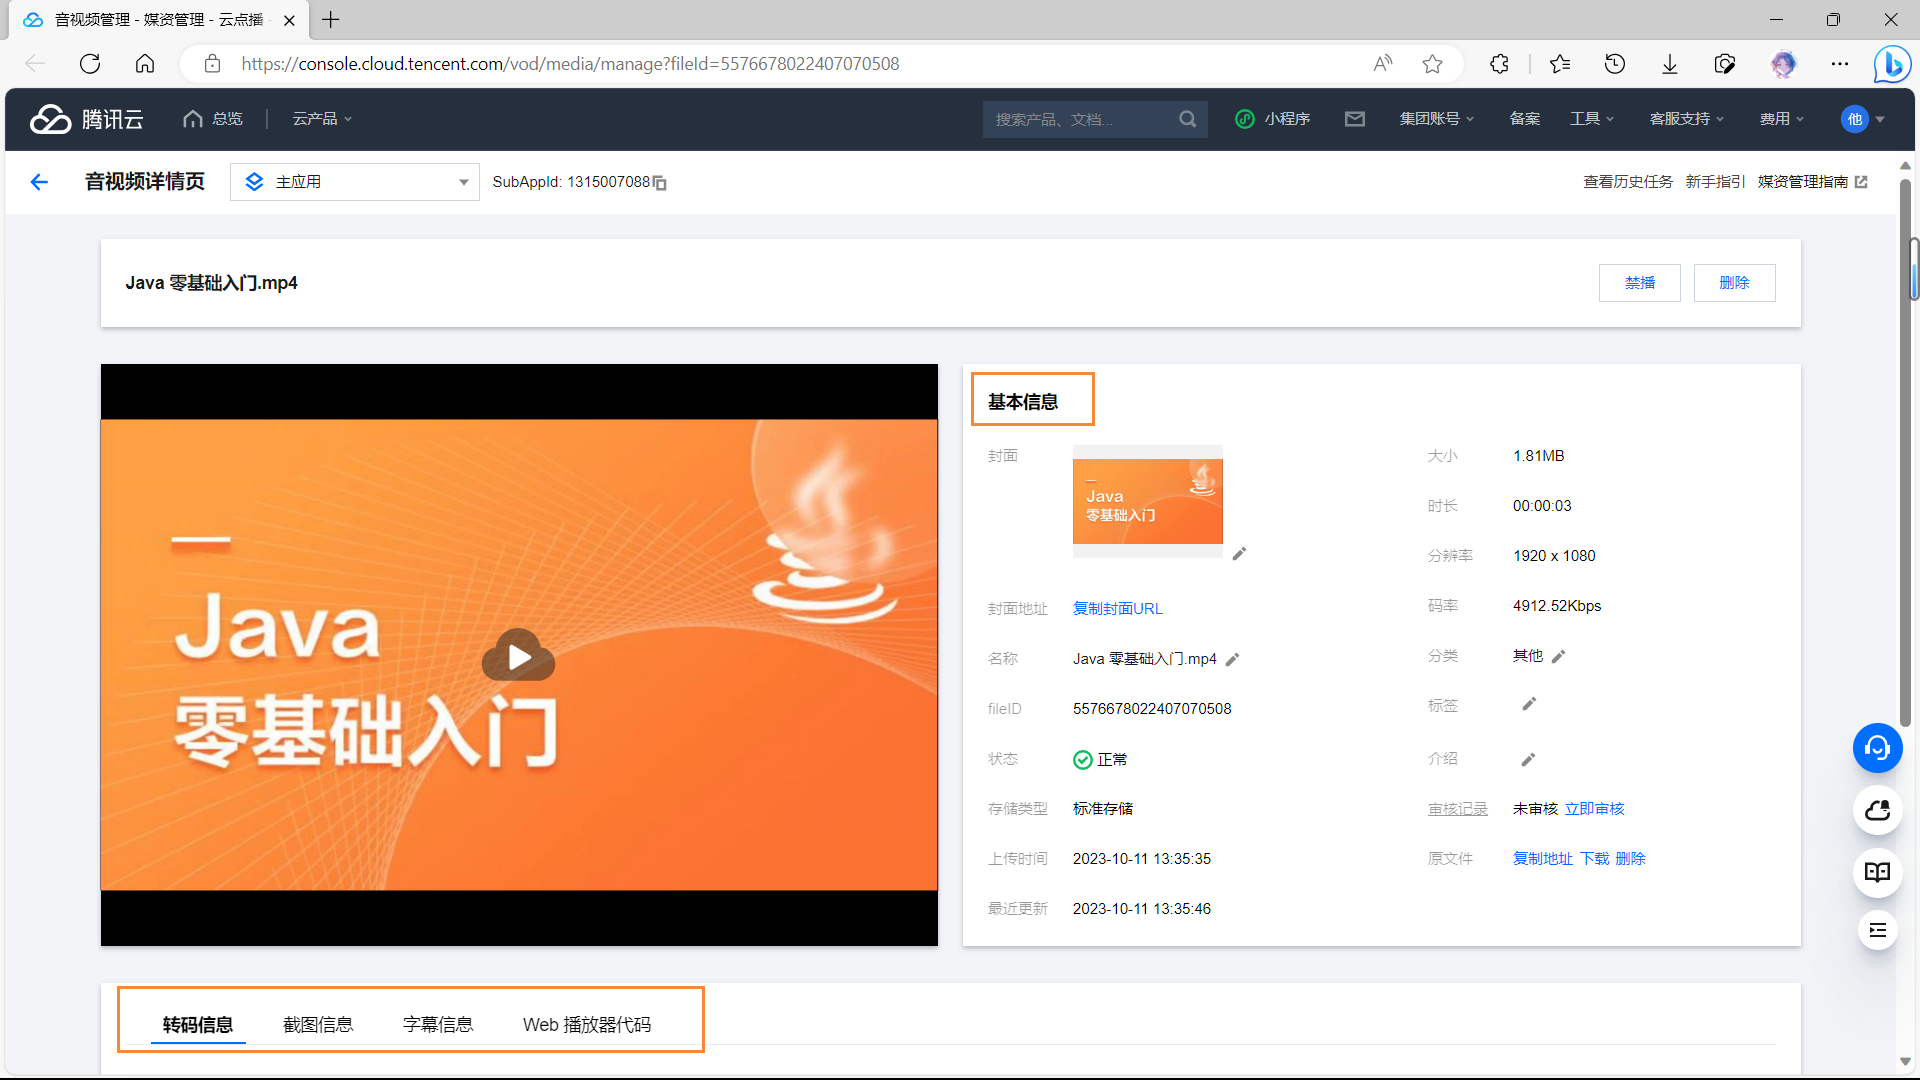
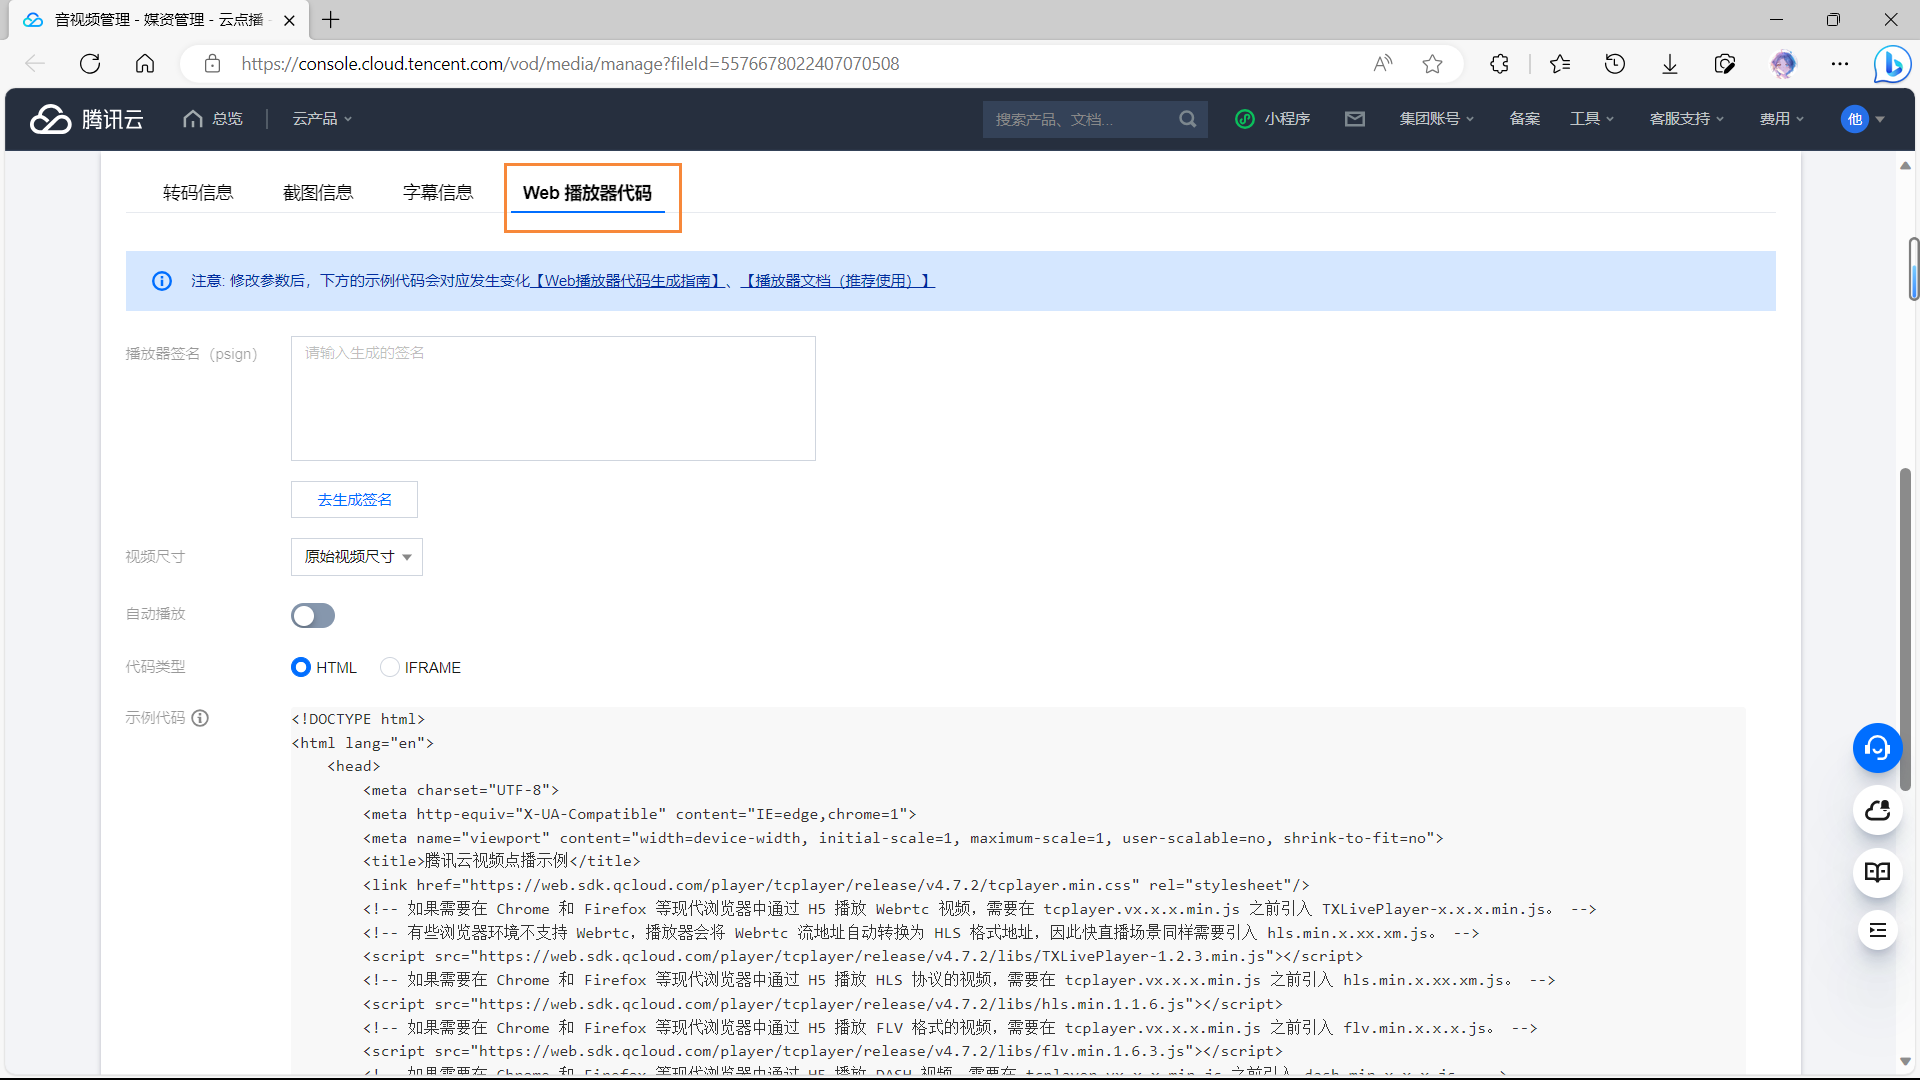
2.4、前端集成
前端集成有两种方式,使用“超级播放器预览”与“web 播放器预览”,后者代码已经不更新,推荐使用前者,因此“web 播放器预览”仅做了解。
1、查看“web 播放器预览”。
说明:需要将视频进行转码,才能支持超级播放器播放,转码为:自适应码流。
2、查看“任务流设置”。

3、查看详情。
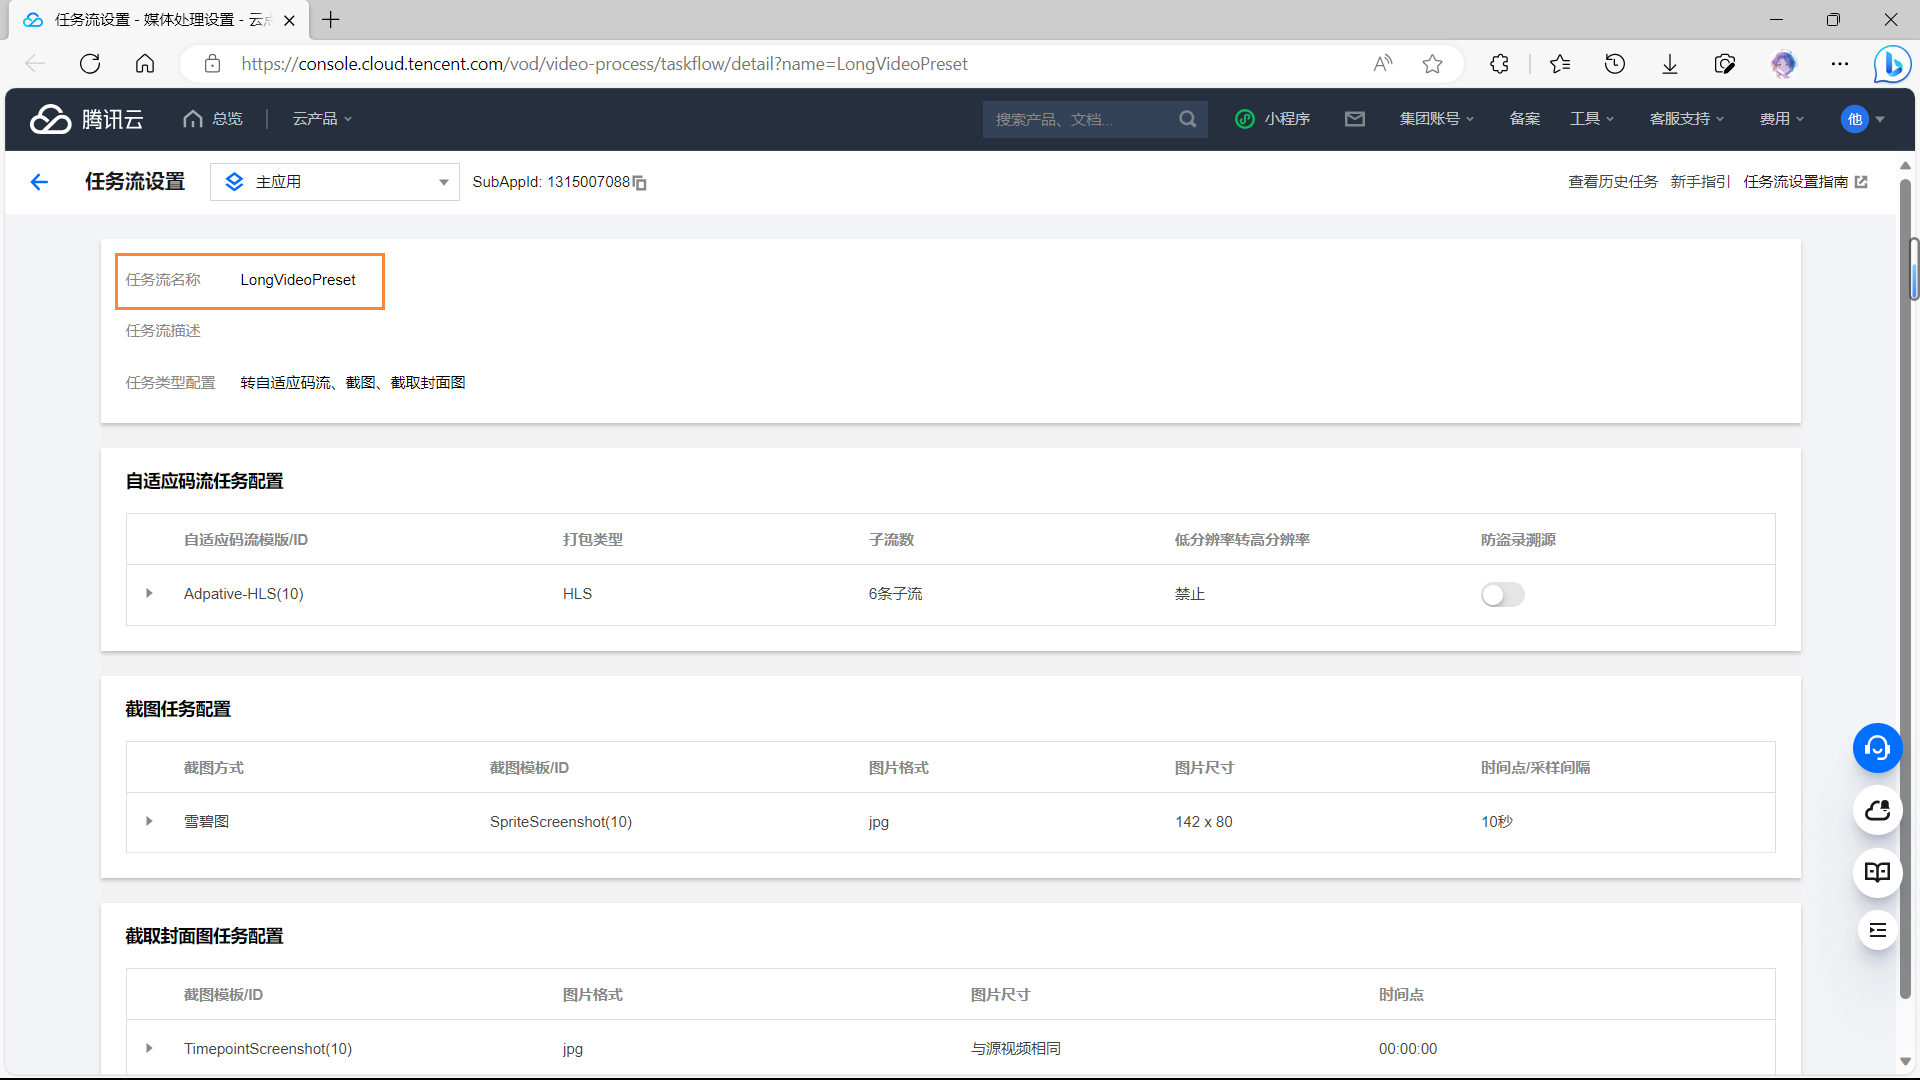
当前任务流就是系统默认的“自适应码流”任务流。
4、在【音视频管理】重新上传视频。
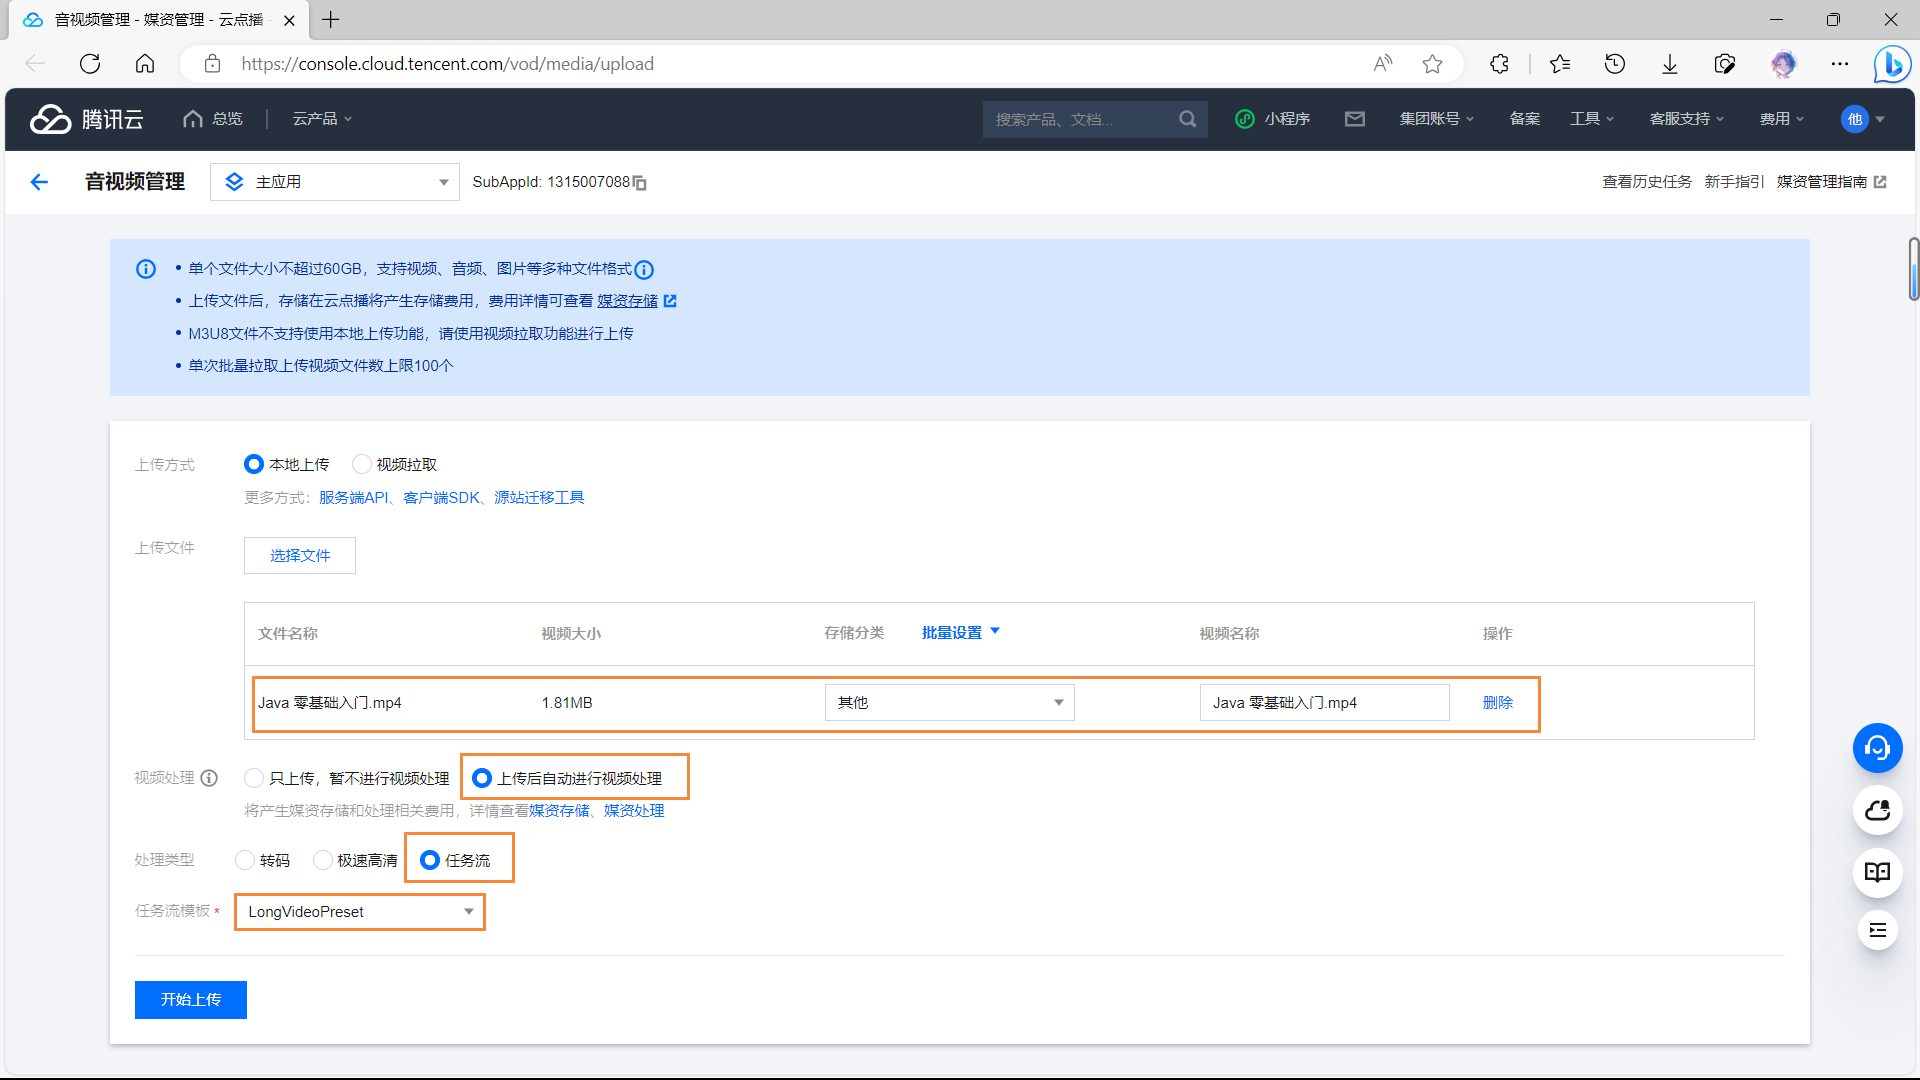
5、查看详情。

6、复制代码 index.html 到项目,即可播放。
3、编写视频点播接口
3.1、创建相关类
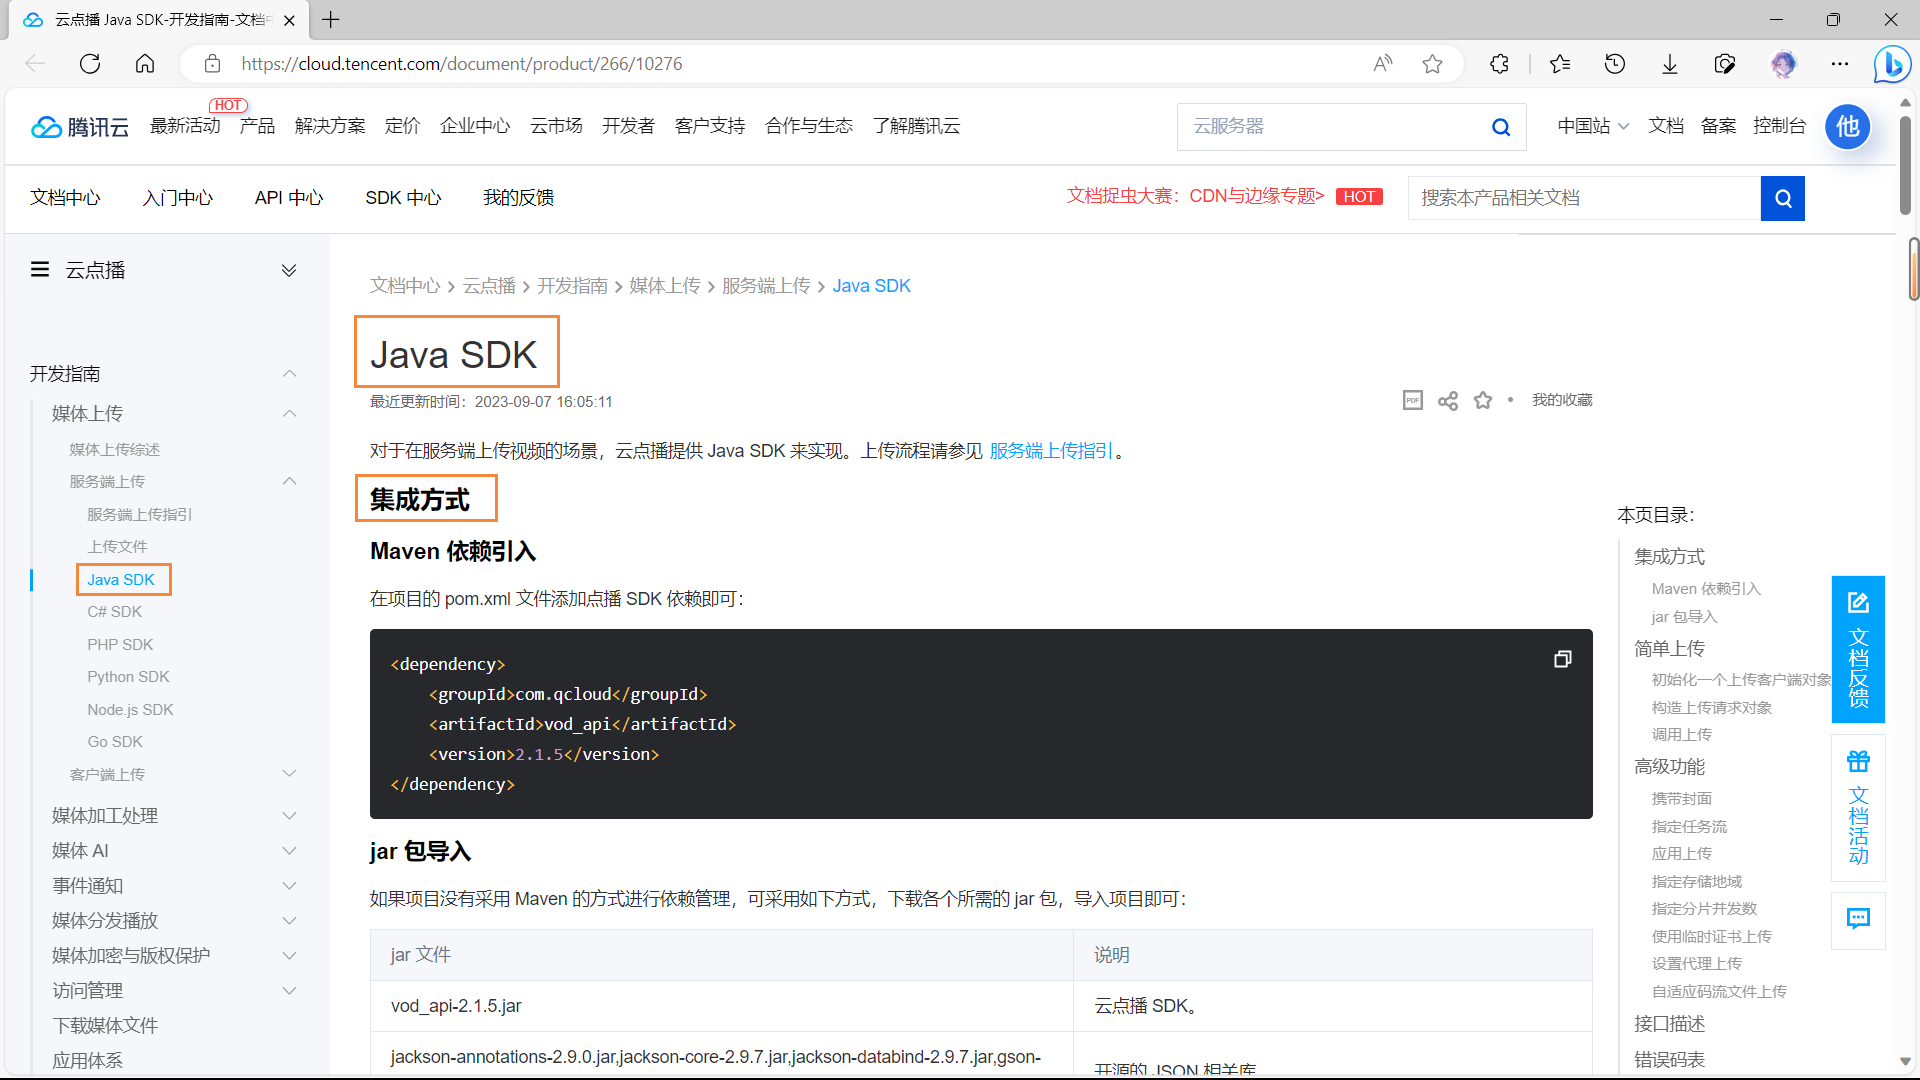
3.2、引入相关依赖
(1)在 service-vod 模块引入。
<!-- 腾讯云点播(Video on Demand,VOD) -->
<dependency>
    <groupId>com.qcloud</groupId>
    <artifactId>vod_api</artifactId>
    <version>2.1.5</version>
    <exclusions>
        <exclusion>
            <groupId>org.slf4j</groupId>
            <artifactId>slf4j-log4j12</artifactId>
        </exclusion>
    </exclusions>
</dependency>
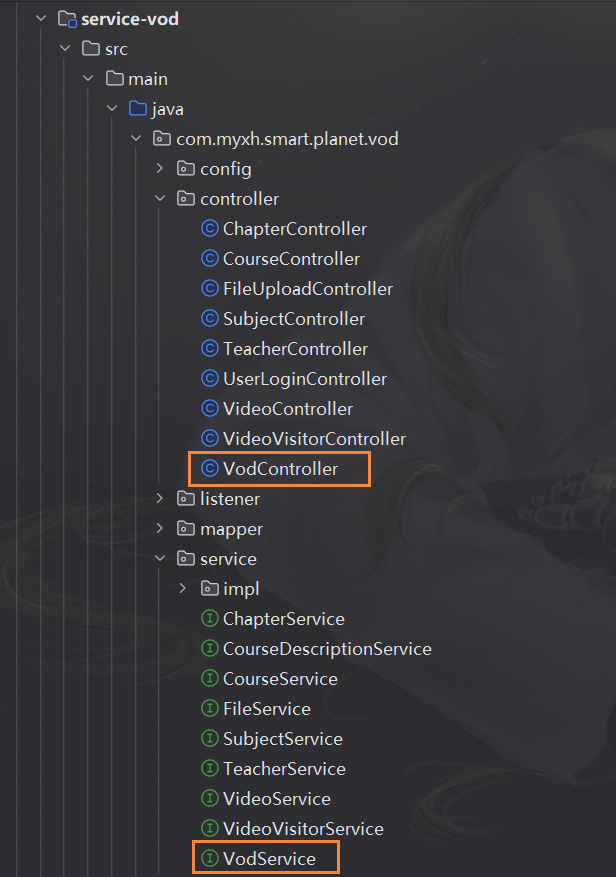
3.3、编写 Controller
(1)上传视频集成方案: https://cloud.tencent.com/document/product/266/10276
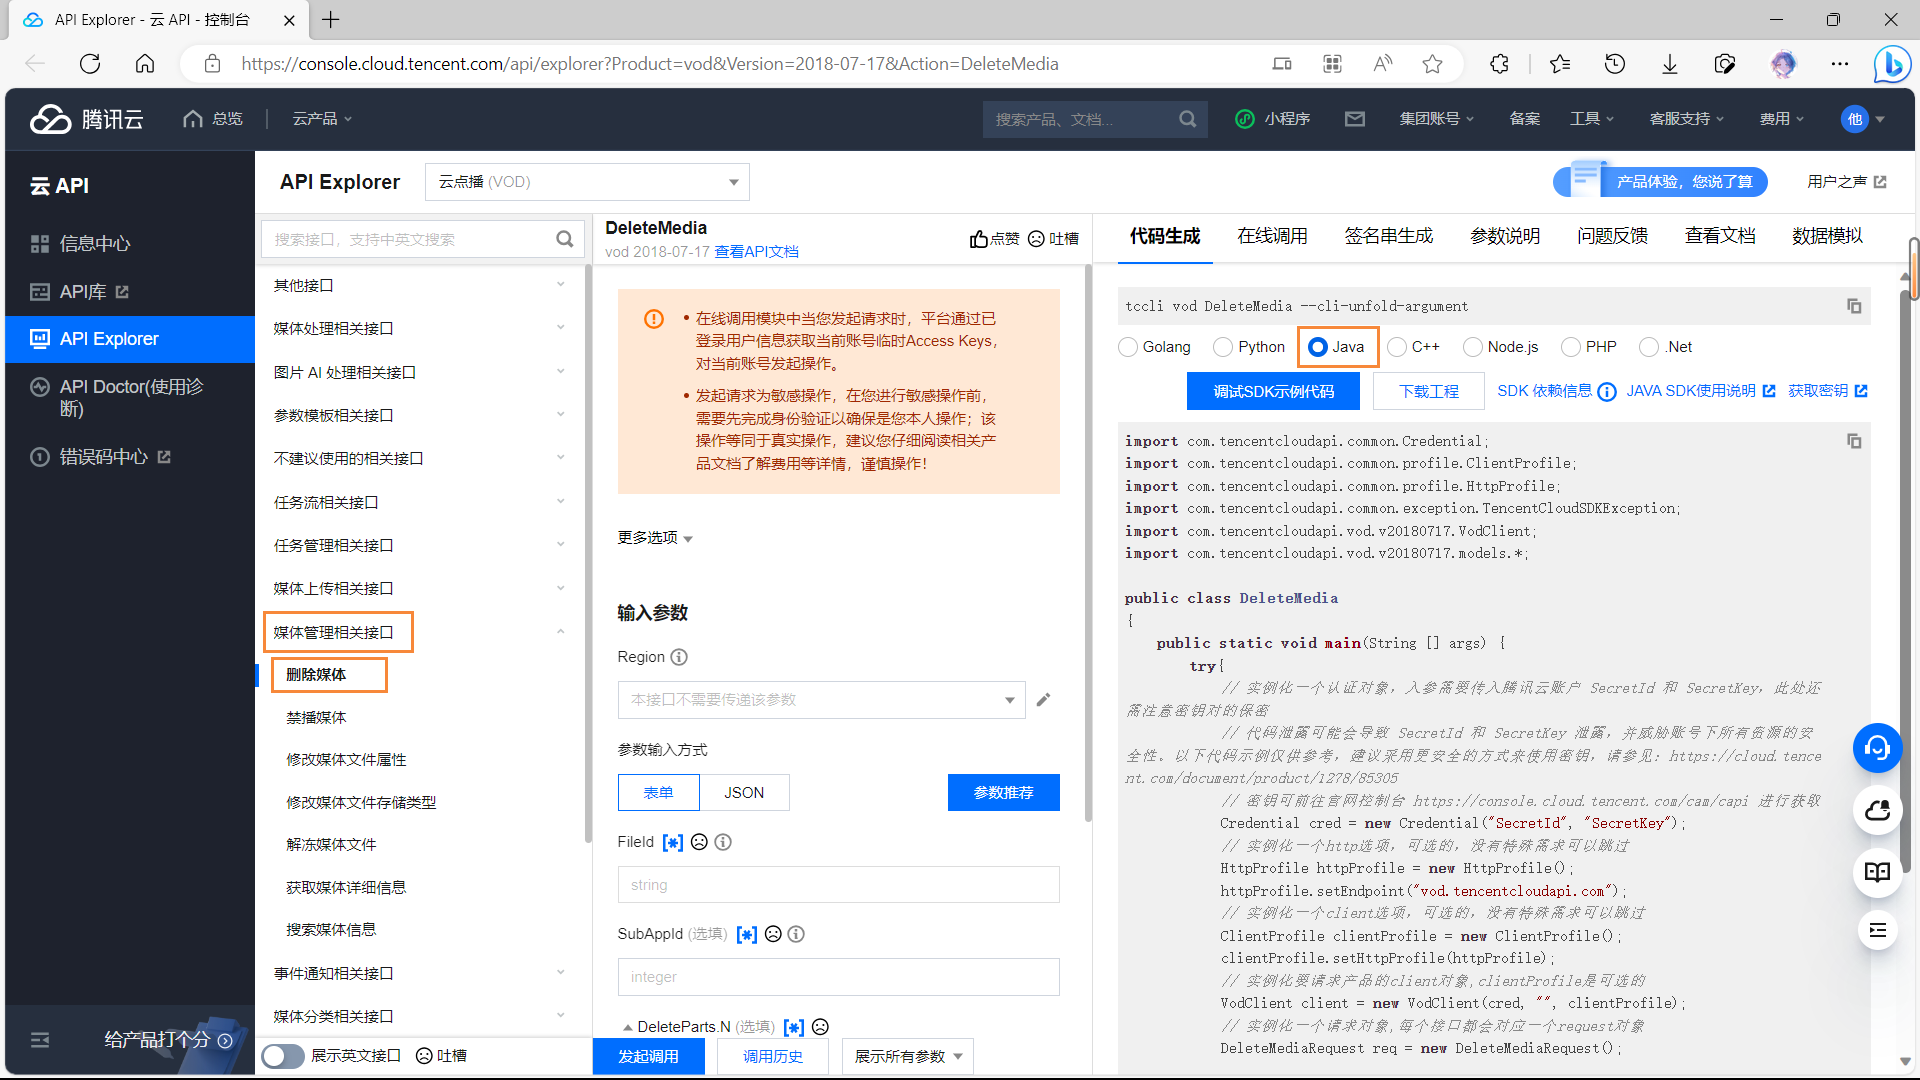
(2)删除视频。
可在线生成代码。
地址:https://console.cloud.tencent.com/api/explorer?Product=vod&Version=2018-07-17&Action=DeleteMedia
package com.myxh.smart.planet.vod.controller;

import com.myxh.smart.planet.result.Result;
import com.myxh.smart.planet.vod.service.VodService;
import io.swagger.v3.oas.annotations.Operation;
import io.swagger.v3.oas.annotations.Parameter;
import io.swagger.v3.oas.annotations.tags.Tag;
import org.springframework.beans.factory.annotation.Autowired;
import org.springframework.http.MediaType;
import org.springframework.web.bind.annotation.PostMapping;
import org.springframework.web.bind.annotation.DeleteMapping;
import org.springframework.web.bind.annotation.RequestMapping;
import org.springframework.web.bind.annotation.RestController;
import org.springframework.web.multipart.MultipartFile;

import java.io.IOException;
import java.io.InputStream;

/**
 * @author MYXH
 * @date 2023/10/11
 */
@Tag(name = "腾讯云点播接口", description = "腾讯云点播接口")
@RestController
@RequestMapping("/admin/vod")
@CrossOrigin
public class VodController
{
    @Autowired
    private VodService vodService;

    /**
     * 上传视频
     *
     * @param file 文件
     * @return videoId 视频 id
     * @throws IOException IO 异常
     */
    @Operation(summary = "上传", description = "上传视频")
    @PostMapping(value = "upload", consumes = MediaType.MULTIPART_FORM_DATA_VALUE)
    public Result<String> uploadVideo(@Parameter(name = "file", description = "文件", required = true)
                                      @RequestParam("file") MultipartFile file) throws IOException
    {
        InputStream inputStream = file.getInputStream();
        String originalFilename = file.getOriginalFilename();
        String videoId = vodService.uploadVideo(inputStream, originalFilename);

        return Result.ok(videoId);
    }

    /**
     * 删除视频
     *
     * @param videoSourceId 视频源 id
     * @return Result 全局统一返回结果
     */
    @Operation(summary = "删除", description = "删除视频")
    @DeleteMapping("remove/{videoSourceId}")
    public Result<Void> removeVideo(@Parameter(name = "videoSourceId", description = "视频源 id", required = true)
                                    @PathVariable("videoSourceId") String videoSourceId)
    {
        vodService.removeVideo(videoSourceId);

        return Result.ok(null);
    }
}
3.4、编写 Service
(1)VodService 定义方法。
package com.myxh.smart.planet.vod.service;

import java.io.InputStream;

/**
 * @author MYXH
 * @date 2023/10/11
 */
public interface VodService
{
    /**
     * 上传视频
     *
     * @param inputStream 输入流
     * @param originalFilename 原始文件名
     * @return videoId 视频 id
     */
    String uploadVideo(InputStream inputStream, String originalFilename);

    /**
     * 删除视频
     *
     * @param videoSourceId 视频源 id
     */
    void removeVideo(String videoSourceId);
}
(2)VodServiceImpl 实现方法。
package com.myxh.smart.planet.vod.service.impl;

import com.myxh.smart.planet.exception.SmartPlanetException;
import com.myxh.smart.planet.vod.service.VodService;
import com.myxh.smart.planet.vod.utils.ConstantPropertiesUtil;
import com.qcloud.vod.VodUploadClient;
import com.qcloud.vod.model.VodUploadRequest;
import com.qcloud.vod.model.VodUploadResponse;
import com.tencentcloudapi.common.Credential;
import com.tencentcloudapi.common.exception.TencentCloudSDKException;
import com.tencentcloudapi.vod.v20180717.VodClient;
import com.tencentcloudapi.vod.v20180717.models.DeleteMediaRequest;
import com.tencentcloudapi.vod.v20180717.models.DeleteMediaResponse;
import org.apache.ibatis.javassist.LoaderClassPath;
import org.springframework.stereotype.Service;

import java.io.InputStream;

/**
 * @author MYXH
 * @date 2023/10/11
 */
@Service
public class VodServiceImpl implements VodService
{
    /**
     * 上传视频
     *
     * @param inputStream      输入流
     * @param originalFilename 原始文件名
     * @return videoId 视频 id
     */
    @Override
    public String uploadVideo(InputStream inputStream, String originalFilename)
    {
        try
        {
            // 指定当前腾讯云账号 id 和 密码
            VodUploadClient client = new VodUploadClient(ConstantPropertiesUtil.ACCESS_KEY_ID,
                    ConstantPropertiesUtil.ACCESS_KEY_SECRET);

            // 视频上传请求对象
            VodUploadRequest request = new VodUploadRequest();

            // 指定要上传的文件
            String path = LoaderClassPath.class.getResource("/video/Java 零基础入门.mp4").getPath();

            // 设置视频文件的本地路径
            request.setMediaFilePath(path);

            // 指定任务流
            request.setProcedure("LongVideoPreset");

            // 调用上传方法,传入接入点地域及上传请求
            VodUploadResponse response = client.upload("ap-beijing", request);

            // 返回文件 id 保存到业务表,用于控制视频播放
            String fileId = response.getFileId();
            System.out.println("fileId = " + fileId);

            return fileId;
        }
        catch (Exception e)
        {
            throw new SmartPlanetException(20001, "上传视频失败");
        }
    }

    /**
     * 删除视频
     *
     * @param videoSourceId 视频源 id
     */
    @Override
    public void removeVideo(String videoSourceId)
    {
        try
        {
            // 实例化一个认证对象,入参需要传入腾讯云账户 secretId,secretKey
            Credential cred = new Credential(ConstantPropertiesUtil.ACCESS_KEY_ID,
                    ConstantPropertiesUtil.ACCESS_KEY_SECRET);

            // 实例化要请求产品的 client 对象,clientProfile 是可选的
            VodClient client = new VodClient(cred, "ap-beijing");

            // 实例化一个请求对象,每个接口都会对应一个 request 对象
            DeleteMediaRequest req = new DeleteMediaRequest();
            req.setFileId(videoSourceId);

            // 返回的 resp 是一个 DeleteMediaResponse 的实例,与请求对象对应
            DeleteMediaResponse resp = client.DeleteMedia(req);

            // 输出 json 格式的字符串回包
            System.out.println("DeleteMediaResponse.toJsonString(resp) = " + DeleteMediaResponse.toJsonString(resp));
        }
        catch (TencentCloudSDKException e)
        {
            throw new SmartPlanetException(20001, "删除视频失败");

        }
    }
}
4、完善上传视频功能
4.1、定义接口
创建 vod.js 定义接口。
import request from "@/utils/request";

const VOD_API = "/admin/vod";

export default {
  /**
   * 删除视频
   *
   * @param {number} id 视频源 id
   * @returns {Promise} 返回一个 Promise 对象,表示操作的异步结果
   */
  removeByVodId(id) {
    return request({
      url: `${VOD_API}/remove/${id}`,
      method: "delete",
    });
  },
};
4.1、添加上传视频
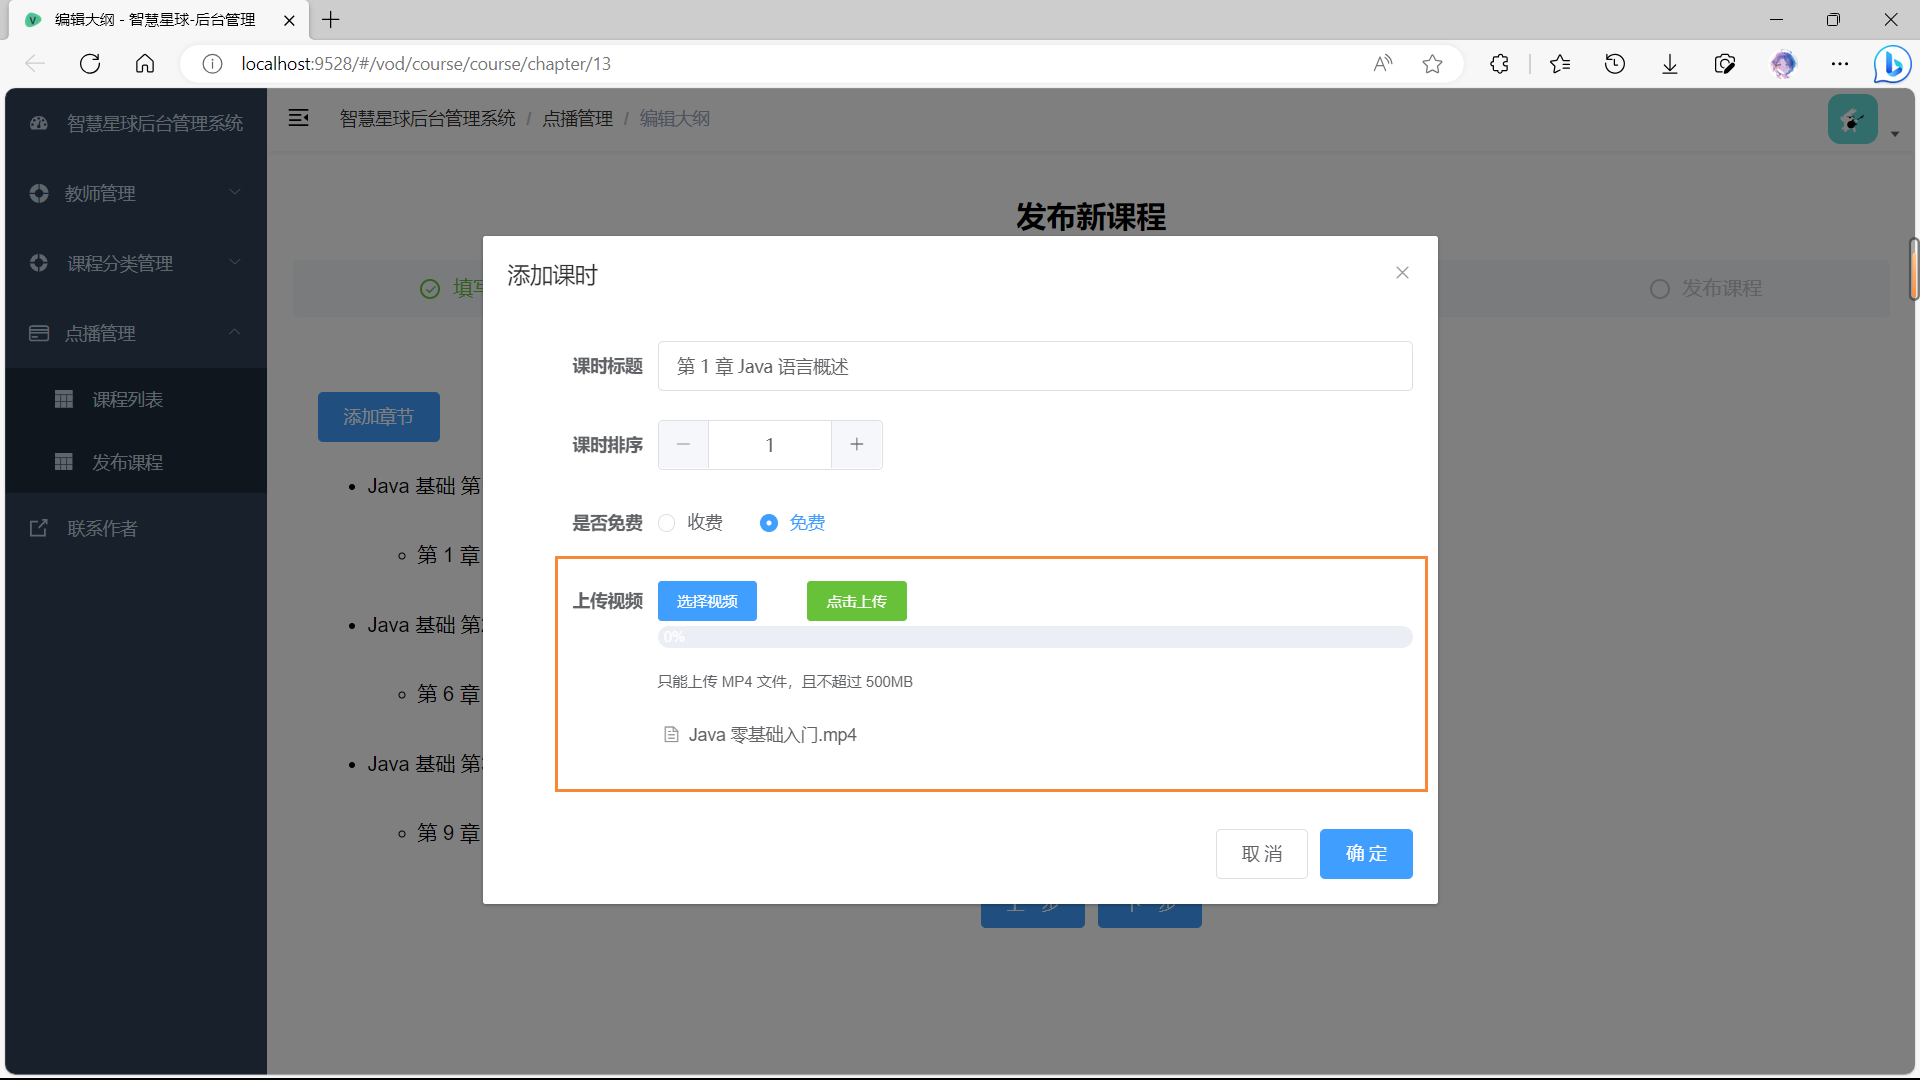
(1)修改 video/form.vue 页面。

<template>
  <!-- 添加和修改课时表单 -->
  <el-dialog :visible="dialogVisible" title="添加课时" @close="close()">
    <el-form :model="video" label-width="120px">
      <el-form-item label="课时标题">
        <el-input v-model="video.title" />
      </el-form-item>
      <el-form-item label="课时排序">
        <el-input-number v-model="video.sort" :min="0" />
      </el-form-item>
      <el-form-item label="是否免费">
        <el-radio-group v-model="video.isFree">
          <el-radio :label="0">收费</el-radio>
          <el-radio :label="1">免费</el-radio>
        </el-radio-group>
      </el-form-item>

      <!-- 上传视频 -->
      <el-form-item label="上传视频">
        <el-upload
          ref="upload"
          action="#"
          :http-request="uploadVideo"
          :limit="1"
          :on-remove="handleRemove"
          :on-change="handleChange"
          :auto-upload="false"
        >
          <el-button
            :visible="!uploading"
            slot="trigger"
            size="small"
            type="primary"
            >选择视频</el-button
          >
          <el-button
            :visible="!uploading"
            style="margin-left: 40px"
            size="small"
            type="success"
            @click="submitUpload()"
            >点击上传</el-button
          >
          <el-progress
            class="progress"
            :text-inside="true"
            :stroke-width="18"
            :percentage="progress"
            status="exception"
          ></el-progress>
          <div slot="tip" class="el-upload__tip">
            只能上传 MP4 文件,且不超过 500MB
          </div>
        </el-upload>
      </el-form-item>
    </el-form>
    <div slot="footer" class="dialog-footer">
      <el-button :visible="!uploading" @click="close()">取 消</el-button>
      <el-button :visible="!uploading" type="primary" @click="saveOrUpdate()"
        >确 定</el-button
      >
    </div>
  </el-dialog>
</template>

<script>
  import TcVod from "vod-js-sdk-v6";
  import request from "@/utils/request";

  import videoAPI from "@/api/vod/video";
  // import vodAPI from "@/api/vod/vod";

  export default {
    data() {
      return {
        BASE_API: "http://localhost:8301",
        dialogVisible: false,
        uploading: false,

        video: {
          sort: 0,
          free: false,
        },

        // 上传文件列表
        fileList: [],

        // 进度条百分比
        progress: 0,

        // 图片原名称和 id
        filename: "",
        fileId: "",

        // 上传成功后的地址
        videoURL: "",
      };
    },

    methods: {
      open(chapterId, videoId) {
        this.dialogVisible = true;
        this.video.chapterId = chapterId;

        if (videoId) {
          videoAPI.getById(videoId).then((response) => {
            this.video = response.data;
            // 回显
            if (this.video.videoOriginalName) {
              this.fileList = [{ name: this.video.videoOriginalName }];
            }
          });
        }
      },

      close() {
        this.dialogVisible = false;

        // 重置表单
        this.resetForm();
      },

      resetForm() {
        this.video = {
          sort: 0,
          free: false,
        };

        // 重置视频上传列表
        this.fileList = [];
      },

      saveOrUpdate() {
        this.dialogVisible = true;

        if (!this.video.title) {
          this.$message.error("请输入课时标题");
          this.dialogVisible = false;

          return;
        }

        if (!this.video.id) {
          this.save();
        } else {
          this.update();
        }
      },

      save() {
        this.video.courseId = this.$parent.$parent.courseId;
        videoAPI.save(this.video).then((response) => {
          this.$message.success(response.message);
          // 关闭组件
          this.close();

          // 刷新列表
          this.$parent.fetchNodeList();
        });
      },

      update() {
        videoAPI.updateById(this.video).then((response) => {
          this.$message.success(response.message);
          // 关闭组件
          this.close();

          // 刷新列表
          this.$parent.fetchNodeList();
        });
      },

      // 处理上传超出一个视频
      handleUploadExceed(files, fileList) {
        this.$message.warning("想要重新上传视频,请先删除已上传的视频");
      },

      // 获取签名,这里的签名请求是由后端提供的,只需要拿到后端给的签名请求即可
      getVodSignature() {
        const url = this.BASE_API + "/admin/vod/sign";
        return request.get(url).then(function (response) {
          return response.data;
        });
      },

      // 文件列表改变时,将文件列表保存到本地
      handleChange(file, fileList) {
        this.fileList = fileList;
        this.filename = this.fileList[0].raw.name;
      },

      // 上传
      submitUpload() {
        if (this.fileList.length === 0) {
          this.$message.warning("请先选择视频,再进行上传");

          return;
        }

        if (this.uploading) {
          // 如果正在上传中,则直接返回,不执行上传逻辑
          return;
        }

        // 设置上传中状态
        this.uploading = true;

        this.uploadVideo();
      },

      // 自定义上传
      uploadVideo() {
        console.log(this.fileList[0].raw);

        if (this.fileList.length === 0) {
          window.alert("您还没有选取文件");
        } else {
          //必须以函数的形式返回,sdk 参数限制
          const getSignature = async () => {
            const data = await this.getVodSignature();

            return data;
          };

          const tcVod = new TcVod({
            // 获取上传签名的函数
            getSignature: getSignature,
          });

          // 获取通过 element-ui 上传到本地的文件,因为参数类型必须为 file,不能直接以对象的形式传输
          const mediaFile = this.fileList[0].raw;

          const uploader = tcVod.upload({
            mediaFile: mediaFile,
          });

          // 监听上传进度
          uploader.on("media_progress", (info) => {
            this.progress = parseInt(info.percent * 100);
          });

          // 上传结束时,将 url 存到本地
          uploader.done().then((doneResult) => {
            // 保存地址
            this.video.videoSourceId = doneResult.fileId;
            this.video.videoOriginalName = this.filename;

            // 将视频的第一帧保存为封面
            const canvas = document.createElement("canvas");
            const img = document.getElementById("video_img");
            const video = document.getElementById("video");
            video.setAttribute("crossOrigin", "anonymous");
            canvas.width = video.clientWidth;
            canvas.height = video.clientHeight;

            video.onloadeddata = (res) => {
              canvas
                .getContext("2d")
                .drawImage(video, 0, 0, canvas.width, canvas.height);
              const dataURL = canvas.toDataURL("image/png");
              img.setAttribute("src", dataURL);

              // 拿到 base64 的字符串,并保存到本地
              this.imgBase = dataURL.split(",")[1];
            };

            // 设置上传完成状态
            this.uploading = false;
          });
        }
      },

      // 点击删除时
      handleRemove(file, fileList) {
        console.log(file, fileList.length);
      },
    },
  };
</script>
5、最终使用腾讯云客户端方式上传视频
5.1、客户端上传视频
5.2、操作步骤一(申请上传签名)
5.2.1、找到 Java 签名示例
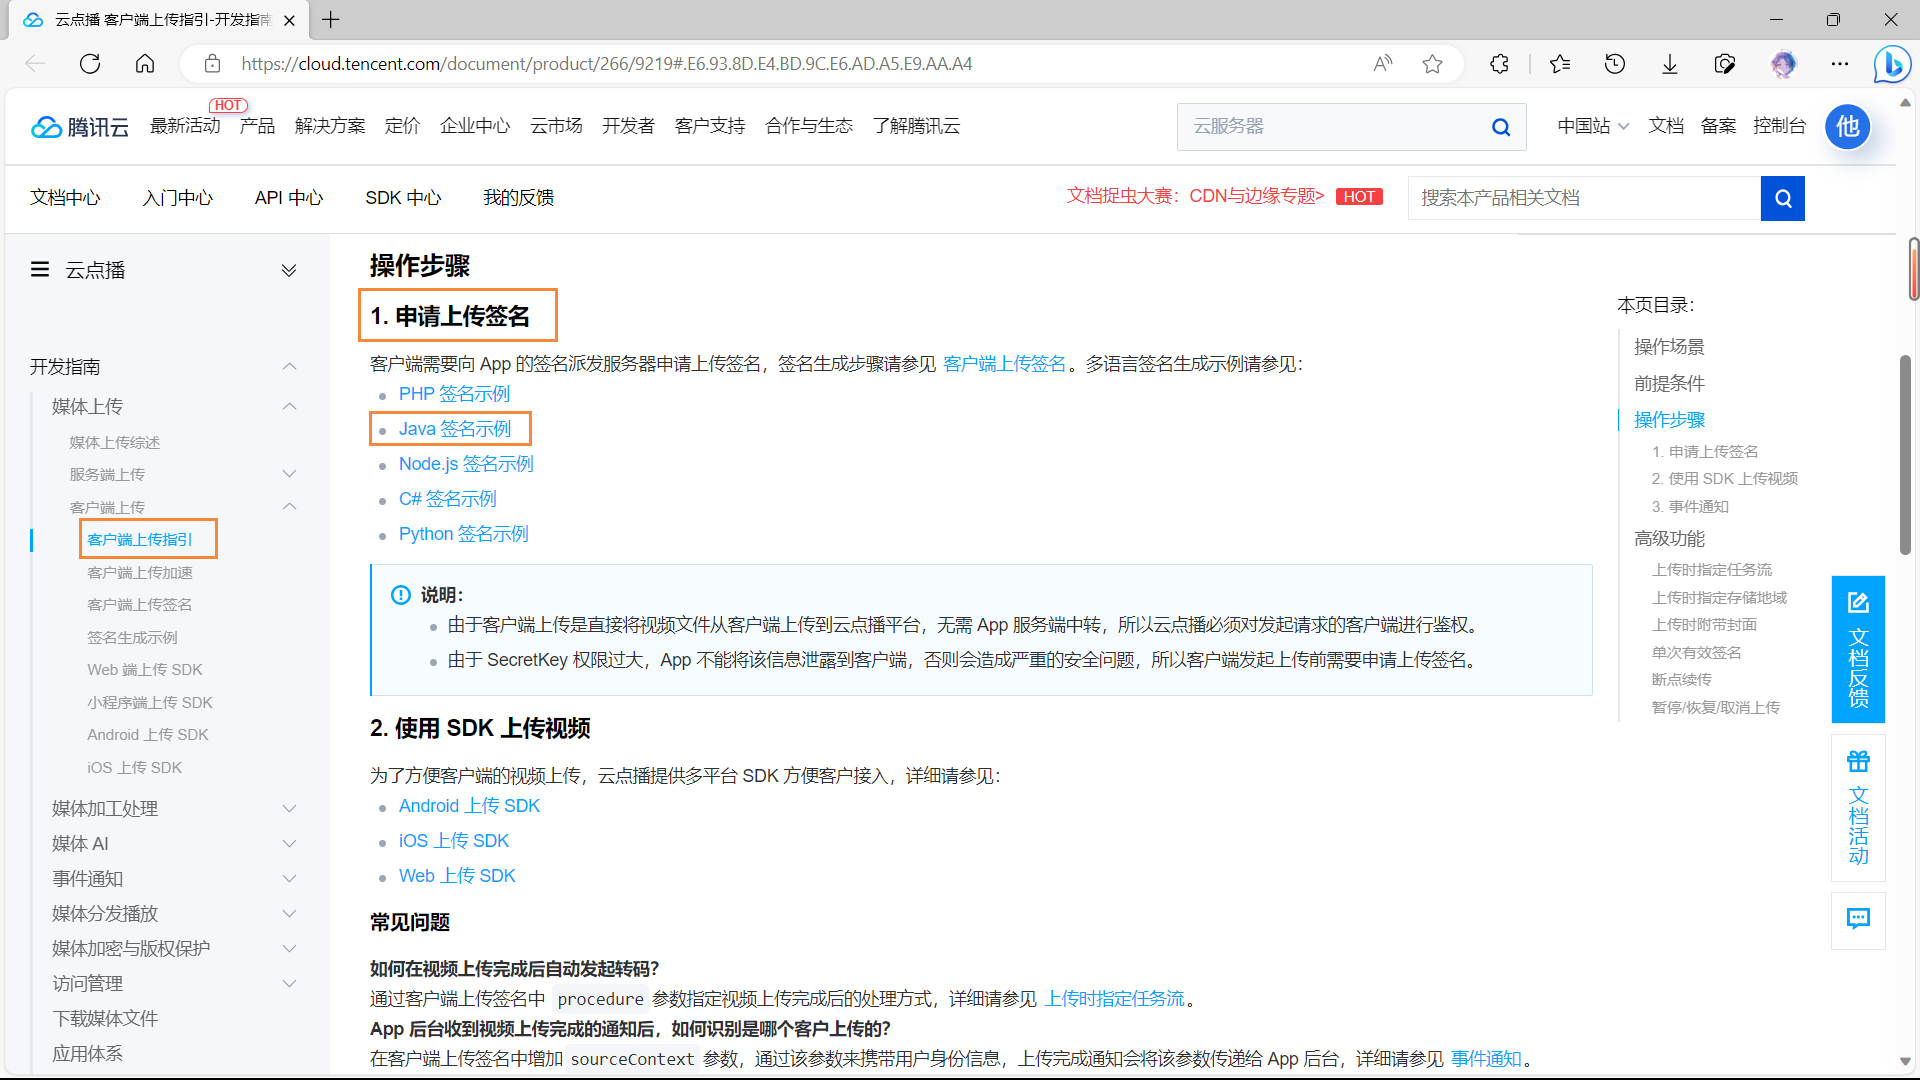

5.2.2、VodController 编写签名接口
Signature 类。
package com.myxh.smart.planet.vod.utils;
import javax.crypto.Mac;
import javax.crypto.spec.SecretKeySpec;
import java.nio.charset.StandardCharsets;
import java.util.Base64;
/**
* @author MYXH
* @date 2023/10/11
* @description 签名工具类
*/
public class Signature
{
private String secretId;
private String secretKey;
private long currentTime;
private int random;
private int signValidDuration;
private String procedure;
// 签名算法
private static final String HMAC_ALGORITHM = "HmacSHA1";
private static final String CONTENT_CHARSET = "UTF-8";
public static byte[] byteMerger(byte[] byte1, byte[] byte2)
{
byte[] byte3 = new byte[byte1.length + byte2.length];
System.arraycopy(byte1, 0, byte3, 0, byte1.length);
System.arraycopy(byte2, 0, byte3, byte1.length, byte2.length);
return byte3;
}
// 获取签名
public String getUploadSignature() throws Exception
{
String strSign = "";
String contextStr = "";
// 生成原始参数字符串
long endTime = (currentTime + signValidDuration);
contextStr += "secretId=" + java.net.URLEncoder.encode(secretId, StandardCharsets.UTF_8);
contextStr += "¤tTimeStamp=" + currentTime;
contextStr += "&expireTime=" + endTime;
contextStr += "&random=" + random;
// 设置转码任务流
contextStr += "&procedure=" + procedure;
try
{
Mac mac = Mac.getInstance(HMAC_ALGORITHM);
SecretKeySpec secretKey = new SecretKeySpec(this.secretKey.getBytes(CONTENT_CHARSET), mac.getAlgorithm());
mac.init(secretKey);
byte[] hash = mac.doFinal(contextStr.getBytes(CONTENT_CHARSET));
byte[] sigBuf = byteMerger(hash, contextStr.getBytes(StandardCharsets.UTF_8));
strSign = base64Encode(sigBuf);
strSign = strSign.replace(" ", "").replace("\n", "").replace("\r", "");
}
catch (Exception e)
{
throw e;
}
return strSign;
}
private String base64Encode(byte[] buffer)
{
Base64.Encoder encoder = Base64.getEncoder();
return encoder.encodeToString(buffer);
}
public void setSecretId(String secretId)
{
this.secretId = secretId;
}
public void setSecretKey(String secretKey)
{
this.secretKey = secretKey;
}
public void setCurrentTime(long currentTime)
{
this.currentTime = currentTime;
}
public void setRandom(int random)
{
this.random = random;
}
public void setSignValidDuration(int signValidDuration)
{
this.signValidDuration = signValidDuration;
}
public void setProcedure(String procedure)
{
this.procedure = procedure;
}
}
VodController 类。
package com.myxh.smart.planet.vod.controller;

import com.myxh.smart.planet.exception.SmartPlanetException;
import com.myxh.smart.planet.result.Result;
import com.myxh.smart.planet.vod.service.VodService;
import com.myxh.smart.planet.vod.utils.ConstantPropertiesUtil;
import com.myxh.smart.planet.vod.utils.Signature;
import io.swagger.v3.oas.annotations.Operation;
import io.swagger.v3.oas.annotations.tags.Tag;
import org.springframework.beans.factory.annotation.Autowired;
import org.springframework.web.bind.annotation.CrossOrigin;
import org.springframework.web.bind.annotation.GetMapping;
import org.springframework.web.bind.annotation.RequestMapping;
import org.springframework.web.bind.annotation.RestController;

import java.util.Random;

/**
 * @author MYXH
 * @date 2023/10/11
 */
@Tag(name = "腾讯云点播接口", description = "腾讯云点播接口")
@RestController
@RequestMapping("/admin/vod")
@CrossOrigin
public class VodController
{
    @Autowired
    private VodService vodService;

    /**
     * 获取客户端上传视频签名
     *
     * @return signature 视频签名
     */
    @Operation(summary = "视频签名", description = "获取客户端上传视频签名")
    @GetMapping("sign")
    public Result<String> sign()
    {
        Signature sign = new Signature();

        // 设置 App 的云 API 密钥
        sign.setSecretId(ConstantPropertiesUtil.ACCESS_KEY_ID);
        sign.setSecretKey(ConstantPropertiesUtil.ACCESS_KEY_SECRET);
        sign.setCurrentTime(System.currentTimeMillis() / 1000);
        sign.setRandom(new Random().nextInt(java.lang.Integer.MAX_VALUE));

        // 签名有效期:2天
        sign.setSignValidDuration(3600 * 24 * 2);

        // 设置转码任务流
        sign.setProcedure("LongVideoPreset");

        try
        {
            String signature = sign.getUploadSignature();
            System.out.println("signature = " + signature);

            return Result.ok(signature);
        }
        catch (Exception e)
        {
            e.printStackTrace();
            throw new SmartPlanetException(20001, "获取签名失败");
        }
    }
}
5.3、操作步骤二(SDK 上传)

5.3.1、下载 Demo 源码修改
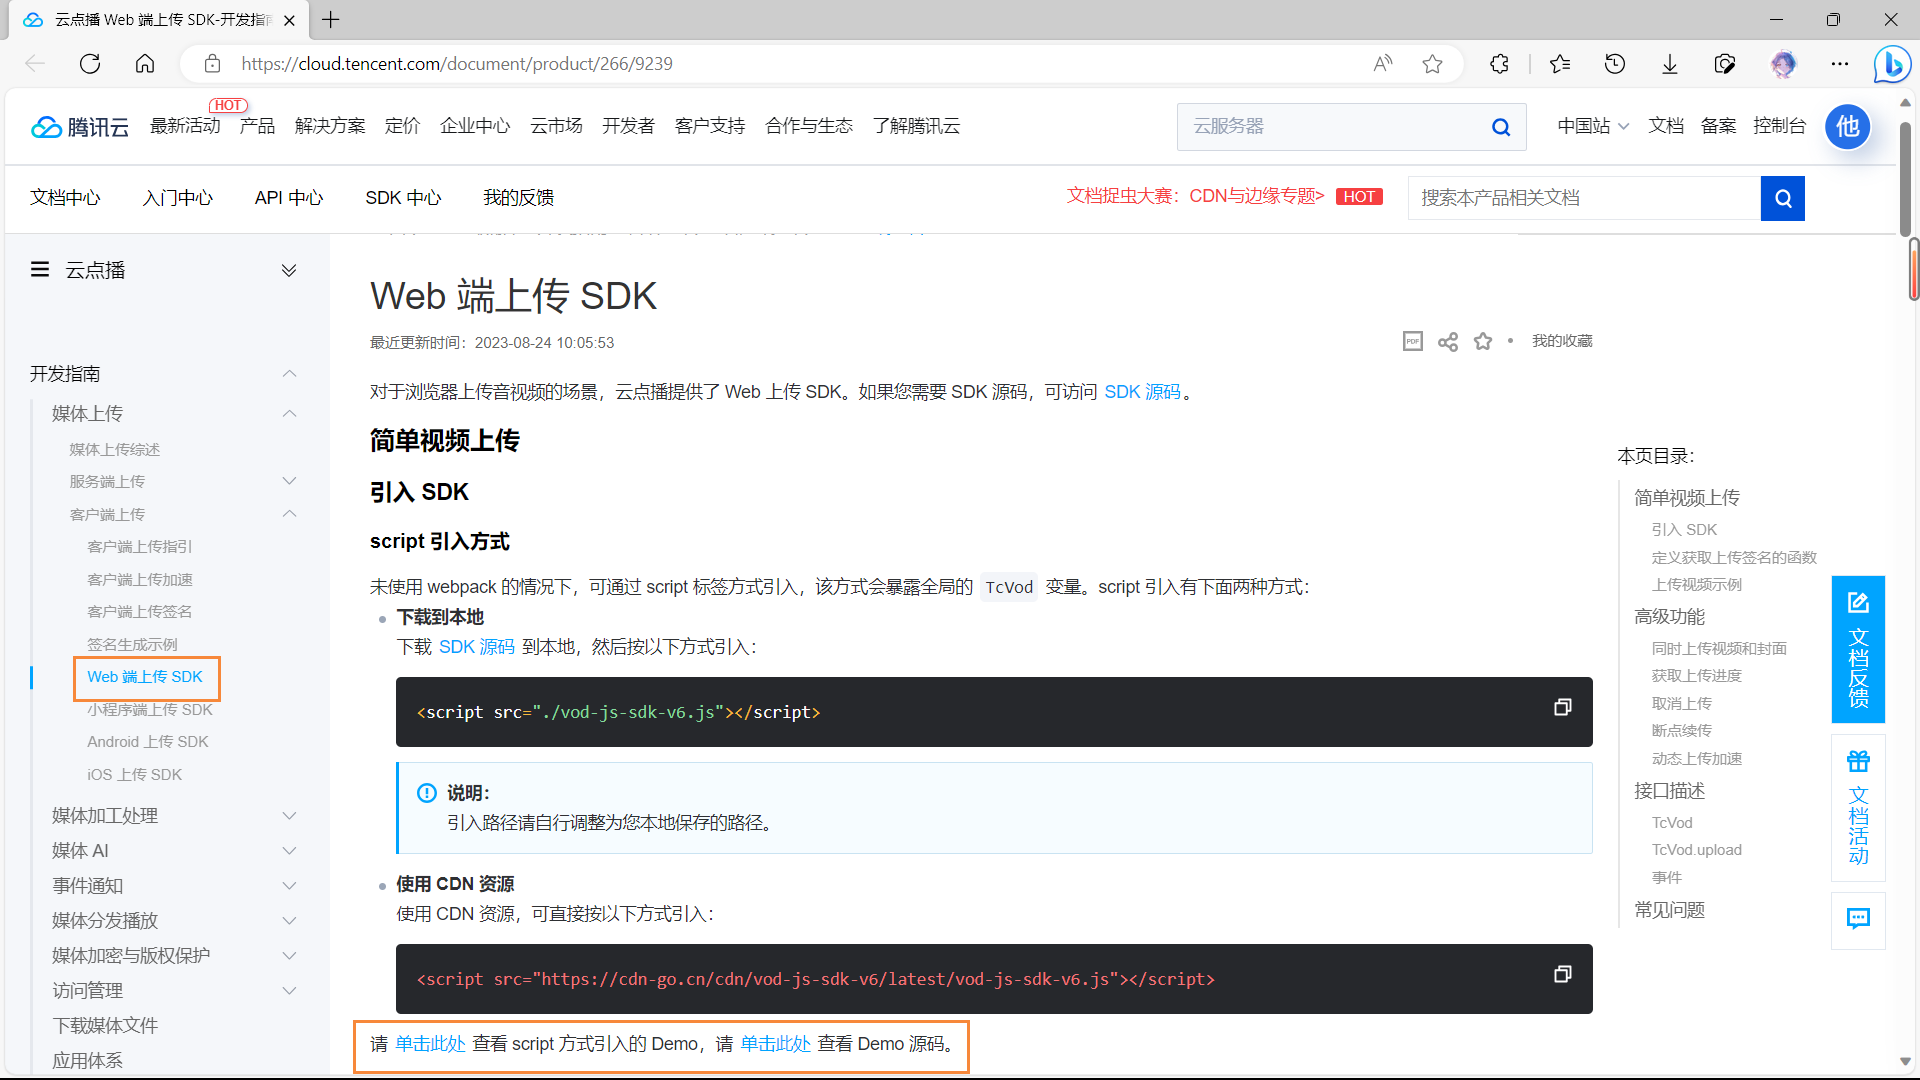
5.3.2、下载腾讯云 Web 端上传 SDK
npm install --save vod-js-sdk-v6
5.3.3、video/form.vue 页面
<template>
  <!-- 添加和修改课时表单 -->
  <el-dialog :visible="dialogVisible" title="添加课时" @close="close()">
    <el-form :model="video" label-width="120px">
      <el-form-item label="课时标题">
        <el-input v-model="video.title" />
      </el-form-item>
      <el-form-item label="课时排序">
        <el-input-number v-model="video.sort" :min="0" />
      </el-form-item>
      <el-form-item label="是否免费">
        <el-radio-group v-model="video.isFree">
          <el-radio :label="0">收费</el-radio>
          <el-radio :label="1">免费</el-radio>
        </el-radio-group>
      </el-form-item>

      <!-- 上传视频 -->
      <el-form-item label="上传视频">
        <el-upload
          ref="upload"
          action="#"
          :http-request="uploadVideo"
          :limit="1"
          :on-remove="handleRemove"
          :on-change="handleChange"
          :auto-upload="false"
        >
          <el-button
            :visible="!uploading"
            slot="trigger"
            size="small"
            type="primary"
            >选择视频</el-button
          >
          <el-button
            :visible="!uploading"
            style="margin-left: 40px"
            size="small"
            type="success"
            @click="submitUpload()"
            >点击上传</el-button
          >
          <el-progress
            class="progress"
            :text-inside="true"
            :stroke-width="18"
            :percentage="progress"
            status="exception"
          ></el-progress>
          <div slot="tip" class="el-upload__tip">
            只能上传 MP4 文件,且不超过 500MB
          </div>
        </el-upload>
      </el-form-item>
    </el-form>
    <div slot="footer" class="dialog-footer">
      <el-button :visible="!uploading" @click="close()">取 消</el-button>
      <el-button :visible="!uploading" type="primary" @click="saveOrUpdate()"
        >确 定</el-button
      >
    </div>
  </el-dialog>
</template>

<script>
  import TcVod from "vod-js-sdk-v6";
  import request from "@/utils/request";

  import videoAPI from "@/api/vod/video";
  // import vodAPI from "@/api/vod/vod";

  export default {
    data() {
      return {
        BASE_API: "http://localhost:8301",
        dialogVisible: false,
        uploading: false,

        video: {
          sort: 0,
          free: false,
        },

        // 上传文件列表
        fileList: [],

        // 进度条百分比
        progress: 0,

        // 图片原名称和 id
        filename: "",
        fileId: "",

        // 上传成功后的地址
        videoURL: "",
      };
    },

    methods: {
      open(chapterId, videoId) {
        this.dialogVisible = true;
        this.video.chapterId = chapterId;

        if (videoId) {
          videoAPI.getById(videoId).then((response) => {
            this.video = response.data;
            // 回显
            if (this.video.videoOriginalName) {
              this.fileList = [{ name: this.video.videoOriginalName }];
            }
          });
        }
      },

      close() {
        this.dialogVisible = false;

        // 重置表单
        this.resetForm();
      },

      resetForm() {
        this.video = {
          sort: 0,
          free: false,
        };

        // 重置视频上传列表
        this.fileList = [];
      },

      saveOrUpdate() {
        this.dialogVisible = true;

        if (!this.video.title) {
          this.$message.error("请输入课时标题");
          this.dialogVisible = false;

          return;
        }

        if (!this.video.id) {
          this.save();
        } else {
          this.update();
        }
      },

      save() {
        this.video.courseId = this.$parent.$parent.courseId;
        videoAPI.save(this.video).then((response) => {
          this.$message.success(response.message);
          // 关闭组件
          this.close();

          // 刷新列表
          this.$parent.fetchNodeList();
        });
      },

      update() {
        videoAPI.updateById(this.video).then((response) => {
          this.$message.success(response.message);
          // 关闭组件
          this.close();

          // 刷新列表
          this.$parent.fetchNodeList();
        });
      },

      // 处理上传超出一个视频
      handleUploadExceed(files, fileList) {
        this.$message.warning("想要重新上传视频,请先删除已上传的视频");
      },

      // 获取签名,这里的签名请求是由后端提供的,只需要拿到后端给的签名请求即可
      getVodSignature() {
        const url = this.BASE_API + "/admin/vod/sign";
        return request.get(url).then(function (response) {
          return response.data;
        });
      },

      // 文件列表改变时,将文件列表保存到本地
      handleChange(file, fileList) {
        this.fileList = fileList;
        this.filename = this.fileList[0].raw.name;
      },

      // 上传
      submitUpload() {
        if (this.fileList.length === 0) {
          this.$message.warning("请先选择视频,再进行上传");

          return;
        }

        if (this.uploading) {
          // 如果正在上传中,则直接返回,不执行上传逻辑
          return;
        }

        // 设置上传中状态
        this.uploading = true;

        this.uploadVideo();
      },

      // 自定义上传
      uploadVideo() {
        console.log(this.fileList[0].raw);

        if (this.fileList.length === 0) {
          window.alert("您还没有选取文件");
        } else {
          //必须以函数的形式返回,sdk 参数限制
          const getSignature = async () => {
            const data = await this.getVodSignature();

            return data;
          };

          const tcVod = new TcVod({
            // 获取上传签名的函数
            getSignature: getSignature,
          });

          // 获取通过 element-ui 上传到本地的文件,因为参数类型必须为 file,不能直接以对象的形式传输
          const mediaFile = this.fileList[0].raw;

          const uploader = tcVod.upload({
            mediaFile: mediaFile,
          });

          // 监听上传进度
          uploader.on("media_progress", (info) => {
            this.progress = parseInt(info.percent * 100);
          });

          // 上传结束时,将 url 存到本地
          uploader.done().then((doneResult) => {
            // 保存地址
            this.video.videoSourceId = doneResult.fileId;
            this.video.videoOriginalName = this.filename;

            // 将视频的第一帧保存为封面
            const canvas = document.createElement("canvas");
            const img = document.getElementById("video_img");
            const video = document.getElementById("video");
            video.setAttribute("crossOrigin", "anonymous");
            canvas.width = video.clientWidth;
            canvas.height = video.clientHeight;

            video.onloadeddata = (res) => {
              canvas
                .getContext("2d")
                .drawImage(video, 0, 0, canvas.width, canvas.height);
              const dataURL = canvas.toDataURL("image/png");
              img.setAttribute("src", dataURL);

              // 拿到 base64 的字符串,并保存到本地
              this.imgBase = dataURL.split(",")[1];
            };

            // 设置上传完成状态
            this.uploading = false;
          });
        }
      },

      // 点击删除时
      handleRemove(file, fileList) {
        console.log(file, fileList.length);
      },
    },
  };
</script>
6、完善删除视频功能
6.1、修改 VideoController 方法
package com.myxh.smart.planet.vod.controller;

import com.myxh.smart.planet.model.vod.Video;
import com.myxh.smart.planet.result.Result;
import com.myxh.smart.planet.vod.service.VideoService;
import io.swagger.v3.oas.annotations.Operation;
import io.swagger.v3.oas.annotations.Parameter;
import io.swagger.v3.oas.annotations.tags.Tag;
import org.springframework.beans.factory.annotation.Autowired;
import org.springframework.web.bind.annotation.GetMapping;
import org.springframework.web.bind.annotation.PostMapping;
import org.springframework.web.bind.annotation.DeleteMapping;
import org.springframework.web.bind.annotation.RequestMapping;
import org.springframework.web.bind.annotation.RestController;

/**
 * @author MYXH
 * @date 2023/10/8
 *
 * <p>
 * 课程视频 前端控制器
 * </p>
 */
@Tag(name = "课程视频小节接口", description = "课程视频小节管理接口")
@RestController
@RequestMapping("/admin/vod/video")
@CrossOrigin
public class VideoController
{
    @Autowired
    private VideoService videoService;

    /**
     * 获取课程视频小节
     *
     * @param id 课程视频小节 id
     * @return Result 全局统一返回结果
     */
    @Operation(summary = "获取课程视频小节", description = "获取课程视频小节")
    @GetMapping("get/{id}")
    public Result<Video> get(@Parameter(name = "id", description = "课程视频小节ID", required = true)
                             @PathVariable("id") Long id)
    {
        Video video = videoService.getById(id);

        return Result.ok(video);
    }

    /**
     * 新增课程视频小节
     *
     * @param video 课程视频小节数据
     * @return Result 全局统一返回结果
     */
    @Operation(summary = "新增课程视频小节", description = "新增课程视频小节")
    @PostMapping("save")
    public Result<Void> save(@RequestBody Video video)
    {
        videoService.save(video);

        return Result.ok(null);
    }

    /**
     * 修改课程视频小节
     *
     * @param video 课程视频小节数据
     * @return Result 全局统一返回结果
     */
    @Operation(summary = "修改课程视频小节", description = "修改课程视频小节")
    @PostMapping("update")
    public Result<Void> update(@RequestBody Video video)
    {
        videoService.updateVideoById(video);

        return Result.ok(null);
    }

    /**
     * 删除课程视频小节
     *
     * @param id 课程视频小节 id
     * @return Result 全局统一返回结果
     */
    @Operation(summary = "删除课程视频小节", description = "删除课程视频小节")
    @DeleteMapping("remove/{id}")
    public Result<Void> remove(@Parameter(name = "id", description = "课程视频小节ID", required = true)
                               @PathVariable("id") Long id)
    {
        videoService.removeVideoById(id);

        return Result.ok(null);
    }
}
6.2、修改 VideoService 方法
修改 VideoService 和 VideoServiceImpl。
package com.myxh.smart.planet.vod.service.impl;

import com.baomidou.mybatisplus.core.conditions.query.QueryWrapper;
import com.baomidou.mybatisplus.extension.service.impl.ServiceImpl;
import com.myxh.smart.planet.model.vod.Video;
import com.myxh.smart.planet.vod.mapper.VideoMapper;
import com.myxh.smart.planet.vod.service.VideoService;
import com.myxh.smart.planet.vod.service.VodService;
import org.springframework.beans.factory.annotation.Autowired;
import org.springframework.stereotype.Service;
import org.springframework.util.ObjectUtils;

import java.util.List;

/**
 * @author MYXH
 * @date 2023/10/8
 *
 * <p>
 * 课程视频 服务实现类
 * </p>
 */
@Service
public class VideoServiceImpl extends ServiceImpl<VideoMapper, Video> implements VideoService
{
    // 注入 VodService
    @Autowired
    private VodService vodService;

    /**
     * 根据课程 id,删除课程视频小节,同时删除视频
     *
     * @param id 课程 id
     */
    @Override
    public void removeVideoByCourseId(Long id)
    {
        // 1、根据课程 id,删除小节中的视频
        // 获取课程里面所有小节
        QueryWrapper<Video> wrapper = new QueryWrapper<>();
        wrapper.eq("course_id", id);
        List<Video> videoList = baseMapper.selectList(wrapper);

        // 遍历获取每个小节中的视频源 id
        for (Video video : videoList)
        {
            String videoSourceId = video.getVideoSourceId();

            // 如果视频源 id 不为空,调用方法删除
            if (!ObjectUtils.isEmpty(videoSourceId))
            {
                vodService.removeVideo(videoSourceId);
            }
        }

        // 2、根据课程 id,删除小节
        baseMapper.delete(wrapper);
    }

    /**
     * 根据章节 id,删除课程视频小节,同时删除视频
     *
     * @param id 章节 id
     */
    public void removeVideoByChapterId(Long id)
    {
        // 1、根据章节 id,删除小节中的视频
        // 获取章节里的所有小节
        QueryWrapper<Video> wrapper = new QueryWrapper<>();
        wrapper.eq("chapter_id", id);
        List<Video> videoList = baseMapper.selectList(wrapper);

        // 遍历获取每个小节中的视频源 id
        for (Video video : videoList)
        {
            String videoSourceId = video.getVideoSourceId();

            // 如果视频源 id 不为空,调用方法删除
            if (!ObjectUtils.isEmpty(videoSourceId))
            {
                vodService.removeVideo(videoSourceId);
            }
        }

        // 2、根据课程 id,删除小节
        baseMapper.delete(wrapper);
    }

    /**
     * 根据课程视频小节 id,删除课程视频小节,同时删除视频
     *
     * @param id 课程视频小节 id
     */
    @Override
    public void removeVideoById(Long id)
    {
        // 1、根据课程视频小节 id,删除视频
        // 获取课程视频小节
        Video video = baseMapper.selectById(id);

        // 获取视频源 id
        String videoSourceId = video.getVideoSourceId();

        // 如果视频源 id 不为空,调用方法删除
        if (!ObjectUtils.isEmpty(videoSourceId))
        {
            vodService.removeVideo(videoSourceId);
        }

        // 2、根据课程视频小节 id,删除小节
        baseMapper.deleteById(id);
    }

    /**
     * 根据课程视频小节 id,修改课程视频小节
     *
     * @param video 课程视频小节数据
     */
    @Override
    public void updateVideoById(Video video)
    {
        Video oldVideo = baseMapper.selectById(video.getId());

        // 如果新的视频源 id 与旧的不相等
        if (!ObjectUtils.isEmpty(oldVideo.getVideoSourceId()) && !oldVideo.getVideoSourceId().equals(video.getVideoSourceId()))
        {
            // 先删除旧视频
            vodService.removeVideo(oldVideo.getVideoSourceId());
        }

        // 再更新课程视频小节
        baseMapper.updateById(video);
    }
}
6.3 修改 ChapterController 方法
package com.myxh.smart.planet.vod.controller;

import com.myxh.smart.planet.model.vod.Chapter;
import com.myxh.smart.planet.result.Result;
import com.myxh.smart.planet.vo.vod.ChapterVo;
import com.myxh.smart.planet.vod.service.ChapterService;
import com.myxh.smart.planet.vod.service.VideoService;
import io.swagger.v3.oas.annotations.Operation;
import io.swagger.v3.oas.annotations.Parameter;
import io.swagger.v3.oas.annotations.tags.Tag;
import org.springframework.beans.factory.annotation.Autowired;
import org.springframework.web.bind.annotation.GetMapping;
import org.springframework.web.bind.annotation.PostMapping;
import org.springframework.web.bind.annotation.DeleteMapping;

import java.util.List;

/**
 * @author MYXH
 * @date 2023/10/8
 *
 * <p>
 * 章节 前端控制器
 * </p>
 */
@Tag(name = "章节接口", description = "章节管理接口")
@RestController
@RequestMapping("/admin/vod/chapter")
@CrossOrigin
public class ChapterController
{
    @Autowired
    private ChapterService chapterService;

    @Autowired
    private VideoService videoService;

    /**
     * 大纲列表,获取章节和小节列表
     *
     * @param courseId 课程 id
     * @return Result 全局统一返回结果
     */
    @Operation(summary = "大纲列表", description = "获取获取章节和小节列表")
    @GetMapping("get/nested/tree/list/{courseId}")
    public Result<List<ChapterVo>> getNestedTreeList(@Parameter(name = "courseId", description = "课程ID", required = true)
                                                     @PathVariable("courseId") Long courseId)
    {
        List<ChapterVo> chapterVoList = chapterService.getNestedTreeList(courseId);

        return Result.ok(chapterVoList);
    }

    /**
     * 添加章节
     *
     * @param chapter 章节数据
     * @return Result 全局统一返回结果
     */
    @Operation(summary = "添加章节", description = "添加章节")
    @PostMapping("save")
    public Result<Void> saveChapter(@RequestBody Chapter chapter)
    {
        chapterService.save(chapter);

        return Result.ok(null);
    }

    /**
     * 根据 id 查询章节
     *
     * @param id 章节 id
     * @return Result 全局统一返回结果
     */
    @Operation(summary = "查询章节", description = "根据 id 查询章节")
    @GetMapping("get/{id}")
    public Result<Chapter> getChapter(@Parameter(name = "id", description = "章节ID", required = true)
                                      @PathVariable("id") Long id)
    {
        Chapter chapter = chapterService.getById(id);

        return Result.ok(chapter);
    }

    /**
     * 修改章节
     *
     * @param chapter 章节数据
     * @return Result 全局统一返回结果
     */
    @Operation(summary = "修改章节", description = "修改章节")
    @PostMapping("update")
    public Result<Void> updateChapter(@RequestBody Chapter chapter)
    {
        chapterService.updateById(chapter);

        return Result.ok(null);
    }

    /**
     * 根据 id 删除章节
     *
     * @param id 章节 id
     * @return Result 全局统一返回结果
     */
    @Operation(summary = "删除章节", description = "根据 id 删除章节")
    @DeleteMapping("remove/{id}")
    public Result<Void> removeChapter(@Parameter(name = "id", description = "章节ID", required = true)
                                      @PathVariable("id") Long id)
    {
        // 1、根据章节 id,删除课程视频小节,同时删除视频
        videoService.removeVideoByChapterId(id);

        // 2、根据 id,删除章节
        chapterService.removeById(id);

        return Result.ok(null);
    }
}
6.4 修改 ChapterService 方法
修改 ChapterService 和 ChapterServiceImpl。
package com.myxh.smart.planet.vod.service.impl;

import com.baomidou.mybatisplus.core.conditions.query.LambdaQueryWrapper;
import com.baomidou.mybatisplus.core.conditions.query.QueryWrapper;
import com.baomidou.mybatisplus.extension.service.impl.ServiceImpl;
import com.myxh.smart.planet.model.vod.Chapter;
import com.myxh.smart.planet.model.vod.Video;
import com.myxh.smart.planet.vo.vod.ChapterVo;
import com.myxh.smart.planet.vo.vod.VideoVo;
import com.myxh.smart.planet.vod.mapper.ChapterMapper;
import com.myxh.smart.planet.vod.service.ChapterService;
import com.myxh.smart.planet.vod.service.VideoService;
import org.springframework.beans.BeanUtils;
import org.springframework.beans.factory.annotation.Autowired;
import org.springframework.stereotype.Service;

import java.util.ArrayList;
import java.util.List;

/**
 * @author MYXH
 * @date 2023/10/8
 *
 * <p>
 * 章节 服务实现类
 * </p>
 */
@Service
public class ChapterServiceImpl extends ServiceImpl<ChapterMapper, Chapter> implements ChapterService
{
    @Autowired
    private VideoService videoService;

    /**
     * 大纲列表,获取章节和小节列表
     *
     * @param courseId 课程 id
     * @return chapterVoList 章节和小节列表
     */
    @Override
    public List<ChapterVo> getNestedTreeList(Long courseId)
    {
        // 定义章节和小节列表 List 集合
        List<ChapterVo> chapterVoList = new ArrayList<>();

        // 根据 courseId 获取课程里面所有章节
        QueryWrapper<Chapter> chapterQueryWrapper = new QueryWrapper<>();
        chapterQueryWrapper.eq("course_id", courseId);
        List<Chapter> chapterList = baseMapper.selectList(chapterQueryWrapper);

        // 根据 courseId 获取课程里面所有小节
        LambdaQueryWrapper<Video> videoLambdaQueryWrapper = new LambdaQueryWrapper<>();
        videoLambdaQueryWrapper.eq(Video::getCourseId, courseId);
        videoLambdaQueryWrapper.orderByAsc(Video::getSort, Video::getId);
        List<Video> videoList = videoService.list(videoLambdaQueryWrapper);

        // 封装章节
        // 遍历所有的章节
        for (Chapter chapter : chapterList)
        {
            // 创建 ChapterVo 对象
            ChapterVo chapterVo = new ChapterVo();
            BeanUtils.copyProperties(chapter, chapterVo);
            chapterVoList.add(chapterVo);

            // 封装章节里面的小节
            // 创建 List 集合用来封装章节所有小节
            List<VideoVo> videoVoList = new ArrayList<>();

            // 遍历小节 List
            for (Video video : videoList)
            {
                // 判断小节是哪个章节下面
                if (chapter.getId().equals(video.getChapterId()))
                {
                    VideoVo videoVo = new VideoVo();
                    BeanUtils.copyProperties(video, videoVo);
                    videoVoList.add(videoVo);
                }
            }

            // 把章节里面所有小节集合放到每个章节里面
            chapterVo.setChildren(videoVoList);
        }

        return chapterVoList;
    }

    /**
     * 根据课程 id 删除章节
     *
     * @param id 课程 id
     */
    @Override
    public void removeChapterByCourseId(Long id)
    {
        QueryWrapper<Chapter> wrapper = new QueryWrapper<>();
        wrapper.eq("course_id", id);
        baseMapper.delete(wrapper);
    }
}
6.5 修改 CourseController 方法
package com.myxh.smart.planet.vod.controller;

import com.baomidou.mybatisplus.extension.plugins.pagination.Page;
import com.myxh.smart.planet.model.vod.Course;
import com.myxh.smart.planet.result.Result;
import com.myxh.smart.planet.vo.vod.CourseFormVo;
import com.myxh.smart.planet.vo.vod.CoursePublishVo;
import com.myxh.smart.planet.vo.vod.CourseQueryVo;
import com.myxh.smart.planet.vod.service.CourseService;
import io.swagger.v3.oas.annotations.Operation;
import io.swagger.v3.oas.annotations.Parameter;
import io.swagger.v3.oas.annotations.tags.Tag;
import org.springframework.beans.factory.annotation.Autowired;
import org.springframework.web.bind.annotation.GetMapping;
import org.springframework.web.bind.annotation.PostMapping;
import org.springframework.web.bind.annotation.PutMapping;
import org.springframework.web.bind.annotation.DeleteMapping;

import java.util.Map;

/**
 * @author MYXH
 * @date 2023/10/8
 *
 * <p>
 * 课程 前端控制器
 * </p>
 */
@Tag(name = "课程接口", description = "课程管理接口")
@RestController
@RequestMapping("/admin/vod/course")
@CrossOrigin
public class CourseController
{
    @Autowired
    private CourseService courseService;

    /**
     * 点播课程列表
     *
     * @param current       当前页码
     * @param limit         每页记录数
     * @param courseQueryVo 查询对象
     * @return Result 全局统一返回结果
     */
    @Operation(summary = "获取点播课程", description = "获取点播课程列表")
    @GetMapping("find/query/page/{current}/{limit}")
    public Result<Map<String, Object>> courseList(@Parameter(name = "current", description = "当前页码", required = true) @PathVariable("current") Long current,
                                                  @Parameter(name = "limit", description = "每页记录数", required = true) @PathVariable("limit") Long limit,
                                                  @Parameter(name = "courseQueryVo", description = "查询对象") CourseQueryVo courseQueryVo)
    {
        Page<Course> coursePageParam = new Page<>(current, limit);
        Map<String, Object> coursePage = courseService.findPage(coursePageParam, courseQueryVo);

        return Result.ok(coursePage);
    }

    /**
     * 添加课程基本信息
     *
     * @param courseFormVo 课程基本信息
     * @return Result 全局统一返回结果
     */
    @Operation(summary = "添加课程基本信息", description = "添加课程基本信息")
    @PostMapping("save")
    public Result<Long> saveCourseInfo(@RequestBody CourseFormVo courseFormVo)
    {
        Long courseId = courseService.saveCourseInfo(courseFormVo);

        return Result.ok(courseId);
    }

    /**
     * 根据 id 获取课程信息
     *
     * @param id 课程 id
     * @return Result 全局统一返回结果
     */
    @Operation(summary = "根据 id 获取课程信息", description = "根据 id 获取课程信息")
    @GetMapping("get/{id}")
    public Result<CourseFormVo> get(@PathVariable("id") Long id)
    {
        CourseFormVo courseFormVo = courseService.getCourseInfoById(id);

        return Result.ok(courseFormVo);
    }

    /**
     * 根据 id 修改课程信息
     *
     * @param courseFormVo 课程基本信息
     * @return Result 全局统一返回结果
     */
    @Operation(summary = "根据 id 修改课程信息", description = "根据 id 修改课程信息")
    @PostMapping("update")
    public Result<Long> updateCourse(@RequestBody CourseFormVo courseFormVo)
    {
        Long courseId = courseService.updateCourseById(courseFormVo);

        return Result.ok(courseId);
    }

    /**
     * 根据课程 id 查询课程发布信息
     *
     * @param id 课程 id
     * @return Result 全局统一返回结果
     */
    @Operation(summary = "根据课程 id 查询课程发布信息", description = "根据课程 id 查询课程发布信息")
    @GetMapping("get/course/publish/vo/{id}")
    public Result<CoursePublishVo> getCoursePublishVoById(@Parameter(name = "id", description = "课程ID", required = true)
                                                          @PathVariable Long id)
    {
        CoursePublishVo coursePublishVo = courseService.getCoursePublishVo(id);

        return Result.ok(coursePublishVo);
    }

    /**
     * 根据课程 id 最终发布课程
     *
     * @param id 课程 id
     * @return Result 全局统一返回结果
     */
    @Operation(summary = "根据课程 id 最终发布课程", description = "根据课程 id 最终发布课程")
    @PutMapping("publish/course/{id}")
    public Result<Void> publishCourseById(@Parameter(name = "id", description = "课程ID", required = true)
                                          @PathVariable Long id)
    {
        courseService.publishCourse(id);

        return Result.ok(null);
    }

    /**
     * 删除课程
     *
     * @param id 课程 id
     * @return Result 全局统一返回结果
     */
    @Operation(summary = "删除课程", description = "删除课程")
    @DeleteMapping("remove/{id}")
    public Result<Void> remove(@Parameter(name = "id", description = "课程ID", required = true)
                               @PathVariable Long id)
    {
        courseService.removeCourseById(id);

        return Result.ok(null);
    }
}
6.6 修改 CourseService 方法
修改 CourseService 和 CourseServiceImpl。
package com.myxh.smart.planet.vod.service.impl;

import com.baomidou.mybatisplus.core.conditions.query.QueryWrapper;
import com.baomidou.mybatisplus.extension.plugins.pagination.Page;
import com.baomidou.mybatisplus.extension.service.impl.ServiceImpl;
import com.myxh.smart.planet.model.vod.Course;
import com.myxh.smart.planet.model.vod.CourseDescription;
import com.myxh.smart.planet.model.vod.Subject;
import com.myxh.smart.planet.model.vod.Teacher;
import com.myxh.smart.planet.vo.vod.CourseFormVo;
import com.myxh.smart.planet.vo.vod.CoursePublishVo;
import com.myxh.smart.planet.vo.vod.CourseQueryVo;
import com.myxh.smart.planet.vod.mapper.CourseMapper;
import com.myxh.smart.planet.vod.service.*;
import org.springframework.beans.BeanUtils;
import org.springframework.beans.factory.annotation.Autowired;
import org.springframework.stereotype.Service;
import org.springframework.util.ObjectUtils;
import org.springframework.util.StringUtils;

import java.util.Date;
import java.util.HashMap;
import java.util.List;
import java.util.Map;

/**
 * @author MYXH
 * @date 2023/10/8
 *
 * <p>
 * 课程 服务实现类
 * </p>
 */
@Service
public class CourseServiceImpl extends ServiceImpl<CourseMapper, Course> implements CourseService
{
    @Autowired
    private SubjectService subjectService;

    @Autowired
    private TeacherService teacherService;

    @Autowired
    private CourseDescriptionService courseDescriptionService;

    @Autowired
    private ChapterService chapterService;

    @Autowired
    private VideoService videoService;

    /**
     * 点播课程列表
     *
     * @param coursePageParam 课程页面参数
     * @param courseQueryVo   查询对象
     * @return coursePage 课程页面
     */
    @Override
    public Map<String, Object> findPage(Page<Course> coursePageParam, CourseQueryVo courseQueryVo)
    {
        // 获取条件值
        // 名称
        String title = courseQueryVo.getTitle();

        // 二级分类
        Long subjectId = courseQueryVo.getSubjectId();

        // 一级分类
        Long subjectParentId = courseQueryVo.getSubjectParentId();

        // 教师
        Long teacherId = courseQueryVo.getTeacherId();

        // 封装条件
        QueryWrapper<Course> wrapper = new QueryWrapper<>();

        if (StringUtils.hasLength(title))
        {
            wrapper.like("title", title);
        }
        if (!ObjectUtils.isEmpty(subjectId))
        {
            wrapper.eq("subject_id", subjectId);
        }
        if (!ObjectUtils.isEmpty(subjectParentId))
        {
            wrapper.eq("subject_parent_id", subjectParentId);
        }
        if (!ObjectUtils.isEmpty(teacherId))
        {
            wrapper.eq("teacher_id", teacherId);
        }

        // 调用方法实现条件查询分页
        Page<Course> coursePage = baseMapper.selectPage(coursePageParam, wrapper);

        // 总记录数
        Long totalCount = coursePage.getTotal();

        // 总页数
        Long totalPage = coursePage.getPages();

        // 每页数据集合
        List<Course> coursePageRecords = coursePage.getRecords();

        // 遍历封装教师和分类名称,获取 id 对应名称,进行封装,最终显示
        coursePageRecords.stream().forEach(this::getTeacherOrSubjectName);

        // 封装返回数据
        Map<String, Object> coursePageMap = new HashMap<>();
        coursePageMap.put("totalCount", totalCount);
        coursePageMap.put("totalPage", totalPage);
        coursePageMap.put("records", coursePageRecords);

        return coursePageMap;
    }

    /**
     * 获取教师和分类名称
     *
     * @param course 课程数据
     * @return course 课程数据
     */
    private Course getTeacherOrSubjectName(Course course)
    {
        // 根据教师 id 获取教师名称
        Teacher teacher = teacherService.getById(course.getTeacherId());

        if (teacher != null)
        {
            course.getParam().put("teacherName", teacher.getName());
        }

        // 根据课程分类 id 获取课程分类名称
        Subject subjectOne = subjectService.getById(course.getSubjectParentId());

        if (subjectOne != null)
        {
            course.getParam().put("subjectParentTitle", subjectOne.getTitle());
        }

        Subject subjectTwo = subjectService.getById(course.getSubjectId());

        if (subjectTwo != null)
        {
            course.getParam().put("subjectTitle", subjectTwo.getTitle());
        }

        return course;
    }

    /**
     * 添加课程基本信息
     *
     * @param courseFormVo 课程基本信息
     * @return courseId 课程 id
     */
    @Override
    public Long saveCourseInfo(CourseFormVo courseFormVo)
    {
        // 添加课程基本信息,操作 course 表
        Course course = new Course();
        BeanUtils.copyProperties(courseFormVo, course);
        baseMapper.insert(course);

        // 添加课程详情信息,操作 course_description 表
        CourseDescription courseDescription = new CourseDescription();
        courseDescription.setDescription(courseFormVo.getDescription());

        // 设置课程 id
        courseDescription.setCourseId(course.getId());
        courseDescriptionService.save(courseDescription);

        // 返回课程 id
        return course.getId();
    }

    /**
     * 根据 id 获取课程信息
     *
     * @param id 课程 id
     * @return CourseFormVo 课程基本信息
     */
    @Override
    public CourseFormVo getCourseInfoById(Long id)
    {
        // 从 course 表中获取课程基本信息
        Course course = baseMapper.selectById(id);

        if (course == null)
        {
            return null;
        }

        //从 course_description 表中获取课程描述信息
        QueryWrapper<CourseDescription> wrapper = new QueryWrapper<>();
        wrapper.eq("course_id", id);
        CourseDescription courseDescription = courseDescriptionService.getOne(wrapper);

        // 封装描述信息,创建 CourseFormVo 对象
        CourseFormVo courseFormVo = new CourseFormVo();
        BeanUtils.copyProperties(course, courseFormVo);

        if (courseDescription != null)
        {
            courseFormVo.setDescription(courseDescription.getDescription());
        }

        return courseFormVo;
    }

    /**
     * 根据 id 修改课程信息
     *
     * @param courseFormVo 课程基本信息
     * @return courseId 课程 id
     */
    @Override
    public Long updateCourseById(CourseFormVo courseFormVo)
    {
        // 修改课程基本信息
        Course course = new Course();
        BeanUtils.copyProperties(courseFormVo, course);
        baseMapper.updateById(course);

        // 修改课程详情信息
        QueryWrapper<CourseDescription> wrapper = new QueryWrapper<>();
        wrapper.eq("course_id", course.getId());
        CourseDescription courseDescription = courseDescriptionService.getOne(wrapper);
        courseDescription.setDescription(courseFormVo.getDescription());

        // 设置课程描述 id
        courseDescription.setCourseId(course.getId());
        courseDescriptionService.updateById(courseDescription);

        // 返回课程 id
        return course.getId();
    }

    /**
     * 根据课程 id 查询课程发布信息
     *
     * @param id 课程 id
     * @return coursePublishVo 课程发布信息
     */
    @Override
    public CoursePublishVo getCoursePublishVo(Long id)
    {
        return baseMapper.selectCoursePublishVoById(id);
    }

    /**
     * 根据课程 id 最终发布课程
     *
     * @param id 课程 id
     */
    @Override
    public void publishCourse(Long id)
    {
        Course course = baseMapper.selectById(id);

        // 已经发布课程
        course.setStatus(1);
        course.setPublishTime(new Date());
        baseMapper.updateById(course);
    }

    /**
     * 删除课程
     *
     * @param id 课程 id
     */
    @Override
    public void removeCourseById(Long id)
    {
        // 根据课程 id 删除小节
        videoService.removeVideoByCourseId(id);

        // 根据课程 id 删除章节
        chapterService.removeChapterByCourseId(id);

        // 根据课程 id 删除描述
        courseDescriptionService.removeByCourseId(id);

        // 根据课程 id 删除课程
        baseMapper.deleteById(id);
    }
}
Day 10-整合网关与实现订单和营销管理模块
一、Spring Cloud 相关概念
1、基本概念
1.1、什么是 Spring Cloud
Spring Cloud 是一系列框架的集合。它利用 Spring Boot 的开发便利性简化了分布式系统基础设施的开发,如服务发现、服务注册、配置中心、消息总线、负载均衡、 熔断器、数据监控等,都可以用 Spring Boot 的开发风格做到一键启动和部署。Spring 并没有重复制造轮子,它只是将目前各家公司开发的比较成熟、经得起实际考验的服务框架组合起来,通过 SpringBoot 风格进行再封装屏蔽掉了复杂的配置和实现原理,最终给开发者留出了一套简单易懂、易部署和易维护的分布式系统开发工具包。
1.2、Spring Cloud 和 Spring Boot 关系
Spring Boot 是 Spring 的一套快速配置脚手架,可以基于 Spring Boot 快速开发单个微服务,Spring Cloud 是一个基于 Spring Boot 实现的开发工具;Spring Boot 专注于快速、方便集成的单个微服务个体,Spring Cloud 关注全局的服务治理框架; Spring Boot 使用了默认大于配置的理念,很多集成方案已经帮你选择好了,能不配置就不配置,Spring Cloud 很大的一部分是基于 Spring Boot 来实现,必须基于 Spring Boot 开发。可以单独使用 Spring Boot 开发项目,但是 Spring Cloud 离不开 Spring Boot。
2、Spring Cloud 相关基础服务组件
服务发现——Netflix Eureka (Nacos)。
服务调用——Netflix Feign。
熔断器——Netflix Hystrix。
服务网关——Spring Cloud GateWay。
分布式配置——Spring Cloud Config (Nacos)。
消息总线 —— Spring Cloud Bus (Nacos)。
二、搭建 Nacos 服务
1、Nacos 概述
1.1、基本概念
Nacos 是阿里巴巴推出来的一个新开源项目,是一个更易于构建云原生应用的动态服务发现、配置管理和服务管理平台。Nacos 致力于帮助您发现、配置和管理微服务。Nacos 提供了一组简单易用的特性集,帮助您快速实现动态服务发现、服务配置、服务元数据及流量管理。Nacos 帮助您更敏捷和容易地构建、交付和管理微服务平台。 Nacos 是构建以“服务”为中心的现代应用架构 (例如微服务范式、云原生范式) 的服务基础设施。
1.2、常见的注册中心
(1)Eureka(原生,2.0 遇到性能瓶颈,停止维护)。
(2)Zookeeper(支持,专业的独立产品。例如:dubbo)。
(3)Consul(原生,GO 语言开发)。
(4) Nacos。
-
相对于 Spring Cloud Eureka 来说,Nacos 更强大。Nacos = Spring Cloud Eureka + Spring Cloud Config。
-
Nacos 可以与 Spring, Spring Boot, Spring Cloud 集成,并能代替 Spring Cloud Eureka, Spring Cloud Config。
-
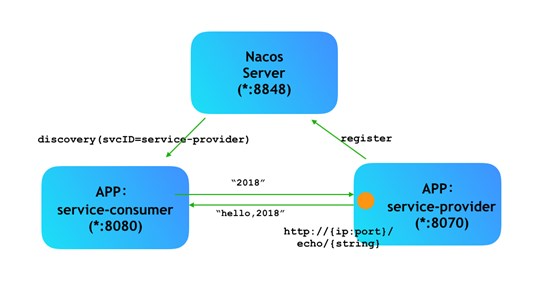
通过 Nacos Server 和 spring-cloud-starter-alibaba-nacos-discovery 实现服务的注册与发现。
1.3、Nacos 结构图
2、Nacos 下载和安装
2.1、下载地址和版本
下载地址:https://github.com/alibaba/nacos/releases
下载版本:nacos-server-2.2.3.tar.gz 或 nacos-server-2.2.3.zip,解压任意目录即可。
2.2、启动 nacos 服务
(1) Linux/Unix/Mac
启动命令(standalone 代表着单机模式运行,非集群模式)。
启动命令:sh startup.sh -m standalone
(2)Windows
启动方式,cmd 打开,执行命令: startup.cmd -m standalone
访问:http://localhost:8848/nacos
用户名/密码:nacos/nacos
(3)登录界面。
(4)主界面。
3、服务注册
把 service-vod 微服务注册到注册中心,其他模块注册步骤相同。
3.1、在 service 模块配置 pom
配置 Nacos 客户端的 pom 依赖。
<!-- alibaba-nacos-discovery 服务注册 -->
<dependency>
    <groupId>com.alibaba.cloud</groupId>
    <artifactId>spring-cloud-starter-alibaba-nacos-discovery</artifactId>
</dependency>

<!-- openfeign 服务调用 -->
<dependency>
    <groupId>org.springframework.cloud</groupId>
    <artifactId>spring-cloud-starter-openfeign</artifactId>
</dependency>

<!-- alibaba-sentinel 流量控制 -->
<dependency>
    <groupId>com.alibaba.cloud</groupId>
    <artifactId>spring-cloud-starter-alibaba-sentinel</artifactId>
</dependency>
3.2、配置 service-vod
配置 application.properties,在客户端微服务中添加注册 Nacos 服务的配置信息。
# nacos 服务地址
spring.cloud.nacos.discovery.server-addr=127.0.0.1:8848
3.3、添加 Nacos 客户端注解
在 service-vod 微服务启动类中添加注解。
package com.myxh.smart.planet.vod;

import org.springframework.boot.SpringApplication;
import org.springframework.boot.autoconfigure.SpringBootApplication;
import org.springframework.cloud.client.discovery.EnableDiscoveryClient;
import org.springframework.context.annotation.ComponentScan;

/**
 * @author MYXH
 * @date 2023/9/29
 */
@SpringBootApplication
@ComponentScan("com.myxh.smart.planet")
@EnableDiscoveryClient
public class ServiceVodApplication
{
    public static void main(String[] args)
    {
        SpringApplication.run(ServiceVodApplication.class, args);
    }
}
3.4、启动客户端微服务
启动注册中心。
启动已注册的微服务,可以在 Nacos 服务列表中看到被注册的微服务。

三、整合 Spring Cloud GateWay 网关
1、网关基本概念
1.1、Gateway 概述
Spring cloud gateway是 spring 官方基于 Spring 5.0、Spring Boot2.0 和 Project Reactor 等技术开发的网关,Spring Cloud Gateway 旨在为微服务架构提供简单、有效和统一的 API 路由管理方式,Spring Cloud Gateway 作为 Spring Cloud 生态系统中的网关,目标是替代 Netflix Zuul,其不仅提供统一的路由方式,并且还基于 Filter 链的方式提供了网关基本的功能,例如:安全、监控/埋点、限流等。
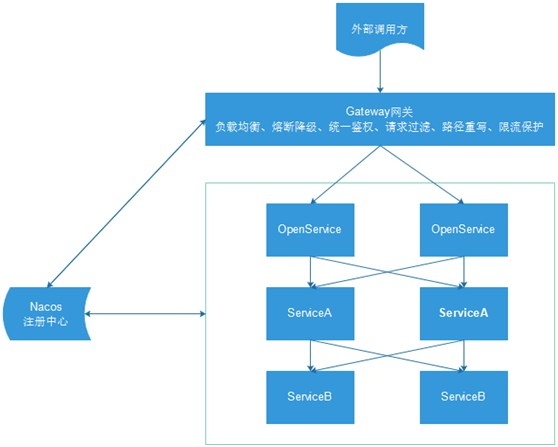
1.2、Gateway 核心概念
网关提供 API 全托管服务,丰富的 API 管理功能,辅助企业管理大规模的 API,以降低管理成本和安全风险,包括协议适配、协议转发、安全策略、防刷、流量、监控日志等贡呢。一般来说网关对外暴露的 URL 或者接口信息,统称为路由信息。如果研发过网关中间件或者使用过 Zuul 的人,会知道网关的核心是 Filter 以及 Filter Chain(Filter 责任链)。Sprig Cloud Gateway 也具有路由和 Filter 的概念。下面介绍一下 Spring Cloud Gateway 中几个重要的概念。
(1)路由: 路由是网关最基础的部分,路由信息有一个 ID、一个目的 URL、一组断言和一组 Filter 组成。如果断言路由为真,则说明请求的 URL 和配置匹配。
(2)断言: Java8 中的断言函数。Spring Cloud Gateway 中的断言函数输入类型是 Spring5.0 框架中的 ServerWebExchange。Spring Cloud Gateway 中的断言函数允许开发者去定义匹配来自于 http request 中的任何信息,比如请求头和参数等。
(3)过滤器: 一个标准的 Spring webFilter。Spring cloud gateway 中的 filter 分为两种类型的 Filter,分别是 Gateway Filter 和 Global Filter。过滤器 Filter 将会对请求和响应进行修改处理。
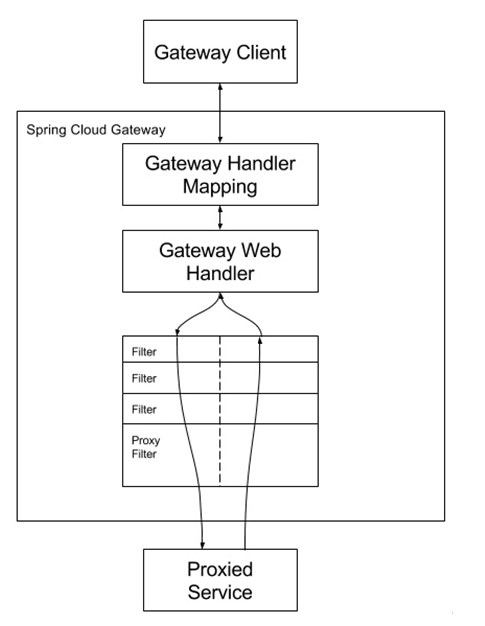
如图所示,Spring cloud Gateway 发出请求。然后再由 Gateway Handler Mapping 中找到与请求相匹配的路由,将其发送到 Gateway web handler。Handler 再通过指定的过滤器链将请求发送到实际的服务执行业务逻辑,然后返回。
2、实现网关转发功能
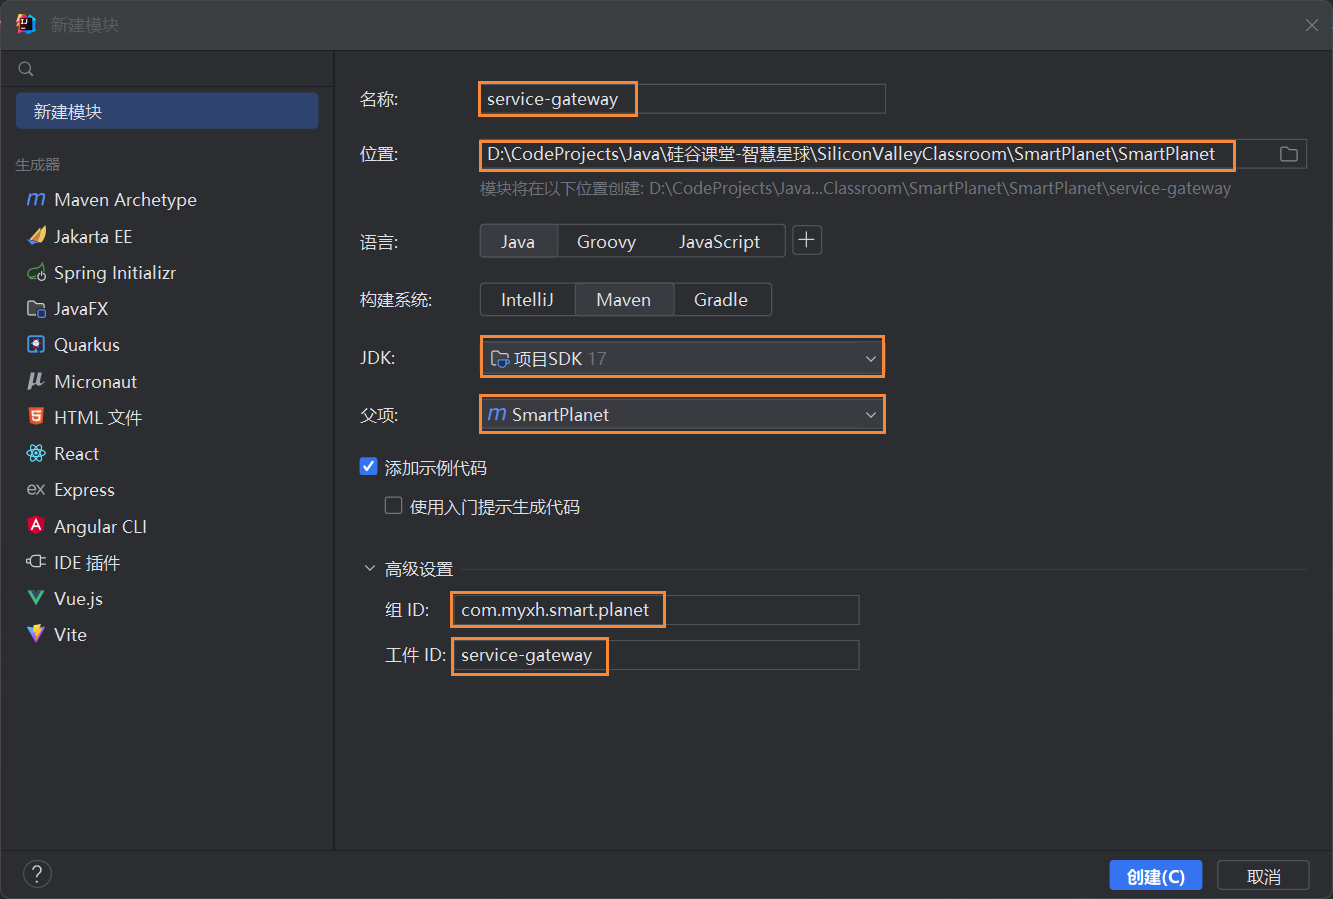
2.1、创建网关模块
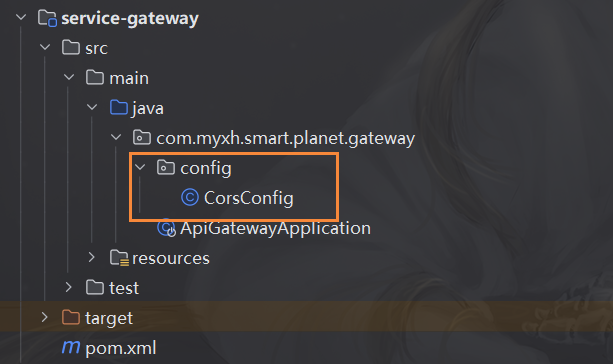
(1)在 SmartPlanet 下创建 service-gateway。
2.2、引入网关依赖
<?xml version="1.0" encoding="UTF-8"?>
<project xmlns="http://maven.apache.org/POM/4.0.0"
         xmlns:xsi="http://www.w3.org/2001/XMLSchema-instance"
         xsi:schemaLocation="http://maven.apache.org/POM/4.0.0 http://maven.apache.org/xsd/maven-4.0.0.xsd">
    <modelVersion>4.0.0</modelVersion>
    <parent>
        <groupId>com.myxh.smart.planet</groupId>
        <artifactId>SmartPlanet</artifactId>
        <version>0.0.1-SNAPSHOT</version>
    </parent>

    <artifactId>service-gateway</artifactId>

    <properties>
        <maven.compiler.source>17</maven.compiler.source>
        <maven.compiler.target>17</maven.compiler.target>
        <project.build.sourceEncoding>UTF-8</project.build.sourceEncoding>
    </properties>

    <dependencies>
        <!-- service-utils -->
        <dependency>
            <groupId>com.myxh.smart.planet</groupId>
            <artifactId>service-utils</artifactId>
            <version>0.0.1-SNAPSHOT</version>
        </dependency>

        <!-- alibaba-nacos-discovery 服务注册 -->
        <dependency>
            <groupId>com.alibaba.cloud</groupId>
            <artifactId>spring-cloud-starter-alibaba-nacos-discovery</artifactId>
        </dependency>

        <!-- gateway 网关 -->
        <dependency>
            <groupId>org.springframework.cloud</groupId>
            <artifactId>spring-cloud-starter-gateway</artifactId>
        </dependency>

        <!-- 负载平衡 loadbalancer -->
        <dependency>
            <groupId>org.springframework.cloud</groupId>
            <artifactId>spring-cloud-starter-loadbalancer</artifactId>
        </dependency>
    </dependencies>
</project>
2.3、创建启动类
package com.myxh.smart.planet.gateway;

import org.springframework.boot.SpringApplication;
import org.springframework.boot.autoconfigure.SpringBootApplication;
import org.springframework.cloud.client.discovery.EnableDiscoveryClient;

/**
 * @author MYXH
 * @date 2023/10/14
 */
@SpringBootApplication
@EnableDiscoveryClient
public class ApiGatewayApplication
{
    public static void main(String[] args)
    {
        SpringApplication.run(ApiGatewayApplication.class, args);
    }
}
2.4、配置路由规则
(1)编写 application.properties。
# 服务端口
server.port=8333

# 服务名
spring.application.name=service-gateway

# nacos 服务地址
spring.cloud.nacos.discovery.server-addr=127.0.0.1:8848

# 使用服务发现路由
spring.cloud.gateway.discovery.locator.enabled=true

# service-vod 模块配置
# 设置路由 id
spring.cloud.gateway.routes[0].id=service-vod
# 设置路由的 uri,lb 全称为 Load Balance 负载平衡
spring.cloud.gateway.routes[0].uri=lb://service-vod
# 设置路由断言,代理 servicerId 为 auth-service 的 /auth/ 路径,/admin/vod/teacher
spring.cloud.gateway.routes[0].predicates= Path=/*/vod/**
3、网关解决跨域问题
3.1、跨域概述
跨域本质是浏览器对于 ajax 请求的一种安全限制:一个页面发起的 ajax 请求,只能是与当前页域名相同的路径,这能有效的阻止跨站攻击。因此:跨域问题 是针对 ajax 的一种限制。但是这却给开发带来了不便,而且在实际生产环境中,肯定会有很多台服务器之间交互,地址和端口都可能不同。
之前通过服务器添加注解实现,现在跨域通过网关来解决跨域问题。
3.2、创建配置类
package com.myxh.smart.planet.gateway.config;

import org.springframework.context.annotation.Bean;
import org.springframework.context.annotation.Configuration;
import org.springframework.web.cors.CorsConfiguration;
import org.springframework.web.cors.reactive.CorsWebFilter;
import org.springframework.web.cors.reactive.UrlBasedCorsConfigurationSource;
import org.springframework.web.util.pattern.PathPatternParser;

/**
 * @author MYXH
 * @date 2023/10/14
 */
@Configuration
public class CorsConfig
{
    /**
     * 处理跨域
     *
     * @return CorsWebFilter(source) 核心 Web 过滤器
     */
    @Bean
    public CorsWebFilter corsFilter()
    {
        CorsConfiguration config = new CorsConfiguration();
        config.addAllowedMethod("*");
        config.addAllowedOrigin("*");
        config.addAllowedHeader("*");
        UrlBasedCorsConfigurationSource source = new UrlBasedCorsConfigurationSource(new PathPatternParser());
        source.registerCorsConfiguration("/**", config);

        return new CorsWebFilter(source);
    }
}
注意: 目前已经在网关做了跨域处理,那么 service 服务就不需要再做跨域处理了,将之前在 controller 类上添加过@CrossOrigin 标签的去掉。
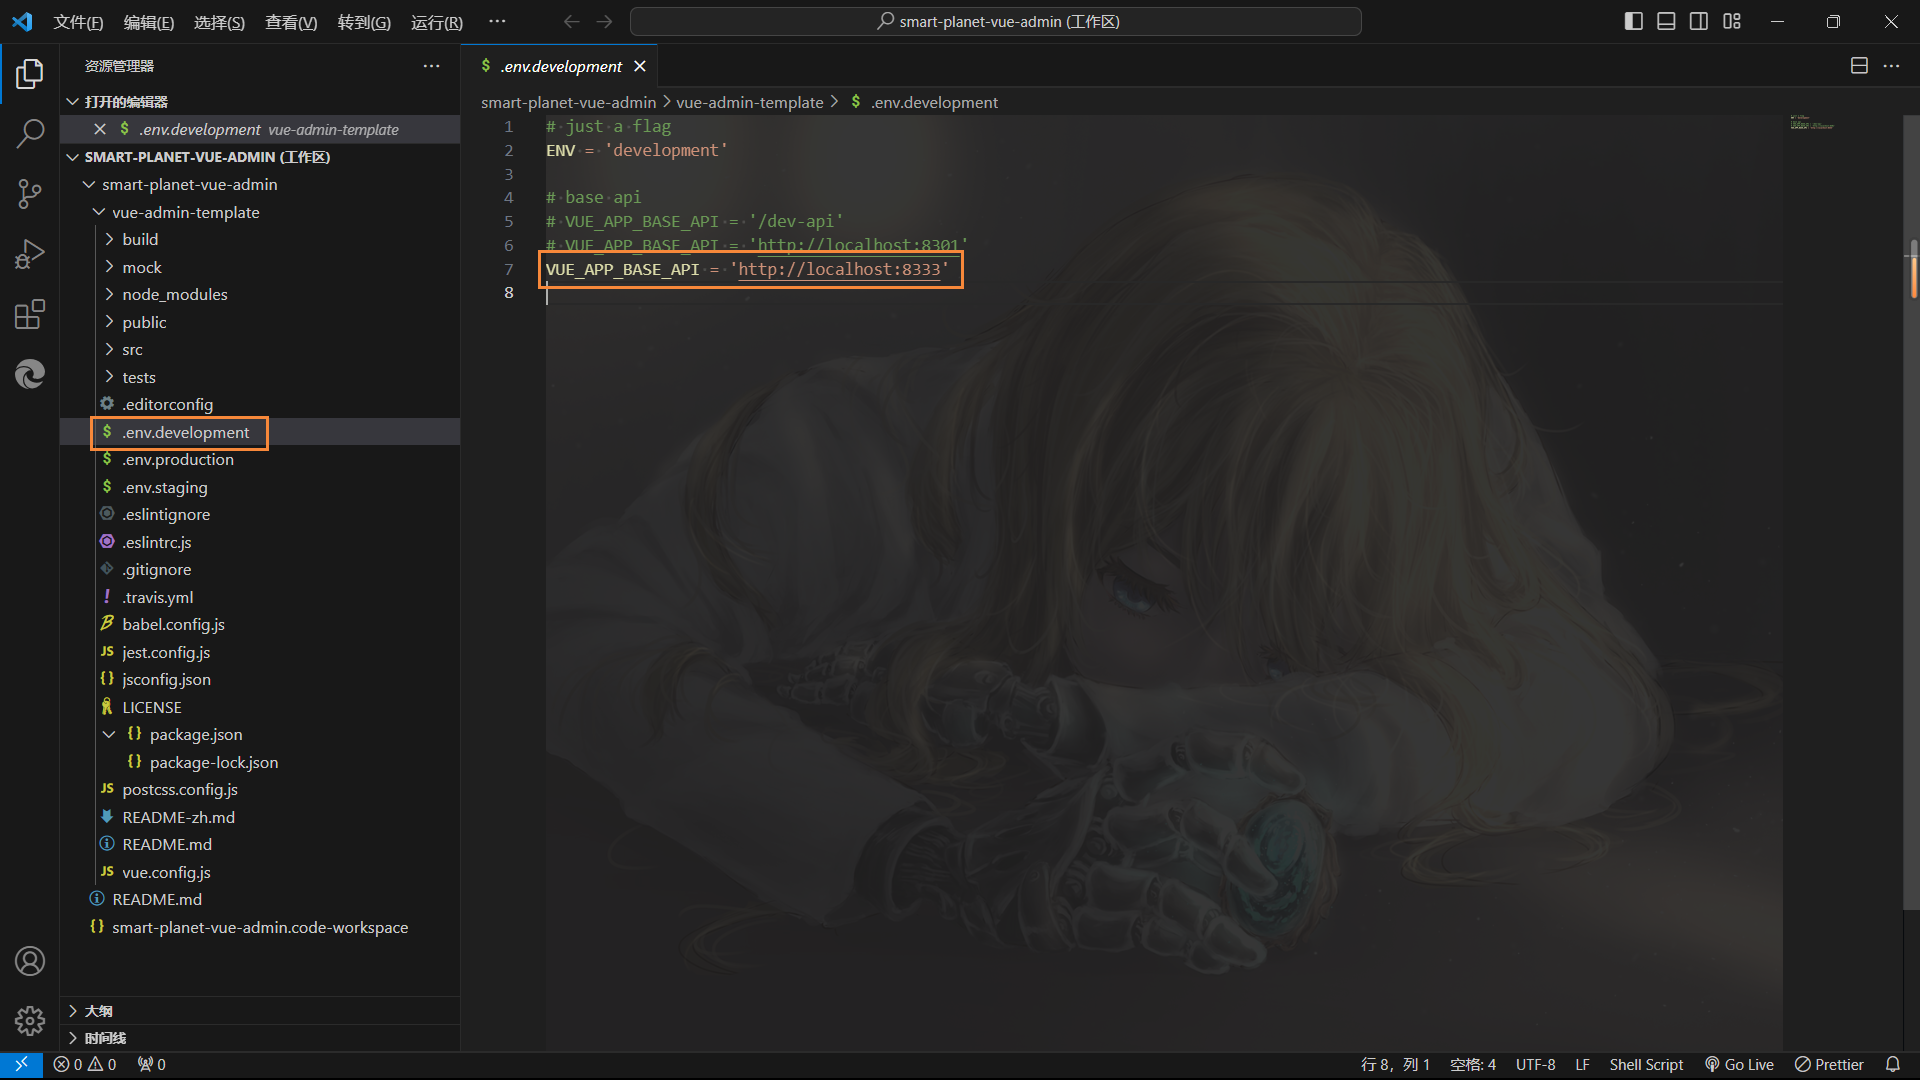
4、修改前端配置文件
4.1、修改接口为网关地址
四、后台管理系统-订单管理模块
1、环境准备
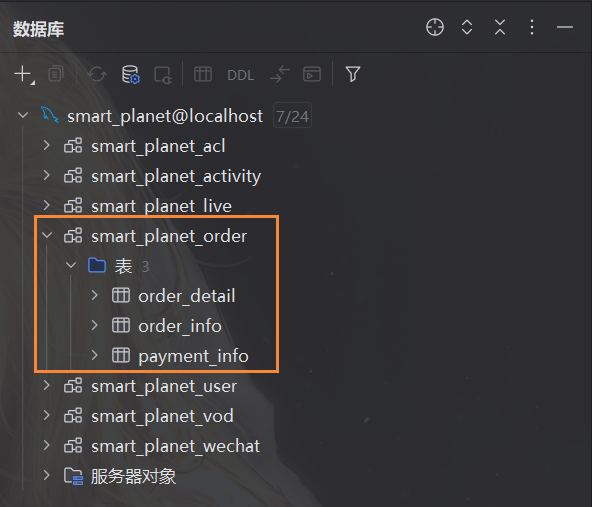
1.1、创建数据库表
1.2、创建订单模块
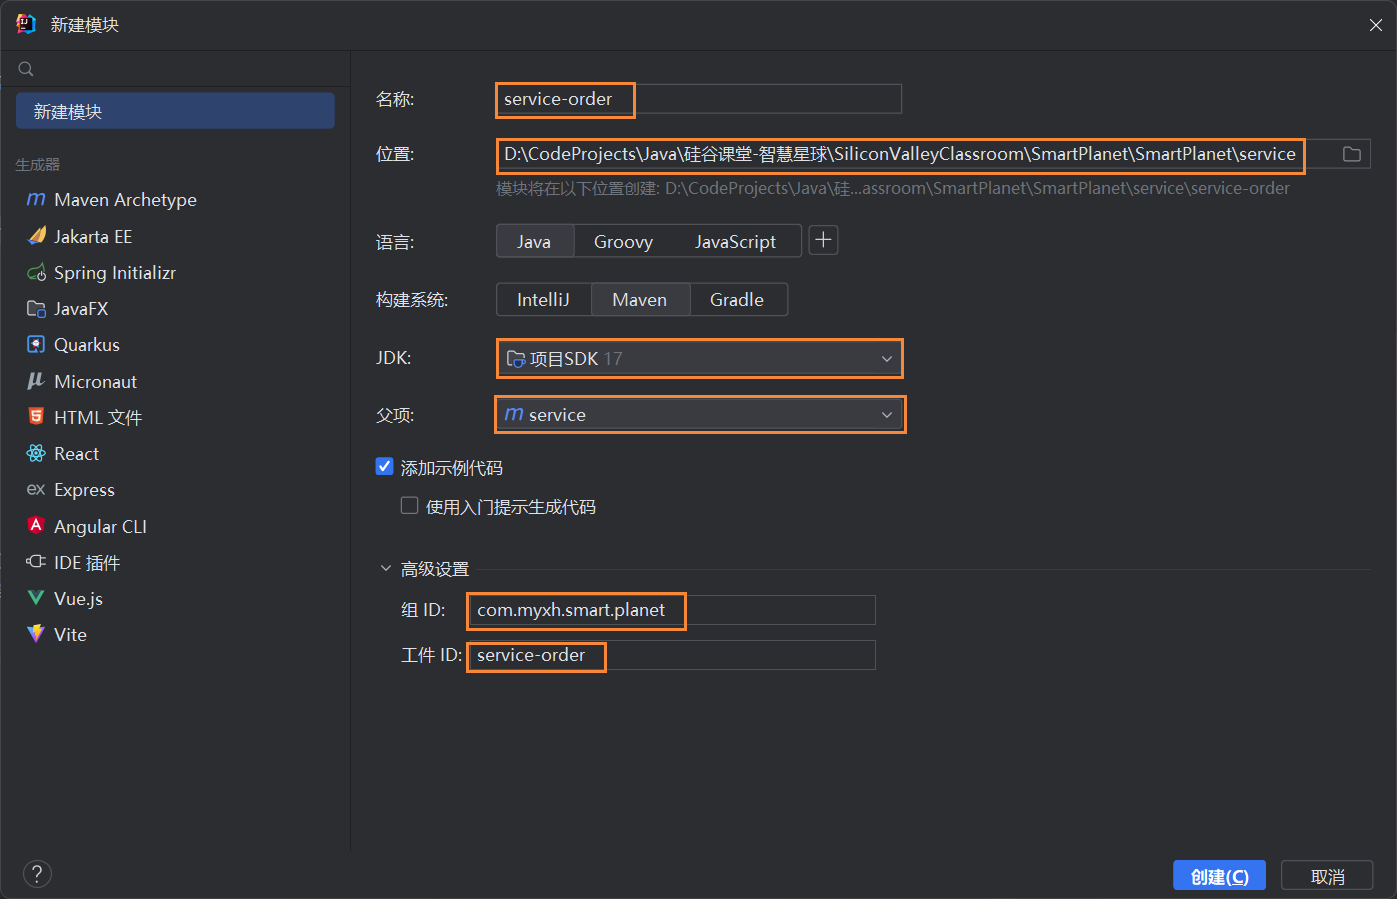
(1)service 模块下创建 service-order 模块。

1.3、生成订单相关代码
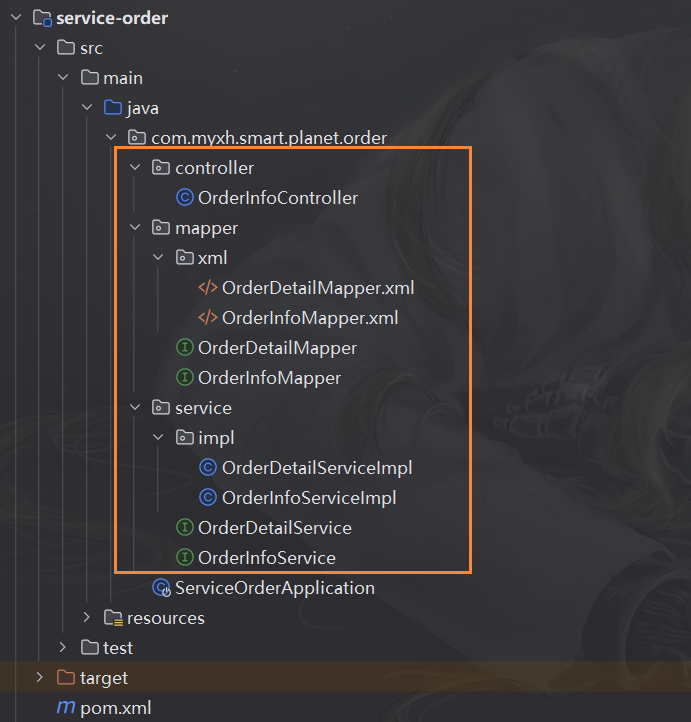
1.4、创建启动类
package com.myxh.smart.planet.order;

import org.springframework.boot.SpringApplication;
import org.springframework.boot.autoconfigure.SpringBootApplication;

/**
 * @author MYXH
 * @date 2023/10/14
 */
@SpringBootApplication
public class ServiceOrderApplication
{
    public static void main(String[] args)
    {
        SpringApplication.run(ServiceOrderApplication.class, args);
    }
}
1.5、创建配置文件
# 服务端口
server.port=8302

# 服务名
spring.application.name=service-order

# 环境设置:dev、test、prod
spring.profiles.active=dev

# MySQL 数据库连接
spring.datasource.driver-class-name=com.mysql.cj.jdbc.Driver
spring.datasource.url=jdbc:mysql://localhost:3306/smart_planet_order?characterEncoding=utf-8&useSSL=false
spring.datasource.username=MYXH
spring.datasource.password=520.ILY!

# 返回 Json 的全局时间格式
spring.jackson.date-format=yyyy-MM-dd HH:mm:ss
spring.jackson.time-zone=GMT+8

# MyBatis 日志
mybatis-plus.configuration.log-impl=org.apache.ibatis.logging.stdout.StdOutImpl

# 设置 mapper.xml 的路径
mybatis-plus.mapper-locations=classpath:com/myxh/smart/planet/order/mapper/xml/*.xml
1.6、创建配置类
package com.myxh.smart.planet.order.config;

import com.baomidou.mybatisplus.annotation.DbType;
import com.baomidou.mybatisplus.extension.plugins.MybatisPlusInterceptor;
import com.baomidou.mybatisplus.extension.plugins.inner.PaginationInnerInterceptor;
import org.mybatis.spring.annotation.MapperScan;
import org.springframework.context.annotation.Bean;
import org.springframework.context.annotation.Configuration;

/**
 * @author MYXH
 * @date 2023/10/14
 * @description 配置类
 */
@Configuration
@MapperScan("com.myxh.smart.planet.order.mapper")
public class OrderConfig
{
    /**
     * 分页插件
     *
     * @return MyBatis Plus 拦截器
     */
    @Bean
    public MybatisPlusInterceptor mybatisPlusInterceptor()
    {
        MybatisPlusInterceptor interceptor = new MybatisPlusInterceptor();
        interceptor.addInnerInterceptor(new PaginationInnerInterceptor(DbType.MYSQL));

        return interceptor;
    }
}
2、开发订单列表接口
2.1、编写 OrderInfoController
package com.myxh.smart.planet.order.controller;

import com.baomidou.mybatisplus.extension.plugins.pagination.Page;
import com.myxh.smart.planet.model.order.OrderInfo;
import com.myxh.smart.planet.order.service.OrderInfoService;
import com.myxh.smart.planet.result.Result;
import com.myxh.smart.planet.vo.order.OrderInfoQueryVo;
import io.swagger.v3.oas.annotations.Operation;
import io.swagger.v3.oas.annotations.Parameter;
import io.swagger.v3.oas.annotations.tags.Tag;
import org.springframework.beans.factory.annotation.Autowired;
import org.springframework.web.bind.annotation.GetMapping;

import java.util.Map;

/**
 * @author MYXH
 * @date 2023/10/14
 *
 * <p>
 * 订单信息 前端控制器
 * </p>
 */
@Tag(name = "订单信息管理", description = "订单信息管理接口")
@RestController
@RequestMapping("/admin/order/order/info")
public class OrderInfoController
{
    @Autowired
    private OrderInfoService orderInfoService;

    /**
     * 条件查询订单分页
     *
     * @param current          当前页码
     * @param limit            每页记录数
     * @param orderInfoQueryVo 查询对象
     * @return Result 全局统一返回结果
     */
    @Operation(summary = "条件查询订单分页", description = "条件查询订单分页")
    @GetMapping("find/query/page/{current}/{limit}")
    public Result<Map<String, Object>> orderInfoList(
            @Parameter(name = "current", description = "当前页码", required = true)
            @PathVariable("current") Long current,
            @Parameter(name = "limit", description = "每页记录数", required = true)
            @PathVariable("limit") Long limit,
            @Parameter(name = "orderInfoVo", description = "查询对象")
            OrderInfoQueryVo orderInfoQueryVo)
    {
        // 创建 page 对象
        Page<OrderInfo> orderInfoPageParam = new Page<>(current, limit);
        Map<String, Object> orderInfoPage = orderInfoService.selectOrderInfoPage(orderInfoPageParam, orderInfoQueryVo);

        return Result.ok(orderInfoPage);
    }
}
2.2、编写 Service
(1)OrderInfoService 定义方法。
package com.myxh.smart.planet.order.service;

import com.baomidou.mybatisplus.extension.plugins.pagination.Page;
import com.baomidou.mybatisplus.extension.service.IService;
import com.myxh.smart.planet.model.order.OrderInfo;
import com.myxh.smart.planet.vo.order.OrderInfoQueryVo;

import java.util.Map;

/**
 * @author MYXH
 * @date 2023/10/14
 *
 * <p>
 * 订单信息 服务类
 * </p>
 */
public interface OrderInfoService extends IService<OrderInfo>
{
    /**
     * 订单信息列表
     *
     * @param orderInfoPageParam 订单信息页面参数
     * @param orderInfoQueryVo 查询对象
     * @return orderInfoPage 订单信息页面
     */
    Map<String, Object> selectOrderInfoPage(Page<OrderInfo> orderInfoPageParam, OrderInfoQueryVo orderInfoQueryVo);
}
(2)OrderInfoServiceImpl 实现方法。
package com.myxh.smart.planet.order.service.impl;

import com.baomidou.mybatisplus.core.conditions.query.QueryWrapper;
import com.baomidou.mybatisplus.extension.plugins.pagination.Page;
import com.baomidou.mybatisplus.extension.service.impl.ServiceImpl;
import com.myxh.smart.planet.model.order.OrderDetail;
import com.myxh.smart.planet.model.order.OrderInfo;
import com.myxh.smart.planet.order.mapper.OrderInfoMapper;
import com.myxh.smart.planet.order.service.OrderDetailService;
import com.myxh.smart.planet.order.service.OrderInfoService;
import com.myxh.smart.planet.vo.order.OrderInfoQueryVo;
import org.springframework.beans.factory.annotation.Autowired;
import org.springframework.stereotype.Service;
import org.springframework.util.ObjectUtils;
import org.springframework.util.StringUtils;

import java.util.HashMap;
import java.util.List;
import java.util.Map;

/**
 * @author MYXH
 * @date 2023/10/14
 *
 * <p>
 * 订单信息 服务实现类
 * </p>
 */
@Service
public class OrderInfoServiceImpl extends ServiceImpl<OrderInfoMapper, OrderInfo> implements OrderInfoService
{
    @Autowired
    private OrderDetailService orderDetailService;

    /**
     * 订单信息列表
     *
     * @param orderInfoPageParam 订单信息页面参数
     * @param orderInfoQueryVo   查询对象
     * @return orderInfoPage 订单信息页面
     */
    @Override
    public Map<String, Object> selectOrderInfoPage(Page<OrderInfo> orderInfoPageParam, OrderInfoQueryVo orderInfoQueryVo)
    {
        // orderInfoQueryVo 获取查询条件
        Long userId = orderInfoQueryVo.getUserId();
        String outTradeNo = orderInfoQueryVo.getOutTradeNo();
        String phone = orderInfoQueryVo.getPhone();
        String createTimeBegin = orderInfoQueryVo.getCreateTimeBegin();
        String createTimeEnd = orderInfoQueryVo.getCreateTimeEnd();
        Integer orderStatus = orderInfoQueryVo.getOrderStatus();

        // 判断条件值是否为空,不为空,进行条件封装
        QueryWrapper<OrderInfo> wrapper = new QueryWrapper<>();

        if (!ObjectUtils.isEmpty(orderStatus))
        {
            wrapper.eq("order_status", orderStatus);
        }
        if (!ObjectUtils.isEmpty(userId))
        {
            wrapper.eq("user_id", userId);
        }
        if (StringUtils.hasLength(outTradeNo))
        {
            wrapper.eq("out_trade_no", outTradeNo);
        }
        if (StringUtils.hasLength(phone))
        {
            wrapper.eq("phone", phone);
        }
        if (StringUtils.hasLength(createTimeBegin))
        {
            wrapper.ge("create_time", createTimeBegin);
        }
        if (StringUtils.hasLength(createTimeEnd))
        {
            wrapper.le("create_time", createTimeEnd);
        }

        // 调用实现条件分页查询
        Page<OrderInfo> pages = baseMapper.selectPage(orderInfoPageParam, wrapper);
        Long totalCount = pages.getTotal();
        Long pageCount = pages.getPages();
        List<OrderInfo> records = pages.getRecords();

        // 订单里面包含详情内容,封装详情数据,根据订单 id 查询详情
        records.stream().forEach(this::getOrderDetail);

        // 所有需要数据封装 map 集合,最终返回
        Map<String, Object> orderInfoPage = new HashMap<>();
        orderInfoPage.put("total", totalCount);
        orderInfoPage.put("pageCount", pageCount);
        orderInfoPage.put("records", records);

        return orderInfoPage;
    }

    /**
     * 查询订单详情数据
     *
     * @param orderInfo 订单信息
     * @return orderInfo 订单信息
     */
    private OrderInfo getOrderDetail(OrderInfo orderInfo)
    {
        // 订单 id
        Long id = orderInfo.getId();

        // 查询订单详情
        OrderDetail orderDetail = orderDetailService.getById(id);

        if (orderDetail != null)
        {
            String courseName = orderDetail.getCourseName();
            orderInfo.getParam().put("courseName", courseName);
        }

        return orderInfo;
    }
}
3、配置网关
3.1、Nacos 注册
(1)service-order 启动类添加注解。
package com.myxh.smart.planet.order;

import org.springframework.boot.SpringApplication;
import org.springframework.boot.autoconfigure.SpringBootApplication;
import org.springframework.cloud.client.discovery.EnableDiscoveryClient;

/**
 * @author MYXH
 * @date 2023/10/14
 */
@SpringBootApplication
@EnableDiscoveryClient
public class ServiceOrderApplication
{
    public static void main(String[] args)
    {
        SpringApplication.run(ServiceOrderApplication.class, args);
    }
}
(2)service-order 配置文件。
# 服务端口
server.port=8302

# 服务名
spring.application.name=service-order

# 环境设置:dev、test、prod
spring.profiles.active=dev

# MySQL 数据库连接
spring.datasource.driver-class-name=com.mysql.cj.jdbc.Driver
spring.datasource.url=jdbc:mysql://localhost:3306/smart_planet_order?characterEncoding=utf-8&useSSL=false
spring.datasource.username=MYXH
spring.datasource.password=520.ILY!

# 返回 Json 的全局时间格式
spring.jackson.date-format=yyyy-MM-dd HH:mm:ss
spring.jackson.time-zone=GMT+8

# MyBatis 日志
mybatis-plus.configuration.log-impl=org.apache.ibatis.logging.stdout.StdOutImpl

# 设置 mapper.xml 的路径
mybatis-plus.mapper-locations=classpath:com/myxh/smart/planet/order/mapper/xml/*.xml

# nacos 服务地址
spring.cloud.nacos.discovery.server-addr=127.0.0.1:8848
3.2、配置路由规则
(1)service-gateway 配置文件。
# service-order 模块配置
# 设置路由 id
spring.cloud.gateway.routes[1].id=service-order
# 设置路由的 uri,lb 全称为 Load Balance 负载平衡
spring.cloud.gateway.routes[1].uri=lb://service-order
# 设置路由断言,代理 servicerId 为 auth-service 的 /auth/ 路径,/admin/order/order/info
spring.cloud.gateway.routes[1].predicates= Path=/*/order/**
4、开发订单列表前端
4.1、定义接口
(1)创建 api/order/orderInfo.js。
import request from "@/utils/request";

const ORDER_INFO_API = "/admin/order/order/info";

export default {
  /**
   * 订单信息列表
   *
   * @param {number} current 当前页码
   * @param {number} limit 每页记录数
   * @param {Object} orderInfoQueryVo 查询对象
   * @returns {Promise} 返回一个 Promise 对象,表示操作的异步结果
   */
  getPageList(current, limit, orderInfoQueryVo) {
    return request({
      url: `${ORDER_INFO_API}/find/query/page/${current}/${limit}`,
      method: "get",
      params: orderInfoQueryVo,
    });
  },
};
4.2、创建路由
(1)router/index.js 定义路由。
// 订单管理
{
  path: "/order",
  component: Layout,
  redirect: "/order/order/info/list",
  name: "Order",
  meta: { title: "订单管理", icon: "el-icon-truck" },
  alwaysShow: true,
  children: [
    {
      path: "order/info/list",
      name: "OrderInfo",
      component: () => import("@/views/order/list"),
      meta: { title: "订单列表" },
    },
  ],
},
4.3、创建 vue 页面
(1)创建 views/order/list.vue。
<template>
  <div class="app-container">
    <el-card class="operate-container" shadow="never">
      <el-form :inline="true" class="demo-form-inline">
        <el-form-item>
          <el-input v-model="searchObj.outTradeNo" placeholder="订单号" />
        </el-form-item>
        <el-form-item>
          <el-input v-model="searchObj.phone" placeholder="手机" />
        </el-form-item>
        <el-form-item>
          <el-date-picker
            v-model="searchObj.createTimeBegin"
            type="date"
            placeholder="选择下单开始日期"
            value-format="yyyy-MM-dd"
          />
        </el-form-item>
        <el-form-item>
          <el-date-picker
            v-model="searchObj.createTimeEnd"
            type="date"
            placeholder="选择截止日期"
            value-format="yyyy-MM-dd"
          />
        </el-form-item>
        <el-form-item>
          <el-select
            v-model="searchObj.orderStatus"
            placeholder="订单状态"
            class="v-select patient-select"
          >
            <el-option
              v-for="item in statusList"
              :key="item.status"
              :label="item.name"
              :value="item.status"
            >
            </el-option>
          </el-select>
        </el-form-item>
        <el-button type="primary" icon="el-icon-search" @click="fetchData()"
          >查询</el-button
        >
        <el-button type="default" @click="resetData()">清空</el-button>
      </el-form>
    </el-card>

    <!-- 列表 -->
    <el-table
      v-loading="listLoading"
      :data="list"
      border
      fit
      highlight-current-row
    >
      <el-table-column label="序号" width="60" align="center">
        <template slot-scope="scope">
          {{ (page - 1) * limit + scope.$index + 1 }}
        </template>
      </el-table-column>
      <el-table-column prop="outTradeNo" label="订单号" width="160" />
      <el-table-column prop="courseName" label="课程名称" width="160">
        <template slot-scope="scope">
          {{ scope.row.param.courseName }}
        </template>
      </el-table-column>
      <el-table-column prop="finalAmount" label="订单金额" width="90" />
      <el-table-column prop="nickName" label="下单用户" />
      <el-table-column prop="phone" label="用户手机" />
      <el-table-column prop="payTime" label="支付时间" width="156" />
      <el-table-column prop="orderStatus" label="订单状态">
        <template slot-scope="scope">
          {{ scope.row.orderStatus == 0 ? "未支付" : "已支付" }}
        </template>
      </el-table-column>
      <el-table-column prop="createTime" label="下单时间" width="156" />
    </el-table>

    <!-- 分页组件 -->
    <el-pagination
      :current-page="page"
      :total="total"
      :page-size="limit"
      :page-sizes="[5, 10, 20, 30, 40, 50, 100]"
      style="padding: 30px 0; text-align: center"
      layout="sizes, prev, pager, next, jumper, ->, total, slot"
      @current-change="fetchData"
      @size-change="changeSize"
    />
  </div>
</template>

<script>
  import orderInfoAPI from "@/api/order/orderInfo";

  export default {
    data() {
      return {
        // 数据是否正在加载
        listLoading: true,

        // banner 列表
        list: null,

        // 数据库中的总记录数
        total: 0,

        // 默认页码
        page: 1,

        // 每页记录数
        limit: 10,

        // 查询表单对象
        searchObj: {},

        statusList: [
          {
            status: 0,
            name: "未支付",
          },
          {
            status: 1,
            name: "已支付",
          },
        ],
      };
    },

    // 生命周期函数:内存准备完毕,页面尚未渲染
    created() {
      this.fetchData();
    },

    // 生命周期函数:内存准备完毕,页面渲染成功
    mounted() {
      console.log("list mounted...");
    },

    methods: {
      // 当页码发生改变的时候
      changeSize(size) {
        this.limit = size;
        this.fetchData(1);
      },

      // 加载 banner 列表数据
      fetchData(page = 1) {
        // 验证开始时间和结束时间的合法性
        if (!this.validateDateRange()) {
          return;
        }

        // 异步获取远程数据(ajax)
        this.page = page;
        orderInfoAPI
          .getPageList(this.page, this.limit, this.searchObj)
          .then((response) => {
            this.list = response.data.records;
            this.total = response.data.total;
            // 数据加载并绑定成功
            this.listLoading = false;
          });
      },

      // 验证开始时间和结束时间的合法性
      validateDateRange() {
        if (
          this.searchObj.createTimeBegin &&
          this.searchObj.createTimeEnd &&
          this.searchObj.createTimeBegin > this.searchObj.createTimeEnd
        ) {
          this.$message.error("开始时间不能晚于结束时间");
          return false;
        }
        return true;
      },

      // 重置查询表单
      resetData() {
        console.log("重置查询表单");
        this.searchObj = {};
        this.fetchData();
      },
    },
  };
</script>
五、后台管理系统-营销管理模块
1、环境准备
1.1、创建数据库表
1.2、创建营销模块
(1)service 模块下创建 service-activity 模块。

1.3、生成营销相关代码
1.4、创建启动类
package com.myxh.smart.planet.activity;

import org.springframework.boot.SpringApplication;
import org.springframework.boot.autoconfigure.SpringBootApplication;
import org.springframework.cloud.client.discovery.EnableDiscoveryClient;

/**
 * @author MYXH
 * @date 2023/10/15
 */
@SpringBootApplication
@EnableDiscoveryClient
public class ServiceActivityApplication
{
    public static void main(String[] args)
    {
        SpringApplication.run(ServiceActivityApplication.class, args);
    }
}
1.5、创建配置文件
# 服务端口
server.port=8303

# 服务名
spring.application.name=service-activity

# 环境设置:dev、test、prod
spring.profiles.active=dev

# MySQL 数据库连接
spring.datasource.driver-class-name=com.mysql.cj.jdbc.Driver
spring.datasource.url=jdbc:mysql://localhost:3306/smart_planet_activity?characterEncoding=utf-8&useSSL=false
spring.datasource.username=MYXH
spring.datasource.password=520.ILY!

# 返回 Json 的全局时间格式
spring.jackson.date-format=yyyy-MM-dd HH:mm:ss
spring.jackson.time-zone=GMT+8

# MyBatis 日志
mybatis-plus.configuration.log-impl=org.apache.ibatis.logging.stdout.StdOutImpl

# 设置 mapper.xml 的路径
mybatis-plus.mapper-locations=classpath:com/myxh/smart/planet/activity/mapper/xml/*.xml

# nacos 服务地址
spring.cloud.nacos.discovery.server-addr=127.0.0.1:8848
1.6、创建配置类
package com.myxh.smart.planet.activity.config;

import com.baomidou.mybatisplus.annotation.DbType;
import com.baomidou.mybatisplus.extension.plugins.MybatisPlusInterceptor;
import com.baomidou.mybatisplus.extension.plugins.inner.PaginationInnerInterceptor;
import org.mybatis.spring.annotation.MapperScan;
import org.springframework.context.annotation.Bean;
import org.springframework.context.annotation.Configuration;

/**
 * @author MYXH
 * @date 2023/10/15
 * @description 配置类
 */
@Configuration
@MapperScan("com.myxh.smart.planet.activity.mapper")
public class ActivityConfig
{
    /**
     * 分页插件
     *
     * @return MyBatis Plus 拦截器
     */
    @Bean
    public MybatisPlusInterceptor mybatisPlusInterceptor()
    {
        MybatisPlusInterceptor interceptor = new MybatisPlusInterceptor();
        interceptor.addInnerInterceptor(new PaginationInnerInterceptor(DbType.MYSQL));

        return interceptor;
    }
}
2、开发优惠券相关接口
2.1、编写 CouponInfoController
package com.myxh.smart.planet.activity.controller;

import com.baomidou.mybatisplus.core.metadata.IPage;
import com.baomidou.mybatisplus.extension.plugins.pagination.Page;
import com.myxh.smart.planet.activity.service.CouponInfoService;
import com.myxh.smart.planet.model.activity.CouponInfo;
import com.myxh.smart.planet.model.activity.CouponUse;
import com.myxh.smart.planet.result.Result;
import com.myxh.smart.planet.vo.activity.CouponUseQueryVo;
import io.swagger.v3.oas.annotations.Operation;
import io.swagger.v3.oas.annotations.Parameter;
import io.swagger.v3.oas.annotations.tags.Tag;
import org.springframework.beans.factory.annotation.Autowired;
import org.springframework.web.bind.annotation.GetMapping;
import org.springframework.web.bind.annotation.PostMapping;
import org.springframework.web.bind.annotation.PutMapping;
import org.springframework.web.bind.annotation.DeleteMapping;
import org.springframework.web.bind.annotation.RequestMapping;
import org.springframework.web.bind.annotation.RestController;

import java.util.List;

/**
 * @author MYXH
 * @date 2023/10/15
 *
 * <p>
 * 优惠券信息 前端控制器
 * </p>
 */
@Tag(name = "优惠券信息管理", description = "优惠券信息管理接口")
@RestController
@RequestMapping("/admin/activity/coupon/info")
public class CouponInfoController
{
    @Autowired
    private CouponInfoService couponInfoService;

    /**
     * 条件查询优惠券分页
     *
     * @param current 当前页码
     * @param limit   每页记录数
     * @return Result 全局统一返回结果
     */
    @Operation(summary = "条件查询优惠券分页", description = "条件查询优惠券分页")
    @GetMapping("find/query/page/{current}/{limit}")
    public Result<IPage<CouponInfo>> couponInfoList(
            @Parameter(name = "current", description = "当前页码", required = true) @PathVariable("current") Long current,
            @Parameter(name = "limit", description = "每页记录数", required = true) @PathVariable("limit") Long limit)
    {
        Page<CouponInfo> couponInfoPageParam = new Page<>(current, limit);
        IPage<CouponInfo> couponInfoPageModel = couponInfoService.page(couponInfoPageParam);

        return Result.ok(couponInfoPageModel);
    }

    /**
     * 根据 id 查询优惠券
     *
     * @param id id
     * @return Result 全局统一返回结果
     */
    @Operation(summary = "查询", description = "根据 id 查询优惠券")
    @GetMapping("get/{id}")
    public Result<CouponInfo> get(@PathVariable("id") String id)
    {
        CouponInfo couponInfo = couponInfoService.getById(id);

        return Result.ok(couponInfo);
    }

    /**
     * 添加优惠券
     *
     * @param couponInfo 优惠券数据
     * @return Result 全局统一返回结果
     */
    @Operation(summary = "添加", description = "添加优惠券")
    @PostMapping("save")
    public Result<Void> save(@RequestBody CouponInfo couponInfo)
    {
        couponInfoService.save(couponInfo);

        return Result.ok(null);
    }

    /**
     * 修改优惠券
     *
     * @param couponInfo 优惠券数据
     * @return Result 全局统一返回结果
     */
    @Operation(summary = "修改", description = "修改优惠券")
    @PutMapping("update")
    public Result<Void> updateById(@RequestBody CouponInfo couponInfo)
    {
        couponInfoService.updateById(couponInfo);

        return Result.ok(null);
    }

    /**
     * 逻辑删除优惠券
     *
     * @param id id
     * @return Result 全局统一返回结果
     */
    @Operation(summary = "删除", description = "逻辑删除优惠券")
    @DeleteMapping("remove/{id}")
    public Result<Void> remove(@PathVariable("id") String id)
    {
        couponInfoService.removeById(id);

        return Result.ok(null);
    }

    /**
     * 批量删除优惠券
     *
     * @param idList id 数组,Json 数组 [1,2,3,...]
     * @return Result 全局统一返回结果
     */
    @Operation(summary = "批量删除", description = "批量删除优惠券")
    @DeleteMapping("remove/batch")
    public Result<Void> batchRemove(@RequestBody List<String> idList)
    {
        couponInfoService.removeByIds(idList);

        return Result.ok(null);
    }

    /**
     * 条件查询已经使用的优惠券分页
     *
     * @param current 当前页码
     * @param limit   每页记录数
     * @return Result 全局统一返回结果
     */
    @Operation(summary = "条件查已经使用的优惠券分页", description = "条件查已经使用的优惠券分页")
    @GetMapping("coupon/use/{current}/{limit}")
    public Result<IPage<CouponUse>> couponUseList(
            @Parameter(name = "current", description = "当前页码", required = true)
            @PathVariable("current") Long current,
            @Parameter(name = "limit", description = "每页记录数", required = true)
            @PathVariable("limit") Long limit,
            @Parameter(name = "couponUseVo", description = "查询对象")
            @RequestBody(required = false) CouponUseQueryVo couponUseQueryVo)
    {
        Page<CouponUse> couponUsePageParam = new Page<>(current, limit);
        IPage<CouponUse> couponUsePageModel = couponInfoService.selectCouponUsePage(couponUsePageParam, couponUseQueryVo);

        return Result.ok(couponUsePageModel);
    }
}
2.2、编写 Service
(1)CouponInfoService 定义方法。
package com.myxh.smart.planet.activity.service;

import com.baomidou.mybatisplus.core.metadata.IPage;
import com.baomidou.mybatisplus.extension.plugins.pagination.Page;
import com.baomidou.mybatisplus.extension.service.IService;
import com.myxh.smart.planet.model.activity.CouponInfo;
import com.myxh.smart.planet.model.activity.CouponUse;
import com.myxh.smart.planet.vo.activity.CouponUseQueryVo;

/**
 * @author MYXH
 * @date 2023/10/15
 *
 * <p>
 * 优惠券信息 服务类
 * </p>
 */
public interface CouponInfoService extends IService<CouponInfo>
{
    /**
     * 优惠券信息列表
     *
     * @param couponUsePageParam 优惠券使用页面参数
     * @param couponUseQueryVo 查询对象
     * @return couponUsePageModel 优惠券使用页面
     */
    IPage<CouponUse> selectCouponUsePage(Page<CouponUse> couponUsePageParam, CouponUseQueryVo couponUseQueryVo);
}


 被折叠的 条评论
为什么被折叠?
被折叠的 条评论
为什么被折叠?
 到【灌水乐园】发言


