


从b站学习springcloud,现在进行总结,该总结除去了视频中出现的小错误,对有些易错的地方进行了提醒
b站链接:https://www.bilibili.com/video/BV1Gt411N7HF?p=2
资料链接:
https://pan.baidu.com/s/1o0Aju3IydKA15Vo1pP4z5w
提取码: 21ru
上一节链接:
下一节链接:
下面的内容总结:
本节是底层原理,代码了解即可
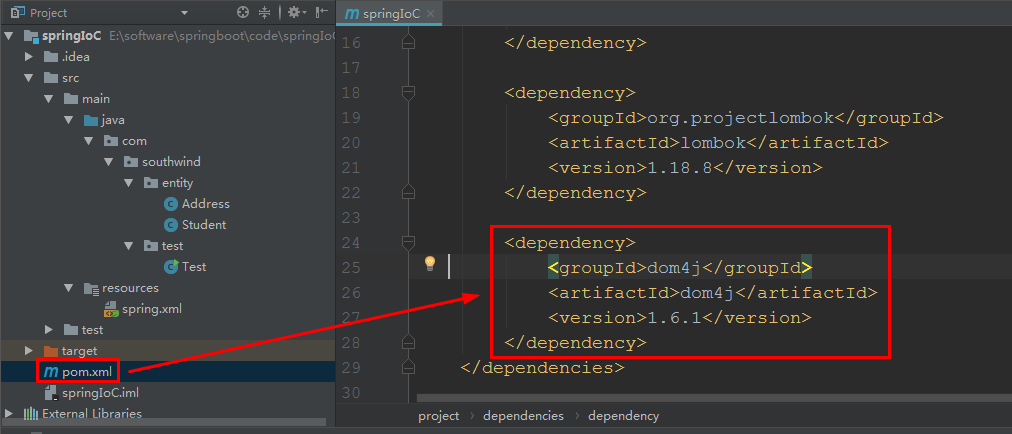
1 在 pom 文件中加入代码:
        <dependency>
            <groupId>dom4j</groupId>
            <artifactId>dom4j</artifactId>
            <version>1.6.1</version>
        </dependency>
2 实现接口:

实现这两个红框
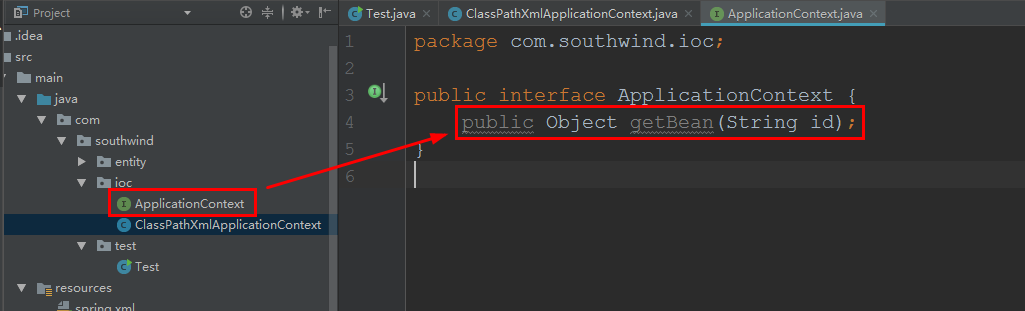
2.1 在 southwind 中创包 ioc,其内创建接口 ApplicationContext ,加入代码:
package com.southwind.ioc;

public interface ApplicationContext {
    public Object getBean(String id);
}
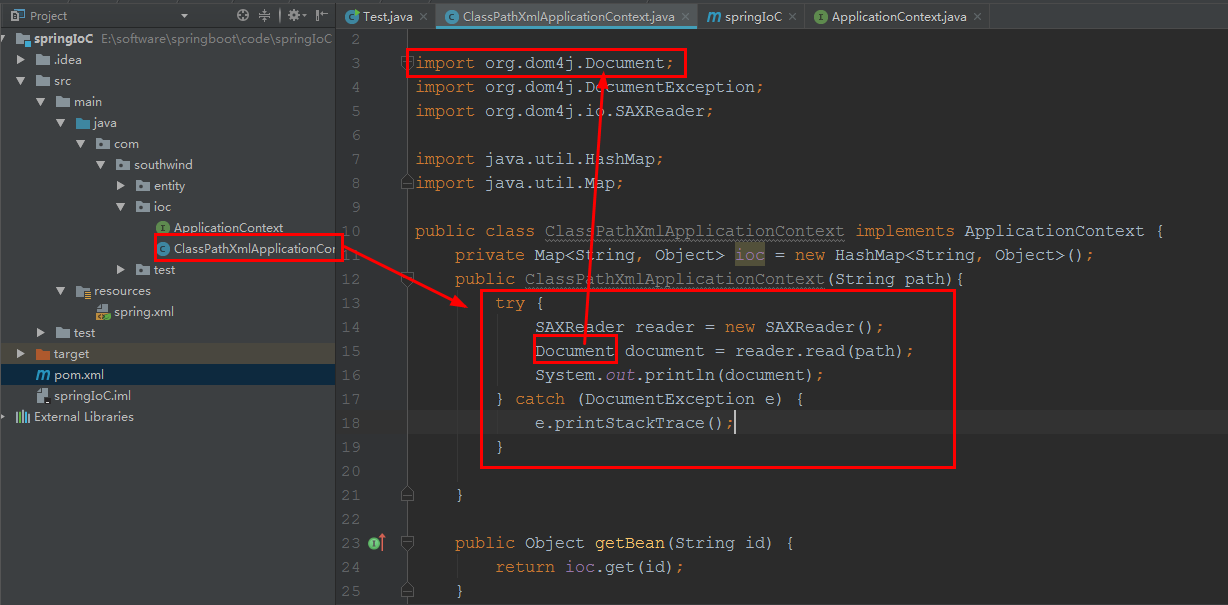
2.2 southwind 中创建 类 ClassPathXmlApplicationContext
SAXReader reader = new SAXReader(); 用到了 ctrl + alt + t
加入代码 :
package com.southwind.ioc;

import org.dom4j.Document;
import org.dom4j.DocumentException;
import org.dom4j.io.SAXReader;

import java.util.HashMap;
import java.util.Map;

public class ClassPathXmlApplicationContext implements ApplicationContext {
    private Map<String, Object> ioc = new HashMap<String, Object>();
    public ClassPathXmlApplicationContext(String path){
        try {
            SAXReader reader = new SAXReader();
            Document document = reader.read(path);
            System.out.println(document);
        } catch (DocumentException e) {
            e.printStackTrace();
        }
    }

    public Object getBean(String id) {
        return ioc.get(id);
    }
}
2.3 在 ioc 中新建 类 Test

选择自己写的接口
ApplicationContext 和 ClassPathXmlApplicationContext 均选择自己写在 ioc中的文件
加入代码:
package com.southwind.ioc;

public class Test {
    public static void main(String[] args) {
        ApplicationContext applicationContext = new ClassPathXmlApplicationContext("./src/main/resources/spring.xml" );
    }
}

./ 表示 当前工程
2.4 启动 ioc/ Test:

2.5 觉得 ioc/ Test 中路径太麻烦,就在 ioc/ ClassPathXmlApplicationContext 中:


启动 ioc/ Test:

2.6 在 ioc/ ClassPathXmlApplicationContext
            Element root = document.getRootElement();
            System.out.println(root);
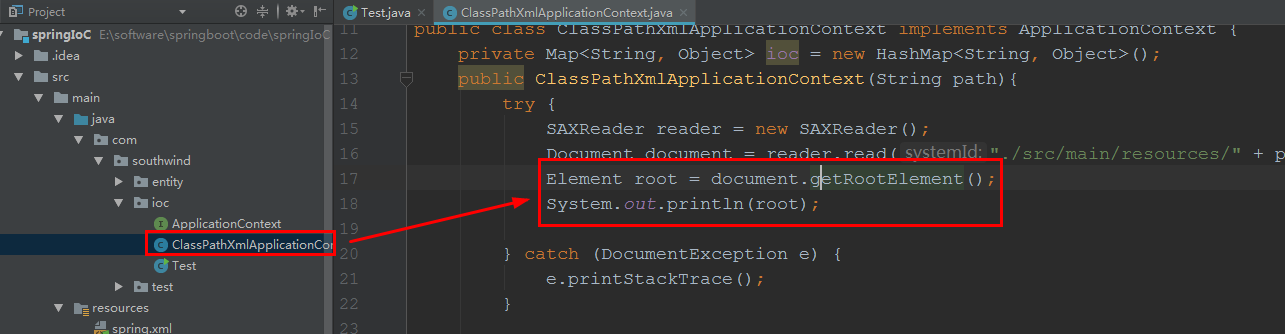
启动 ioc/ Test:

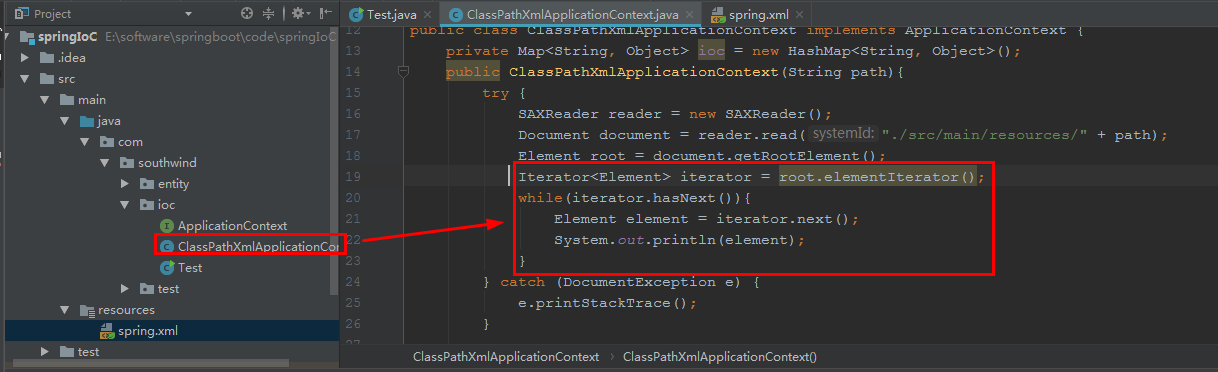
2.7 迭代操作,在 ioc/ ClassPathXmlApplicationContext 中,加入代码:

 			Iterator<Element> iterator = root.elementIterator();
            while(iterator.hasNext()){
                Element element = iterator.next();
                System.out.println(element);
            }
启动 ioc/ Test:

2.8 在 ioc/ ClassPathXmlApplicationContext 中,加入代码:
                String id = element.attributeValue("id");
                String className = element.attributeValue("class");
                System.out.println(id);
                System.out.println(className
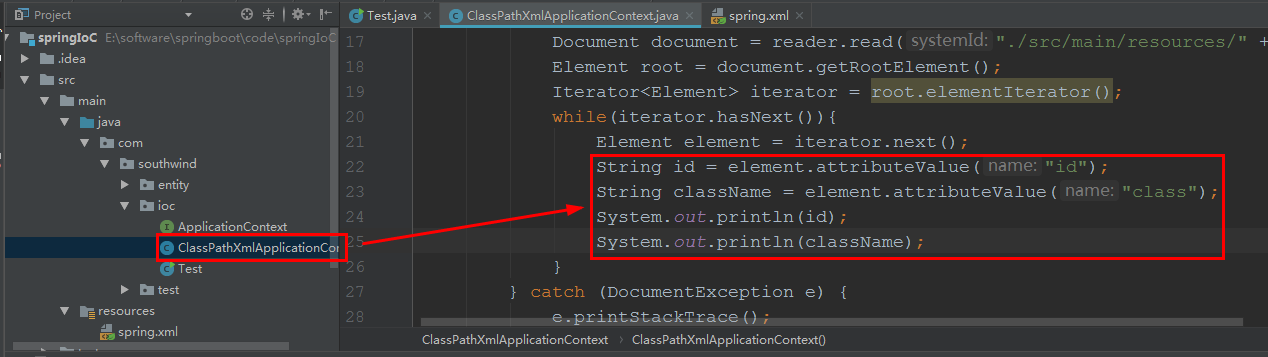
启动 ioc/ Test:

2.9 在 ioc/ ClassPathXmlApplicationContext 中,加入代码:
				// 通过反射机制 创建对象,拿到class
                Class clazz = Class.forName(className);
                // 获取 无参构造
                Constructor constructor = clazz.getConstructor();
                System.out.println(constructor);
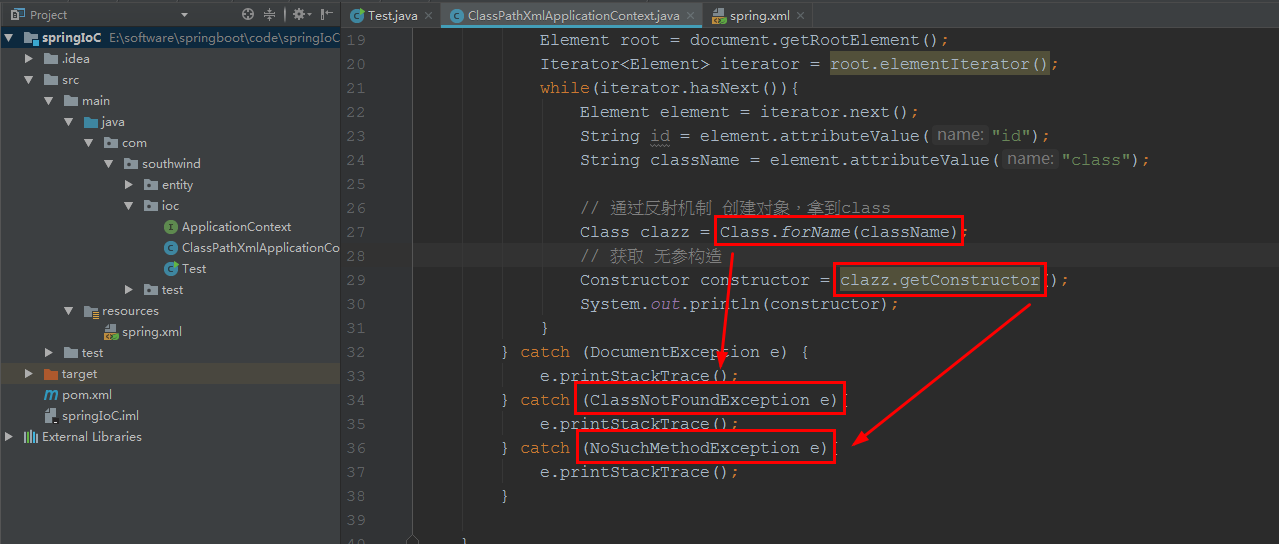
启动 ioc/ Test:

2.10 在 ioc/ ClassPathXmlApplicationContext 中,加入代码:
				Object object = constructor.newInstance();
                System.out.println(object);
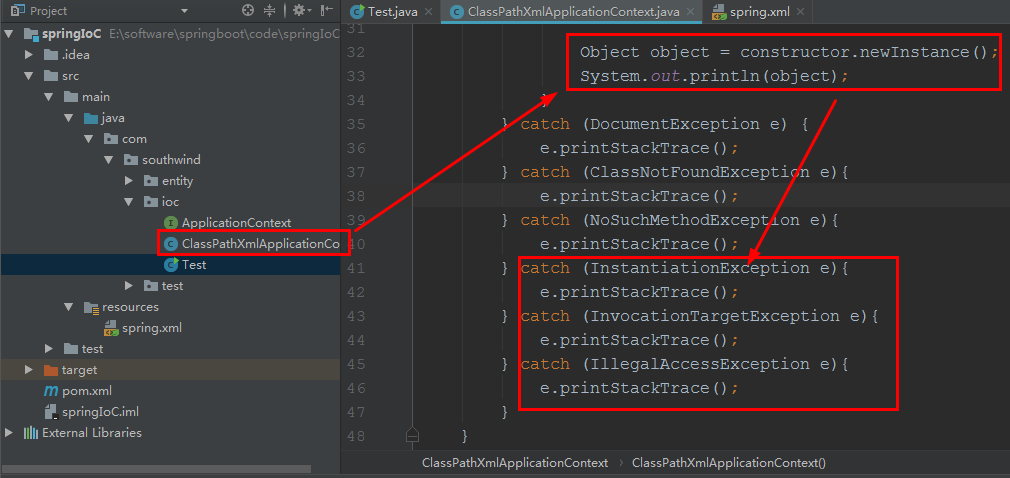
启动 ioc/ Test:

2.11 在 ioc/ ClassPathXmlApplicationContext 中,加入代码:
ioc.put(id, object);

在 ioc/ Test 加入代码:
		Student student = (Student) applicationContext.getBean("student");
        System.out.println(student);
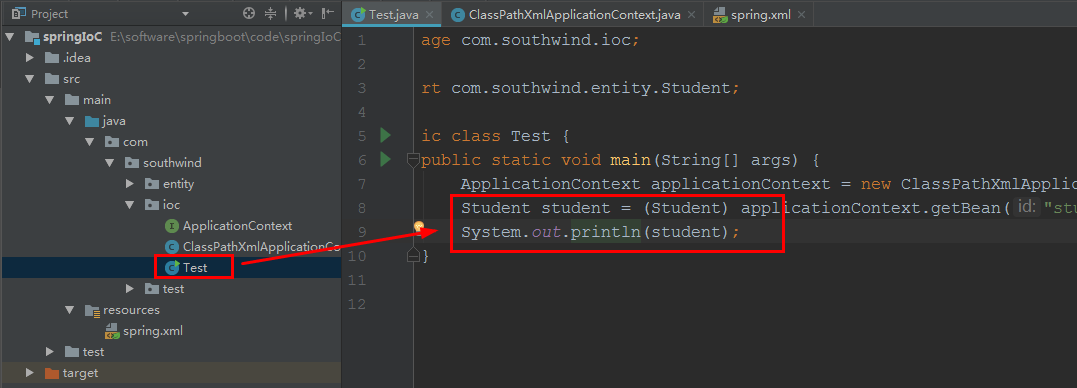
启动 ioc/ Test:

赋值:
2.12 在 ioc/ ClassPathXmlApplicationContext 中,加入代码:
                // 给 目标对象 赋值
                Iterator<Element> beanIter = element.elementIterator();
                while(beanIter.hasNext()){
                    Element property = beanIter.next();
                    String name = property.attributeValue("name");
                    String value = property.attributeValue("value");
                    String methodName = "set" + name.substring(0,1).toUpperCase() + name.substring(1);
                    System.out.println(methodName);
就是变成 set + Name 形式,如 setAge、setId

启动 ioc/ Test:

2.13 在 ioc/ ClassPathXmlApplicationContext 中,加入代码:
                    Field field = clazz.getDeclaredField(name);
                    Method method = clazz.getDeclaredMethod(methodName, field.getType());
                    System.out.println(method);
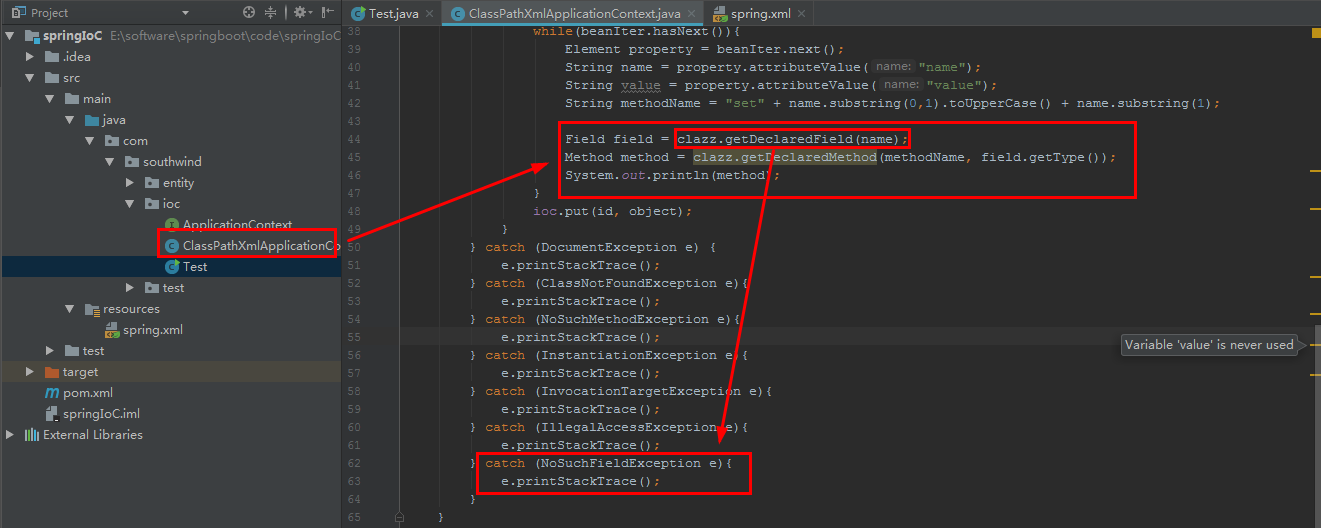
启动 ioc/ Test:

2.14 在 ioc/ ClassPathXmlApplicationContext 中,加入代码:
                    // 根据成员变量的数据类型将 value 进行转换
                    Object value= null;
                    if(field.getType().getName() == "long"){
                        value = Long.parseLong(valueStr);
                    }
                    if(field.getType().getName() == "java.lang.String"){
                        value = valueStr;
                    }
                    if(field.getType().getName() == "int"){
                        value = Integer.parseInt(valueStr);
                    }
                    method.invoke(object, value);//赋值
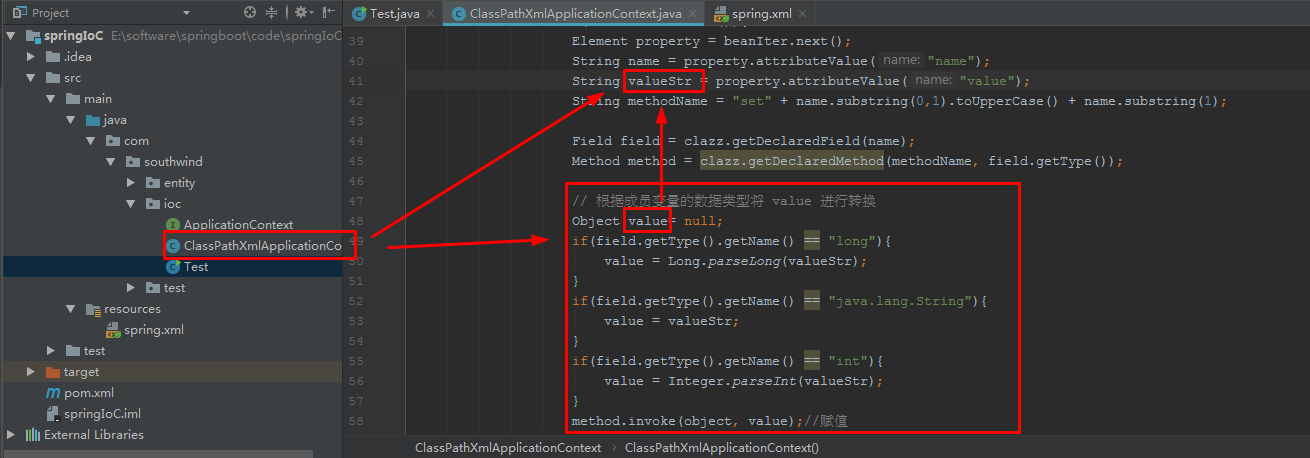
启动 ioc/ Test:

分析:
address 是 null,没被赋值,因为不是(object, value)类型,我要取 ref 赋值

2.15 在 ioc/ ClassPathXmlApplicationContext 中,加入代码:


总代码:
package com.southwind.ioc;

import org.dom4j.Document;
import org.dom4j.DocumentException;
import org.dom4j.Element;
import org.dom4j.io.SAXReader;

import java.lang.reflect.Constructor;
import java.lang.reflect.Field;
import java.lang.reflect.InvocationTargetException;
import java.lang.reflect.Method;
import java.util.HashMap;
import java.util.Iterator;
import java.util.Map;

public class ClassPathXmlApplicationContext implements ApplicationContext {
    private Map<String, Object> ioc = new HashMap<String, Object>();
    public ClassPathXmlApplicationContext(String path){
        try {
            SAXReader reader = new SAXReader();
            Document document = reader.read("./src/main/resources/" + path);
            Element root = document.getRootElement();
            Iterator<Element> iterator = root.elementIterator();
            while(iterator.hasNext()){
                Element element = iterator.next();
                String id = element.attributeValue("id");
                String className = element.attributeValue("class");

                // 通过反射机制 创建对象,拿到class
                Class clazz = Class.forName(className);
                // 获取 无参构造
                Constructor constructor = clazz.getConstructor();

                Object object = constructor.newInstance();

                // 给 目标对象 赋值
                Iterator<Element> beanIter = element.elementIterator();
                while(beanIter.hasNext()){
                    Element property = beanIter.next();
                    String name = property.attributeValue("name");
                    String valueStr = property.attributeValue("value");

                    String ref = property.attributeValue("ref");
                    if(ref == null){ // 普通赋值
                        String methodName = "set" + name.substring(0,1).toUpperCase() + name.substring(1);

                        Field field = clazz.getDeclaredField(name);
                        Method method = clazz.getDeclaredMethod(methodName, field.getType());

                        // 根据成员变量的数据类型将 value 进行转换
                        Object value= null;
                        if(field.getType().getName() == "long"){
                            value = Long.parseLong(valueStr);
                        }
                        if(field.getType().getName() == "java.lang.String"){
                            value = valueStr;
                        }
                        if(field.getType().getName() == "int"){
                            value = Integer.parseInt(valueStr);
                        }
                        method.invoke(object, value);//赋值
                    }
                    ioc.put(id, object);
                }
            }
            Object obj1 = ioc.get("address");
            Object obj2 = ioc.get("student");
            System.out.println(obj1);
            System.out.println(obj2);
        } catch (DocumentException e) {
            e.printStackTrace();
        } catch (ClassNotFoundException e){
            e.printStackTrace();
        } catch (NoSuchMethodException e){
            e.printStackTrace();
        } catch (InstantiationException e){
            e.printStackTrace();
        } catch (InvocationTargetException e){
            e.printStackTrace();
        } catch (IllegalAccessException e){
            e.printStackTrace();
        } catch (NoSuchFieldException e){
            e.printStackTrace();
        }
    }

    public Object getBean(String id) {
        return ioc.get(id);
    }
}
启动 ioc/ Test:

3 test/ Test 中:
getBean("student"); 改成 getBean(Student.class);


启动 test/ Test:

问题:
配置文件中,1个数据类型的对象 只能有1个实例,否则抛出异常
下面就是错的:

因为1个数据类型的对象 只能有1个实例,有了红框代码,1个数据类型的对象 就是2个实例了
启动 test/ Test:

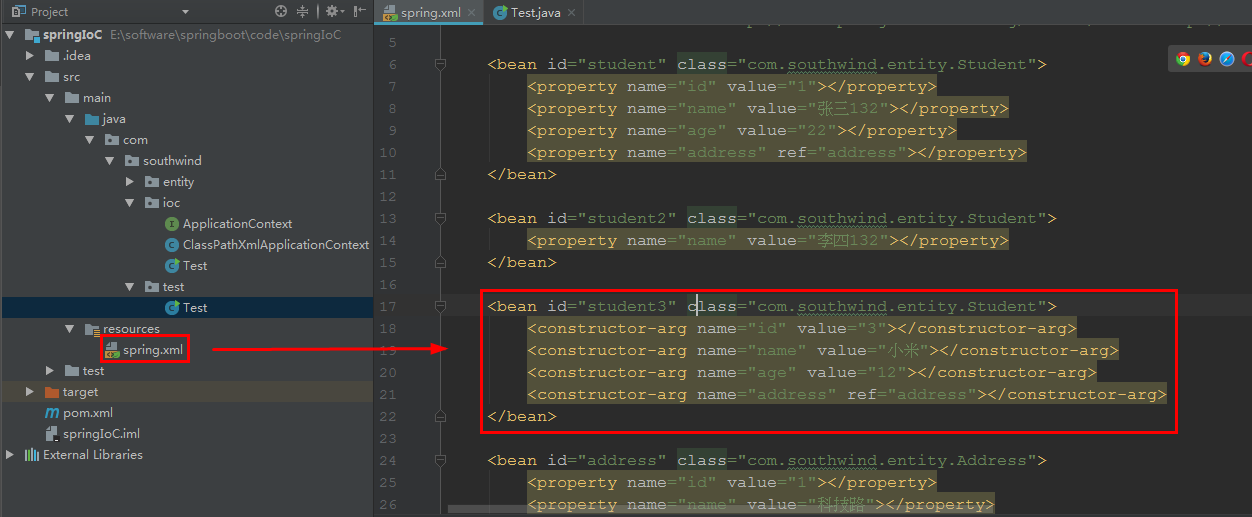
4 在 resources/ spring.xml 中,加入代码:
	<bean id="student3" class="com.southwind.entity.Student">
        <constructor-arg name="id" value="3"></constructor-arg>
        <constructor-arg name="name" value="小米"></constructor-arg>
        <constructor-arg name="age" value="12"></constructor-arg>
        <constructor-arg name="address" ref="address"></constructor-arg>
    </bean>
也可以:
	<bean id="student3" class="com.southwind.entity.Student">
        <constructor-arg value="3"></constructor-arg>
        <constructor-arg value="小米"></constructor-arg>
        <constructor-arg value="12"></constructor-arg>
        <constructor-arg ref="address"></constructor-arg>
    </bean>
上面代码的前提是:顺序和 类 Student 中 数据类型的顺序一致
若不一致,就是:
	<bean id="student3" class="com.southwind.entity.Student">
	    <constructor-arg index="0" value="3"></constructor-arg>
	    <constructor-arg index="2" value="18"></constructor-arg>
	    <constructor-arg index="1" value="小明"></constructor-arg>
	    <constructor-arg index="3" ref="address"></constructor-arg>
	</bean>
test/ Test 中:Student.class 变成 "student3"

启动 test/ Test:


 4021
4021

 被折叠的 条评论
为什么被折叠?
被折叠的 条评论
为什么被折叠?
 到【灌水乐园】发言


