


0、直接使用
单通道图片计算指标代码看2.2
三通道图片计算指标代码看2.3
1、PSNR,SSIM的知识点讲解、原理分析
1.1 PSNR
Peak Signal-to-Noise Ratio 峰值信噪比 单位为 d B dB dB
给定一个大小为
m
×
n
m \times n
m×n的干净图像
I
I
I和噪声图像
K
K
K,均方误差
M
S
E
MSE
MSE定义为:
M
S
E
=
1
m
n
∑
i
=
0
m
−
1
∑
j
=
0
n
−
1
[
I
(
i
,
j
)
−
K
(
i
,
j
)
]
2
M S E=\frac{1}{m n} \sum_{i=0}^{m-1} \sum_{j=0}^{n-1}[I(i, j)-K(i, j)]^{2}
MSE=mn1i=0∑m−1j=0∑n−1[I(i,j)−K(i,j)]2
然后
P
S
N
R
PSNR
PSNR就定义为:
P
S
N
R
=
10
⋅
log
10
(
M
A
X
I
2
M
S
E
)
或
者
P
S
N
R
=
20
⋅
log
10
(
M
A
X
I
M
S
E
)
P S N R=10 \cdot \log _{10}\left(\frac{M A X_{I}^{2}}{M S E}\right)\\ 或者\\ P S N R=20 \cdot \log _{10}\left(\frac{M A X_{I}}{\sqrt{M S E}}\right)
PSNR=10⋅log10(MSEMAXI2)或者PSNR=20⋅log10(MSEMAXI)
其中
M
A
X
I
2
M A X_{I}^{2}
MAXI2为图片可能的最大像素值。如果每个像素都由 8 位二进制来表示,那么就为 255。通常,如果像素值由位
B
B
B二进制来表示,那么
M
A
X
I
=
2
B
−
1
M A X_{I}=2^{B}-1
MAXI=2B−1。
一般地,针对 uint8 数据,最大像素值为 255;针对浮点型数据,最大像素值为 1。
上面是针对灰度图像的计算方法,如果是彩色图像,通常有三种方法来计算。其中,第二和第三种方法比较常见。
- 分别计算 RGB 三个通道的 PSNR,然后取平均值。
- 计算 RGB 三通道的 MSE ,然后再除以 3 。
- 将图片转化为 YCbCr 格式,然后只计算 Y 分量也就是亮度分量的 PSNR。
针对超光谱图像,我们需要针对不同波段分别计算 P S N R PSNR PSNR,然后取平均值,这个指标称为 M P S N R MPSNR MPSNR。
1.2 SSIM
Structural SIMilarity 结构相似性
S
S
I
M
SSIM
SSIM公式基于样本
x
x
x和之
y
y
y间的三个比较衡量:亮度 (luminance)、对比度 (contrast) 和结构 (structure)。
l
(
x
,
y
)
=
2
μ
x
μ
y
+
c
1
μ
x
2
+
μ
y
2
+
c
1
c
(
x
,
y
)
=
2
σ
x
σ
y
+
c
2
σ
x
2
+
σ
y
2
+
c
2
s
(
x
,
y
)
=
σ
x
y
+
c
3
σ
x
σ
y
+
c
3
l(x, y)=\frac{2 \mu_{x} \mu_{y}+c_{1}}{\mu_{x}^{2}+\mu_{y}^{2}+c_{1}}\\c(x, y)=\frac{2 \sigma_{x} \sigma_{y}+c_{2}}{\sigma_{x}^{2}+\sigma_{y}^{2}+c_{2}}\\s(x, y)=\frac{\sigma_{x y}+c_{3}}{\sigma_{x} \sigma_{y}+c_{3}}
l(x,y)=μx2+μy2+c12μxμy+c1c(x,y)=σx2+σy2+c22σxσy+c2s(x,y)=σxσy+c3σxy+c3
一般取
c
3
=
c
2
/
2
c_{3}=c_{2} / 2
c3=c2/2。
- μ x \mu_x μx为 x x x的均值
- μ y \mu_y μy为 y y y的均值
- σ x 2 \sigma_x^2 σx2为 x x x的方差
- σ y 2 \sigma_y^2 σy2为 y y y的方差
- σ x y \sigma_{xy} σxy为 x x x和 y y y的协方差
- c 1 = ( k 1 L ) 2 , c 2 = ( k 2 L ) 2 c_{1}=\left(k_{1} L\right)^{2}, c_{2}=\left(k_{2} L\right)^{2} c1=(k1L)2,c2=(k2L)2为两个常数,避免除零
- L L L为像素值的范围, 2 B − 1 2^B-1 2B−1
- k 1 = 0.01 , k 2 = 0.03 k_{1}=0.01, k_{2}=0.03 k1=0.01,k2=0.03为默认值
那么
S
S
I
M
(
x
,
y
)
=
[
l
(
x
,
y
)
α
⋅
c
(
x
,
y
)
β
⋅
s
(
x
,
y
)
γ
]
S S I M(x, y)=\left[l(x, y)^{\alpha} \cdot c(x, y)^{\beta} \cdot s(x, y)^{\gamma}\right]
SSIM(x,y)=[l(x,y)α⋅c(x,y)β⋅s(x,y)γ]
将
α
,
β
,
γ
\alpha, \beta, \gamma
α,β,γ设为1,可以得到
S
S
I
M
(
x
,
y
)
=
(
2
μ
x
μ
y
+
c
1
)
(
2
σ
x
y
+
c
2
)
(
μ
x
2
+
μ
y
2
+
c
1
)
(
σ
x
2
+
σ
y
2
+
c
2
)
S S I M(x, y)=\frac{\left(2 \mu_{x} \mu_{y}+c_{1}\right)\left(2 \sigma_{x y}+c_{2}\right)}{\left(\mu_{x}^{2}+\mu_{y}^{2}+c_{1}\right)\left(\sigma_{x}^{2}+\sigma_{y}^{2}+c_{2}\right)}
SSIM(x,y)=(μx2+μy2+c1)(σx2+σy2+c2)(2μxμy+c1)(2σxy+c2)
每次计算的时候都从图片上取一个
N
×
N
N×N
N×N的窗口,然后不断滑动窗口进行计算,最后取平均值作为全局的 SSIM。
对于多通道的SSIM
- 分别计算 RGB 各个通道上的 PSNR\SSIM均值,然后取平均值(除以3)。
- 将图像转换为YCbCr格式,然后只计算Y分量(亮度分量)的PSNR\SSIM。
针对超光谱图像,我们需要针对不同波段分别计算 SSIM,然后取平均值,这个指标称为 MSSIM。
2、计算代码
2.1 看一下skimage的源码
def peak_signal_noise_ratio(image_true, image_test, *, data_range=None):
    """
    Compute the peak signal to noise ratio (PSNR) for an image.
    Parameters
    ----------
    image_true : ndarray
        Ground-truth image, same shape as im_test.
    image_test : ndarray
        Test image.
    data_range : int, optional
        The data range of the input image (distance between minimum and
        maximum possible values).  By default, this is estimated from the image
        data-type.
    Returns
    -------
    psnr : float
        The PSNR metric.
    Notes
    -----
    .. versionchanged:: 0.16
        This function was renamed from ``skimage.measure.compare_psnr`` to
        ``skimage.metrics.peak_signal_noise_ratio``.
    References
    ----------
    .. [1] https://en.wikipedia.org/wiki/Peak_signal-to-noise_ratio
    """
    check_shape_equality(image_true, image_test)

    if data_range is None:
        if image_true.dtype != image_test.dtype:
            warn("Inputs have mismatched dtype.  Setting data_range based on "
                 "image_true.")
        dmin, dmax = dtype_range[image_true.dtype.type]#在dtype_range这个字典中会存储不同numpy类型所对应的可能去到的最大最小值  这个字典在下面一代码中
        true_min, true_max = np.min(image_true), np.max(image_true)
        if true_max > dmax or true_min < dmin:
            raise ValueError(
                "image_true has intensity values outside the range expected "
                "for its data type. Please manually specify the data_range.")
        # 真实图片最小值是不是会取到负的
        # 针对无符号整型 dmin, dmax 为0,255   data_range为255
        # 针对无符号整型 dmin, dmax 为-1,1    data_range为1
        if true_min >= 0:
            # most common case (255 for uint8, 1 for float)
            data_range = dmax
        else:
            data_range = dmax - dmin

    image_true, image_test = _as_floats(image_true, image_test)

    err = mean_squared_error(image_true, image_test)
    return 10 * np.log10((data_range ** 2) / err)
字典代码
dtype_range = {bool: (False, True),
np.bool_: (False, True),
np.bool8: (False, True),
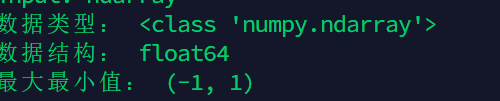
float: (-1, 1),
np.float_: (-1, 1),
np.float16: (-1, 1),
np.float32: (-1, 1),
np.float64: (-1, 1)}
dtype_range.update(_integer_ranges)#还补充了整型数据的取值范围 实际取值我算了一下是
测试一下这个dtype_range
image = image.astype(np.uint8)
print("数据类型:",type(image))
print("数据结构:",image.dtype)
print("最大最小值:",dtype_range[image.dtype.type])

image = image.astype(np.float64)
print("数据类型:",type(image))
print("数据结构:",image.dtype)
print("最大最小值:",dtype_range[image.dtype.type])
2.2 实际使用情况1:单通道情况
用这两张图片进行计算举例
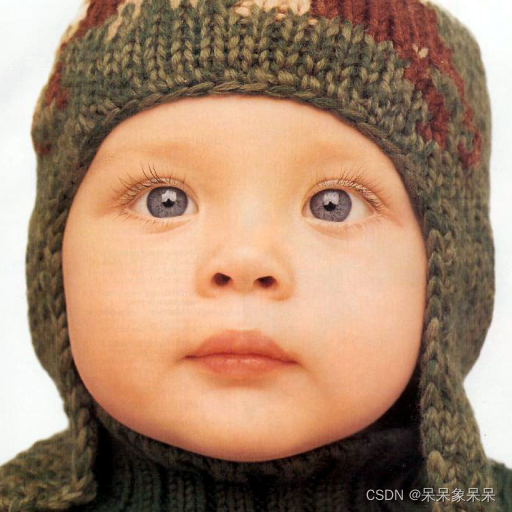
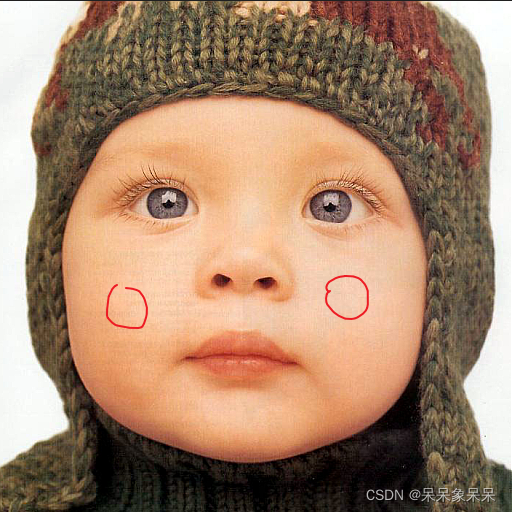
尽可能将输入转化为
数据类型为uint8,范围为0-255的图像image1,image2
数据类型为float64,范围为0-1.0的图像image1,image2
错误示范:输入不符合标准
float64 对应的范围应该归一化到0-1,判断的时候会出错报错说你的范围超过了数据类型所对应的范围
from skimage.metrics import peak_signal_noise_ratio
from skimage.metrics import structural_similarity
import skimage.io as io

image_path1 = "./1.png"
image_path2 = "./2.png"
# 因为是张彩色图片所以截取出一个通道
image1 = io.imread(image_path1)[...,0]
image2 = io.imread(image_path2)[...,0]
image1 = image1/1.0
image2 = image2/1.0
# 至此image1为float64 且0-255.0  就会报错

print(image1.dtype)
psnr_val = peak_signal_noise_ratio(image1, image2)
ssim_val = structural_similarity(image1,image2,win_size=11,gaussian_weights=True,multichannel=True,data_range=1.0,K1=0.01,K2=0.03,sigma=1.5)
print("psnr_val",psnr_val)
print("ssim_val",ssim_val)
Windows 下面的报错是这样的

Linux下面的报错是这样的

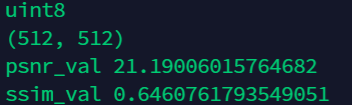
正确示例:数据类型为uint8,范围为0-255的图像image1,image2
注意range应该设置为255
from skimage.metrics import peak_signal_noise_ratio
from skimage.metrics import structural_similarity
import skimage.io as io

image_path1 = "./1.png"
image_path2 = "./2.png"
# 因为是张彩色图片所以截取出一个通道
image1 = io.imread(image_path1)[...,0]
image2 = io.imread(image_path2)[...,0]
print(image1.dtype)# uint8 范围0-255
print(image1.shape)
psnr_val = peak_signal_noise_ratio(image1, image2)
ssim_val = structural_similarity(image1,image2,win_size=11,gaussian_weights=True,multichannel=False,data_range=255,K1=0.01,K2=0.03,sigma=1.5)
print("psnr_val",psnr_val)
print("ssim_val",ssim_val)
这里需要注意一个问题
如果图像已经是单通道了请记得一定要把multichannel关掉我下面举两个例子
(1)multichannel=True
(2)multichannel=False
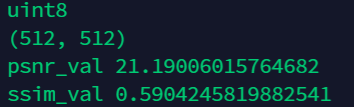
为什么说我们后面一种方式是对的呢。我对图片进行了生维度,让他有了通道维度并且维度为1,的时候把multichannel打开
image1 = image1[:,:,np.newaxis]
image2 = image2[:,:,np.newaxis]
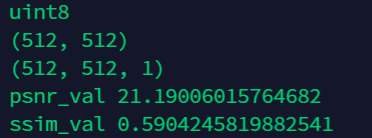
注意ssim在两种情况下是不一样的,如果打开了multichannel 他就会默认第二个维度是通道,也就是裁剪成一个一个小条形,然后进行计算之后求平均
正确示例:数据类型为float64,范围为0-1.0的图像image1,image2
注意range应该设置为1.0
from skimage.metrics import peak_signal_noise_ratio
from skimage.metrics import structural_similarity
import skimage.io as io

image_path1 = "./1.png"
image_path2 = "./2.png"
image1 = io.imread(image_path1)[...,0]
image2 = io.imread(image_path2)[...,0]
image1 = image1/1.0
image2 = image2/1.0
# 至此image1为float64 且0-255.0
# 归一化到0-1.0
image1 = image1/255.0
image2 = image2/255.0
print(image1.dtype)
psnr_val = peak_signal_noise_ratio(image1, image2)
ssim_val = structural_similarity(image1,image2,win_size=11,gaussian_weights=True,multichannel=False,data_range=1.0,K1=0.01,K2=0.03,sigma=1.5)
print("psnr_val",psnr_val)
print("ssim_val",ssim_val)

2.3 实际使用情况2:RGB三通道
需要先转换成YCbCr空间然后对亮度进行求解PSNR,转换方法可以参照我的另一篇博客
RGB图像转换成YCbCr图像,rgb2ycbcr的使用,转换参数_呆呆象呆呆的博客-CSDN博客
同时也要保证数值范围和数值类型要相符合,尽可能将输入转化为
数据类型为uint8,范围为0-255的图像image1,image2(不太推荐因为算出Y通道后,大概率都是浮点型的数据,强行转换成uint8这样精度会下降,所以比较推荐下面一种方式)
数据类型为float64,范围为0-1.0的图像image1,image2
正确示例1:使用rgb2ycbcr计算Y通道后求PSNR或者SSIM
from skimage.metrics import peak_signal_noise_ratio
from skimage.metrics import structural_similarity
import skimage.io as io
import numpy as np
image_path1 = "./1.png"
image_path2 = "./2.png"
# 因为是张彩色图片 所以选一个通道
image1 = io.imread(image_path1)
image2 = io.imread(image_path2)
#我认为最简单的方法
image1 = image1/255.0
image2 = image2/255.0
image1 = 65.481 * image1[:,:,0] + 128.553 * image1[:,:,1] + 24.966 * image1[:,:,2] + 16 # 不加16是因为之后会抵消(计算PSNR的时候可以不加,但是SSIM需要加上)
image2 = 65.481 * image2[:,:,0] + 128.553 * image2[:,:,1] + 24.966 * image2[:,:,2] + 16
image1 = image1/255.0
image2 = image2/255.0
# 只计算Y通道的值
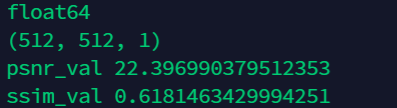
print(image1.dtype)
image1 = np.expand_dims(image1,axis=2)
image2 = np.expand_dims(image2,axis=2)# 为什么要升维度,因为structural_similarity默认输入shape最后一个为通道数量,如果不加上的话,他求解的ssim就会是[H*W]所有[H*1]这样小图片的平均值源码地址可以参考本文备注的ssim源码 中间搜索变量 nch 就能发现
print(image1.shape)
psnr_val = peak_signal_noise_ratio(image1, image2)
ssim_val = structural_similarity(image1,image2,win_size=11,gaussian_weights=True,multichannel=False,data_range=1.0,K1=0.01,K2=0.03,sigma=1.5)
print("psnr_val",psnr_val)
print("ssim_val",ssim_val)
三通道转换成Y通道后的PSNR和上面一个例子中单通道的PSNR肯定是不一样的
正确示例2:直接计算Y通道后求PSNR或者SSIM
from skimage.metrics import peak_signal_noise_ratio
from skimage.metrics import structural_similarity
from skimage.color import rgb2ycbcr
import skimage.io as io
image_path1 = "./1.png"
image_path2 = "./2.png"
image1 = io.imread(image_path1)
image2 = io.imread(image_path2)
# rgb2ycbcr的输入需要归一化到0-1.0的float
#这个在上一篇blog中讲过了rgb2ycbcr输出为浮点型且范围是0-255.0 所以需要再次归一化0-1
image1 = image1/255.0
image2 = image2/255.0
image1 = rgb2ycbcr(image1)[:, :, 0:1]
image2 = rgb2ycbcr(image2)[:, :, 0:1]
image1 = image1/255.0
image2 = image2/255.0
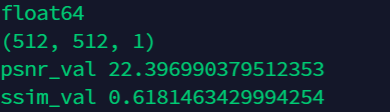
print(image1.dtype)
print(image1.shape)
psnr_val = peak_signal_noise_ratio(image1, image2)
ssim_val = structural_similarity(image1,image2,win_size=11,gaussian_weights=True,multichannel=True,data_range=1.0,K1=0.01,K2=0.03,sigma=1.5)
print("psnr_val",psnr_val)
print("ssim_val",ssim_val)
LAST、参考文献
scikit-image/simple_metrics.py at main · scikit-image/scikit-image · GitHub
PSNR与SSIM对于彩色图像和灰度图像的计算区别_风雪夜归人o的博客-CSDN博客
图像质量的客观评估指标PSNR与SSIM_小村长技术blog-CSDN博客
备注 SSIM的源码
 摘录于   https://github.com/scikit-image/scikit-image/blob/main/skimage/metrics/_structural_similarity.py
from warnings import warn
import numpy as np
from scipy.ndimage import uniform_filter, gaussian_filter

from ..util.dtype import dtype_range
from ..util.arraycrop import crop
from .._shared.utils import warn, check_shape_equality

__all__ = ['structural_similarity']


def structural_similarity(im1, im2,
                          *,
                          win_size=None, gradient=False, data_range=None,
                          multichannel=False, gaussian_weights=False,
                          full=False, **kwargs):
    """
    Compute the mean structural similarity index between two images.
    Parameters
    ----------
    im1, im2 : ndarray
        Images. Any dimensionality with same shape.
    win_size : int or None, optional
        The side-length of the sliding window used in comparison. Must be an
        odd value. If `gaussian_weights` is True, this is ignored and the
        window size will depend on `sigma`.
    gradient : bool, optional
        If True, also return the gradient with respect to im2.
    data_range : float, optional
        The data range of the input image (distance between minimum and
        maximum possible values). By default, this is estimated from the image
        data-type.
    multichannel : bool, optional
        If True, treat the last dimension of the array as channels. Similarity
        calculations are done independently for each channel then averaged.
    gaussian_weights : bool, optional
        If True, each patch has its mean and variance spatially weighted by a
        normalized Gaussian kernel of width sigma=1.5.
    full : bool, optional
        If True, also return the full structural similarity image.
    Other Parameters
    ----------------
    use_sample_covariance : bool
        If True, normalize covariances by N-1 rather than, N where N is the
        number of pixels within the sliding window.
    K1 : float
        Algorithm parameter, K1 (small constant, see [1]_).
    K2 : float
        Algorithm parameter, K2 (small constant, see [1]_).
    sigma : float
        Standard deviation for the Gaussian when `gaussian_weights` is True.
    Returns
    -------
    mssim : float
        The mean structural similarity index over the image.
    grad : ndarray
        The gradient of the structural similarity between im1 and im2 [2]_.
        This is only returned if `gradient` is set to True.
    S : ndarray
        The full SSIM image.  This is only returned if `full` is set to True.
    Notes
    -----
    To match the implementation of Wang et. al. [1]_, set `gaussian_weights`
    to True, `sigma` to 1.5, and `use_sample_covariance` to False.
    .. versionchanged:: 0.16
        This function was renamed from ``skimage.measure.compare_ssim`` to
        ``skimage.metrics.structural_similarity``.
    References
    ----------
    .. [1] Wang, Z., Bovik, A. C., Sheikh, H. R., & Simoncelli, E. P.
       (2004). Image quality assessment: From error visibility to
       structural similarity. IEEE Transactions on Image Processing,
       13, 600-612.
       https://ece.uwaterloo.ca/~z70wang/publications/ssim.pdf,
       :DOI:`10.1109/TIP.2003.819861`
    .. [2] Avanaki, A. N. (2009). Exact global histogram specification
       optimized for structural similarity. Optical Review, 16, 613-621.
       :arxiv:`0901.0065`
       :DOI:`10.1007/s10043-009-0119-z`
    """
    check_shape_equality(im1, im2)

    if multichannel:
        # loop over channels
        args = dict(win_size=win_size,
                    gradient=gradient,
                    data_range=data_range,
                    multichannel=False,
                    gaussian_weights=gaussian_weights,
                    full=full)
        args.update(kwargs)
        nch = im1.shape[-1]
        mssim = np.empty(nch)
        if gradient:
            G = np.empty(im1.shape)
        if full:
            S = np.empty(im1.shape)
        for ch in range(nch):
            ch_result = structural_similarity(im1[..., ch],
                                              im2[..., ch], **args)
            if gradient and full:
                mssim[..., ch], G[..., ch], S[..., ch] = ch_result
            elif gradient:
                mssim[..., ch], G[..., ch] = ch_result
            elif full:
                mssim[..., ch], S[..., ch] = ch_result
            else:
                mssim[..., ch] = ch_result
        mssim = mssim.mean()
        if gradient and full:
            return mssim, G, S
        elif gradient:
            return mssim, G
        elif full:
            return mssim, S
        else:
            return mssim

    K1 = kwargs.pop('K1', 0.01)
    K2 = kwargs.pop('K2', 0.03)
    sigma = kwargs.pop('sigma', 1.5)
    if K1 < 0:
        raise ValueError("K1 must be positive")
    if K2 < 0:
        raise ValueError("K2 must be positive")
    if sigma < 0:
        raise ValueError("sigma must be positive")
    use_sample_covariance = kwargs.pop('use_sample_covariance', True)

    if gaussian_weights:
        # Set to give an 11-tap filter with the default sigma of 1.5 to match
        # Wang et. al. 2004.
        truncate = 3.5

    if win_size is None:
        if gaussian_weights:
            # set win_size used by crop to match the filter size
            r = int(truncate * sigma + 0.5)  # radius as in ndimage
            win_size = 2 * r + 1
        else:
            win_size = 7   # backwards compatibility

    if np.any((np.asarray(im1.shape) - win_size) < 0):
        raise ValueError(
            "win_size exceeds image extent.  If the input is a multichannel "
            "(color) image, set multichannel=True.")

    if not (win_size % 2 == 1):
        raise ValueError('Window size must be odd.')

    if data_range is None:
        if im1.dtype != im2.dtype:
            warn("Inputs have mismatched dtype.  Setting data_range based on "
                 "im1.dtype.", stacklevel=2)
        dmin, dmax = dtype_range[im1.dtype.type]
        data_range = dmax - dmin

    ndim = im1.ndim

    if gaussian_weights:
        filter_func = gaussian_filter
        filter_args = {'sigma': sigma, 'truncate': truncate}
    else:
        filter_func = uniform_filter
        filter_args = {'size': win_size}

    # ndimage filters need floating point data
    im1 = im1.astype(np.float64)
    im2 = im2.astype(np.float64)

    NP = win_size ** ndim

    # filter has already normalized by NP
    if use_sample_covariance:
        cov_norm = NP / (NP - 1)  # sample covariance
    else:
        cov_norm = 1.0  # population covariance to match Wang et. al. 2004

    # compute (weighted) means
    ux = filter_func(im1, **filter_args)
    uy = filter_func(im2, **filter_args)

    # compute (weighted) variances and covariances
    uxx = filter_func(im1 * im1, **filter_args)
    uyy = filter_func(im2 * im2, **filter_args)
    uxy = filter_func(im1 * im2, **filter_args)
    vx = cov_norm * (uxx - ux * ux)
    vy = cov_norm * (uyy - uy * uy)
    vxy = cov_norm * (uxy - ux * uy)

    R = data_range
    C1 = (K1 * R) ** 2
    C2 = (K2 * R) ** 2

    A1, A2, B1, B2 = ((2 * ux * uy + C1,
                       2 * vxy + C2,
                       ux ** 2 + uy ** 2 + C1,
                       vx + vy + C2))
    D = B1 * B2
    S = (A1 * A2) / D

    # to avoid edge effects will ignore filter radius strip around edges
    pad = (win_size - 1) // 2

    # compute (weighted) mean of ssim
    mssim = crop(S, pad).mean()

    if gradient:
        # The following is Eqs. 7-8 of Avanaki 2009.
        grad = filter_func(A1 / D, **filter_args) * im1
        grad += filter_func(-S / B2, **filter_args) * im2
        grad += filter_func((ux * (A2 - A1) - uy * (B2 - B1) * S) / D,
                            **filter_args)
        grad *= (2 / im1.size)

        if full:
            return mssim, grad, S
        else:
            return mssim, grad
    else:
        if full:
            return mssim, S
        else:
            return mssim


 690
690

 被折叠的 条评论
为什么被折叠?
被折叠的 条评论
为什么被折叠?
 到【灌水乐园】发言


