


1、参考博客
1、docker的安装使用,及打包深度学习环境【很详细】
2、Docker打包深度学习项目(解决:Opencv依赖库、共享内存)
3、Docker 镜像构建之 Dockerfile
4、Docker深度学习环境安装、部署、打包
5、使用conda pack进行环境迁移(步骤很详细)
6、使用nvidia-docker创建gpu支持深度学习环境的容器
2、 普通Docker和NVIDIA Docker安装
不同平台的Docker安装方式可以参考官方文档(Docker Install) ,我这里就用Ubuntu系统作为例子。
1、Install Docker Engine on Ubuntu
# Docker
#在首次在新的主机上安装Docker Engine之前,需要设置Docker存储库。之后,您可以从存储库中安装和更新Docker。
#1、更新apt包索引并安装包,以允许apt通过HTTPS使用存储库:
$ sudo apt-get update
$ sudo apt-get install \
    apt-transport-https \
    ca-certificates \
    curl \
    gnupg-agent \
    software-properties-common
#2. 添加Docker的官方GPG密钥:
$ curl -fsSL https://download.docker.com/linux/ubuntu/gpg | sudo apt-key add -
#添加docker官方gpg密钥,这里改成中科大镜像的
curl -fsSL https://mirrors.ustc.edu.cn/docker-ce/linux/ubuntu/gpg | sudo gpg --dearmor -o /usr/share/keyrings/docker-archive-keyring.gpg


#3、使用以下命令设置存储库:
$ sudo add-apt-repository \
   "deb [arch=amd64] https://download.docker.com/linux/ubuntu \
   $(lsb_release -cs) \
   stable"

 #设置稳定版本库,也换成中科大的
 echo \
"deb [arch=$(dpkg --print-architecture) signed-by=/usr/share/keyrings/docker-archive-keyring.gpg] https://mirrors.ustc.edu.cn/docker-ce/linux/ubuntu/ \
$(lsb_release -cs) stable" | sudo tee /etc/apt/sources.list.d/docker.list > /dev/null

# Docker engine,安装docker,默认是安装最新版
#1. 更新apt包索引,安装最新版本的Docker Engine、containd和Docker Compose,或者执行下一步安装具体版本:
$ sudo apt-get update
$ sudo apt-get install docker-ce docker-ce-cli containerd.io

 sudo apt-get update
 sudo apt-get install docker-ce docker-ce-cli containerd.io docker-compose-plugin
在完成安装后,执行下面命令,以确保安装成功:
sudo docker run hello-world
执行后看到打印出来正常的提示信息则表示安装成功。
Unable to find image 'hello-world:latest' locally
latest: Pulling from library/hello-world
2db29710123e: Pull complete
Digest: sha256:10d7d58d5ebd2a652f4d93fdd86da8f265f5318c6a73cc5b6a9798ff6d2b2e67
Status: Downloaded newer image for hello-world:latest

Hello from Docker!
This message shows that your installation appears to be working correctly.

To generate this message, Docker took the following steps:
1. The Docker client contacted the Docker daemon.
2. The Docker daemon pulled the "hello-world" image from the Docker Hub.
    (amd64)
3. The Docker daemon created a new container from that image which runs the
    executable that produces the output you are currently reading.
4. The Docker daemon streamed that output to the Docker client, which sent it
    to your terminal.

To try something more ambitious, you can run an Ubuntu container with:
$ docker run -it ubuntu bash

Share images, automate workflows, and more with a free Docker ID:
https://hub.docker.com/
7. 卸载
sudo apt-get purge docker-ce docker-ce-cli containerd.io docker-compose-plugin

sudo rm -rf /var/lib/docker
sudo rm -rf /var/lib/containerd
输入指令: docker version或者docker -v
然后启动,输入指令:systemctl start docker
输入指令:systemctl status docker 查看状态
设置开机自启动
输入指令:systemctl enable docker
2、安装NVIDIA Docker。
详细安装步骤见NVIDIA Docker Installation Guide. 安装完记得重启Docker,并用nvidia/cuda:11.0-base这个默认容器测试一下是否安装成功。
1、Setting up Docker
在更新包清单后安装nvidia-docker2包(和依赖项):
curl https://get.docker.com | sh \
  && sudo systemctl --now enable docker
sudo apt-get update
sudo apt-get install -y nvidia-docker2
2、重启docker
查看docker镜像
nvidia-docker image ls
sudo systemctl restart docker
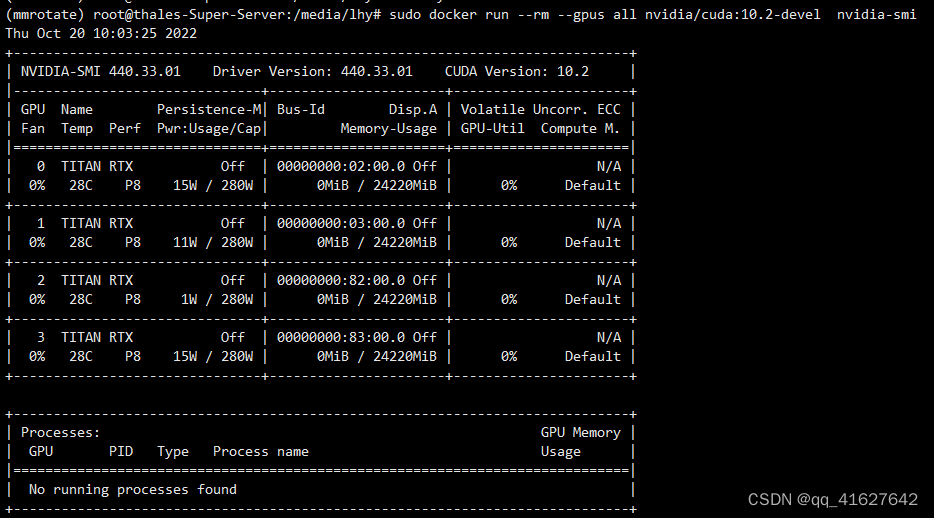
sudo docker run --rm --gpus all nvidia/cuda:10.2-devel nvidia-smi
sudo docker run --rm --gpus all nvidia/cuda:11.0.3-base-ubuntu20.04 nvidia-smi
# Restart the Docker daemon to complete the installation after setting the default runtime:
sudo systemctl restart docker

sudo docker run --rm --gpus all nvidia/cuda:11.0-base nvidia-smi
# 出现显卡信息界面即为安装成功
+-----------------------------------------------------------------------------+
| NVIDIA-SMI 450.51.06    Driver Version: 450.51.06    CUDA Version: 11.0     |
|-------------------------------+----------------------+----------------------+
| GPU  Name        Persistence-M| Bus-Id        Disp.A | Volatile Uncorr. ECC |
| Fan  Temp  Perf  Pwr:Usage/Cap|         Memory-Usage | GPU-Util  Compute M. |
|                               |                      |               MIG M. |
|===============================+======================+======================|
|   0  Tesla T4            On   | 00000000:00:1E.0 Off |                    0 |
| N/A   34C    P8     9W /  70W |      0MiB / 15109MiB |      0%      Default |
|                               |                      |                  N/A |
+-------------------------------+----------------------+----------------------+

+-----------------------------------------------------------------------------+
| Processes:                                                                  |
|  GPU   GI   CI        PID   Type   Process name                  GPU Memory |
|        ID   ID                                                   Usage      |
|=============================================================================|
|  No running processes found                                                 |
+-----------------------------------------------------------------------------+
#查看目前有的镜像
$: docker images ls
REPOSITORY        TAG                            IMAGE ID       CREATED          SIZE
chicken           v1                             1108516f1e34   40 minutes ago   41.5GB
pytorch/pytorch   1.10.0-cuda11.3-cudnn8-devel   46961cbf2ac7   13 days ago      14.4GB
nvidia/cuda       11.0-base                      2ec708416bb8   14 months ago    122MB
pytorch/pytorch   0.4-cuda9-cudnn7-devel         63994d8624a2   3 years ago      4.71GB
#查看目前有的nvidia镜像
(base) lhy@thales-Super-Server:~$ sudo nvidia-docker image ls
REPOSITORY                                      TAG                             IMAGE ID       CREATED         SIZE
base_lhy                                        v2                              099779ca711d   2 hours ago     3.35GB
ship_lhy                                        v2                              d7736e805e66   3 hours ago     3.85GB
base_lhy                                        v1                              39254c6ac92d   5 hours ago     349MB
ship                                            v1                              800102d47ed0   2 days ago      15.8GB
mmrotate-base                                   latest                          b33eed70e933   2 days ago      11.8GB
10.1.30.236:1180/zdplane-alg/pytorch            1.7.1                           6d16d5fd026c   4 weeks ago     19.1GB
plane_change                                    v1                              d481d76ca6a1   5 weeks ago     3.11GB
plane_cd_base                                   v1                              2951b40b0c50   5 weeks ago     929MB
base                                            v5                              0c129df3f48b   5 weeks ago     273MB
base                                            v4                              3a808aa5bee7   5 weeks ago     349MB
rotplane_base                                   v2                              c26be3e9fc4e   2 months ago    11.3GB
rotplane_base                                   v1                              a51c200fd94b   2 months ago    11.3GB
nvidia/cuda                                     11.0.3-base-ubuntu20.04         8017f5c31b74   3 months ago    122MB
pzrh                                            v1                              d06577ff10c1   3 months ago    2.09GB
<none>                                          <none>                          56f73c60d0b4   3 months ago    2.09GB
10.1.30.238:1180/alg/piesat.ortho.img_rectify   v1.2ghb                         fd04729678e0   4 months ago    1.54GB
continuumio/anaconda3                           latest                          377b235daeb7   4 months ago    3.65GB
frolvlad/alpine-miniconda3                      latest                          0ff139b9c93c   5 months ago    163MB
wuda                                            2.0                             800b35286000   5 months ago    1.94GB
24test100                                       v3                              101ff1eb47fc   5 months ago    11GB
base                                            v3                              1cd39b55f94b   5 months ago    273MB
base                                            v2                              bcfa14c8c145   5 months ago    273MB
base                                            v1                              e674c4d007d6   5 months ago    158MB
<none>                                          <none>                          4c251ae5df8f   5 months ago    5.03GB
<none>                                          <none>                          eae9394a25b0   5 months ago    7.75GB
tjp                                             v2                              954754db5c38   7 months ago    13.5GB
road_keras                                      v2                              5d12ac1f344d   7 months ago    12.3GB
building                                        v2                              73897a66af37   7 months ago    26.1GB
nvidia/cuda                                     10.2-cudnn7-devel-ubuntu18.04   02a0c8a4b445   9 months ago    3.96GB
bridge                                          v1                              c49c6be899cc   12 months ago   25.6GB
plane                                           v7                              c3137977e0e6   14 months ago   12.2GB
nvidia/cuda                                     10.2-devel                      7e913212889f   15 months ago   3.01GB
nvidia/cuda                                     9.0-base                        0bedd0dfd4cb   15 months ago   152MB
greenhouse                                      v5                              40f0131db4ca   2 years ago     9.06GB
dockerduong/cuda10.2-ubuntu18.04                latest                          08e708eba74a   2 years ago     108MB
3、启动NVIDIA-DOCKER

3、打包镜像Docker Build Image
1、拉取基础镜像
Anaconda发行版被安装到/opt/conda文件夹中,并确保默认用户的路径中有conda命令。
You can download and run this image using the following commands:
docker pull continuumio/anaconda3
docker run -i -t continuumio/anaconda3 /bin/bash
## 1、整理代码
将需要打包的模型代码整理到同一个目录下。举例来说,目录应该包含模型代码、数据文件夹、输出文件夹:
```bash
Model:
      Code
      Val Data
      Output Data

如果用的是python语言的,可以准备一个requirement.txt,列出需要安装的包。后面就可以一步安装到位。
# 到代码目录下新建requirement.txt文件
touch requirment.txt
我的只需要再安装一个opencv包,所以我的requirment文件只要加上:
opencv-python==3.4.2.17
大家看自己需要什么额外的包直接写上名称和对应版本就可以了。用pip生成的requirement文件包含太多重复无用的包,建议还是自己简单写几个。
例如:
拷贝到容器中。
这里我将conda中一个安装有TensorFlow+keras+gpu的环境移植到容器中:
docker cp /root/anaconda3/envs/cyc_work tensorflow_gpu:/opt/conda/envs
其中,/root/anaconda3/envs/cyc_work是主机中虚拟环境路径,可以再激活待移植环境后使用whereis conda查询;tensorflow_gpu是我创建的容器名称,/opt/conda/envs是容器中conda环境的路径。
完成拷贝后,可以重新进入容器的bash交互界面,使用conda env list查看,你会发现主机中的虚拟环境已经成功移植过来:
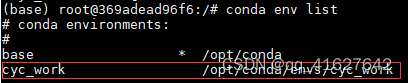
Tips. 因为是拷贝的虚拟环境,每次进入容器后手动source activate 很麻烦,可以修改~/.bashrc文件中的最后一行配置,修改conda默认启动环境。
至此,已经成功实现将conda的虚拟环境移植到docker容器中,使用这个方法可以轻松地将不同的环境移植到不同的容器
2、创建Dockfile创建镜像
同样,新建一个Dockfile文件,每一步的详细说明可以查看Dockerfile说明 、Dockerfile reference
# Use an official PyTorch runtime as a parent image
FROM pytorch/pytorch

# Set the working directory
WORKDIR /docker_sample

# Copy the current directory contents into the container
COPY . /docker_sample

# Install any needed packages specified in requirements.txt
RUN pip install -r requirements.txt

# Run when the container launches
CMD ["python", "deploy_models.py"]
3、Dockerbuild
1、通过dockerfile生成 镜像
# 命令关键字 build -f参数后紧跟dockerfile文件名 -t参数后跟随的是期望的镜像名称和版本号。
# 别忘了最后的那个 . 这个点是为生成后的docker镜像指定上下文的路径。一般写个. 表示将当前的目录
# 作为上下文赋予新建的docker镜像。如果有特殊需要,可以将宿主机中的具体目录写在 . 的位置也可以。
[root@docker01 ~]# docker build -f centos_dockerfile -t mycentos7:1.0 .
查看效果,如下图红框中的内容即新增出来的镜像
2、打包Docker镜像
sudo docker build -t docker_sample:latest .
其中-t参数指定镜像的名称为docker_sample和tag标签为latest,其中tag标签相当于版本号,最后的小点"."表示当前目录,因为当前目录下有Dockerfile文件。
3、运行Docker镜像
每个Docker镜像只被分配了几百M的共享内存,对于很多CNN模型是远远不够的,因此需要加上 --shm-size 8G 来增大Docker镜像的共享内存大小(Shared Memories Size)。我的任务8G就够用了。
docker run --shm-size 8G --gpus all -v -it --rm image-name
添加-v Path:/model/val 就可以将宿主机上的Path文件夹映射到Docker镜像里的val文件夹下,那么Docker镜像运行时就会从Path这个文件夹下取数据,记得Path一定要是绝对路径。Ubuntu中可以通过Ctrl+L得到文件的绝对路径。
对于我这个任务来说,我需要将新测试集和输出文件夹位置映射给Docker镜像,所以运行命令就是:
sudo docker run --shm-size 8G --gpus all -v PATH_TO_VAL:/model/val
-v PATH_TO_PUT:/model/output -it --rm image_name
sudo nvidia-docker run --shm-size 8G --gpus all -v PATH_TO_VAL:/model/val
-v PATH_TO_PUT:/model/output -it --rm image_name
测试成功就可以提交打包的镜像啦!
4、 保存Docker镜像
# 保存文件
docker save -o output-filename image-name
sudo docker save -o docker_image.tar docker_sample:latest
4、外部测试镜像
1、导入Docker镜像
sudo docker load -i docker_image.tar
2、运行Docker镜像
docker run -idt --shm-size 4096m  --gpus all --name swin_seg xx:xx
sudo nvidia-docker run  --gpus all  -it baseconda_lhy:v1 /bin/bash

# 参数一
--shm-size  # 设置容器的共享内存大小,这里设置的4g

# 参数二
--gpus all # 开启gpu
5、实例:Pyinstaller打包代码和虚拟环境成exe与Dockfile封装()
1、安装pyinstaller
pip install pyinstaller
2、打包可执行程序
(mmrotate) lhy@thales-Super-Server:/media/lhy/mmrotatecopy$ pyinstaller -F detect_ship_hugetif.py -p /home/lhy/anaconda3/envs/mmrotate/lib/python3.8/site-packages

生成一次之后路径下会生成XX.spec,修改后可以用spec生成。

# -*- mode: python ; coding: utf-8 -*-


block_cipher = None


a = Analysis(
    ['detect_ship_hugetif.py'],
    pathex=['/home/lhy/anaconda3/envs/mmrotate/lib/python3.8/site-packages'],
    binaries=[],
    datas=[],
    hiddenimports=['setuptools._distutils','mmcv._ext'],#如果有库的依赖错误,在这里补上即可
    hookspath=[],
    hooksconfig={},
    runtime_hooks=[],
    excludes=[],
    win_no_prefer_redirects=False,
    win_private_assemblies=False,
    cipher=block_cipher,
    noarchive=False,
)
pyz = PYZ(a.pure, a.zipped_data, cipher=block_cipher)

exe = EXE(
    pyz,
    a.scripts,
    a.binaries,
    a.zipfiles,
    a.datas,
    [],
    name='detect_ship_hugetif',
    debug=False,
    bootloader_ignore_signals=False,
    strip=False,
    upx=True,
    upx_exclude=[],
    runtime_tmpdir=None,
    console=True,
    disable_windowed_traceback=False,
    argv_emulation=False,
    target_arch=None,
    codesign_identity=None,
    entitlements_file=None,
)
options常用参数(按需求选择):
-D 与 -F 相反用法,生成一个文件目录包含可执行文件和相关动态链接库和资源文件等,对于打包结果较大的项目,选用-D生成目录相比-F的打包方式,执行速度更快,但包含更加多的文件
-F 表示在 dist 文件夹下只生成单个可执行文件(内部包含所有依赖),不加默认会在 dist 生成一大堆依赖文件+可执行文件。
-w 表示去掉控制台窗口,如果你的程序是有界面的,可以不写这个参数,
-c 表示去掉窗框,使用控制台,推荐使用,会打印各种信息和log到控制台,加上这个参数生成的spec中的console=True
-p 表示自己定义需要加载的类路径,项目中包含多个自建模块的时候需要加上 -p aaa.py -p bbb.py -p ccc.py
-i 表示可执行文件的图标,后面跟图标的路径,可以自定义exe文件的图标,我尝试了好多次没成功
打包完毕后在 dist 文件夹下双击项目启动文件就可以执行了
3、执行.spec可执行程序
(mmrotate) lhy@thales-Super-Server:/media/lhy/mmrotatecopy$ pyinstaller detect_ship_hugetif.spec

4、dist下面会生成可执行文件,将配置文件和参数存进来即可。

5、执行./exe
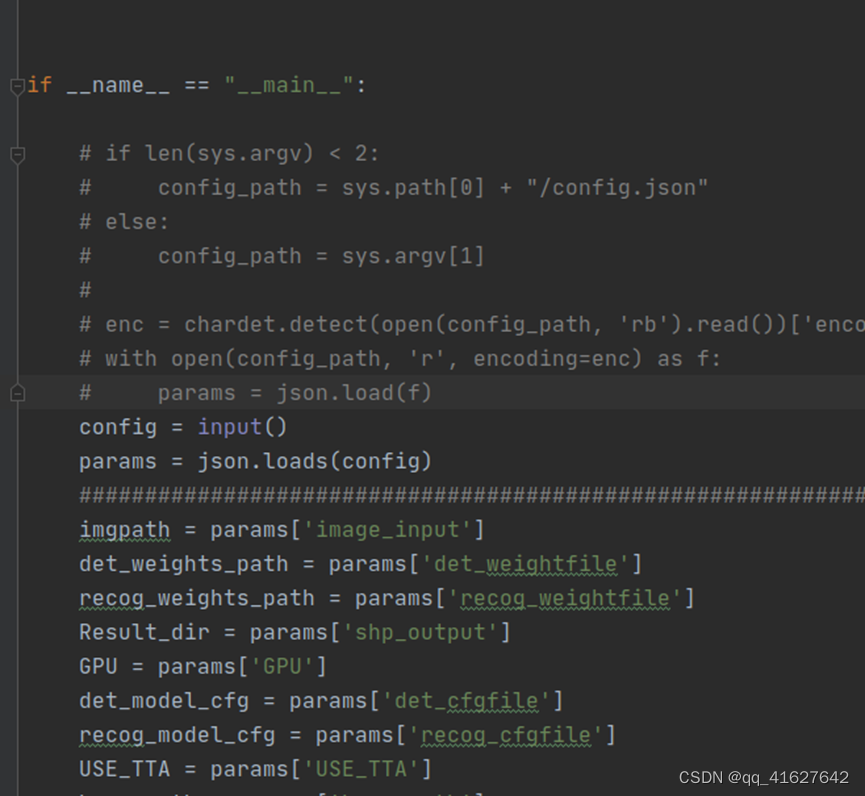
(mmrotate) lhy@thales-Super-Server:/media/lhy/mmrotatecopy$ cat param.json | python detect_ship_hugetif.py
6、拉去或者导入base镜像
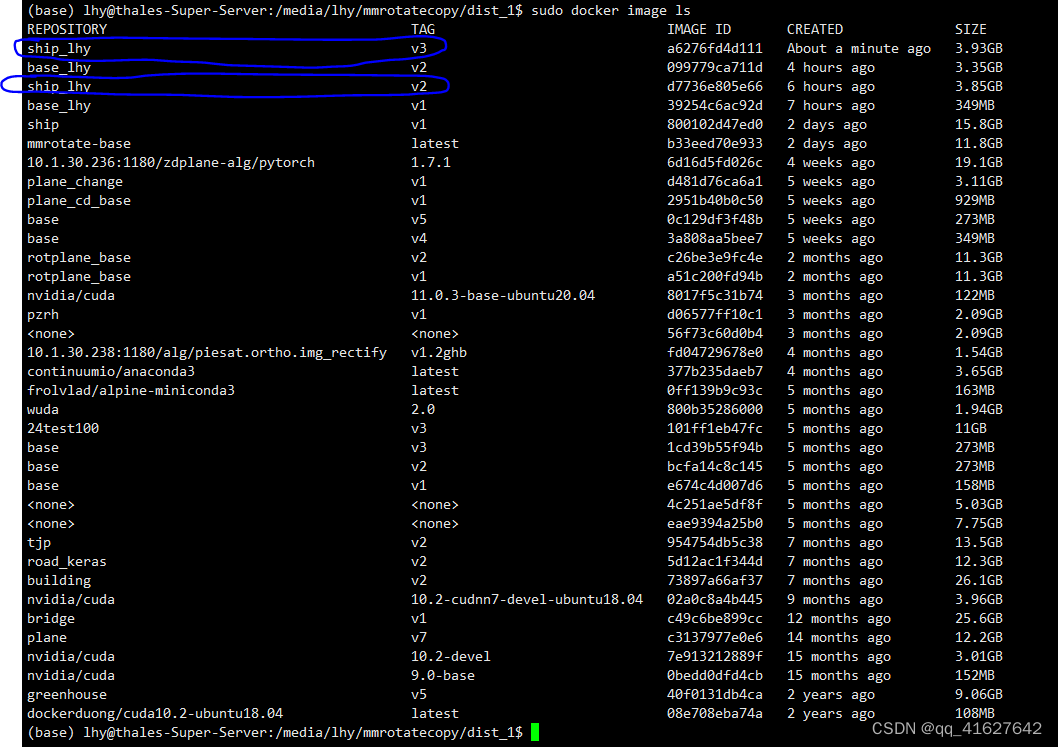
1、查看本地的基础
(base) lhy@thales-Super-Server:~$ sudo docker image ls
REPOSITORY                                      TAG                             IMAGE ID       CREATED         SIZE
base_lhy                                        v2                              099779ca711d   3 hours ago     3.35GB
ship_lhy                                        v2                              d7736e805e66   4 hours ago     3.85GB
base_lhy                                        v1                              39254c6ac92d   6 hours ago     349MB
ship                                            v1                              800102d47ed0   2 days ago      15.8GB
mmrotate-base                                   latest                          b33eed70e933   2 days ago      11.8GB
10.1.30.236:1180/zdplane-alg/pytorch            1.7.1                           6d16d5fd026c   4 weeks ago     19.1GB
plane_change                                    v1                              d481d76ca6a1   5 weeks ago     3.11GB
plane_cd_base                                   v1                              2951b40b0c50   5 weeks ago     929MB
base                                            v5                              0c129df3f48b   5 weeks ago     273MB
base                                            v4                              3a808aa5bee7   5 weeks ago     349MB
rotplane_base                                   v2                              c26be3e9fc4e   2 months ago    11.3GB
rotplane_base                                   v1                              a51c200fd94b   2 months ago    11.3GB
nvidia/cuda                                     11.0.3-base-ubuntu20.04         8017f5c31b74   3 months ago    122MB
pzrh                                            v1                              d06577ff10c1   3 months ago    2.09GB
<none>                                          <none>                          56f73c60d0b4   3 months ago    2.09GB
10.1.30.238:1180/alg/piesat.ortho.img_rectify   v1.2ghb                         fd04729678e0   4 months ago    1.54GB
continuumio/anaconda3                           latest                          377b235daeb7   4 months ago    3.65GB
frolvlad/alpine-miniconda3                      latest                          0ff139b9c93c   5 months ago    163MB
wuda                                            2.0                             800b35286000   5 months ago    1.94GB
24test100                                       v3                              101ff1eb47fc   5 months ago    11GB
base                                            v3                              1cd39b55f94b   5 months ago    273MB
base                                            v2                              bcfa14c8c145   5 months ago    273MB
base                                            v1                              e674c4d007d6   5 months ago    158MB
<none>                                          <none>                          4c251ae5df8f   5 months ago    5.03GB
<none>                                          <none>                          eae9394a25b0   5 months ago    7.75GB
tjp                                             v2                              954754db5c38   7 months ago    13.5GB
road_keras                                      v2                              5d12ac1f344d   7 months ago    12.3GB
building                                        v2                              73897a66af37   7 months ago    26.1GB
nvidia/cuda                                     10.2-cudnn7-devel-ubuntu18.04   02a0c8a4b445   9 months ago    3.96GB
bridge                                          v1                              c49c6be899cc   12 months ago   25.6GB
plane                                           v7                              c3137977e0e6   14 months ago   12.2GB
nvidia/cuda                                     10.2-devel                      7e913212889f   15 months ago   3.01GB
nvidia/cuda                                     9.0-base                        0bedd0dfd4cb   15 months ago   152MB
greenhouse                                      v5                              40f0131db4ca   2 years ago     9.06GB
dockerduong/cuda10.2-ubuntu18.04                latest                          08e708eba74a   2 years ago     108MB
我们选取base:v4 作为基础镜像
7、 dockerfile:指定工作目录 ,打出基础镜像
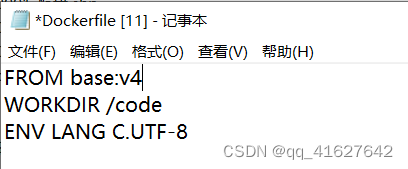
sudo docker build -t base_lhy:v1 .
8、 把打包好的推理文件夹考备到docker容器里
1、进入容器
sudo nvidia-docker run -it base_lhy:v1 /bin/bash
sudo nvidia-docker run  --gpus all  -it baseconda_lhy:v1 /bin/bash
2、查看运行的容器Id号
sudo docker ps -a
3、将dist中准备好的文件拷贝到运行的容器中的主目录code文件夹下
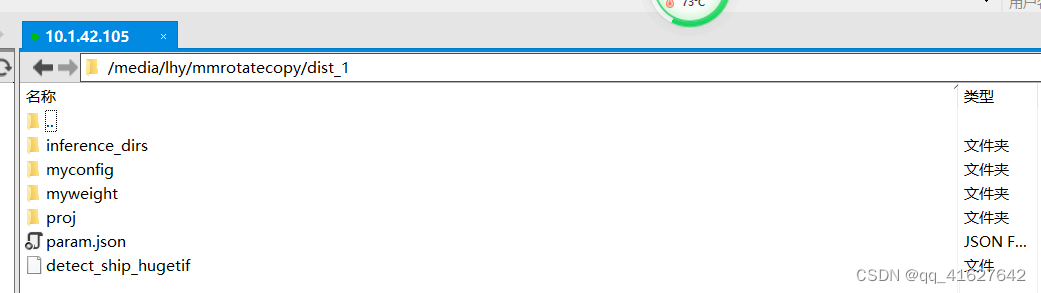
(base) lhy@thales-Super-Server:/media/lhy/mmrotatecopy/dist_1$ sudo docker cp /media/lhy/mmrotatecopy/dist_1/myconfig  640ff0779bf1:/code/
(base) lhy@thales-Super-Server:/media/lhy/mmrotatecopy/dist_1$ sudo docker cp /media/lhy/mmrotatecopy/dist_1/myweight  640ff0779bf1:/code/
(base) lhy@thales-Super-Server:/media/lhy/mmrotatecopy/dist_1$ sudo docker cp /media/lhy/mmrotatecopy/dist_1/proj  640ff0779bf1:/code/
(base) lhy@thales-Super-Server:/media/lhy/mmrotatecopy/dist_1$ sudo docker cp /media/lhy/mmrotatecopy/dist_1/param.json  640ff0779bf1:/code/
(base) lhy@thales-Super-Server:/media/lhy/mmrotatecopy/dist_1$ sudo docker cp /media/lhy/mmrotatecopy/dist_1/inference_dirs  640ff0779bf1:/code/
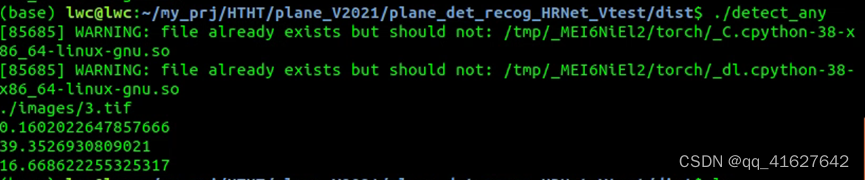
4、在容器内部运行代码
root@640ff0779bf1:/code/inference_dirs/input# cat param.json | ./detect_ship_hugetif
5、Docker commit 容器名 镜像名(使用docker commit 进行镜像容器修改)
docker commit 容器名 镜像名(使用docker commit 进行镜像容器修改)
docker commit 640ff0779bf1 ship_lhy:v2(使用docker commit 进行镜像容器修改)
docker commit 6ae727b2a299 ship_lhy:v3
6、外部调用打包好的docker镜像
(base) lhy@thales-Super-Server:~$ sudo nvidia-docker run ship_lhy:v2 /bin/bash -c "cat param.json | ./detect_ship_hugetif"
sudo nvidia-docker run -v /media/lhy/mmrotate/inference_dirs/redet_ship_exp1/input:/code/inference_dirs/input -it ship_lhy:v2 /bin/bash -c "cat param.json|./detect_ship_hugetif"#外部数据路径映射docker内部的/code/inference_dirs/input数据路径
7、docker save -o 镜像名 tar包名(镜像打包保存)
docker save -o tar包名 镜像名
sudo docker save -o dockership_lhy.tar ship_lhy:v2
6、实例:打包mmsegmentation深度学习环境
1、构建Dockerfile
# 从conda开始构建
FROM continuumio/anaconda3:2020.07
# 作者
MAINTAINER xxxx

# 从cuda复制基础环境
COPY --from=nvidia/cuda:11.4.0-devel-ubuntu20.04 / /

# Set the working directory
WORKDIR /xx_code

# Copy the current directory contents into the container
COPY .  /xx_code

# 复制代码
#COPY xx_code /xx_code

# 复制conda环境
COPY env_name.tar.gz /opt/conda/envs/

# 解压创建conda环境
RUN mkdir /opt/conda/envs/env_name
RUN tar -zxf /opt/conda/envs/env_name.tar.gz -C /opt/conda/envs/env_name

# 设置全局shell环境,使用/bin/bash
SHELL ["/bin/bash","-c"]

RUN source activate env_name
RUN echo "source activate env_name " >> ~/.bashrc
#运行代码
CMD python detect_ship_hugetif.py


 1万+
1万+


 被折叠的 条评论
为什么被折叠?
被折叠的 条评论
为什么被折叠?
 到【灌水乐园】发言


