


网络拓扑是最简单的两节点单链路网络
NS3用的是3.25版本
linux环境是 虚拟机下的Ubuntu16.04
具体的安装过程另寻博客哦~

一、【理论】利用排队论建模计算
(懒得导公式,直接用纸)


二、【实践】使用 NS3 仿真上述网络场景,测量并绘图显示所有的评价指标 仿真代码
2.1 仿真核心代码
#include <fstream>
#include "ns3/core-module.h"
#include "ns3/network-module.h"
#include "ns3/internet-module.h"
#include "ns3/point-to-point-module.h"
#include "ns3/applications-module.h"

//使用命名空间ns3
using namespace ns3;

//定义日志组件,组件名 FirstScriptExample
NS_LOG_COMPONENT_DEFINE ("FirstScriptExample");

//---------------MyApp-------------------------------------


class MyApp : public Application
{
public:
    MyApp (); // 构造函数
    virtual ~MyApp ();// 析构函数
    static TypeId GetTypeId (void); // 设置MyApp 的属性系统
    //Setup 函数通过参数值给MyApp 的私有成员变量赋值
    void Setup (Ptr<Socket> socket,
        Address address,
        uint32_t nPackets,
        Ptr<ExponentialRandomVariable> pArrival1,
        Ptr<ExponentialRandomVariable> pVariable2);

private:
    virtual void StartApplication (void); // 启动MyAPP
    virtual void StopApplication (void);// 停止MyAPP

    void ScheduleTx (void);// 生成下一个包的到达事件
    void SendPacket (void);// 发送数据包

    Ptr<Socket> m_socket; // Socket 指针,负责建立socket 连接
    Address m_peer; // 远端地址
    EventId m_sendEvent;// 发送事件
    bool m_running;// 运行状态
    uint32_t        m_nPackets;
    uint32_t m_packetsSent; // 已发送数据包
    // 指数随机变量pArrival 产生随机数作为包的发送间隔
    Ptr<ExponentialRandomVariable> pArrival;
    //产生随机数作为数据包大小
    Ptr<ExponentialRandomVariable> pSize;
};
MyApp::MyApp ()
  : m_socket (0),
    m_peer (),
    m_sendEvent (),
    m_running (false),
    m_nPackets (0),
    m_packetsSent (0)
{
}

MyApp::~MyApp()
{
  m_socket = 0;
}

void //setup 函数,根据参数设置私有成员属性的值
MyApp::Setup (Ptr<Socket> socket, Address address,uint32_t nPackets,
Ptr<ExponentialRandomVariable> pVariable1,Ptr<ExponentialRandomVariable> pVariable2)
{
    // 以下均为赋值语句
    m_socket = socket;
    m_peer = address;
    m_nPackets = nPackets;
    pArrival = pVariable1;
    pSize = pVariable2;
}

/* static */
TypeId MyApp::GetTypeId (void)
{
  static TypeId tid = TypeId ("MyApp")
    .SetParent<Application> ()
    .SetGroupName ("Tutorial")
    .AddConstructor<MyApp> ()
    ;
  return tid;
}


void
MyApp::StartApplication (void) // 启动应用
{
    m_running = true; // 将m_running 设为true ,表明程序为运行状态
    m_packetsSent = 0;// 已发包的数目m_packetsSent =0
    if (InetSocketAddress::IsMatchingType (m_peer)){
        m_socket->Bind ();
    }else{
        m_socket->Bind6 ();
    }
    m_socket->Connect (m_peer); // 通过远端地址建立socket 连接
    SendPacket ();
}


void
MyApp::StopApplication (void) // 停止应用
{
    m_running = false;// 运行状态设为false
    if (m_sendEvent.IsRunning ()){
    Simulator::Cancel (m_sendEvent);// 取消发送事件
    }
    if (m_socket){
    m_socket->Close (); // 关闭socket 连接
    }
}

void
MyApp::SendPacket (void) // 发送数据包
{
    int pvalue = ceil(pSize -> GetValue ()); // 指数分布随机变量pSize 获得一个随机做为包大小
    Ptr<Packet> packet = Create<Packet> (pvalue );// 根据pvalue 值创建一个相应大小的数据包
    m_socket->Send (packet); // 发送当前包
    // 如果已发送包的数目小于总的包的数目,调用ScheduleTx 函数并使m_packetsSent+1
    if (++m_packetsSent < m_nPackets) {
    ScheduleTx (); // 设置下一个包的调度事件
}
}

void
MyApp::ScheduleTx (void) // 生成下一个包的到达事件
{
    if (m_running) // 启动应用后m_running 设置为true, 应用停止后设置为false
    {
    double value = pArrival->GetValue ();// 使用指数随机变量生成发送下一个包的时间间隔
    Time tNext (Seconds (value)); // 将value 转换成时间变量tNext
    m_sendEvent = Simulator::Schedule (tNext, &MyApp::SendPacket, this);
    // 经过tNext 时间后,调用SendPacket 函数发送下一个包
    }
}


//________________________________________________________


int
main (int argc, char *argv[])
{
  CommandLine cmd;
  cmd.Parse (argc, argv);

  // 设置时间数值的解析单位, Time::NS 表示纳秒
  Time::SetResolution (Time::NS);

  // 激活日志组件 UdpEchoClientApplication ,激活的日志级别为为 LOG_LEVEL_INFO  //LOG_LEVEL_FUNCTION
  //LogComponentEnable ("UdpEchoClientApplication", LOG_LEVEL_INFO);
  // 激活日志组件 UdpEchoServerApplication ,激活的日志级别为LOG_LEVEL_INFO
  //LogComponentEnable ("UdpEchoServerApplication", LOG_LEVEL_INFO);


  NodeContainer nodes;  // 定义节点容器 nodes, 相当于节点数组, nodes.get(i) 获得第i i
  nodes.Create (2);     //nodes 使用 Create(2)


//————————————————【确定网络设备类型,依拓扑安装在相应的节点上】——————————————

  PointToPointHelper pointToPoint;// 定义 PointToPointHelper 对象 pointToPoint ,负责网络设备的配置
  pointToPoint.SetDeviceAttribute ("DataRate", StringValue ("1Mbps"));// 设置点对点信道的链路速率为 1mbps
  pointToPoint.SetChannelAttribute ("Delay", StringValue ("0.1ms"));//设置点对点信道的链路延迟为 0.1ms
  pointToPoint.SetQueue ("ns3::DropTailQueue", "MaxPackets", UintegerValue(50));//队列容量K=50
  //pointToPoint.SetQueue ("ns3::DropTailQueue","MaxSize", StringValue ("50p")) ;

  NetDeviceContainer devices;// 定义网络设备容器对象 devices
  // pointToPoint 调用 Install(nodes) 函数在 nodes 包含的节点上安装点到点网络设备和信道, , 并将
  //安装成功后的网络设备赋给 devices 。 devices 包含节点0 0 和节点1 1 上的网络设备
  devices = pointToPoint.Install (nodes);

  InternetStackHelper stack;// 定义 InternetStackHelper 对象 stack, , 负责安装 Internet 协议栈
  stack.Install (nodes);// stack 使用 Install( ( nodes) ) 函数在 nodes包含的节点上安装协议栈

//————————————————【给每个网络设备安装Internet协议栈, 并分配Ip地址】——————————————

  Ipv4AddressHelper address;// 定义 Ipv4AddressHelper 对象 address ,负责 IP 的分配
  address.SetBase ("10.1.1.0", "255.255.255.0");//address 调用 SetBase 设置网关 10.1.1.0 和子网掩码

  // address 调用 Assign 函数在 devices 包含的网络设备上分配 Ip 地址,从 10.1.1.1 1 开始。节点0 0 的网
  //络设备分配地址 10.1.1.1 1 ,节点2 2 的网络设备分配 10.1.1.2 2 。分配成功后的 IP 地址由
  //Ipv4InterfaceContainer 对象 interfaces
  Ipv4InterfaceContainer interfaces = address.Assign (devices);


//————————————————【使用Application的子类生成相应的数据包】——————————————

  //************服务器*****************
  /*
  uint16_t sinkPort = 9;
  Address sinkAddress (InetSocketAddress (interfaces.GetAddress (1), sinkPort));
  PacketSinkHelper packetSinkHelper ("ns3::UdpSocketFactory", InetSocketAddress (Ipv4Address::GetAny (), sinkPort));
  ApplicationContainer sinkApps = packetSinkHelper.Install (nodes.Get (1));
  sinkApps.Start (Seconds (0.));
  */

  uint16_t sinkPort = 9;
  UdpEchoServerHelper echoServer (sinkPort);
  Address sinkAddress (InetSocketAddress (interfaces.GetAddress (1), sinkPort));

  ApplicationContainer serverApps = echoServer.Install (nodes.Get (1));
  serverApps.Start (Seconds (0.));


  //************客户端*****************
  // 在节点0 上创建一个Socket, 类型为UdpSocket
  Ptr<Socket> ns3UdpSocket = Socket::CreateSocket (nodes.Get (0),
  UdpSocketFactory::GetTypeId ());


  // 指数随机变量PArrival
  Ptr<ExponentialRandomVariable> PArrival= CreateObject<ExponentialRandomVariable> ();
  PArrival->SetAttribute ("Mean", DoubleValue (1/562.5)); // 平均值
  PArrival->SetAttribute ("Bound", DoubleValue (0)); // 下界
  // 指数随机变量Psize
  Ptr<ExponentialRandomVariable> Psize= CreateObject<ExponentialRandomVariable> ();
  Psize->SetAttribute ("Mean", DoubleValue (200-28)); // 平均值,包大小
  Psize->SetAttribute ("Bound", DoubleValue (0)); // 下界, 包大小

  Ptr<MyApp> app = CreateObject<MyApp> (); // 创建一个MyApp 对象,使app 指向它
  //setup 函数将主函数中定义的socket ,远端地址,包数目,随机变量赋给app 的成员变量
  app->Setup (ns3UdpSocket, sinkAddress, 100000,PArrival,Psize);

  // 将app 安装在节点0上 上
  nodes.Get (0)->AddApplication (app);
  // 设置启动时间
  app->SetStartTime (Seconds (0.0));
  // 设置停止时间
  //app->SetStopTime (Seconds (1000.0));
  //—————————————【tracing】——————————————
  AsciiTraceHelper ascii;
  pointToPoint.EnableAsciiAll ( ascii.CreateFileStream("mytest.tr"));
 //—————————————【运行】——————————————
  Simulator::Run ();//运行仿真实验
  Simulator::Destroy ();//销毁仿真实验中创建的对象
  return 0;
}
2.1 计算评价指标
· 计算丢包率:通过计算 d(丢包事件)/N(发包总数)得到
· 计算平均队长:统计不同时刻的队长再除以统计次数得到
BEGIN{
receiverPktNum=0;
cur_qsize=0;
count_20=0;
qsizeSum=0;
drop=0;
N=100000;
}
{
event=$1;
time = $2;
node = $3; #发生事件的节点
nodeNum=substr(node,11,1); #get node num
if(nodeNum==0){
if(event == "d"){
drop++
}
for (i=1;i<=NF;i++)#find packet ID
{
if ($i ~ /id/) #if $i field matches "id"
myPacketID = $(i+1);#record the id of the packet for future use
else if ($i ~ />/) #if $i field matches ">"
{
srcIP = $(i-1);
dstIP = $(i+1);
if(match(srcIP, myScrIP) && match(dstIP, myDstIP) )#link matches
{
packet_id = myPacketID;
break;
#start to record the information of the packet
}#if
}#else if
}#for
if(event=="+"){
start_time[packet_id]=time
cur_qsize++
#if(cur_qsize>0)print cur_qsize
qsizeSum=qsizeSum+cur_qsize
}
if(event=="-"){
end_time[packet_id]=time
cur_qsize--
if(cur_qsize>=20){count_20++}
}
if(event == "r"&&receiver[packet_id]!=1){
receiver[packet_id]=1
if(packet_id==N)print time
}
if(event == "d"){
drop++
}
}#if(nodeNUm)
}
END{
result = qsizeSum/N
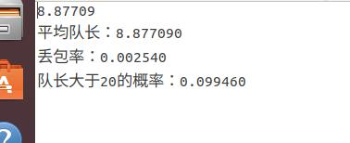
printf("平均队长:%f\n",result)
printf("丢包率:%f\n",drop/N)
p20=count_20/N
printf("队长大于 20 的概率:%f\n",count_20/N)
}
#awk -f awkTest.awk mytest.tr > resultTest.result
awk分析trace文件得到的结果:
2.3 队长指标可视化
利用awk文件处理trace文件得到以下结果
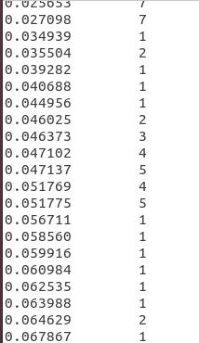
根据这份数据文件利用 gnuplot 输出
plot "resultView.result" with lines

横轴为仿真时间
纵轴为当前队长
可以看到队长大于 20 的情况并不多,而丢包(队长等于 50 的时候)的概率是很小的


 914
914


 被折叠的 条评论
为什么被折叠?
被折叠的 条评论
为什么被折叠?
 到【灌水乐园】发言


