


目录
1.变速动画函数封装
current:100 target:200
变速(缓动)效果:(target-current)/10
step=200-100=100/10=10
current=100+10=110
step=200-110=90/10=9
current=110+9=119
step=200-119=81/10=8.1---取9(取更大的,使离目标更近:正数向上取整,负数向下取整)
current=119+9=128 ...
按这种情况,当target和current之间的距离小于10时,step的绝对值肯定小于1,所以至少都能移动1px

1.1 导航栏案例
<!DOCTYPE html>
<html lang="en">
<head>
    <meta charset="UTF-8">
    <title></title>
    <style>
        ul {
            margin: 0;
            padding: 0;
            list-style: none;
            position: relative;
        }

        body {
            background-color:gray;
        }

        .nav {
            width:650px;
            height: 42px;
            margin: 100px auto;
            background: url(images/rss.png) right center no-repeat;
            background-color: white;
            border-radius: 10px;
            position: relative;
        }

        .nav li {
            width: 83px;
            height: 42px;
            text-align: center;
            line-height: 42px;
            float: left;
            cursor: pointer;
        }

        .nav span {
            position: absolute;
            top: 0;
            left: 0;
            width: 83px;
            height: 42px;
            background: url(images/cloud.gif) no-repeat;
        }

    </style>
</head>
<body>
<div class="nav">
    <span id="cloud"></span>
    <ul id="navBar">
        <li>北京校区</li>
        <li>上海校区</li>
        <li>广州校区</li>
        <li>深圳校区</li>
        <li>武汉校区</li>
        <li>关于我们</li>
        <li>联系我们</li>
    </ul>
</div>
<script>
    function my$(id) {
        return document.getElementById(id);
    }

    function animate(element, target) {
        clearInterval(element.timeId);
        element.timeId = setInterval(function () {
            var current = element.offsetLeft;
            var step = (target - current) / 10;
            step = step > 0 ? Math.ceil(step) : Math.floor(step);
            current += step;
            element.style.left = current + "px";
            if (current === target) {
                clearInterval(element.timeId);
            }
            console.log("目标位置:" + target + ",当前位置:" + current + ",每次移动步数:" + step);
        }, 20);
    }


        //获取云彩
        var cloud = my$("cloud");
        //获取所有的li标签
        var list = my$("navBar").children;
        //循环遍历,分别注册鼠标进入,鼠标离开,点击事件
        for (var i = 0; i < list.length; i++) {
            //鼠标进入事件
            list[i].onmouseover = mouseoverHandle;
            //点击事件
            list[i].onclick = clickHandle;
            //鼠标离开事件
            list[i].onmouseout = mouseoutHandle;
        }

        function mouseoverHandle() {//进入
            //移动到鼠标此次进入的li的位置
            animate(cloud, this.offsetLeft);
        }

        //点击的时候,记录此次点击的位置
        var lastPosition = 0;

        function clickHandle() {//点击
            lastPosition = this.offsetLeft;
        }

        function mouseoutHandle() {//离开
            animate(cloud, lastPosition);
        }


</script>
</body>
</html>

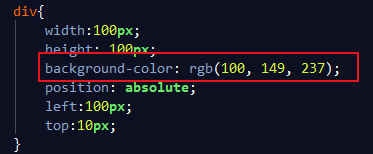
2.获取任意一个元素的任意一个样式属性的值(字符串类型)
element:元素对象;attribute:样式属性
谷歌,火狐支持(两者等价)
window.getComputedStyle(element,null).attribute;
window.getComputedStyle(element,null)["attribute"];
IE8支持(两者等价)
element.currentStyle.attribute;
element.currentStyle["attribute"];

3.变速动画函数封装增加任意一个属性

4.变速动画函数封装增加任意多个属性(在3的基础上)


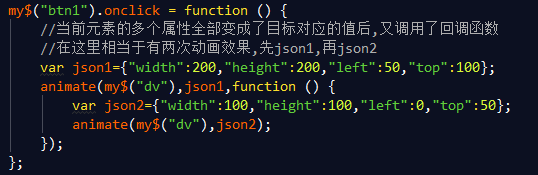
5.变速动画函数封装增加回调函数(在4的基础上)

6.变速动画函数封装增加透明度和层级(在5的基础上)
这里的animate函数是目前的最后一个版本(后续案例也是使用这个函数)
<!DOCTYPE html>
<html lang="en">
<head>
    <meta charset="UTF-8">
    <title>Title</title>
    <style>
        div {
            width: 100px;
            height: 100px;
            background-color: lightskyblue;
            position: absolute;
            left: 0;
            top: 50px;
        }
    </style>
</head>
<body>
<input type="button" value="移动到400px" id="btn1"/>
<div id="dv"></div>
<script>
    function my$(id) {
        return document.getElementById(id);
    }

    function getStyle(element, attr) {
        return window.getComputedStyle ? window.getComputedStyle(element, null)[attr] : element.currentStyle[attr];
    }

    function animate(element, json, fn) {
        clearInterval(element.timeId);
        element.timeId = setInterval(function () {
            var flag = true;
            for (var attr in json) {
                if (attr === "opacity") { //判断这个属性attr中是不是opacity
                    var current = getStyle(element, attr) * 100; //获取元素的当前的透明度,当前的透明度放大100倍
                    var target = json[attr] * 100; //目标的透明度放大100倍
                    var step = (target - current) / 10;
                    step = step > 0 ? Math.ceil(step) : Math.floor(step);
                    current += step;
                    element.style[attr] = current / 100;
                } else if (attr === "zIndex") { //判断这个属性attr中是不是zIndex
                    element.style[attr] = json[attr]; //层级改变就是直接改变这个属性的值
                } else {
                    //普通的属性
                    //获取元素这个属性的当前的值
                    var current = parseInt(getStyle(element, attr));
                    //当前的属性对应的目标值
                    var target = json[attr];
                    //移动的步数
                    var step = (target - current) / 10;
                    step = step > 0 ? Math.ceil(step) : Math.floor(step);
                    current += step;
                    element.style[attr] = current + "px";
                }
                if (current !== target) {
                    flag = false;
                }
            }
            if (flag) {
                clearInterval(element.timeId);
                if (fn) {
                    fn();
                }
            }
            console.log("目标:" + target + ",当前:" + current + ",每次的移动步数:" + step);
        }, 20);
    }

    //层级:z-index
    //透明度: 数字类型--小数
    my$("btn1").onclick = function () {
        var json1 = {"width": 200, "height": 200, "left": 50, "top": 100, "opacity": 0.2};
        animate(my$("dv"), json1, function () {
            animate(my$("dv"), {"width": 100, "height": 100, "left": 0, "top": 50, "opacity": 1, "zIndex": 1000});
        });
    };
</script>
</body>
</html>
7.变速动画函数案例
7.1 手风琴效果

没有鼠标进入时:

鼠标进入其中一个li时:

7.2 开机动画效果


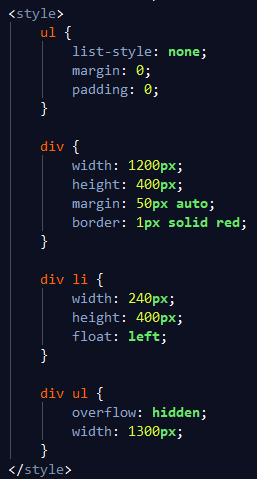
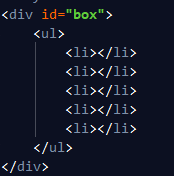
7.3 旋转木马效果
补充:
- href="javascript:void(0);":让超链接去执行一个js函数,而不是去跳转到一个地址, 而void(0)表示一个空的方法,也就是不执行js函数【void(0)此时可以省略】
- <a href="javascript:f1();":这样点击a标签就可以执行f1()函数了
- href="javascript:;"与href="#"的区别:#点击之后页面会滚到顶部;而javascript:;还是在当前位置
<!DOCTYPE html>
<html lang="en">
<head>
    <meta charset="UTF-8">
    <title>旋转木马</title>
    <style>
        ul {
            list-style: none;
            margin: 0;
            padding: 0;
        }

        a {
            cursor: pointer;
        }

        .wrap {
            width: 1200px;
            margin: 100px auto;
        }

        .slide {
            height: 500px;
            position: relative;
        }

        .slide li {
            position: absolute;
            left: 200px;
            top: 0;
        }

        .slide li img {
            width: 100%;
            border: 0;
            vertical-align: top;
        }

        .arrow {
            opacity: 0;
        }

        .prev, .next {
            width: 76px;
            height: 112px;
            position: absolute;
            top: 50%;
            margin-top: -56px;
            background: url(images/prev.png) no-repeat;
            z-index: 99;
        }

        .next {
            right: 0;
            background-image: url(images/next.png);
        }
    </style>
</head>
<body>
<div class="wrap" id="wrap">
    <div class="slide" id="slide">
        <ul>
            <li><a href="#"><img src="images/slidepic1.jpg" alt=""/></a></li>
            <li><a href="#"><img src="images/slidepic2.jpg" alt=""/></a></li>
            <li><a href="#"><img src="images/slidepic3.jpg" alt=""/></a></li>
            <li><a href="#"><img src="images/slidepic4.jpg" alt=""/></a></li>
            <li><a href="#"><img src="images/slidepic5.jpg" alt=""/></a></li>
        </ul>
        <div class="arrow" id="arrow">
            <a href="javascript:void(0);" class="prev" id="arrLeft"></a>
            <a href="javascript:;" class="next" id="arrRight"></a>
        </div>
    </div>
</div>
<script>
    function my$(id) {
        return document.getElementById(id);
    }

    function getStyle(element, attr) {
        return window.getComputedStyle ? window.getComputedStyle(element, null)[attr] : element.currentStyle[attr];
    }

    function animate(element, json, fn) {
        clearInterval(element.timeId);
        element.timeId = setInterval(function () {
            var flag = true;
            for (var attr in json) {
                if (attr === "opacity") { //判断这个属性attr中是不是opacity
                    var current = getStyle(element, attr) * 100; //获取元素的当前的透明度,当前的透明度放大100倍
                    var target = json[attr] * 100; //目标的透明度放大100倍
                    var step = (target - current) / 10;
                    step = step > 0 ? Math.ceil(step) : Math.floor(step);
                    current += step;
                    element.style[attr] = current / 100;
                } else if (attr === "zIndex") { //判断这个属性attr中是不是zIndex
                    element.style[attr] = json[attr]; //层级改变就是直接改变这个属性的值
                } else {
                    //普通的属性
                    //获取元素这个属性的当前的值
                    var current = parseInt(getStyle(element, attr));
                    //当前的属性对应的目标值
                    var target = json[attr];
                    //移动的步数
                    var step = (target - current) / 10;
                    step = step > 0 ? Math.ceil(step) : Math.floor(step);
                    current += step;
                    element.style[attr] = current + "px";
                }
                if (current !== target) {
                    flag = false;
                }
            }
            if (flag) {
                clearInterval(element.timeId);
                if (fn) {
                    fn();
                }
            }
            console.log("目标:" + target + ",当前:" + current + ",每次的移动步数:" + step);
        }, 20);
    }

    var config = [
        {
            width: 400,
            top: 20,
            left: 50,
            opacity: 0.2,
            zIndex: 2
        },//0
        {
            width: 600,
            top: 70,
            left: 0,
            opacity: 0.8,
            zIndex: 3
        },//1
        {
            width: 800,
            top: 100,
            left: 200,
            opacity: 1,
            zIndex: 4
        },//2
        {
            width: 600,
            top: 70,
            left: 600,
            opacity: 0.8,
            zIndex: 3
        },//3
        {
            width: 400,
            top: 20,
            left: 750,
            opacity: 0.2,
            zIndex: 2
        }//4
    ];
    var flag=true;//假设所有的动画执行完毕了
    //先散开图片
    var list = my$("slide").getElementsByTagName("li");
    function assign() {
        for (var i = 0; i < list.length; i++) {
            animate(list[i], config[i],function () {
               flag=true;
            });
        }
    }
    assign();

    //右边按钮
    my$("arrRight").onclick=function(){
        if(flag){
            flag=false;//这样多次点击时,只要动画还没结束,就无法执行下次动画(动画执行完毕--flag=true清理定时器,再次点击按钮才有效果)
            //把第一个元素的值删除,追加到数组的最后
            config.push(config.shift());
            assign();//重新分配
        }

    };
    //左边按钮
    my$("arrLeft").onclick=function(){
        if(flag){
            flag=false;
            //把最后一个元素的值删除,追加到数组的最前面
            config.unshift(config.pop());
            assign();//重新分配
        }
    };
    //鼠标进入,显示左右焦点div
    my$("slide").onmouseover = function () {
        animate(my$("arrow"), {"opacity": 1});
    };
    //鼠标离开,隐藏左右焦点div
    my$("slide").onmouseout = function () {
        animate(my$("arrow"), {"opacity": 0});
    };
</script>
</body>
</html> 


 570
570


 被折叠的 条评论
为什么被折叠?
被折叠的 条评论
为什么被折叠?
 到【灌水乐园】发言


