


我们首先来看一下架构的图,方便我们来了解并且复习一下之前所提到的知识。
由外部的软件实时产生一些数据,然后用flume实时对这些数据进行采集,利用KafkaSink将数据递接到kafka,做到一个缓存的作用,然后这些消息队列再作为SparkStreaming的数据源,完成业务运算,最后入库或者可视化。

然后就来用代码来表示一下
- 首先我们用代码来模拟AppServer实时来产生数据。

- 然后我们对这个日志的输入进行一定的配置
输出级别为INFO,使用SYSTEM.out的方式在控制台输出,格式为Pattern所示

输出如下:

此时,日志的产生就完成了。
- flume的日志采集
streaming.conf
# Name the components on this agent
agent1.sources = avro-source
agent1.channels = logger-channel
agent1.sinks = log-sink

# Describe/configure the source
agent1.sources.avro-source.type = avro
agent1.sources.avro-source.bind = 0.0.0.0
agent1.sources.avro-source.port = 41414

# Describe the channel
agent1.channels.logger-channel.type = memory
agent1.channels.logger-channel.capacity = 1000
agent1.channels.logger-channel.transactionCapacity = 100

# Describe the sink
agent1.sinks.log-sink.type = logger

# Bind the source and sink to the channel
agent1.sources.avro-source.channels = logger-channel
agent1.sinks.log-sink.channel = logger-channel
这时,我们完成了flume的配置
- 然后我们要做到让产生的日志信息和flume对接上,先来看看flume官方的Log4j.Appender是如何定义的

然后根据官方进行一下我们的log4j.properties的相关配置
log4j.rootLogger=INFO,stdout,flume

log4j.appender.stdout = org.apache.log4j.ConsoleAppender
log4j.appender.stdout.target = System.out
log4j.appender.stdout.layout = org.apache.log4j.PatternLayout
log4j.appender.stdout.layout.ConversionPattern= %d{yyyy-MM-dd HH:mm:ss,SSS} [%t] [%c] [%p] - %m%n

#...
log4j.appender.flume = org.apache.flume.clients.log4jappender.Log4jAppender
log4j.appender.flume.Hostname = 192.168.243.20
log4j.appender.flume.Port = 41414
log4j.appender.flume.UnsafeMode = true
然后添加一个相关的jar包
		<dependency>
            <groupId>org.apache.flume.flume-ng-clients</groupId>
            <artifactId>flume-ng-log4jappender</artifactId>
            <version>1.7.0</version>
        </dependency>
重新启动flume
[centos01@linux01 conf]$ flume-ng agent \
> --name agent \  上面配置的agent名字就是agent
> --conf $FLUME_HOME/conf \  系统配置的目录
> --conf-file $FLUME_HOME/conf/streaming.conf  \   系统配置的文件
> -Dflume.root.logger=INFO,console   将日志打印到控制台
这时,我们已经能让产生的日志对接到flume上了,紧接着要做的是将flume采集到数据对接到kafka
- flume对接kafka
首先启动后台的kafka进程
kafka-server-start.sh
-daemon /home/centos01/modules/kafka_2.11-0.11.0.2/config/server.properties
先来看看我们已经创建过的topic

现在我们在这个基础上再创建一个topic,帮助我们测试这个案例
[centos01@linux01 kafka_2.11-0.11.0.2]$ kafka-topics.sh
--create
--zookeeper linux01:2181
--replication-factor 1
--partitions 1
--topic streamingtopic
创建一个新的flume conf,帮助我们能将采集到的数据对接到kafka,也是来看官方文档

其实kafka那篇讲过配置,就不多说了,下面直接贴上flume conf
# Name the components on this agent
agent1.sources = avro-source
agent1.channels = logger-channel
agent1.sinks = kafka-sink

# Describe/configure the source
agent1.sources.avro-source.type = avro
agent1.sources.avro-source.bind = 0.0.0.0
agent1.sources.avro-source.port = 41414

# Describe the channel
agent1.channels.logger-channel.type = memory
agent1.channels.logger-channel.capacity = 1000
agent1.channels.logger-channel.transactionCapacity = 100

# Describe the sink
agent1.sinks.kafka-sink.type = org.apache.flume.sink.kafka.KafkaSink
agent1.sinks.kafka-sink.kafka.topic = streamingtopic
agent1.sinks.kafka-sink.kafka.bootstrap.servers = 192.168.243.20:9092
agent1.sinks.kafka-sink.kafka.flumeBatchSize = 20
agent1.sinks.kafka-sink.kafka.producer.acks = 1
agent1.sinks.kafka-sink.kafka.producer.linger.ms = 1

# Bind the source and sink to the channel
agent1.sources.avro-source.channels = logger-channel
agent1.sinks.kafka-sink.channel = logger-channel
启动flume,指令就不说了。
然后启动kafka消费者
[centos01@linux01 kafka_2.11-0.11.0.2]$ kafka-console-consumer.sh
--bootstrap-server linux01:9092
--topic streamingtopic
然后运行程序


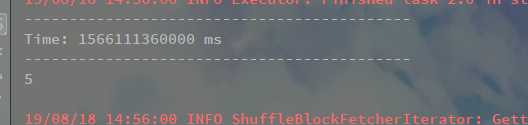
成功。
- SparkStreaming处理kafka内的数据,进行业务计算。
object KafkaStreamingApp {

  def main(args: Array[String]): Unit = {
    var Array(zkQuorm,group,topics,numThreads) = args

    var sc = new SparkConf().setAppName("kafka").setMaster("local[*]")
    var ssc = new StreamingContext(sc,Seconds(5))

    val topicMap = topics.split(",").map((_,numThreads.toInt)).toMap

    val messages = KafkaUtils.createStream(ssc,zkQuorm,group,topicMap)

    messages.map(_._2).count().print()
    ssc.start()
    ssc.awaitTermination()


  }
}
然后进行系统参数的配置

运行程序之前同时启动之前的操作:


 415
415


 被折叠的 条评论
为什么被折叠?
被折叠的 条评论
为什么被折叠?
 到【灌水乐园】发言


