


本节,我们将为您详细讲解如何使用 IDEA 创建一个 Spring Boot 项目。
配置开发环境
在使用 Spring Boot 进行开发之前,第一件事就是配置好开发环境。这里我们以 Windows 操作系统为例,如果您使用的是其他操作系统,请对照其相关设置进行操作。
工欲善其事,必先利其器,IDE(集成开发环境)的选择相当重要,目前市面上有很多优秀的 IDE 开发工具,例如 IntelliJ IDEA、Spring Tools、Visual Studio Code 和 Eclipse 等等,那么我们该如何选择呢?
这里我们极力推荐大家使用 IntelliJ IDEA,因为相比于与其他 IDE,IntelliJ IDEA 对 Spring Boot 提供了更好的支持。
Spring Boot 版本及其环境配置要求如下表。
| Spring Boot | 2.x |
|---|---|
| JDK | 8.0 及以上版本 |
| Maven | 3.x |
| IntelliJ IDEA | 14.0 以上 |
- 在 Java 官方网站下载 JDK 8.0 及以上版本,JDK 的安装以及环境配置请参考JDK下载与安装教程 和 Java JDK环境变量配置 。
- Maven 3.x 的下载安装及配置过程,请参考Maven 安装与配置。
- 浏览器访问 IntelliJ IDEA 官方下载页面,下载并安装 IntelliJ IDEA。
创建 Spring Boot 项目有两种方式
- 方式一:Maven构建
- 方式二:Spring Initializr构建
Maven构建
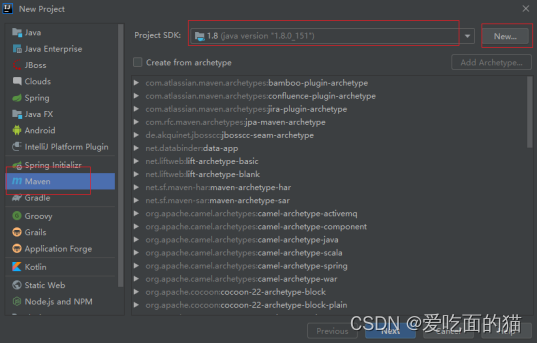
步骤1:选择初始化工具
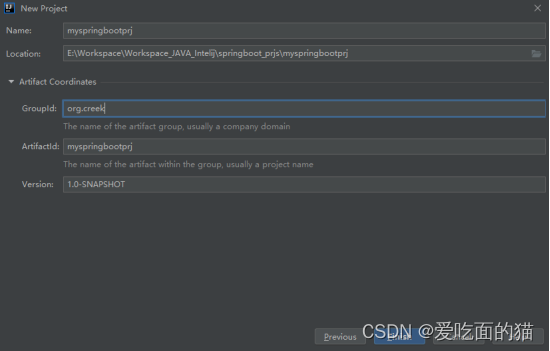
步骤2:创建项目
步骤3:选择依赖
<?xml version="1.0" encoding="UTF-8"?>
<project xmlns="http://maven.apache.org/POM/4.0.0"
         xmlns:xsi="http://www.w3.org/2001/XMLSchema-instance"
         xsi:schemaLocation="http://maven.apache.org/POM/4.0.0 http://maven.apache.org/xsd/maven-4.0.0.xsd">
    <modelVersion>4.0.0</modelVersion>

    <groupId>org.creek</groupId>
    <artifactId>myspringbootprj</artifactId>
    <version>1.0-SNAPSHOT</version>
    <!-- 引入Spring Boot依赖 -->
    <parent>
        <groupId>org.springframework.boot</groupId>
        <artifactId>spring-boot-starter-parent</artifactId>
        <version>2.2.4.RELEASE</version>
    </parent>
    <dependencies>
        <!-- 引入Web场景依赖启动器 -->
        <dependency>
            <groupId>org.springframework.boot</groupId>
            <artifactId>spring-boot-starter-web</artifactId>
        </dependency>
    </dependencies>
</project>步骤4:创建包
com.example.demo
步骤5:添加控制器
package com.example.demo.controllers;
import org.springframework.web.bind.annotation.GetMapping;
import org.springframework.web.bind.annotation.RestController;
@RestController
public class HelloController {
@GetMapping("/hello")
public String hello(){
return "hello Spring Boot";
}
}
步骤6:创建启动了类
在包com.example.demo下,创建一个名为 HelloWorldApplication 主程序,用来启动 Spring Boot 应用
package com.example.demo;
import org.springframework.boot.SpringApplication;
import org.springframework.boot.autoconfigure.SpringBootApplication;
@SpringBootApplication
public class HelloWorldApplication {
public static void main(String[] args){
SpringApplication.run(HelloWorldApplication .class,args);
}
}
Spring Boot 项目目录结构如下图。

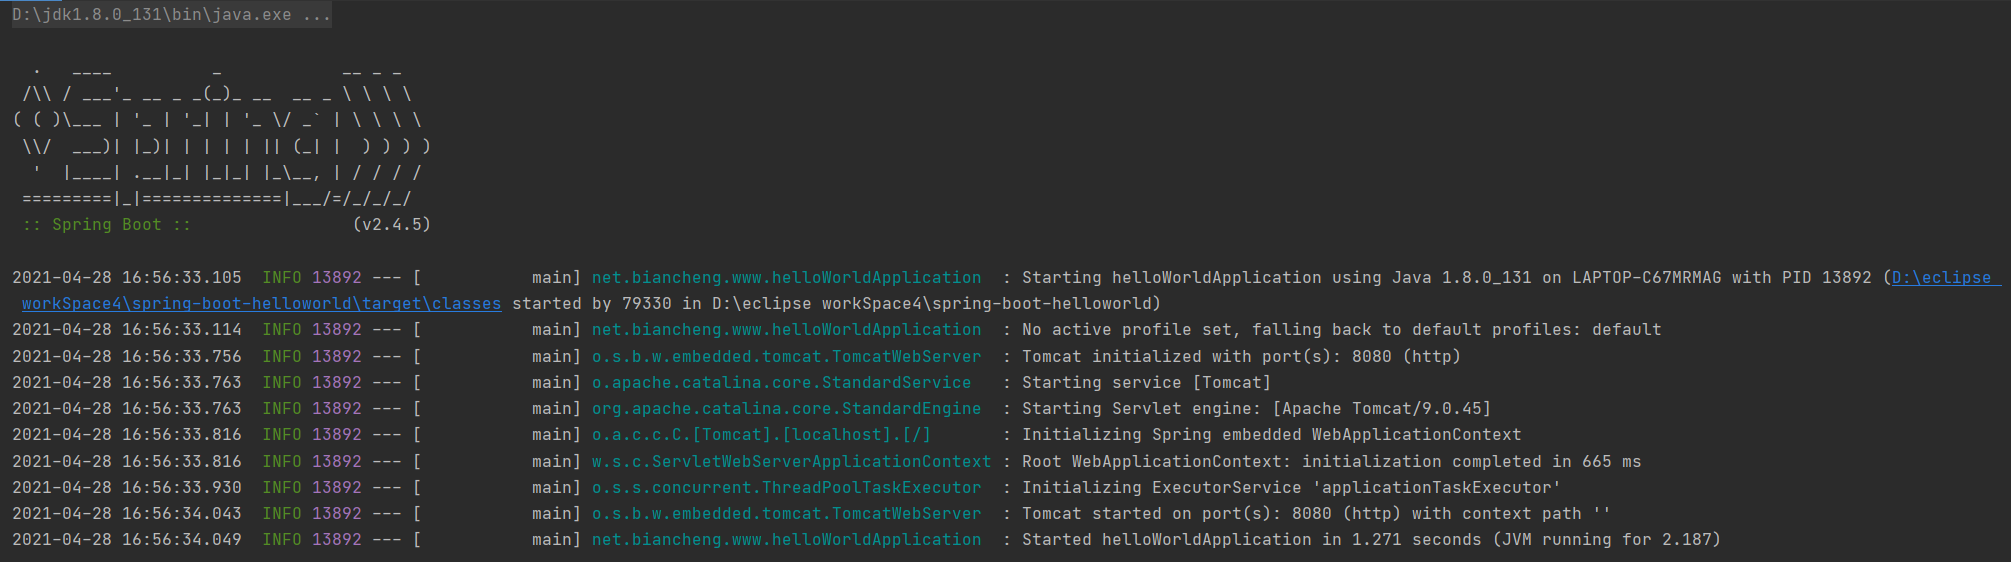
步骤7:启动 Spring Boot运行项目
默认情况下,Spring Boot 项目会创建一个名为 ***Application 的主程序启动类 ,该类中使用了一个组合注解 @SpringBootApplication,用来开启 Spring Boot 的自动配置,另外该启动类中包含一个 main() 方法,用来启动该项目。
直接运行启动类 HelloworldApplication 中的 main() 方法,便可以启动该项目,结果如下图。
Spring Initializr构建
IntelliJ IDEA 支持用户使用 Spring 项目创建向导(Spring Initializr )快速地创建一个 Spring Boot 项目,步骤如下。
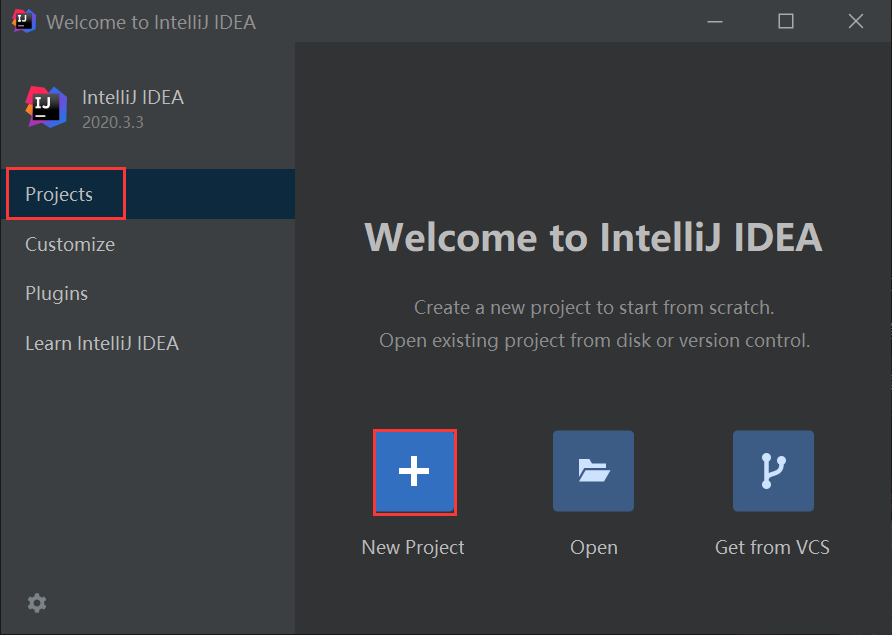
步骤1:创建项目
在 IntelliJ IDEA 欢迎页面左侧选择 Project ,然后在右侧选择 New Project,如下图。
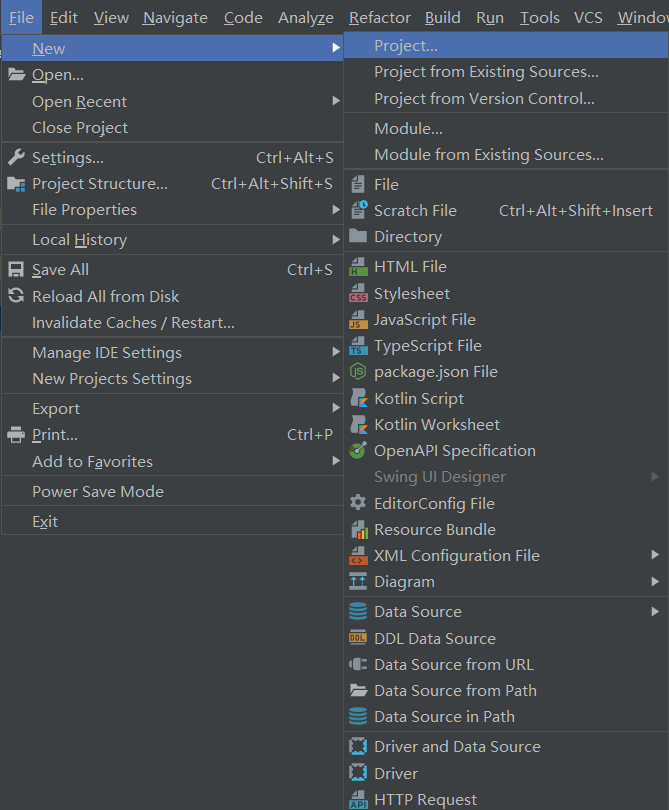
或者在 IntelliJ IDEA 工作区上方的菜单栏中选择 File ,在下拉菜单中选则 New,然后选择 Project,如下图。
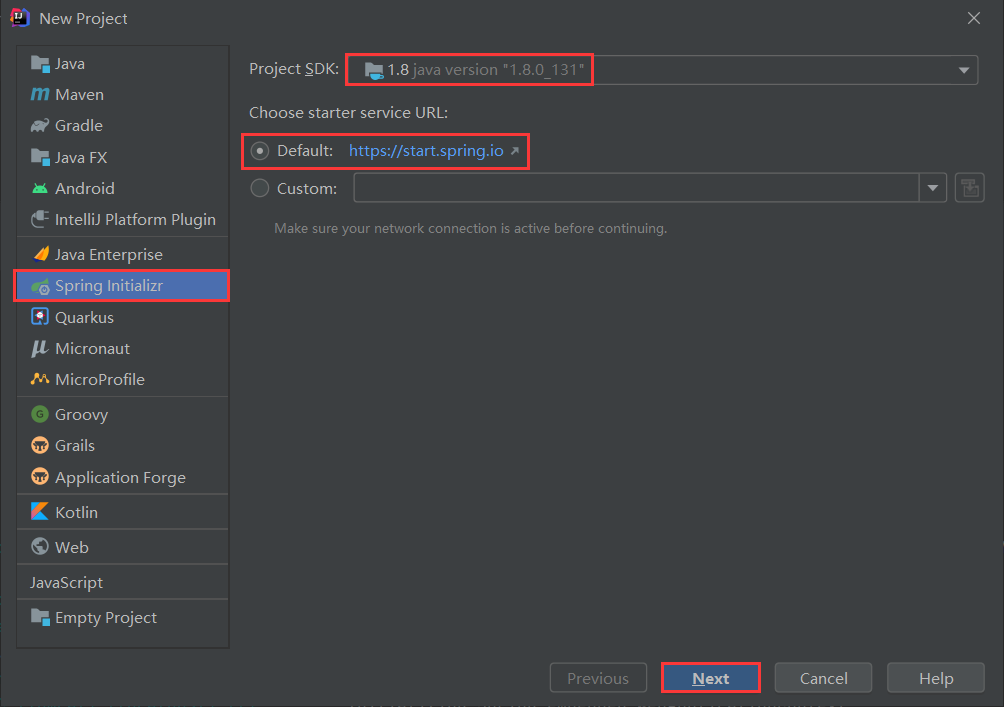
步骤2:选择初始化工具
在新建工程界面左侧,选择 Spring Initializr,选择项目的 SDK 为 1.8,选择 starter service URL 为 http://start.spring.io(默认),最后点击下方的 Next 按钮进行下一步。
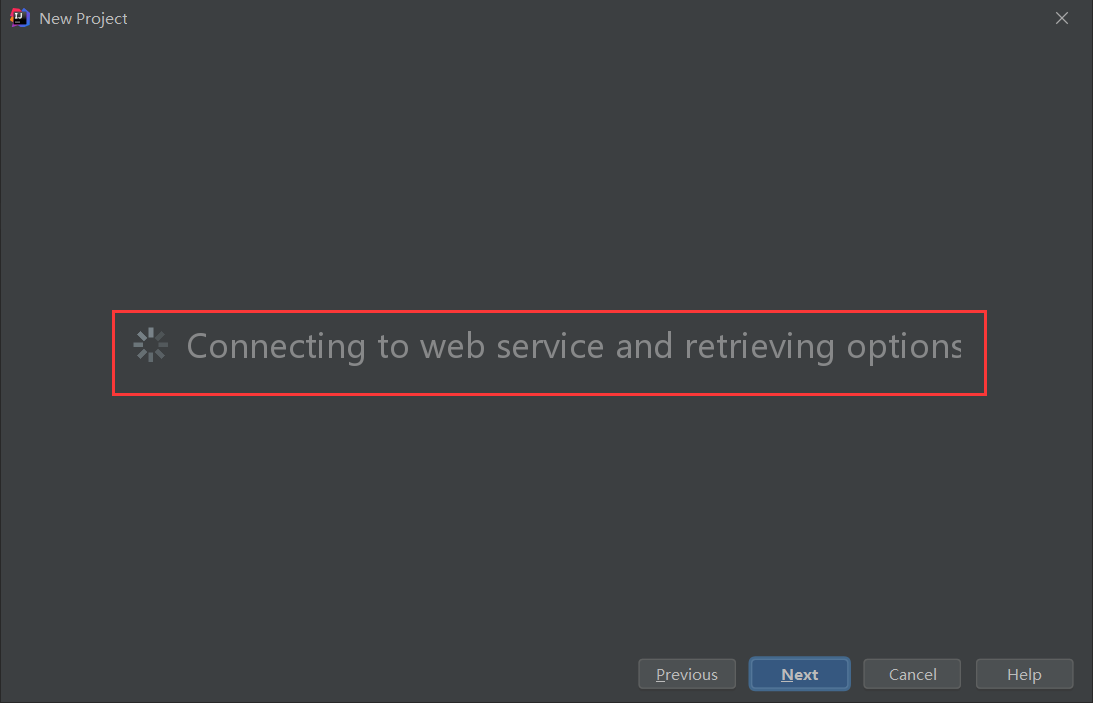
步骤3:自动连接网络自动初始化项目框架
IDEA 会连接网络,并根据 starter service URL 查询 Spring Boot 的当前可用版本和组件列表,如下图。
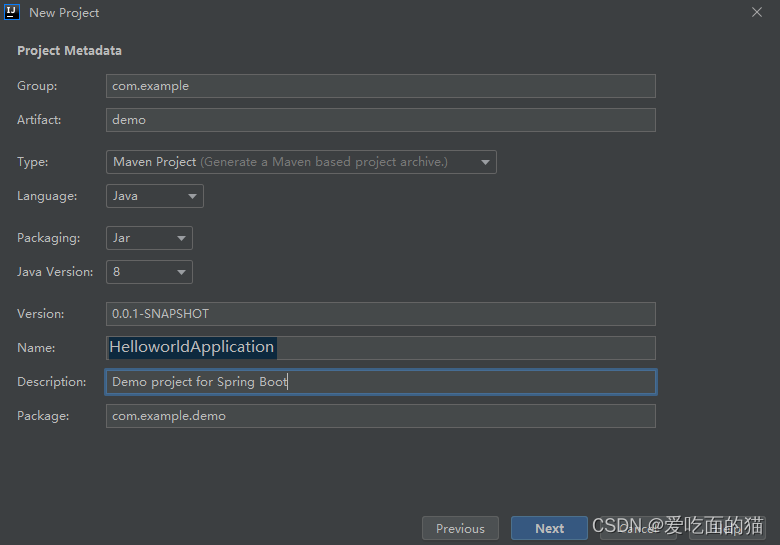
步骤4:创建项目
在 Spring Initializr Project Settings 中,输入项目的 GroupId、ArtifactId 等内容,注意 Type 为 Maven,packaging 为 jar,Java version 切换为 8(默认为 11),最后点击下方的 Next 按钮,进行下一步。
步骤5:选择依赖
在 dependencise 界面中,选择 Spring Boot 的版本及所依赖的 Spring Boot 组件(例如 Spring Boot 的版本为 2.4.5, Spring Boot 组件为 Web),然后点击下方的 Next 按钮。
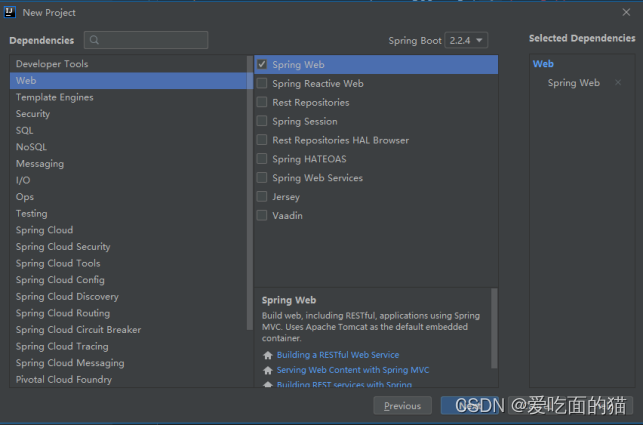
步骤6:选择依赖
根据需要修改项目名称及项目存储位置等信息,最后点击 Finish 按钮,完成 Spring Boot 项目的创建,如下图。
步骤7:添加控制器
package com.example.demo.controllers;
import org.springframework.web.bind.annotation.GetMapping;
import org.springframework.web.bind.annotation.RestController;
@RestController
public class HelloController {
@GetMapping("/hello")
public String hello(){
return "hello Spring Boot";
}
}
步骤6:启动 Spring Boot运行项目
默认情况下,Spring Boot 项目会创建一个名为 ***Application 的主程序启动类 ,该类中使用了一个组合注解 @SpringBootApplication,用来开启 Spring Boot 的自动配置,另外该启动类中包含一个 main() 方法,用来启动该项目。
直接运行启动类 HelloworldApplication 中的 main() 方法,便可以启动该项目,结果如下图。
单元测试
步骤1:配置单元测试组件
在pom.xml文件中添加依赖如下:
<dependency>
	<groupId>org.springframework.boot</groupId>
	<artifactId>spring-boot-starter-test</artifactId>
	<scope>test</scope>
    使用Junit单元测试要排除掉spring自带的 junit-vintage-engine
	<exclusions>
		<exclusion>
			<groupId>org.junit.vintage</groupId>
			<artifactId>junit-vintage-engine</artifactId>
		</exclusion>
	</exclusions>
</dependency>

使用Junit单元测试
<dependency>
    <groupId>junit</groupId>
    <artifactId>junit</artifactId>
    <version>4.11</version>
    <scope>test</scope>
</dependency>步骤2:创建测试
import com.example.demo.controllers.HelloController;
import org.junit.jupiter.api.Test;
import org.springframework.beans.factory.annotation.Autowired;
import org.springframework.boot.test.context.SpringBootTest;


//加载项目的ApplicationContext上下文环境
@SpringBootTest
class DemoApplicationTests {

    @Test
    void contextLoads() {
    }

    @Autowired
    private HelloController helloController;

    @Test
    public void helloControllerTest() {
        String hello = helloController.hello();
        System.out.println(hello);
    }
}
热部署
SpringBoot devtools实现热部署说明:
spring-boot-devtools热部署是对修改的类和配置文件进行重新加载,所以在重新加载的过程中会看到项目启动的过程,其本质上只是对修改类和配置文件的重新加载,所以速度极快
spring-boot-devtools 对于前端使用模板引擎的项目,能够自动禁用缓存,在页面修改后,只需要刷新浏览器器页面即可
idea监测到项目runninng 或者 debuging 会停用自动编译,所以还需要手动biild [Ctrl + F9] 或者 [ctrl + b]
热部署,可以直接修改后台代码,不用重启整个项目,刷新页面即可看到修改后的内容。
注意:如果使用springboot初始化工具可以省略版本,因为starter的父依赖中的spring-boot-dependnecies中已经对版本仲裁了,即已经有了。
步骤1:配置插件
<dependency>
	<groupId>org.springframework.boot</groupId>
	<artifactId>spring-boot-devtools</artifactId>
	<version>2.6.12</version>
    <!-- optional:true表示 当前这个项目被继承之后,这个依赖不向下传递-->
    <optional>true</optional>
    <scope>runtime</scope>
</dependency>

<plugin>
    <groupId>org.springframework.boot</groupId>
    <artifactId>spring-boot-maven-plugin</artifactId>
    <!--没有该项配置,热部署不会起作用-->
    <configuration>
        <fork>true</fork>
    </configuration>
</plugin>
步骤2:设置IDEA
选择【File】→【Settings】选项,打开Compiler面板设置页。选择自动编译。

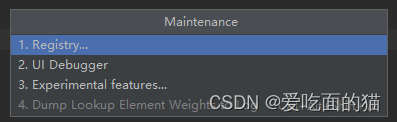
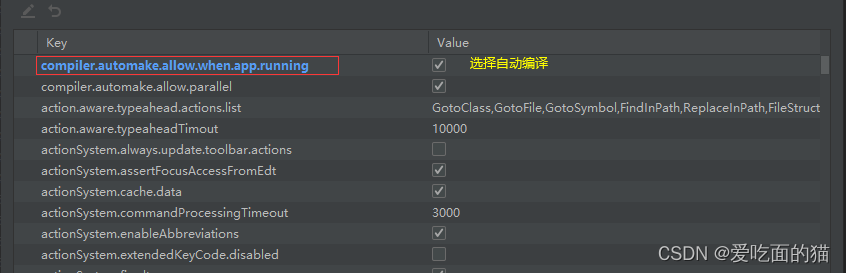
步骤3:配置Maintenance
使用快捷键“Ctrl+Shift+Alt+/”打开Maintenance选项框,选中并打开Registry页面。勾选自动编译。
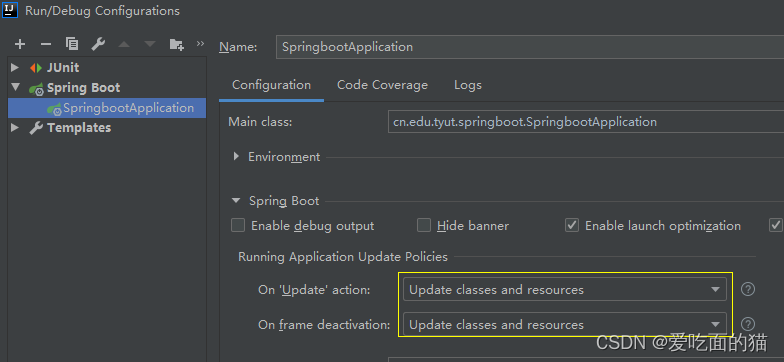
步骤4:打开Intellij自动部署策略
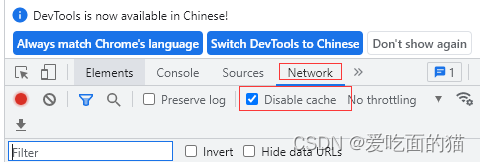
建议启动前关闭浏览器缓存:
步骤5:启动主启动了,修改controller代码查看
package com.example.demo.controllers;

import org.springframework.web.bind.annotation.GetMapping;

import org.springframework.web.bind.annotation.RestController;

@RestController

public class HelloController {
    @GetMapping("/hello")

    public String hello(){
        //原有内容 使用
        System.out.println("hello");
        //新增内容
        System.out.println(123);
        return "hello Spring Boot";
    }
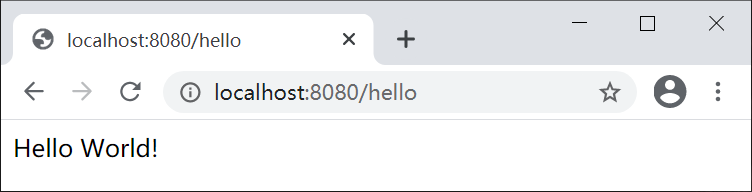
}步骤6:使用http://localhost:8080hello测试
在步骤5的基础上,修改代码,使用http://localhost:8080hello进行访问查看结果。
03SpringBoot 的工作原理https://blog.csdn.net/qq_41946216/article/details/124765411?spm=1001.2014.3001.5501


 1433
1433


 被折叠的 条评论
为什么被折叠?
被折叠的 条评论
为什么被折叠?
 到【灌水乐园】发言


