


MyBatis 是一个半自动化的 ORM 框架,所谓半自动化是指 MyBatis 只支持将数据库查出的数据映射到 POJO 实体类上,而实体到数据库的映射则需要我们自己编写 SQL 语句实现,相较于Hibernate 这种完全自动化的框架,Mybatis 更加灵活,我们可以根据自身的需求编写 sql 语句来实现复杂的数据库操作。
随着 Spring Boot 越来越流行,越来越多的被厂商及开发者所认可,MyBatis 也开发了一套基于 Spring Boot 模式的 starter:mybatis-spring-boot-starter。本节我们就介绍下如何在 Spring Boot 项目中整合 MyBatis。
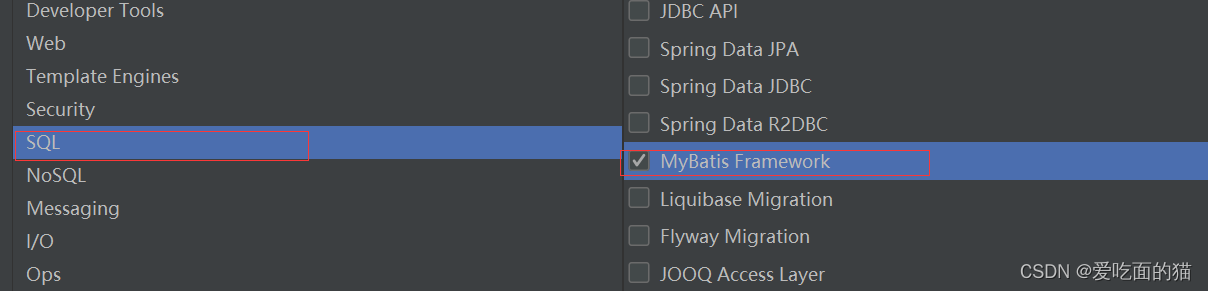
引入依赖
Spring Boot 整合 MyBatis 的第一步,就是在项目的 pom.xml 中引入 mybatis-spring-boot-starter 的依赖,示例代码如下。
<!--引入 mybatis-spring-boot-starter 的依赖-->
<dependency>
    <groupId>org.mybatis.spring.boot</groupId>
    <artifactId>mybatis-spring-boot-starter</artifactId>
    <version>2.2.0</version>
</dependency>
配置 MyBatis
在 Spring Boot 的配置文件(application.properties/yml)中对 MyBatis 进行配置,例如指定 mapper.xml 的位置、实体类的位置、是否开启驼峰命名法等等,示例代码如下。
###################### MyBatis 配置#########################
mybatis:
  # 指定 mapper.xml 的位置
  mapper-locations: classpath:mybatis/mapper/*.xml
  #扫描实体类的位置,在此处指明扫描实体类的包,在 mapper.xml 中就可以不写实体类的全路径名
  type-aliases-package: net.biancheng.www.bean
  configuration:
    #默认开启驼峰命名法,可以不用设置该属性
    map-underscore-to-camel-case: true
注意:使用 MyBatis 时,必须配置数据源信息,例如数据库 URL、数据库用户型、数据库密码和数据库驱动等。否则报错。
#数据源连接信息
spring:
  datasource:
    username: root
    password: root
    url: jdbc:mysql://localhost:3306/tyut?useUnicode=true&allowPublicKeyRetrieval=true&characterEncoding=UTF-8&useSSL=false&serverTimezone=Asia/Shanghai
    driver-class-name: com.mysql.cj.jdbc.Driver
创建实体类
在指定的数据库内创建一个 user 表,并插入一些数据,如下。
id user_id user_name password sex age address qq email
1 12 老张 123456 男 24 重庆大学 324234 324234@qq.com
2 13 刘丽 123456 女 23 重庆大学 34543532 34543532@qq.com
4 14 张丽 123456 女 19 重庆大学 346756543 346756543@qq.com
5 15 王芳 123456 女 20 重庆大学 353453354 353453354@qq.com
7 16 李迪 123456 男 26 tyut 313370741 313370741@qq.com
8 17 杨科 123456 男 24 tyut 313370741 313370741@qq.com
9 18 张美 123456 女 23 tyut 313370741 313370741@qq.comDROP TABLE IF EXISTS user;
CREATE TABLE `user`(
`id` int(20) NOT NULL AUTO_INCREMENT,`user_id` int(20) DEFAULT NULL,
`user_name` varchar(32) DEFAULT NULL,`password` varchar(32) DEFAULT NULL,
`sex` varchar(32) DEFAULT NULL,
`age` int(20) DEFAULT NULL,
`address` varchar(32) DEFAULT NULL,
`qq` varchar(32) DEFAULT NULL,
`email` varchar(32) DEFAULT NULL,
PRIMARY KEY (`id`)
) ENGINE=InnoDB AUTO_INCREMENT=2 DEFAULT CHARSET=utf8;
insert into `user`(id,user_id,user_name,password,sex,age,address,qq,email)values(1,12,'老张','123456','男',24'重庆大学','324234','324234@qq.com')
insert into `user`(id,user_id,user_name,password,sex,age,address,qq,email)values(2,13,'刘丽','123456','女',23'重庆大学','34543532','34543532@qq.com')
insert into `user`(id,user_id,user_name,password,sex,age,address,qq,email)values(4,14,'张丽','123456','女',19'重庆大学','346756543','346756543@qq.com')
insert into `user`(id,user_id,user_name,password,sex,age,address,qq,email)values(5,15,'王芳','123456','女',20'重庆大学','353453354','353453354@qq.com')
insert into `user`(id,user_id,user_name,password,sex,age,address,qq,email)values(7,16,'李迪','123456','男',26'tyut','313370741','313370741@qq.com')
insert into `user`(id,user_id,user_name,password,sex,age,address,qq,email)values(8,17,'杨科','123456','男',24'tyut','313370741','313370741@qq.com')
insert into `user`(id,user_id,user_name,password,sex,age,address,qq,email)values(9,18,'张美','123456','女',23'tyut','313370741','313370741@qq.com')
根据数据库 user 表,创建相应的实体类 User,代码如下。
public class User implements Serializable {
        private Integer id;
        private Integer userId;
        private String userName;
        private String password;
        private String sex;
        private Integer userAge;
        private String address;
        private String qq;
        private String email;
        省略 getter setter toString 和构造方法
}
创建 Mapper 接口
在com.hwadee.mapper 中创建一个 UserMapper 接口,并在该类上使用 @Mapper 注解,代码如下。
package com.hwadee.mapper;
import com.hwadee.entity.User;
import org.apache.ibatis.annotations.Mapper;
@Mapper
public interface UserMapper {
    //通过用户名密码查询用户数据
    User getByUserNameAndPassword(User user);
}
当 mapper 接口较多时,我们可以在 Spring Boot 主启动类上使用 @MapperScan 注解扫描指定包下的 mapper 接口,而不再需要在每个 mapper 接口上都标注 @Mapper 注解。
创建 Mapper 映射文件
在配置文件 application.properties/yml 通过 mybatis.mapper-locations 指定的位置mybatis/mapper/ 中创建 UserMapper.xml,代码如下。
<?xml version="1.0" encoding="UTF-8"?>
<!DOCTYPE mapper PUBLIC "-//mybatis.org//DTD Mapper 3.0//EN" "http://mybatis.org/dtd/mybatis-3-mapper.dtd">
<mapper namespace="com.hwadee.dao.UserMapper">
    <resultMap id="BaseResultMap" type="User">
        <id column="id" property="id"></id>
        <result column="user_id" property="userId"></result>
        <result column="user_name" property="userName"></result>
        <result column="password" property="password"></result>
        <result column="sex" property="sex"></result>
        <result column="age" property="userAge"></result>
        <result column="address" property="address"></result>
        <result column="qq" property="qq"></result>
        <result column="email" property="email"></result>
    </resultMap>
    <sql id="Base_Column_List">
        id, user_id, password, user_name, sex, age, address, qq, email
    </sql>
    <!--根据用户名密码查询用户信息-->
    <!--application.yml 中通过 type-aliases-package 指定了实体类的为了,因此-->
    <select id="getByUserNameAndPassword" resultType="User">
        select *
        from user
        where user_name= #{userName,jdbcType=VARCHAR}
          and password= #{password,jdbcType=VARCHAR}
    </select>
</mapper>
使用 Mapper 进行开发时,需要遵循以下规则:
- mapper 映射文件中 namespace 必须与对应的 mapper 接口的完全限定名一致。
- mapper 映射文件中 statement 的 id 必须与 mapper 接口中的方法的方法名一致
- mapper 映射文件中 statement 的 parameterType 指定的类型必须与 mapper 接口中方法的参数类型一致。
- mapper 映射文件中 statement 的 resultType 指定的类型必须与 mapper 接口中方法的返回值类型一致。
创建 Mapper 映射文件
1. 在 spring-boot项目中com.hwadee.service 包中创建一个名为 UserService 的接口,代码如下。
import net.biancheng.www.bean.User;
public interface UserService {
    public User getByUserNameAndPassword(User user);
}
2. 在com.hwadee.service.impl 包中创建 UserService 接口的实现类,并使用 注解@Service 将其以组件的形式添加到容器中,代码如下。
@Service("userService")
public class UserServiceImpl implements UserService {
    @Autowired
    UserMapper userMapper;

    @Override
    public User getByUserNameAndPassword(User user) {
        User loginUser = userMapper.getByUserNameAndPassword(user);
        return loginUser;
    }
}
3. 创建 LoginController 并编写 doLogin() 方法 ,代码如下。
@Slf4j
@Controller
public class LoginController {
    @Autowired
    UserService userService;
    @RequestMapping("/user/login")
    public String doLogin(User user, Map<String, Object> map, HttpSession session) {
        //从数据库中查询用户信息
        User loginUser = userService.getByUserNameAndPassword(user);
        if (loginUser != null) {
            session.setAttribute("loginUser", loginUser);
            log.info("登陆成功,用户名:" + loginUser.getUserName());
            //防止重复提交使用重定向
            return "redirect:/main.html";
        } else {
            map.put("msg", "用户名或密码错误");
            log.error("登陆失败");
            return "login";
        }
    }
}
4. 启动springboot主体类,进行测试
访问“http://localhost:8080/user/login?ussername=xxx&password=123456”
注解方式
通过上面的学习,我们知道 mapper 映射文件其实就是一个 XML 配置文件,它存在 XML 配置文件的通病,即编写繁琐,容易出错。即使是一个十分简单项目,涉及的 SQL 语句也都十分简单,我们仍然需要花费一定的时间在mapper 映射文件的配置上。
为了解决这个问题,MyBatis 针对实际实际业务中使用最多的“增伤改查”操作,分别提供了以下注解来替换 mapper 映射文件,简化配置:
- @Select
- @Insert
- @Update
- @Delete
通过以上注解,基本可以满足我们对数据库的增删改查操作,示例代码如下。
@Mapper
public interface UserMapper {
    @Select("select * from user where user_name = #{userName,jdbcType=VARCHAR} and password = #{password,jdbcType=VARCHAR}")
    List<User> getByUserNameAndPassword(User user);
    @Delete("delete from user where id = #{id,jdbcType=INTEGER}")
    int deleteByPrimaryKey(Integer id);
    @Insert("insert into user ( user_id, user_name, password, email)" +
            "values ( #{userId,jdbcType=VARCHAR}, #{userName,jdbcType=VARCHAR}, #{password,jdbcType=VARCHAR}, #{email,jdbcType=VARCHAR})")
    int insert(User record);
    @Update(" update user" +
            "    set user_id = #{userId,jdbcType=VARCHAR},\n" +
            "      user_name = #{userName,jdbcType=VARCHAR},\n" +
            "      password = #{password,jdbcType=VARCHAR},\n" +
            "      email = #{email,jdbcType=VARCHAR}\n" +
            "    where id = #{id,jdbcType=INTEGER}")
    int updateByPrimaryKey(User record);
}
注意事项
mapper 接口中的任何一个方法,都只能使用一种配置方式,即注解和 mapper 映射文件二选一,但不同方法之间,这两种方式则可以混合使用,例如方法 1 使用注解方式,方法 2 使用 mapper 映射文件方式。
我们可以根据 SQL 的复杂程度,选择不同的方式来提高开发效率。
- 如果没有复杂的连接查询,我们可以使用注解的方式来简化配置;
- 如果涉及的 sql 较为复杂时,则使用 XML (mapper 映射文件)的方式更好一些。
16Spring Boot整合日志框架
https://blog.csdn.net/qq_41946216/article/details/127106166?spm=1001.2014.3001.5502


 1928
1928


 被折叠的 条评论
为什么被折叠?
被折叠的 条评论
为什么被折叠?
 到【灌水乐园】发言


