


作者首先通过train.py训练微调模型,之后用训练好的模型在predict_video.py进行视频分类。
在执行图像分类时,我们:
输入一幅图像到我们的CNN中;
从CNN中获得预测;
选择相应概率最大的标签。
由于视频只是一系列帧,一种简单的视频分类方法是:
1.循环播放视频文件中的所有帧
2.对于每一帧,通过CNN传递帧
3.对每个帧进行单独的分类,并且相互独立
4.选择相应概率最大的标签
5.标记帧并将输出帧写入磁盘
我的方法:
在4的后面增加一条:
计算最后K个预测的平均值,并选择相应概率最大的标签
数据集是一些运动类型的图片,地址,数据集共有22个类别:
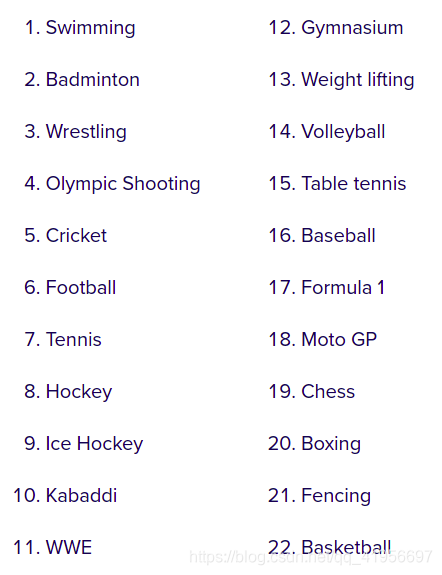
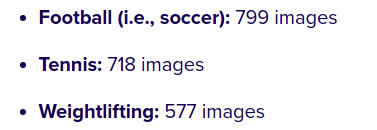
为了节省时间,计算资源,并演示实际的视频分类算法,我们选取了数据集中的部分数据集
train.py:一个keras训练脚本,获取数据集图像,加载ResNet50/CNN,并应用ImageNet权重微调训练我们的模型,输出三个文件:
model/activity.model : 一种基于ResNet50的精细分类器,用于运动识别。
model/lb.pickle:包含唯一类标签的序列化标签二进制程序。
plot.png:准确度/损失训练历史图。
predict_video.py:从示例example_clips/加载一个输入视频,然后使用今天的滚动平均方法对视频进行分类。
# set the matplotlib backend so figures can be saved in the background
import matplotlib
matplotlib.use("Agg")
# import the necessary packages
from tensorflow.keras.preprocessing.image import ImageDataGenerator
from tensorflow.keras.layers import AveragePooling2D
from tensorflow.keras.applications import ResNet50
from tensorflow.keras.layers import Dropout
from tensorflow.keras.layers import Flatten
from tensorflow.keras.layers import Dense
from tensorflow.keras.layers import Input
from tensorflow.keras.models import Model
from tensorflow.keras.optimizers import SGD
from sklearn.preprocessing import LabelBinarizer
from sklearn.model_selection import train_test_split
from sklearn.metrics import classification_report
from imutils import paths
import matplotlib.pyplot as plt
import numpy as np
import argparse
import pickle
import cv2
import os
``
导入需要的包
# construct the argument parser and parse the arguments
ap = argparse.ArgumentParser()
ap.add_argument("-d", "--dataset", required=True,
	help="path to input dataset")
ap.add_argument("-m", "--model", required=True,
	help="path to output serialized model")
ap.add_argument("-l", "--label-bin", required=True,
	help="path to output label binarizer")
ap.add_argument("-e", "--epochs", type=int, default=25,
	help="# of epochs to train our network for")
ap.add_argument("-p", "--plot", type=str, default="plot.png",
	help="path to output loss/accuracy plot")
args = vars(ap.parse_args())
脚本接受五个命令行参数,其中前三个是必需的,在pycharm运行时会报错,此时我们需要在Terminal中输入
python train.py --dataset Sports-Type-Classifier/data --model model/activity.model \
	--label-bin output/lb.pickle --epochs 50
代码是没问题的,原因是python没办法把“–-dataset”,“–model”,“–label-bin”和它的路径(指代的东西)联系起来
# 初始化spots活动数据集中的标签集,我们将在其中训练我们的网络
LABELS = set(["weight_lifting", "tennis", "football"])
# 抓取数据集目录中的图像列表,然后初始化数据列表(即图像)和类图像
print("[INFO] loading images...")
imagePaths = list(paths.list_images(args["dataset"]))
data = []
labels = []
# 在图像路径上循环
for imagePath in imagePaths:
	# 从文件名中提取类标签
	label = imagePath.split(os.path.sep)[-2]
	# if the label of the current image is not part of of the labels
	# are interested in, then ignore the image
	if label not in LABELS:
		continue
	# 加载图像,将其转换为RGB通道顺序,并将其调整为固定的224x224像素,忽略纵横比
	image = cv2.imread(imagePath)
	image = cv2.cvtColor(image, cv2.COLOR_BGR2RGB)
	image = cv2.resize(image, (224, 224))
	# 分别更新数据和标签列表
	data.append(image)
	labels.append(label)
接下来,我们将对标签进行热编码并对数据进行分区:
# 将数据和标签转换为NumPy数组
data = np.array(data)
labels = np.array(labels)
# 对标签执行一次热编码
lb = LabelBinarizer()
labels = lb.fit_transform(labels)
# 使用75%的培训数据和25%的测试数据将数据划分为培训和测试部分
(trainX, testX, trainY, testY) = train_test_split(data, labels,
	test_size=0.25, stratify=labels, random_state=42)
让我们初始化数据扩充对象:
# 初始化训练数据扩充对象
trainAug = ImageDataGenerator(
	rotation_range=30,
	zoom_range=0.15,
	width_shift_range=0.2,
	height_shift_range=0.2,
	shear_range=0.15,
	horizontal_flip=True,
	fill_mode="nearest")
# 初始化验证/测试数据增强对象(我们将向其添加均值减法)
valAug = ImageDataGenerator()
# 定义ImageNet mean减法(按RGB顺序),并为每个数据增强对象设置“平均减法”值
mean = np.array([123.68, 116.779, 103.939], dtype="float32")
trainAug.mean = mean
valAug.mean = mean
微调:加载用ImageNet weights预先训练的ResNet50,同时切断网络的头部。组装了一个新的头部模型,并将其缝合到基础模型上。我们现在冻结baseModel,这样它就不会通过反向传播进行训练(第125行和第126行)。
# load the ResNet-50 network, ensuring the head FC layer sets are left
# off
baseModel = ResNet50(weights="imagenet", include_top=False,
	input_tensor=Input(shape=(224, 224, 3)))
# construct the head of the model that will be placed on top of the
# the base model
headModel = baseModel.output
headModel = AveragePooling2D(pool_size=(7, 7))(headModel)
headModel = Flatten(name="flatten")(headModel)
headModel = Dense(512, activation="relu")(headModel)
headModel = Dropout(0.5)(headModel)
headModel = Dense(len(lb.classes_), activation="softmax")(headModel)
# place the head FC model on top of the base model (this will become
# the actual model we will train)
model = Model(inputs=baseModel.input, outputs=headModel)
# loop over all layers in the base model and freeze them so they will
# *not* be updated during the training process
for layer in baseModel.layers:
	layer.trainable = False
训练模型:
# compile our model (this needs to be done after our setting our
# layers to being non-trainable)
print("[INFO] compiling model...")
opt = SGD(lr=1e-4, momentum=0.9, decay=1e-4 / args["epochs"])
model.compile(loss="categorical_crossentropy", optimizer=opt,
	metrics=["accuracy"])
# train the head of the network for a few epochs (all other layers
# are frozen) -- this will allow the new FC layers to start to become
# initialized with actual "learned" values versus pure random
print("[INFO] training head...")
H = model.fit(
	x=trainAug.flow(trainX, trainY, batch_size=32),
	steps_per_epoch=len(trainX) // 32,
	validation_data=valAug.flow(testX, testY),
	validation_steps=len(testX) // 32,
	epochs=args["epochs"])
评估并绘制培训历史:
# evaluate the network
print("[INFO] evaluating network...")
predictions = model.predict(x=testX.astype("float32"), batch_size=32)
print(classification_report(testY.argmax(axis=1),
	predictions.argmax(axis=1), target_names=lb.classes_))
# plot the training loss and accuracy
N = args["epochs"]
plt.style.use("ggplot")
plt.figure()
plt.plot(np.arange(0, N), H.history["loss"], label="train_loss")
plt.plot(np.arange(0, N), H.history["val_loss"], label="val_loss")
plt.plot(np.arange(0, N), H.history["accuracy"], label="train_acc")
plt.plot(np.arange(0, N), H.history["val_accuracy"], label="val_acc")
plt.title("Training Loss and Accuracy on Dataset")
plt.xlabel("Epoch #")
plt.ylabel("Loss/Accuracy")
plt.legend(loc="lower left")
plt.savefig(args["plot"])
保存模型和标签二进制:
# serialize the model to disk
print("[INFO] serializing network...")
model.save(args["model"], save_format="h5")
# serialize the label binarizer to disk
f = open(args["label_bin"], "wb")
f.write(pickle.dumps(lb))
f.close()
接下来是predict_video.py文件:
# import the necessary packages
from tensorflow.keras.models import load_model
from collections import deque
import numpy as np
import argparse
import pickle
import cv2
# construct the argument parser and parse the arguments
ap = argparse.ArgumentParser()
ap.add_argument("-m", "--model", required=True,
	help="path to trained serialized model")
ap.add_argument("-l", "--label-bin", required=True,
	help="path to  label binarizer")
ap.add_argument("-i", "--input", required=True,
	help="path to our input video")
ap.add_argument("-o", "--output", required=True,
	help="path to our output video")
ap.add_argument("-s", "--size", type=int, default=128,
	help="size of queue for averaging")
args = vars(ap.parse_args())
分析五个命令行参数,其中四个是必需的:
–model:从上一个训练步骤生成的输入模型的路径。
–label-bin:上一个脚本生成的序列化pickle格式标签二进制程序的路径
–input:用于视频分类的输入视频路径
–output:我们的输出视频路径将被保存到磁盘。
–size:滚动平均队列的最大大小(默认为128)。对于后面的一些示例结果,我们将把size设置为1,这样就不会执行平均。
通过导入和命令行参数,我们现在可以执行初始化:
# load the trained model and label binarizer from disk
print("[INFO] loading model and label binarizer...")
model = load_model(args["model"])
lb = pickle.loads(open(args["label_bin"], "rb").read())
# initialize the image mean for mean subtraction along with the
# predictions queue
mean = np.array([123.68, 116.779, 103.939][::1], dtype="float32")
Q = deque(maxlen=args["size"])
我们将使用deque来实现滚动预测平均。我们的deque,Q,用maxlen初始化,maxlen等于args[“size”]值.
让我们初始化cv2.VideoCapture对象并开始在视频帧上循环:
# 初始化视频流、指向输出视频文件的指针和帧尺寸
vs = cv2.VideoCapture(args["input"])
writer = None
(W, H) = (None, None)
# loop over frames from the video file stream
while True:
	# 从文件中读取下一帧
	(grabbed, frame) = vs.read()
	# 如果帧没有被抓取,那么我们已经到达流的结尾
	if not grabbed:
		break
	# 如果帧尺寸为空,设置帧的尺寸
	if W is None or H is None:
		(H, W) = frame.shape[:2]
让我们对帧进行预处理:
# 克隆输出帧,然后将其从BGR转换为RGB
#排序,将帧大小调整为固定的224x224,然后
#执行平均减法
	output = frame.copy()
	frame = cv2.cvtColor(frame, cv2.COLOR_BGR2RGB)
	frame = cv2.resize(frame, (224, 224)).astype("float32")
	frame -= mean
接下来是帧分类推断和滚动预测平均:
	# 在帧上进行预测,然后更新预测队列
	preds = model.predict(np.expand_dims(frame, axis=0))[0]
	Q.append(preds)
	# perform prediction averaging over the current history of
	# previous predictions
	results = np.array(Q).mean(axis=0)
	i = np.argmax(results)
	label = lb.classes_[i]
对当前帧进行预测。预测结果通过添加到Q。
现在我们有了结果标签,让我们注释输出帧并将其写入磁盘:
	# draw the activity on the output frame
	text = "activity: {}".format(label)
	cv2.putText(output, text, (35, 50), cv2.FONT_HERSHEY_SIMPLEX,
		1.25, (0, 255, 0), 5)
	# check if the video writer is None
	if writer is None:
		# initialize our video writer
		fourcc = cv2.VideoWriter_fourcc(*"MJPG")
		writer = cv2.VideoWriter(args["output"], fourcc, 30,
			(W, H), True)
	# write the output frame to disk
	writer.write(output)
	# show the output image
	cv2.imshow("Output", output)
	key = cv2.waitKey(1) & 0xFF
	# if the `q` key was pressed, break from the loop
	if key == ord("q"):
		break
# release the file poi
[video(video-44EiVADG-1615446683526)(type-undefined)(url-undefined)(image-https://img-blog.csdnimg.cn/editor-video.png)(title-undefined)]
nters
print("[INFO] cleaning up...")
writer.release()
vs.release()
执行时需要在Terminal上输入
python predict_video.py --model model/activity.model \
	--label-bin model/lb.pickle \
	--input example_clips/tennis.mp4 \
	--output output/tennis_1frame.avi \
	--size 128
第一次运行时可能会遇到:
cv2.error: OpenCV(3.4.2) /tmp/build/80754af9/opencv-suite_1535558553474/work/modules/highgui/src/window.cpp:632: error: (-2:Unspecified error) The function is not implemented. Rebuild the library with Windows, GTK+ 2.x or Carbon support. If you are on Ubuntu or Debian, install libgtk2.0-dev and pkg-config, then re-run cmake or configure script in function 'cvShowImage'
解决方法:
pip install opencv-contrib-python


 1089
1089


 被折叠的 条评论
为什么被折叠?
被折叠的 条评论
为什么被折叠?
 到【灌水乐园】发言


