yolo目标检测数据集标注及格式介绍

本篇文章介绍yolo目标检测数据集的一般格式,及如何借助labelimg标注软件对图片进行标注。最后对数据集进行划分,并将数据集组织为ultralytics框架可用的目录结构,使数据集能够利用ultralytics框架对yolo3、yolo5、yolo8、yolo9、yolo10等进行训练。

1.安装labelimg标注软件

安装该标注软件较为简单,需要事先安装好Python。安装好python之后,直接在命令行窗口通过pip即可安装labelimg标注软件

pip install labelImg

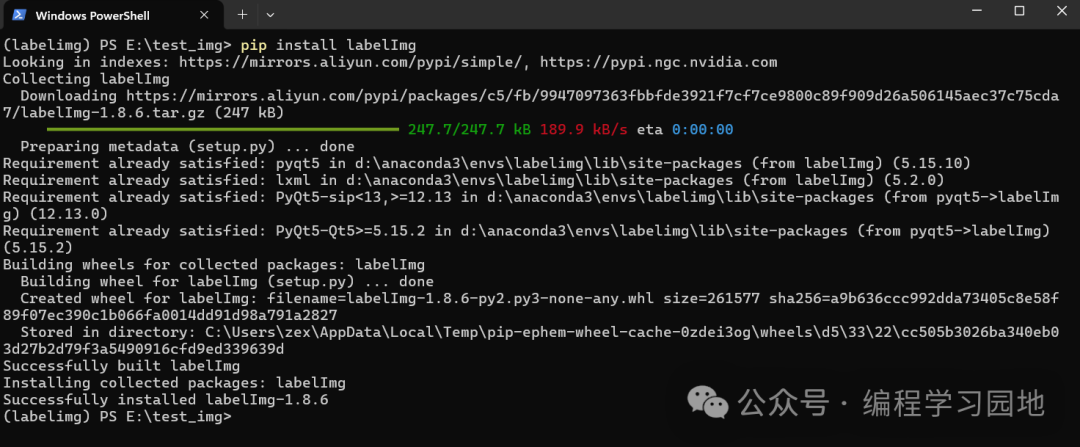
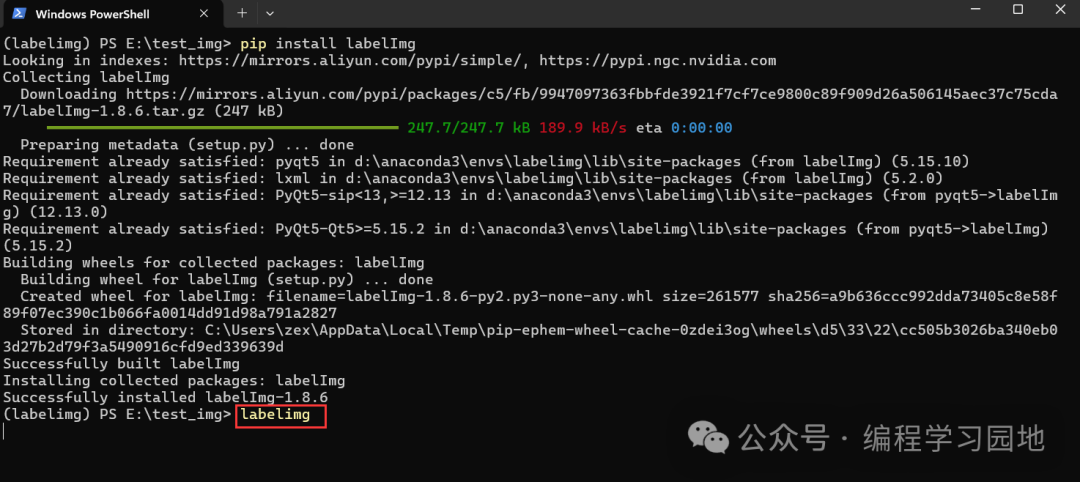
安装好之后,接着直接在命令行中输入labelimg命令,即可启动labelimg软件,接着系统会自动弹窗显示软件界面,有了界面即可点击界面中的按钮对图片进行标注。

2、对图片进行标注

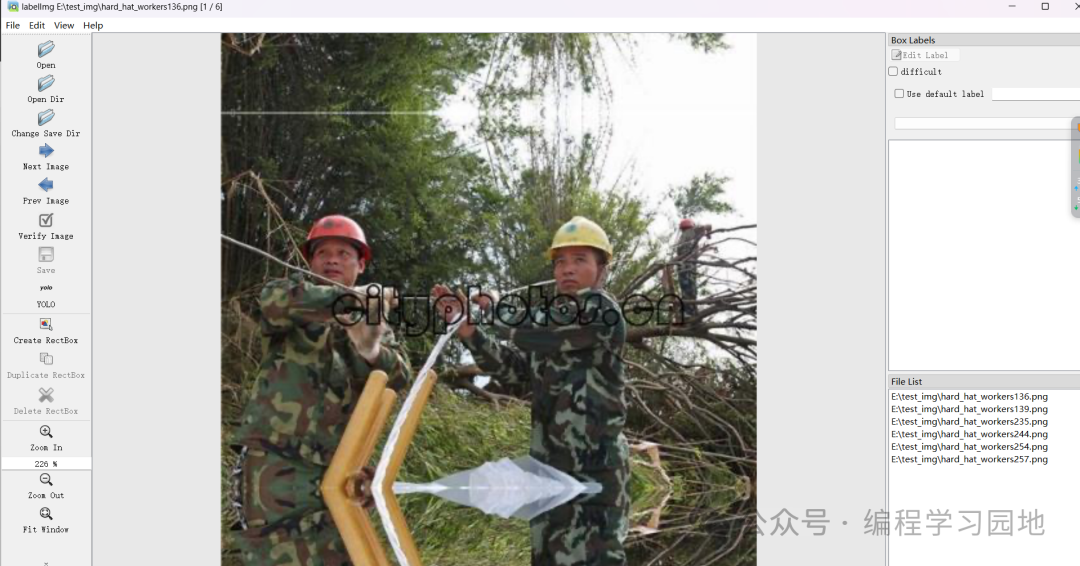
下面以test_img文件夹(该目录下有一些施工人员的图片)下的图片为例,介绍一下如何用labelimg标注软件对图片进行标注,我们的标注目标是对戴安全帽的人和未戴安全帽的人头部进行标注,戴安全帽标签为helmet、未戴安全帽标签为head。

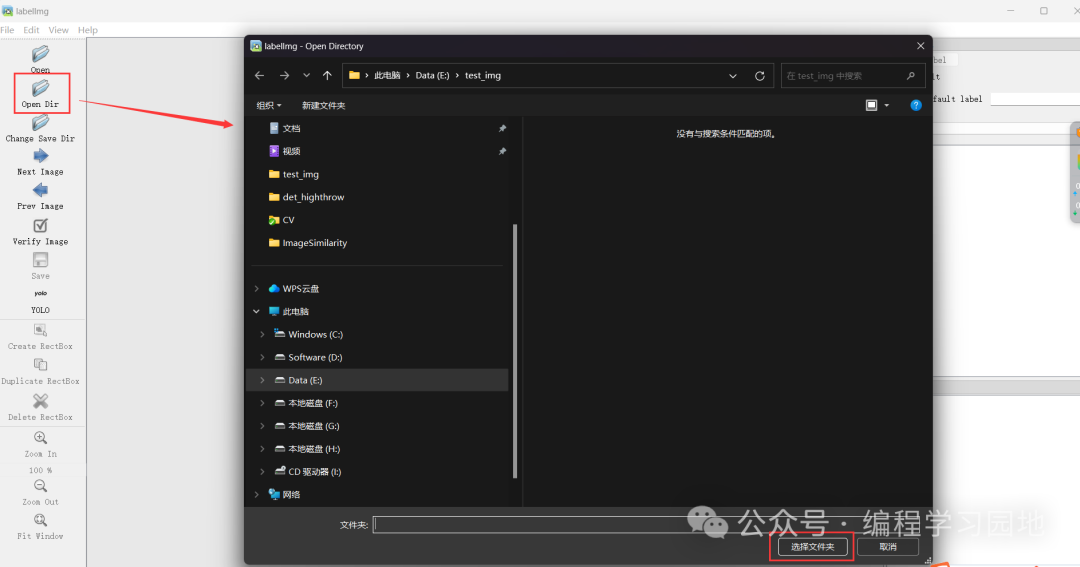
首先,点击 Open Dir 按钮,弹出文件夹选择,选择我们实现准备好的图片

接着labelimg界面中会显示选中的文件夹下第一张图片

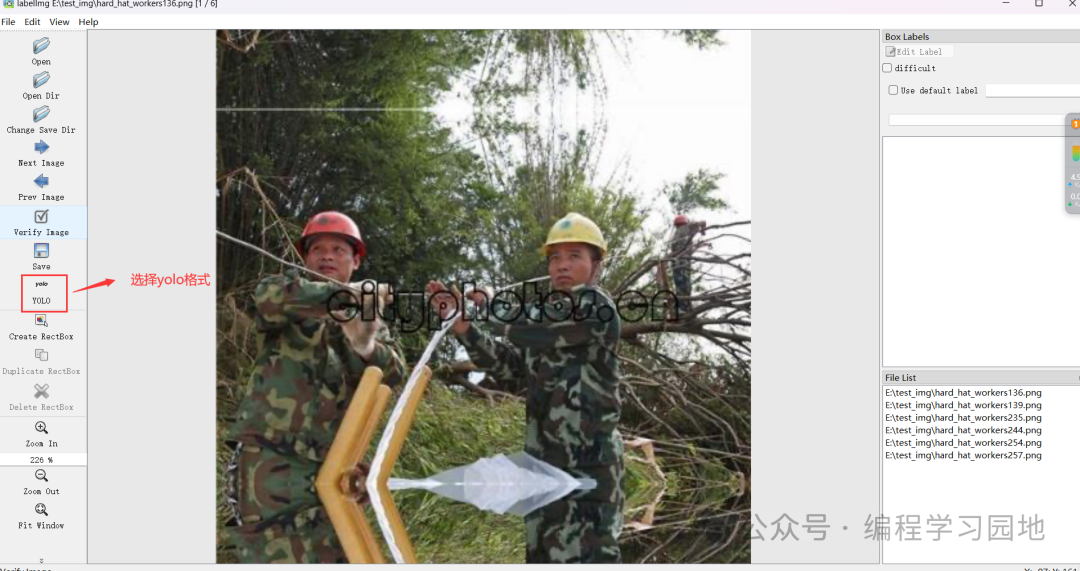
标注之前需要选择数据集保存的格式,这里有三种格式:yolo、ml、voc,我们这里选择yolo格式,点击下图的按钮进行切换选择。

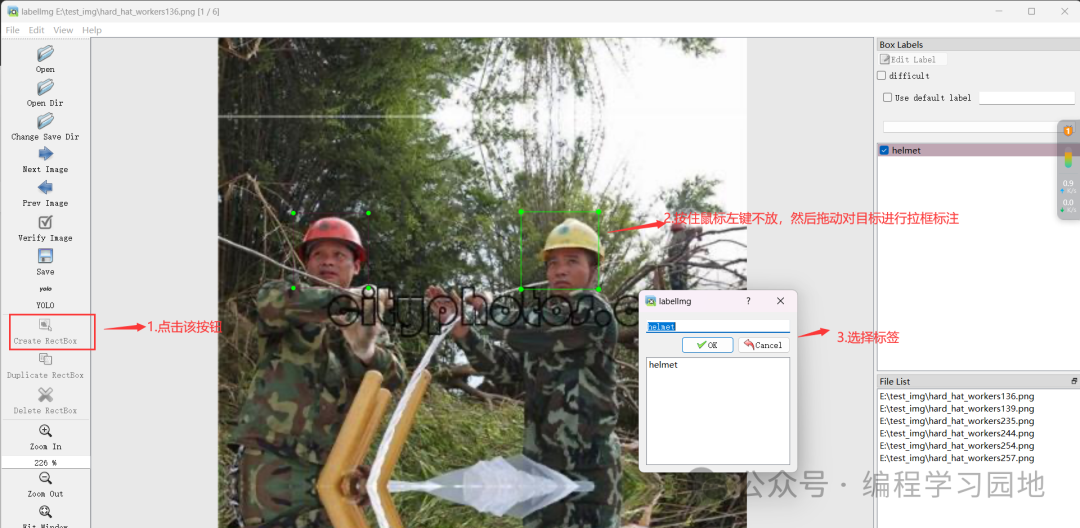
紧接着点击‘Create RectBox’按钮,然后按住鼠标左键不放并拖动鼠标,对目标进行拉框标注,框好之后松开鼠标左键自动弹出标签选择框(如下图步骤3),在输入框中输入标签即可(注意标签名称不能为中文及特殊字符,只能是英文或者数字)。最后点击左侧工具栏的'Save按钮'对当前标注好的图片进行保存,保存的文件为.txt文本

标注完并保存当前标注好的图片之后,点击左侧工具栏 ‘Next Image’对下一张图片进行标注,保存,依次往复。下面一段视频为整个步骤的实操演示:

3、标注文件结构内容分析

标注好之后,该目录下会多出一系列的.txt文本文件,图片及txt文件都存放在一个目录中,注意每张图片及其对应的txt标注文件的文件名是一模一样的,即图片和标签文件一一对应。

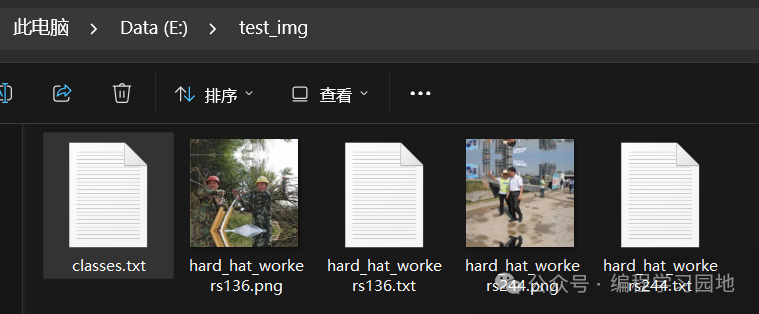
其中,classes.txt中记录了该数据集的所有标签

而其余的txt文本文件即为每张图片的标注框类别及坐标

上述标注文本中每个目标框为一行,可以看到文件名为‘hard_hat_workers244.txt’一共有四行,即代表该标签对应的图片一共有四个框。而每行的内容是按照下面格式给出的:

class_id  x  y  w  h

其中,每个字段代表的含义如下:

class_id:类别的id编号x:目标的中心点x坐标(横向)/图片总宽度y:目标的中心的y坐标(纵向)/图片总高度w:目标框的宽度/图片总宽度h:目标框的高度/图片总高度

class_id是以数字从0递增的,0代表classes.txt中第一行的标签:helmet,而1代表classes.txt中第二行的标签:head。依此类推......

4、划分训练集、验证集、测试集

我们还是以test_img文件夹内的图片及其标注文件为例,这次我们多标注几张图片将图片数量增加到840张,并对这840张图片进行一一标注。

目前,E盘下test_img目录中的图片和txt标注文件都是混做一块,我们首先把图片和txt标签分开,即图片单独存放到E盘helmet_dataset的images目录下,标签单独存放到E盘helmet_dataset的labels目录下,借助下面的脚本实现上述目标

import osimport shutilfile_lists=os.listdir('E:\\test_img')dst='E:\helmet_dataset'images_dst=os.path.join(dst,'images')labels_dst=os.path.join(dst,'labels')if not os.path.exists(images_dst):    os.makedirs(images_dst)if not os.path.exists(labels_dst):    os.makedirs(labels_dst)for f in file_lists:    if f.endswith('.jpg') or f.endswith('.png') or f.endswith('jpeg'):        pure_name=f.split('.')[0]        txt_name=str(pure_name)+'.txt'        shutil.copy(os.path.join('E:','test_img',f),images_dst)        shutil.copy(os.path.join('E:','test_img',txt_name),labels_dst)

对数据集进行划分,一般是按照7:2:1的比例划分训练集(train)、验证集(val)、测试集(test) 或者按照8:2的比例划分训练集与验证集。这里采用7:2:1的比例按照下面的脚本划分出训练集、验证集、测试集。划分后的数据集保存到E:\helmet_dataset_split

import osimport shutilimport random random.seed(0) def split_data(total_image_path, split_dataset_path, train_rate, val_rate, test_rate):    #将所有的图片名称添加到list中    total_eachclass_image = []    for image in os.listdir(total_image_path):        total_eachclass_image.append(image)    total = len(total_eachclass_image)    #打乱    random.shuffle(total_eachclass_image)    #训练集    train_images = total_eachclass_image[0:int(train_rate * total)]    #验证集    val_images = total_eachclass_image[int(train_rate * total):int((train_rate + val_rate) * total)]    #测试集    test_images = total_eachclass_image[int((train_rate + val_rate) * total):]    #从原始图片文件夹中复制训练集图片    for image in train_images:        # print(image)        old_each_img_path = total_image_path + '/'+image                split_train_img_path =  split_dataset_path + '/' + 'train' + '/' + 'images'        if not os.path.exists(split_train_img_path):            os.makedirs(split_train_img_path)        split_train_each_img_path = split_train_img_path + '/' + image        shutil.copy(old_each_img_path, split_train_each_img_path)    train_img_list = os.listdir(split_dataset_path + '/' + 'train' + '/' + 'images')    # print(new_name)    for im in train_img_list:        txt_name=im.split('.')[0]+'.txt'        old_each_txt_path = total_txt_path + '/' +txt_name        # print('old_xmlpath--->{}'.format(old_xmlpath))        split_train_txt_path = split_dataset_path + '/' + 'train' + '/' + 'labels'        if not os.path.exists(split_train_txt_path):            os.makedirs(split_train_txt_path)        split_train_each_txt_path = split_train_txt_path + '/' + txt_name        shutil.copy(old_each_txt_path, split_train_each_txt_path)     for image in val_images:        old_each_img_path = total_image_path + '/' + image        split_val_img_path = split_dataset_path + '/' + 'val' + '/' + 'images'        if not os.path.exists(split_val_img_path):            os.makedirs(split_val_img_path)        split_val_each_img_path = split_val_img_path + '/' + image        shutil.copy(old_each_img_path, split_val_each_img_path)            val_img_list = os.listdir(split_dataset_path + '/' + 'val' + '/' + 'images')     for im in val_img_list:        txt_name=im.split('.')[0]+'.txt'        old_each_txt_path = total_txt_path + '/' +txt_name        split_val_txt_path = split_dataset_path + '/' + 'val' + '/' + 'labels'        if not os.path.exists(split_val_txt_path):            os.makedirs(split_val_txt_path)        split_val_each_txt_path = split_val_txt_path + '/' + txt_name        shutil.copy(old_each_txt_path,split_val_each_txt_path)     for image in test_images:        old_each_img_path = total_image_path + '/' + image        split_test_img_path = split_dataset_path + '/' + 'test' + '/' + 'images'        if not os.path.exists(split_test_img_path):            os.makedirs(split_test_img_path)        split_test_each_img_path = split_test_img_path + '/' + image        shutil.copy(old_each_img_path, split_test_each_img_path)    test_img_list = os.listdir(split_dataset_path + '/' + 'test' + '/' + 'images')     for im in test_img_list:        txt_name=im.split('.')[0]+'.txt'        old_each_txt_path = total_txt_path + '/' +txt_name        split_test_txt_path = split_dataset_path + '/' + 'test' + '/' + 'labels'        if not os.path.exists(split_test_txt_path):            os.makedirs(split_test_txt_path)        split_test_each_txt_path = split_test_txt_path + '/' + txt_name        shutil.copy(old_each_txt_path, split_test_each_txt_path)  if __name__ == '__main__':    total_image_path = r"E:\helmet_dataset\images"    total_txt_path=r'E:\helmet_dataset\labels'    split_dataset_path=r"E:\helmet_dataset_split"    split_data(total_image_path, split_dataset_path, train_rate=0.7, val_rate=0.2, test_rate=0.1)

 利用上述脚本划分之后,E:\helmet_dataset_split目录变为如下结构:

train
├── images
└── labels

val
├── images
└── labels

test
├── images
└── labels

此时数据划分完毕,上述目录格式的数据集即为ultralytics框架可以使用的YOLO数据集格式,我们可以用该数据集借助ultralytics项目训练yolo3、yolo5、yolo8、yolo9、yolo10等网络模型。

本篇文章转载于博主的微信公众号“编程学习园地”,后续博客将不在CSDN中首发转而在该公众号中发表,觉得博主的文章对您有帮助,速速去微信关注吧

  • 18
    点赞
  • 10
    收藏
    觉得还不错? 一键收藏
  • 打赏
    打赏
  • 0
    评论
评论
添加红包

请填写红包祝福语或标题

红包个数最小为10个

红包金额最低5元

当前余额3.43前往充值 >
需支付:10.00
成就一亿技术人!
领取后你会自动成为博主和红包主的粉丝 规则
hope_wisdom
发出的红包

打赏作者

城南皮卡丘

你的鼓励将是我创作的最大动力

¥1 ¥2 ¥4 ¥6 ¥10 ¥20
扫码支付:¥1
获取中
扫码支付

您的余额不足,请更换扫码支付或充值

打赏作者

实付
使用余额支付
点击重新获取
扫码支付
钱包余额 0

抵扣说明:

1.余额是钱包充值的虚拟货币,按照1:1的比例进行支付金额的抵扣。
2.余额无法直接购买下载,可以购买VIP、付费专栏及课程。

余额充值