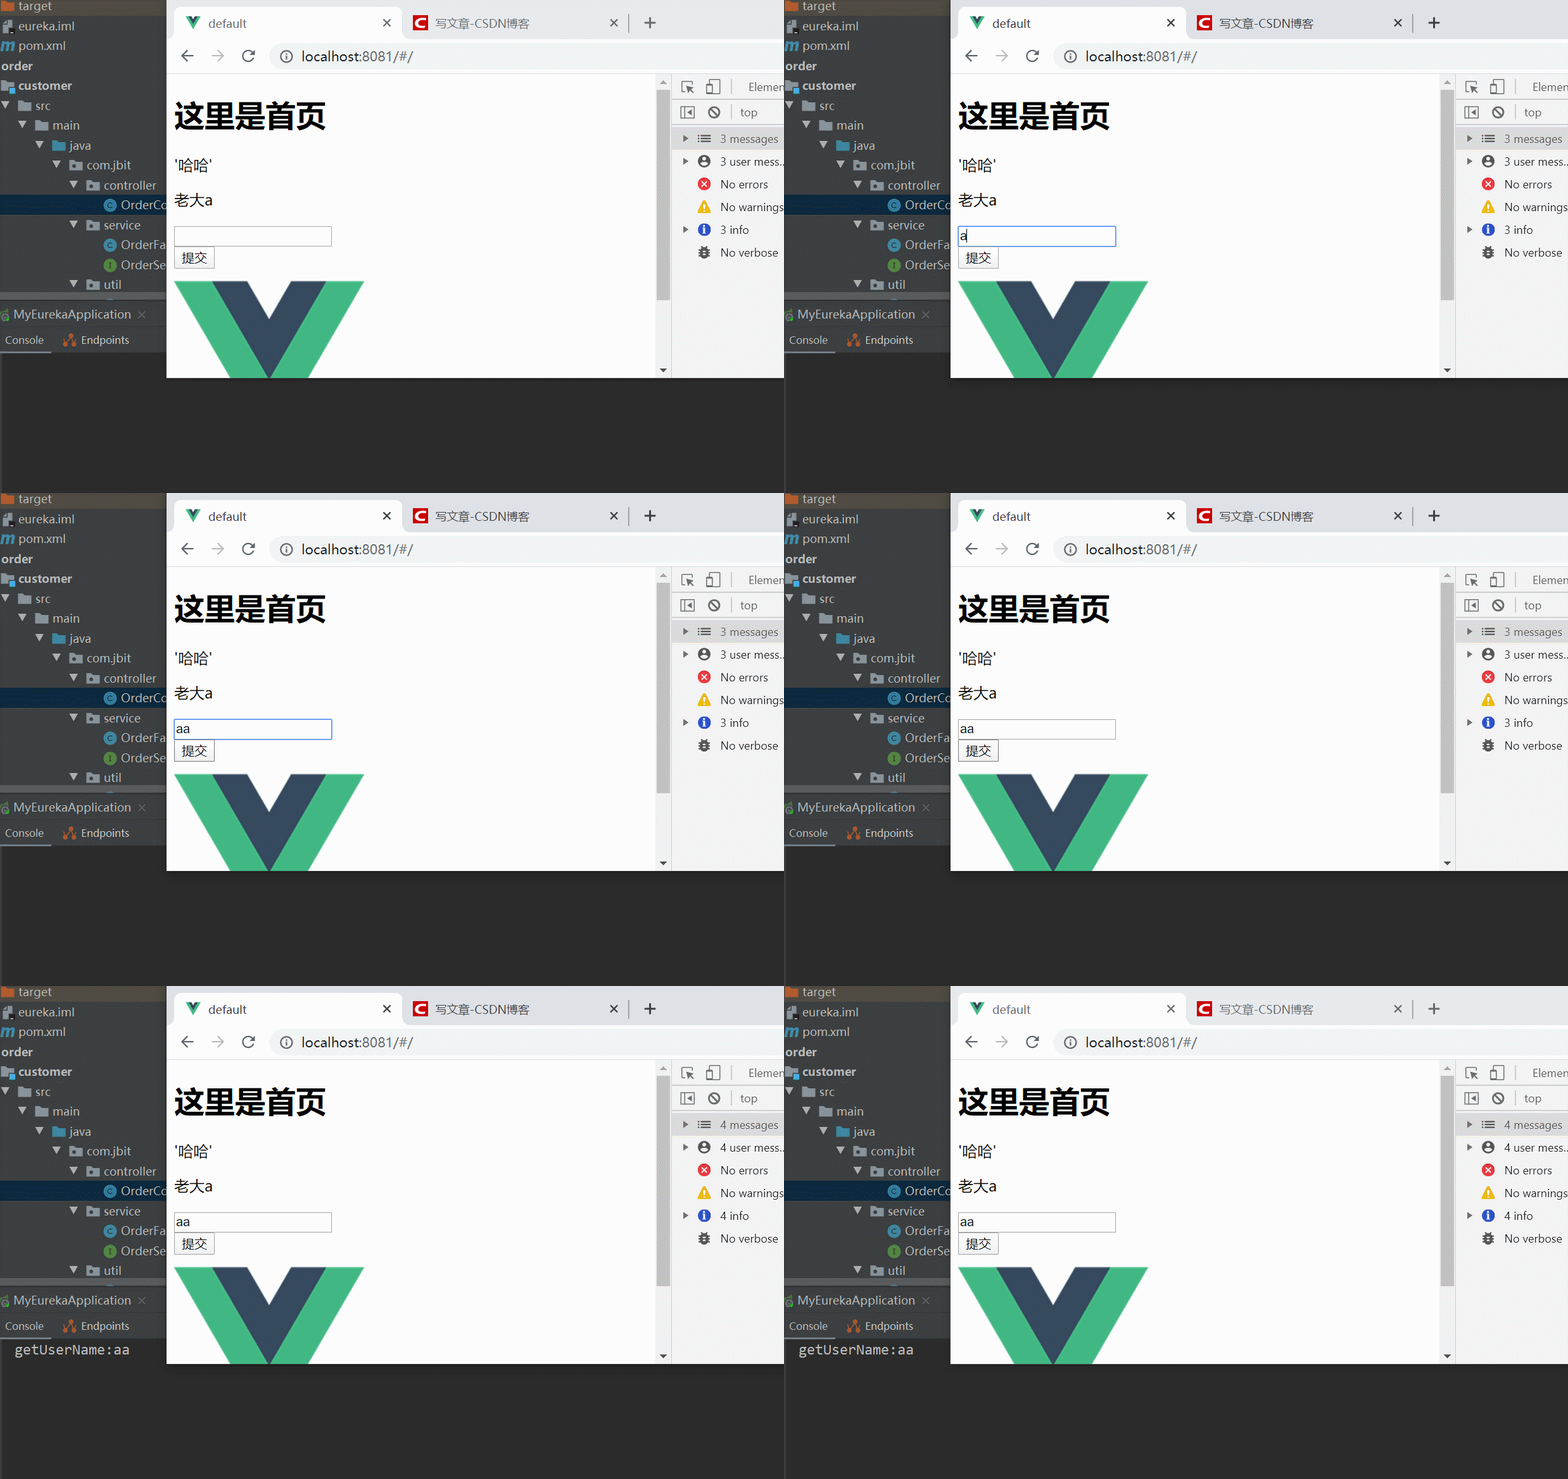
这里我们需要使用axios,所以在终端里面先运行npm install axios --save
运行好之后的页面
index.vue
<template>
	<div>
		<h1>这里是首页</h1>
	</div>
</template>

<script>
	//引入axios(类似于ajax)
	import axios from "axios"

	export default{
		mounted(){
			//对就你java中请求的名称
			axios.get("/selectAll").then(
				res => {
					console.log(res);
				}
			)
		}

	}
</script>

<style>
</style>
在项目的根路径下创建vue.config.js(作用是对后台请求的处理简化)

module.exports = {
	//配置接口转发
	devServer: {
		//对应你Java项目访问的请求
		proxy: "http://127.0.0.1:8080/order"
	}
};
你访问的java中的项目请求路径就是vue.config.js的proxy的值加index.vue中axios.get()里面的值
例如我访问的就是"http://127.0.0.1:8080/order/selectAll",将前面公用部分的放到了proxy,后者就是一个一个的请求
启动后摁下f12后访问的结果

将list数据取出来显示
index.vue
<template>
	<div>
		<h1>这里是首页</h1>
		<Header :list="userList"></Header>
	</div>
</template>

<script>
	//引入组件
	import Header from './component/header.vue'
	import axios from "axios"

	export default{
		components: {
			Header
		},
		data:function(){
			return{
				userList:[]
			}
		},
		mounted(){
			axios.get("/selectAll").then(
				res => {
					console.log(res);
					const data=res.data;
					this.userList=data;

				}
			)
		}

	}
</script>

<style>
</style>
header.vue
<!--组件-->
<template>
	<div>
		<!-- <h1>这里是头部部分 {{name}}</h1> -->
		<p v-for="user in list" :key="user.id">
			{{user.userName}}
		</p>
	</div>

</template>

<script>
	export default{
		name:'Header',
		props:{
			list:Array
		}
	}
</script>

<style>
</style>

传递参数
index.vue
<template>
	<div>
		<h1>这里是首页</h1>
		<!--获取str的值并且传给组件Header的属性name-->
		<Header :name="str" :list="userList"></Header>
	</div>
</template>

<script>
	//引入组件
	import Header from './component/header.vue'
	import axios from "axios"

	export default{
		//一个vue实例,实例名称叫Index
		name:"Index",
		components: {
			Header
		},
		data:function(){
			return{
				str:"张三",
				/* userList:[
					{"id":1,"userName":"张三"},
					{"id":2,"userName":"李四"},
					{"id":3,"userName":"王五"}
				] */
				userList:[]
			}
		},
		mounted(){
			axios.get("/selectAll").then(
				res => {
					console.log(res);
					const data=res.data;
					this.userList=data;
				}
			)
		}
	}
</script>

<style>
</style>
header.vue
<!--组件-->
<template>
	<div>
		<!-- <h1>这里是头部部分 {{name}}</h1> -->
		<p v-for="user in list" :key="user.id">
			{{user.userName}}
		</p>

		<input v-model="userName" />
		<br />
		<button @click="login">提交</button>
	</div>

</template>

<script>
	import axios from 'axios'

	export default{
		name:"Header",
		data:function(){
			return{
				userName:""
			}
		},
		props:{
			list:Array,
			name:String
		},
		methods:{
			login(){
				axios.post("/login",{
					userName:this.userName
				}).then(
					res=>{
						console.log(res);
					}
				)
			}
		}
	}
</script>

<style>
</style>
controller
 @PostMapping("login")
    public String login(@RequestBody User user){
        System.out.println("getUserName:"+user.getUserName());

        return "success!!!";
    }

对axios的简化
在main.js中加入以下两行代码
import axios from 'axios'
Vue.prototype.$http = axios
其他页面的导入axios的内容就可以注释了


 313
313


 被折叠的 条评论
为什么被折叠?


