


Spirng Bean 元信息配置阶段
1 面向资源
- xml配置(很熟悉了不做讨论)
- Properties配置(不经常使用)
public class BeanMetaDemo {
    public static void main(String[] args) {
        DefaultListableBeanFactory factory = new DefaultListableBeanFactory();
        PropertiesBeanDefinitionReader reader = new PropertiesBeanDefinitionReader(factory);
        Resource resource = new ClassPathResource("/meta-info/person.properties");
        // 解决乱码的问题
        EncodedResource encodedResource = new EncodedResource(resource, "UTF-8");
        int i = reader.loadBeanDefinitions(encodedResource);
        Object person = factory.getBean("person");
        System.out.println(person);
    }
}
person.(class)=pojo.Person
person.id=10010
person.name=李勇
2 面向注解
@Bean;
@Component;
@Service;
@Repository;
3 面向API
BeanDefinitionBuilder builder = BeanDefinitionBuilder.genericBeanDefinition(TestBean.class)
           .setScope("singleton")
           .setInitMethodName("init")
           .setDestroyMethodName("destroy");
Bean 元信息解析
1 面向资源BeanDefiniton 解析
- BeanDefinitonReader
- xml 解析器 BeanDefinitionParser
2 面向注解BeanDefiniton - AnnotatedBeanDefinitonReader
// 基于注解的APIBean注册
public class AnnotatedBeanDefinitionParsingDemo {
 public static void main(String[] args) {
     DefaultListableBeanFactory beanFactory = new DefaultListableBeanFactory();
     AnnotatedBeanDefinitionReader reader = new AnnotatedBeanDefinitionReader(beanFactory);
     int beforeCount = beanFactory.getBeanDefinitionCount();
     reader.register(AnnotatedBeanDefinitionParsingDemo.class);
     int afterCount = beanFactory.getBeanDefinitionCount();

     System.out.println(afterCount - beforeCount);
     AnnotatedBeanDefinitionParsingDemo bean = beanFactory.getBean(AnnotatedBeanDefinitionParsingDemo.class);
     System.out.println(bean);
 }
Bean注册阶段
BeanDefinitionregistery
@Override
	public void registerBeanDefinition(String beanName, BeanDefinition beanDefinition)
			throws BeanDefinitionStoreException {

		Assert.hasText(beanName, "Bean name must not be empty");
		Assert.notNull(beanDefinition, "BeanDefinition must not be null");

		if (beanDefinition instanceof AbstractBeanDefinition) {
			try {
				((AbstractBeanDefinition) beanDefinition).validate();
			}
			catch (BeanDefinitionValidationException ex) {
				throw new BeanDefinitionStoreException(beanDefinition.getResourceDescription(), beanName,
						"Validation of bean definition failed", ex);
			}
		}

		BeanDefinition existingDefinition = this.beanDefinitionMap.get(beanName);
		if (existingDefinition != null) {
			if (!isAllowBeanDefinitionOverriding()) {
				throw new BeanDefinitionOverrideException(beanName, beanDefinition, existingDefinition);
			}
			else if (existingDefinition.getRole() < beanDefinition.getRole()) {
				// e.g. was ROLE_APPLICATION, now overriding with ROLE_SUPPORT or ROLE_INFRASTRUCTURE
				if (logger.isInfoEnabled()) {
					logger.info("Overriding user-defined bean definition for bean '" + beanName +
							"' with a framework-generated bean definition: replacing [" +
							existingDefinition + "] with [" + beanDefinition + "]");
				}
			}
			else if (!beanDefinition.equals(existingDefinition)) {
				if (logger.isDebugEnabled()) {
					logger.debug("Overriding bean definition for bean '" + beanName +
							"' with a different definition: replacing [" + existingDefinition +
							"] with [" + beanDefinition + "]");
				}
			}
			else {
				if (logger.isTraceEnabled()) {
					logger.trace("Overriding bean definition for bean '" + beanName +
							"' with an equivalent definition: replacing [" + existingDefinition +
							"] with [" + beanDefinition + "]");
				}
			}
			this.beanDefinitionMap.put(beanName, beanDefinition);
		}
		else {
			// 线程安全
			if (hasBeanCreationStarted()) {
				// Cannot modify startup-time collection elements anymore (for stable iteration)
				synchronized (this.beanDefinitionMap) {
					this.beanDefinitionMap.put(beanName, beanDefinition);
					List<String> updatedDefinitions = new ArrayList<>(this.beanDefinitionNames.size() + 1);
					// 保证顺序
					updatedDefinitions.addAll(this.beanDefinitionNames);
					updatedDefinitions.add(beanName);
					this.beanDefinitionNames = updatedDefinitions;
					removeManualSingletonName(beanName);
				}
			}
			else {
				// Still in startup registration phase
				this.beanDefinitionMap.put(beanName, beanDefinition);
				this.beanDefinitionNames.add(beanName);
				removeManualSingletonName(beanName);
			}
			this.frozenBeanDefinitionNames = null;
		}

		if (existingDefinition != null || containsSingleton(beanName)) {
			resetBeanDefinition(beanName);
		}
	}
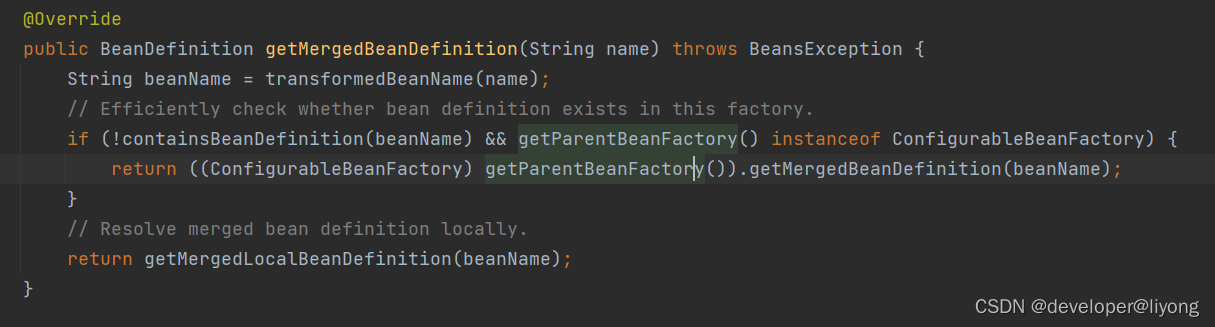
BeanDefinition 合并阶段
BeanDefinition#getParentName
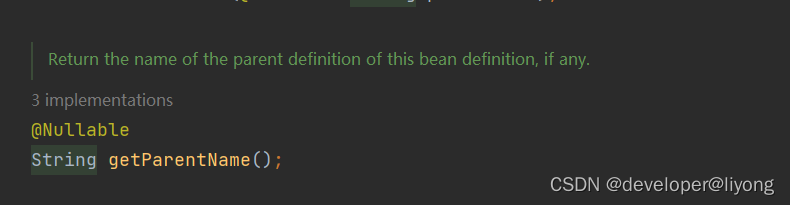
在xml里面是通过这个属性来配置的,所以需要classloader的参与:

在注解其实本身就包含了继承关系,可以直接拿到父类信息。
1 没有父类了已经RootBeanDefinition 不需要合并
2 普通的BeanDefinition为GenericBeanDefinition需要合并
合并过程中GenericBeanDefinition->RootBeanDefinition
代码贴士:ConcurrentHashMap虽然是线程安全的但是只针对于单个操作,get和put,如果有多个get,put操作一起也不能保证是线程安全的。
Bean Class 加载
这里返回的是一个文本BeanDefinition#getBeanClassName
 AbstractAutowireCapableBeanFactory#createBean
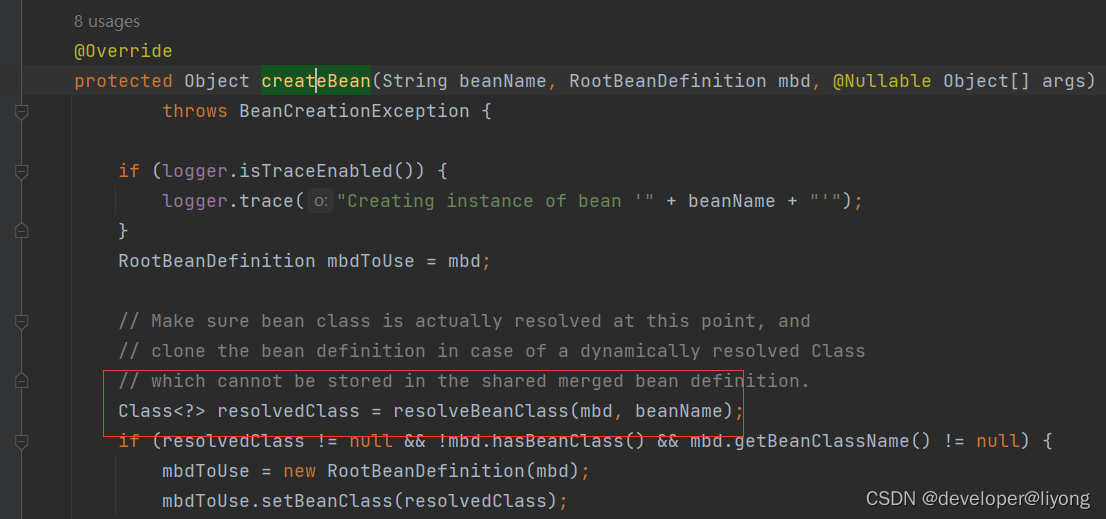
org.springframework.beans.factory.support.AbstractBeanDefinition#resolveBeanClass
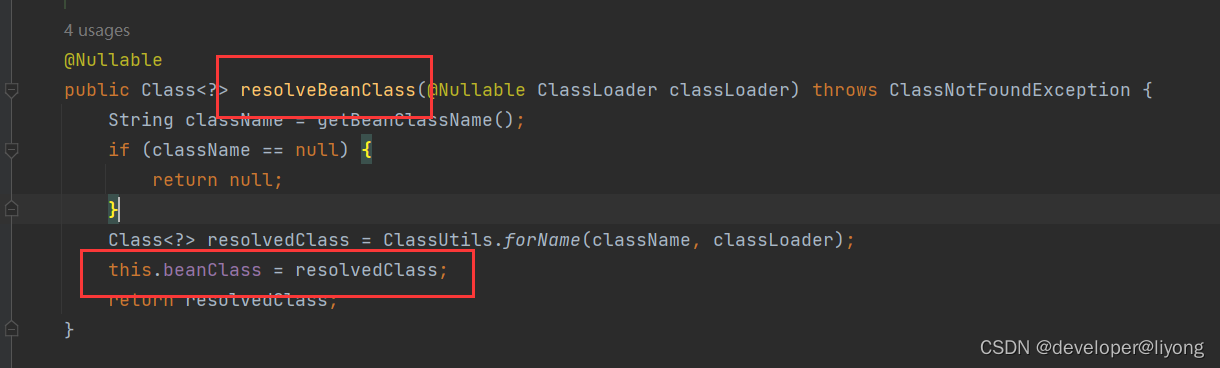
this.beanClass 之前是字符串类型,在处理完毕以后是Class类型。
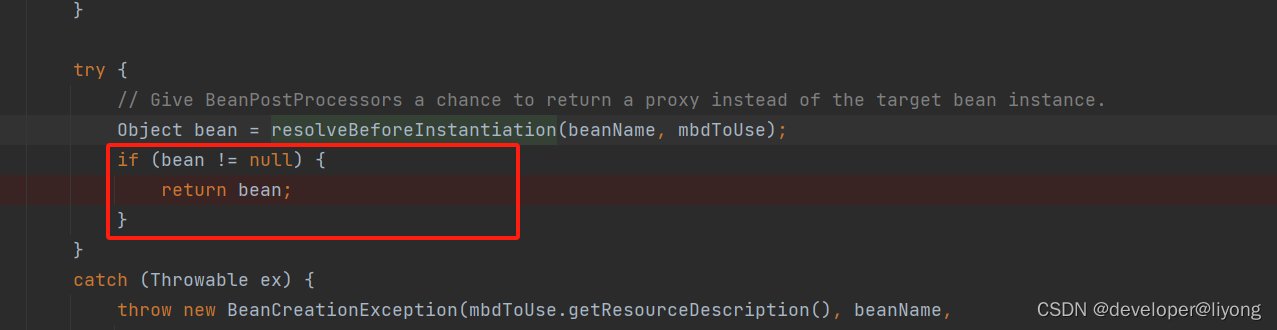
Bean实例化前阶段
InstantiationAwareBeanPostProcessor#postProcessBeforeInstantiation
通常用于替换之前的实现类,绕开Spring的实例化。
public class BeanInstantiationLifeCycleDemo {

    @Bean
    public Person person() {
        Person person = new Person();
        person.setName("liyong");
        person.setId(11L);
        return person;
    }
    public static void main(String[] args) {
        AnnotationConfigApplicationContext context = new AnnotationConfigApplicationContext();
        context.register(BeanInstantiationLifeCycleDemo.class);
        DefaultListableBeanFactory beanFactory = (DefaultListableBeanFactory) context.getBeanFactory();
        beanFactory.addBeanPostProcessor(new MyPostProcessBeforeInstantiation());
        context.refresh();
        Object person = context.getBean("person");
        System.out.println(person);
    }
    static class MyPostProcessBeforeInstantiation implements InstantiationAwareBeanPostProcessor {
        @Override
        public Object postProcessBeforeInstantiation(Class<?> beanClass, String beanName) throws BeansException {
            // 实例化之前执行 如果说满足条件直接替换之前的实现
            if (ObjectUtils.nullSafeEquals("person", beanName) && Person.class.equals(beanClass)) {
                Person person = new Person();
                person.setId(11L);
                person.setName("person");
                return person;
            }
            return null;
        }
    }
}
在这里我们返回了我们创建的对象,所以后面的操作不再进行了:
Spring Bean 实例化阶段
实例化方式
- 传统方式
- 实例化策略InstantitaionStrategy
构造器依赖注入
InstantitaionStrategy有两种实现方法
1 传统的实现方法
AbstractAutowireCapableBeanFactory#createBeanInstance
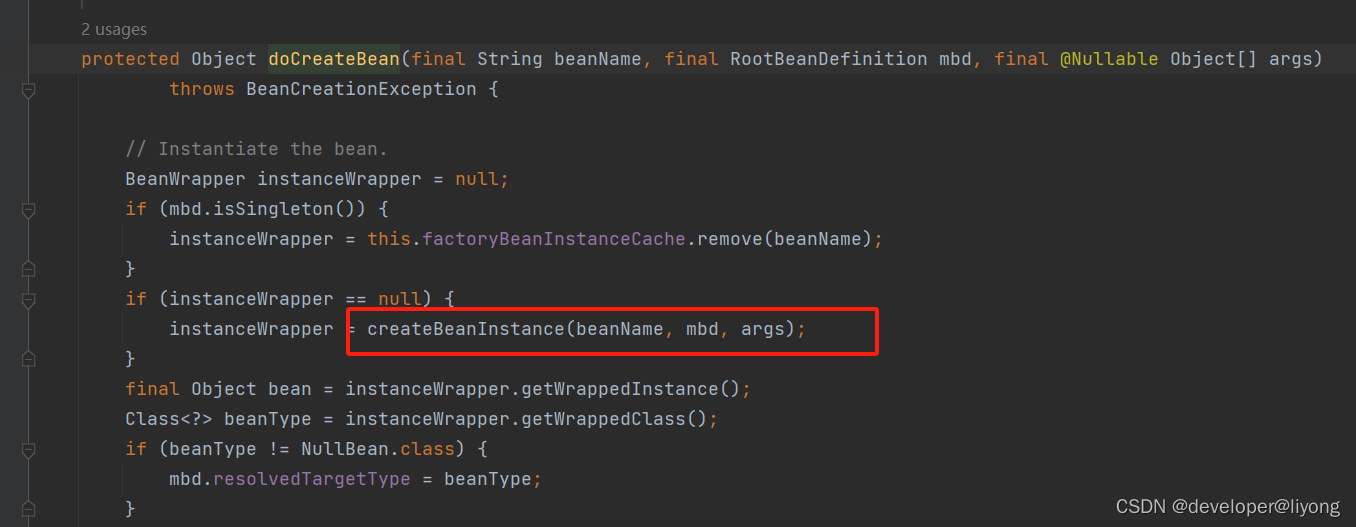
2 特殊的实现方法
Spring Bean 实例化后阶段
这里控制了对象实例化以后是否对属性进行赋值:
InstantiationAwareBeanPostProcessor#postProcessAfterInstantiation
@Override
public boolean postProcessAfterInstantiation(Object bean, String beanName) throws BeansException {
   // 这里就可以注入我们自己的值,这里和前面before的区别就是 这里我们对象已经被创建了,我们是在已经创建好的对象给它改变属性值
   if (ObjectUtils.nullSafeEquals("person", beanName) && Person.class.equals(bean.getClass())) {
       Person person = (Person) bean;
       person.setId(11L);
       person.setName("person");
       return false;
   }
   return true;
}
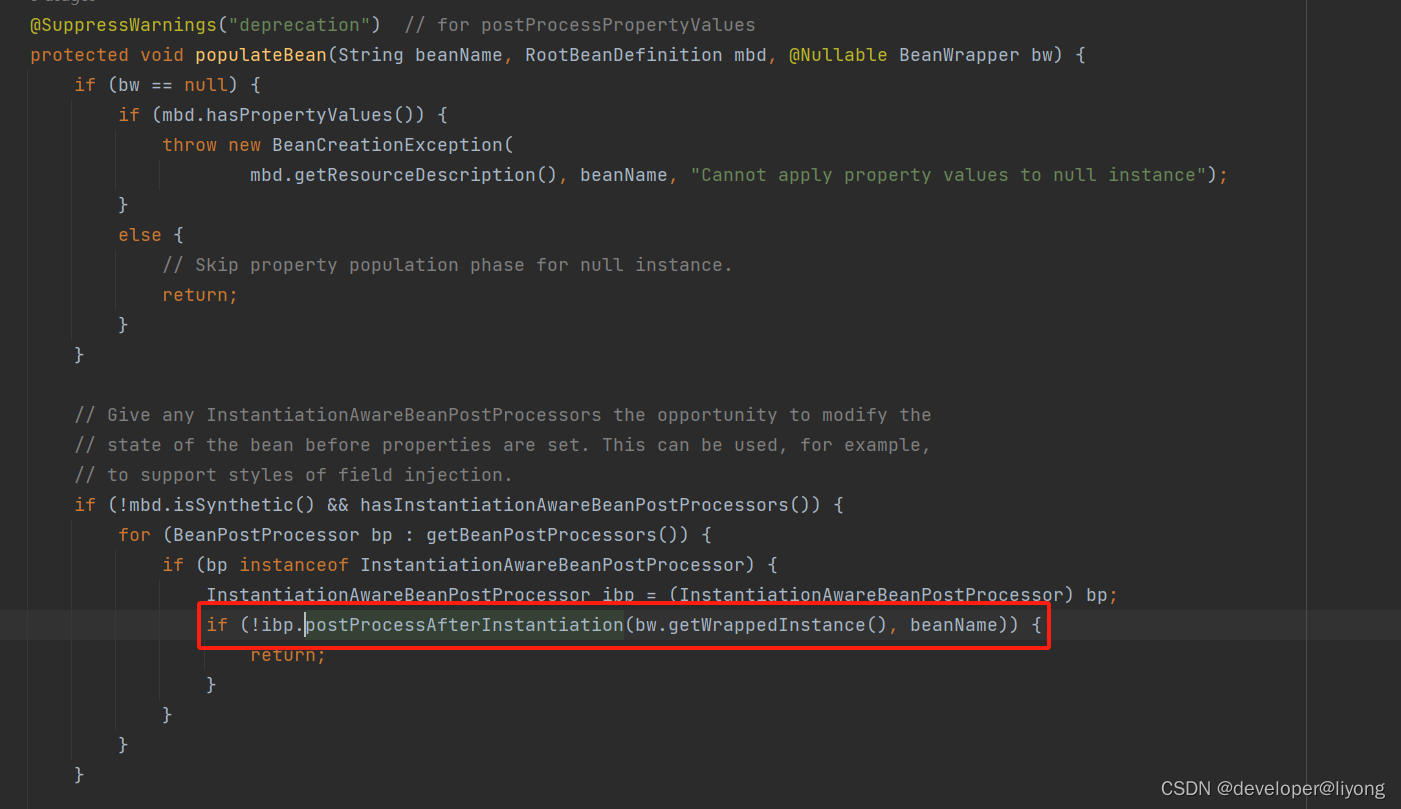
在这里我们返回了false,所以后面操作不会执行了,而后面的操作也就是赋值属性。
Spring Bean 属性赋值前阶段
Bean 属性值元信息
- PropertyValues
Bean属性值前回调
- InstantiationAwareBeanPostProcessor#postProcessPropertyValues 注意到在高版本的Spring 这个方法已经被打上了过时的标签
- InstantiationAwareBeanPostProcessor#postProcessProperties (5.1及以后)
如果我们希望拦截属性赋值操作
@Override
public PropertyValues postProcessProperties(PropertyValues pvs, Object bean, String beanName) throws BeansException {
   // 这里就可以注入我们自己的值 需要注意如果我们postProcessAfterInstantiation 已经返回了false这里就不会执行
   if (ObjectUtils.nullSafeEquals("person", beanName) && Person.class.equals(bean.getClass())) {
       MutablePropertyValues propertyValues = new MutablePropertyValues();
       propertyValues.add("number", "1111");
       return propertyValues;
   }
   return pvs;
}
Spring 生命周期 Aware 接口的顺序
其实顺序就是下面这个顺序:
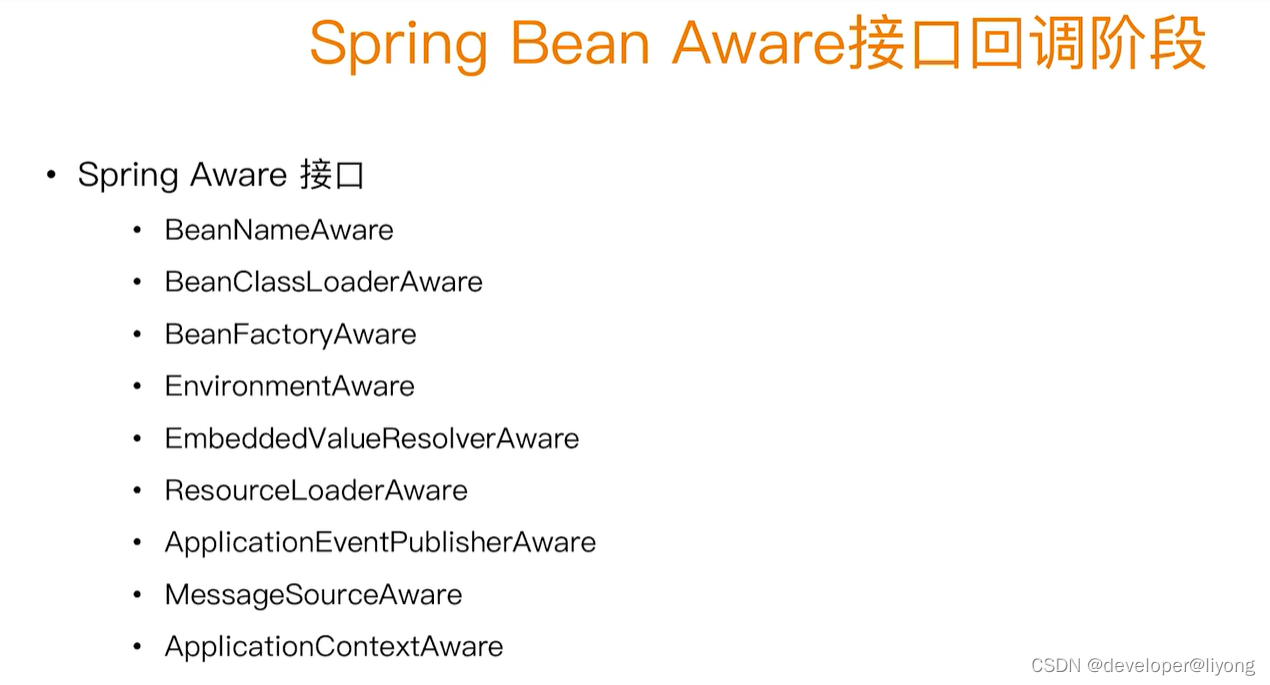
我们可以看到源码中的调用顺序:
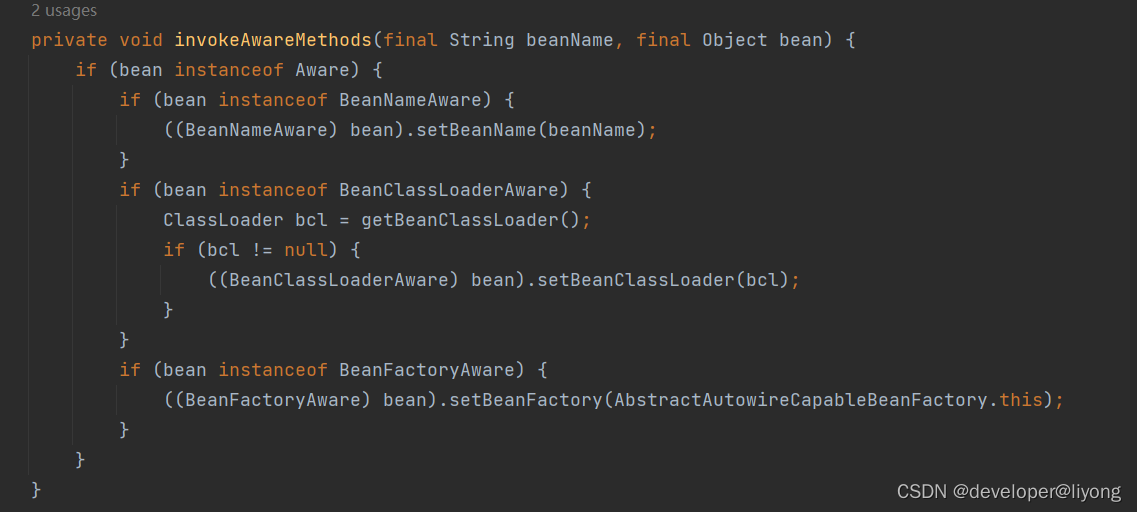
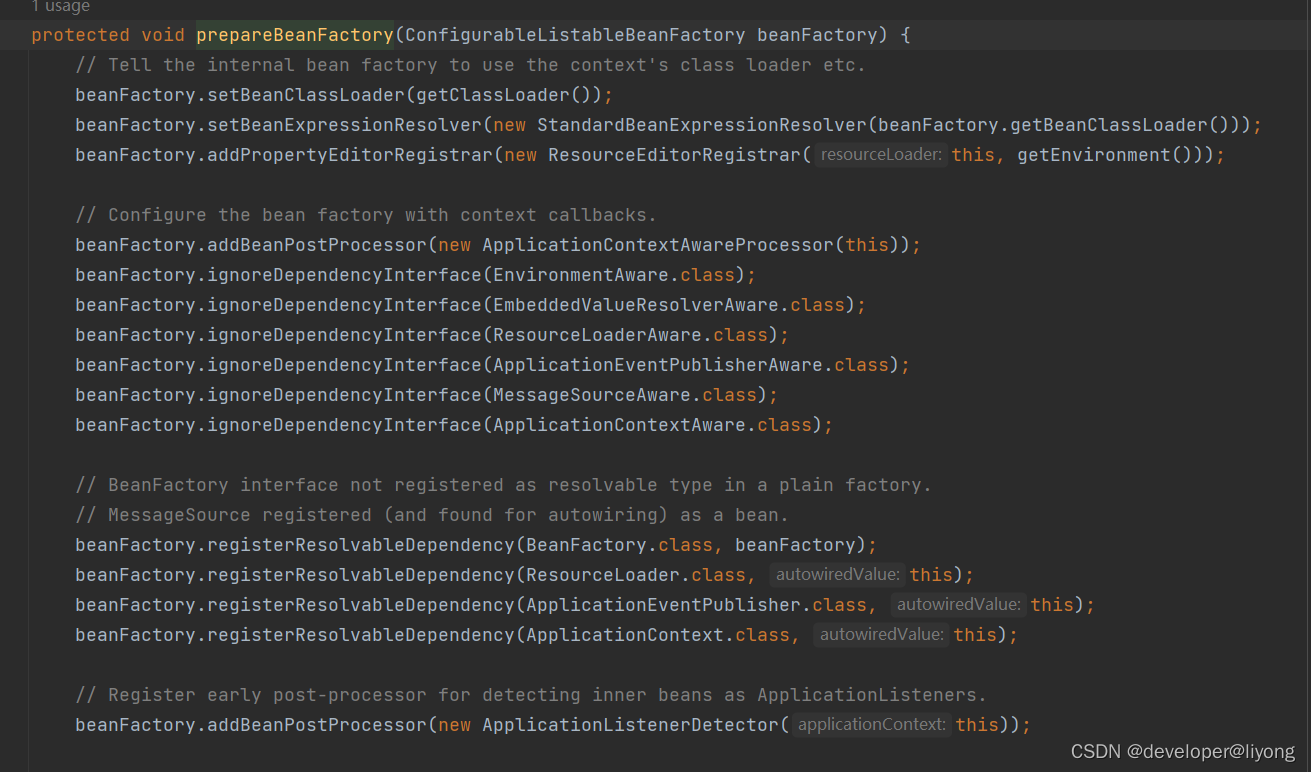
EnvironmentAware 以及后面的接口都是属于ApplicationContext的生命周期,普通的BeanFactory 并不会回调这些Aware接口,在操作ApplicationContext的时候才会回调这些接口,因为在ApplicationContext初始化阶段,会添加一个AwarePostProcessor但是这个类是内置类,所以只有与ApplicationContext打交道才会有更多的Aware接口方法回调。
SpirngBean初始化 前阶段
在前面的讨论,已经完成了以下工作,这些工作也是属于前阶段
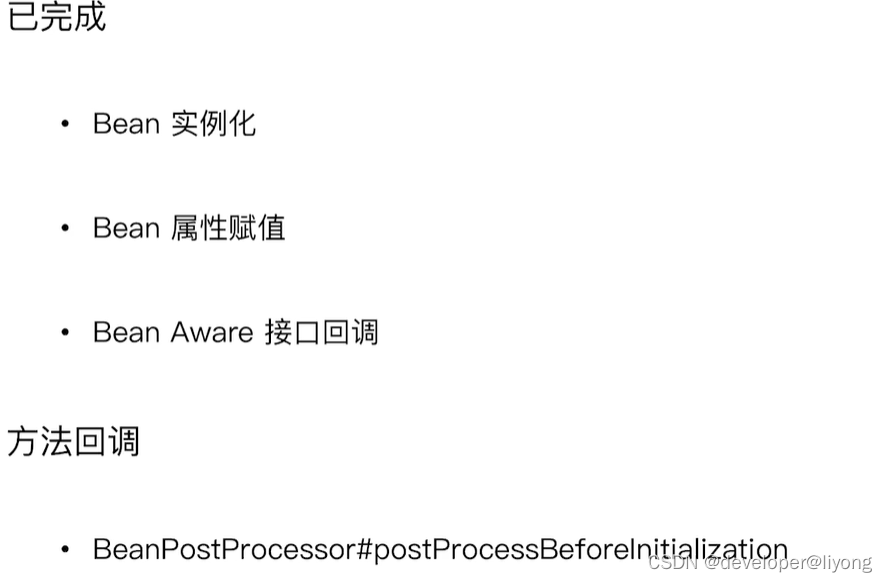
InstantiationAwareBeanPostProcessor#postProcessBeforeInitialization
@Override
public Object postProcessBeforeInitialization(Object bean, String beanName) throws BeansException {

}
源码是在这里进行应用的:
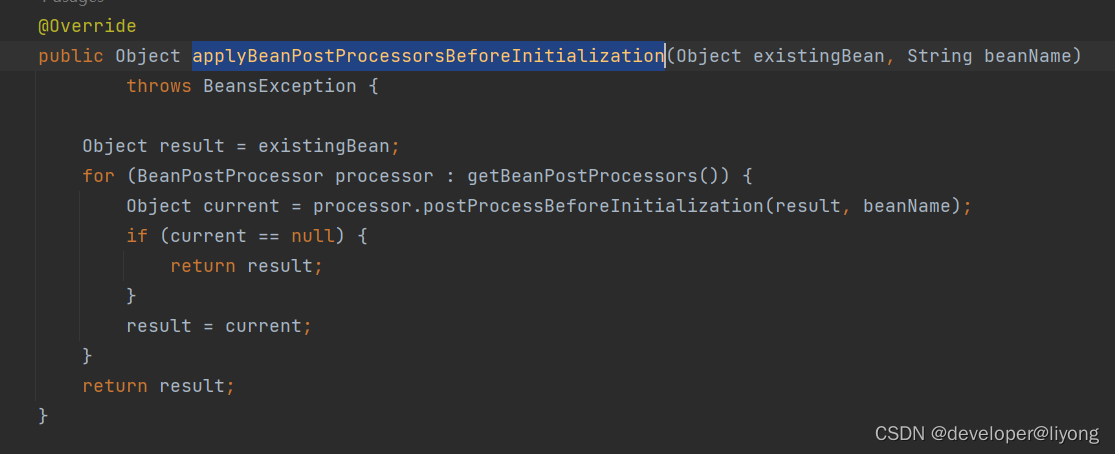
AbstractApplicationContext#prepareBeanFactory
SpringBean 初始化阶段
他们的执行顺序就是下面的执行顺序
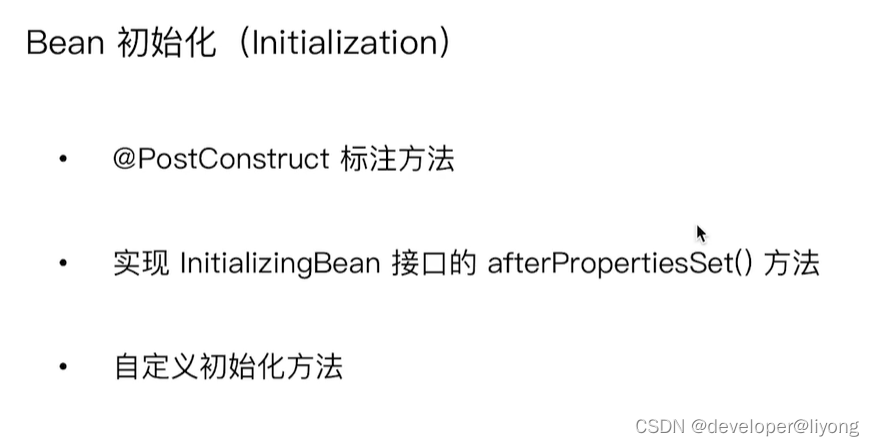
@PostConstruct 是依赖于注解驱动的,如果通过xml的方式是不会触发的,因为没有对应的PostProcessor。如果我们需要这个生效
beanFactory.addBeanPostProcessor(new CommonAnnotationPostProcessor());
自定义方法是通过xml init-method来进行配置。
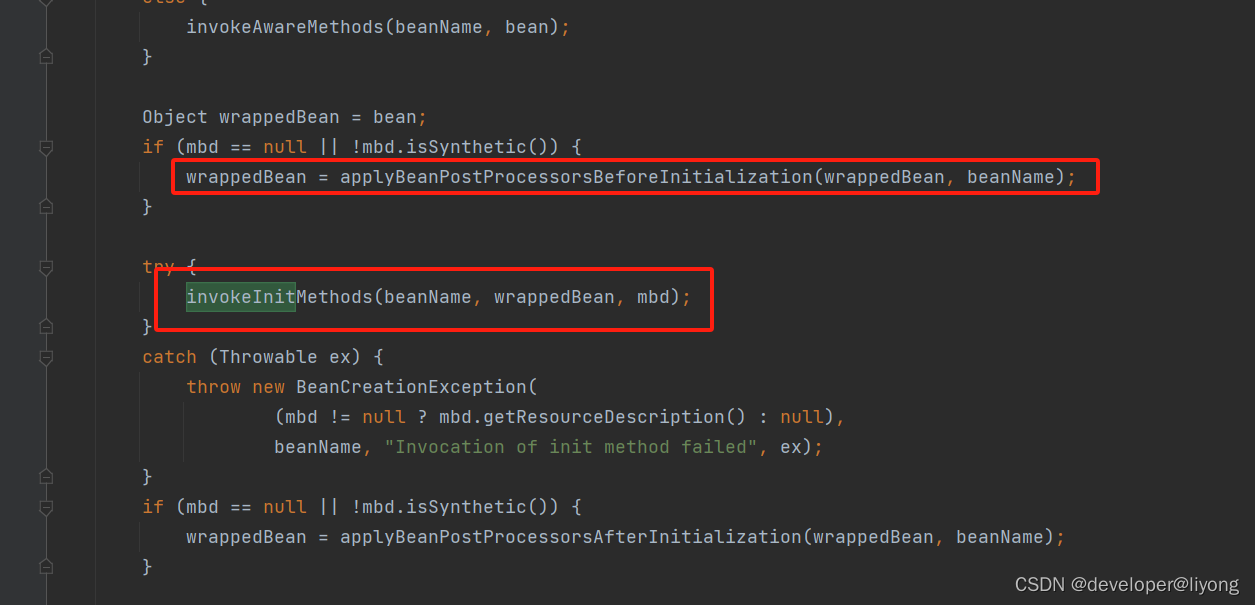
AbstractAutowireCapableBeanFactory#initializeBean
实际上PostConstruct是在这个方法applyBeanPostProcessorsBeforeInitialization进行触发的,核心代码在InitDestroyAnnotationBeanPostProcessor里面CommonAnnotationBeanPostProcessor没有postProcessBeforeInitialization方法而是继承InitDestroyAnnotationBeanPostProcessor所以最终调用会到InitDestroyAnnotationBeanPostProcessor类,因为LifecycleElement里面存储了注解标注的方法,通过反射的方式进行调用。
初始化后阶段
BeanPostProcessor#postProcessAfterInitialization
@Override
public Object postProcessAfterInitialization(Object bean, String beanName) throws BeansException {
    return InstantiationAwareBeanPostProcessor.super.postProcessAfterInitialization(bean, beanName);
}
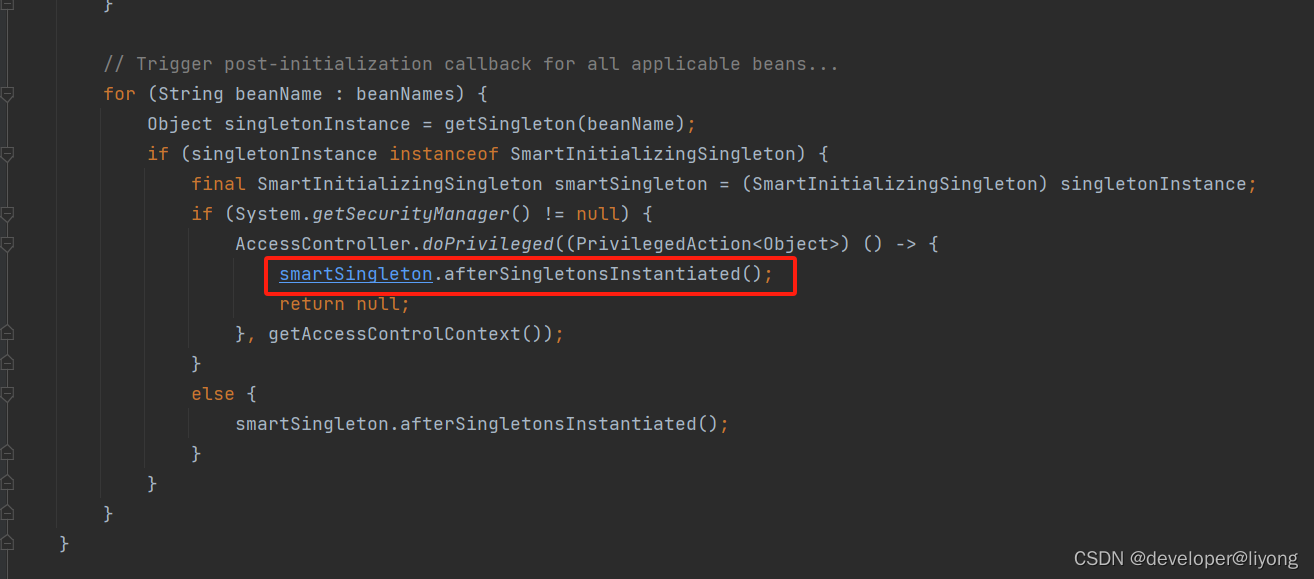
初始化完成阶段
通过下面这个接口来实现
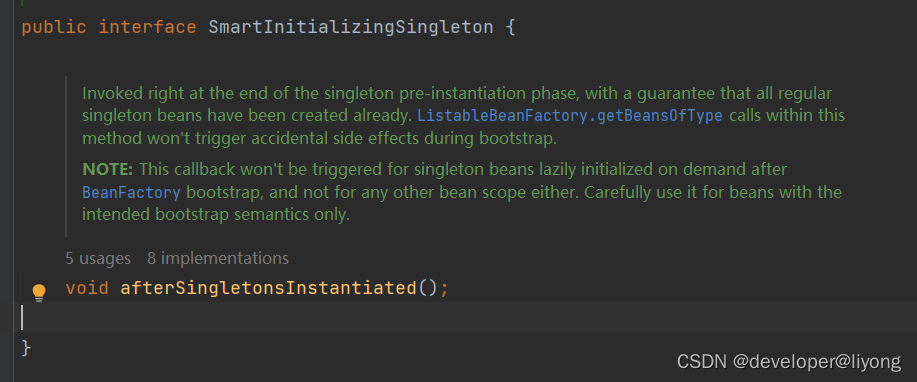
preInstantiateSingletons在这个方法里面被调用,他通常需要在ApplicationContext来进行使用,需要显式的调用。确保Bean已经被完全初始化。
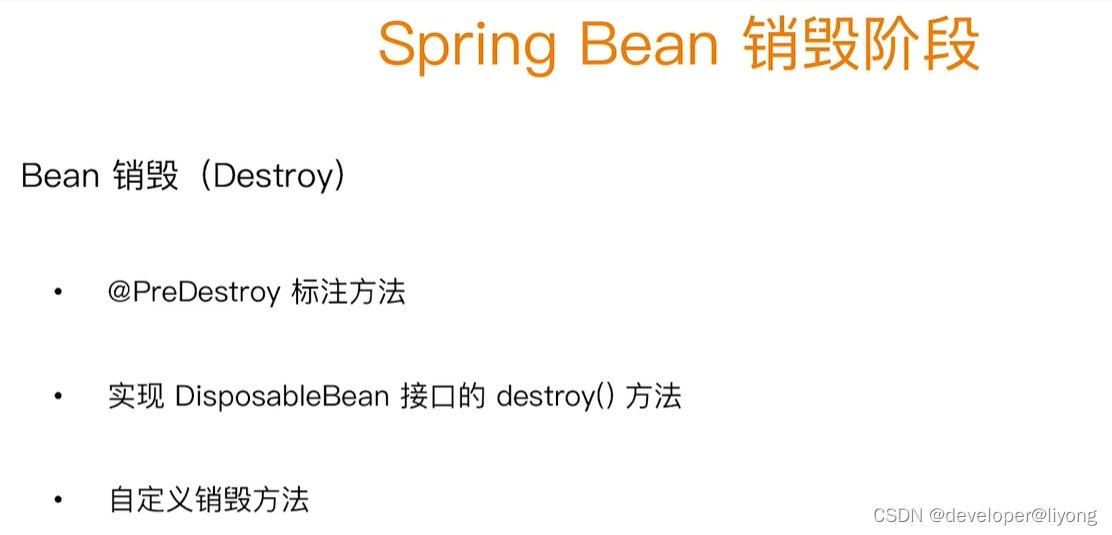
Spring Bean销毁阶段

DisposableBeanAdapter#destroy()
销毁前:
DestructionAwareBeanPostProcessor
@Override
public void postProcessBeforeDestruction(Object bean, String beanName) throws BeansException {
}
beanFactory.addBeanPostProcessor(new MyDestructionAwareBeanPostProcessor());
// 这个销毁是在容器中销毁 而不是在Java 中销毁
beanFactory.destoryBean("person", person);
Spring销毁阶段
有这样几种方式
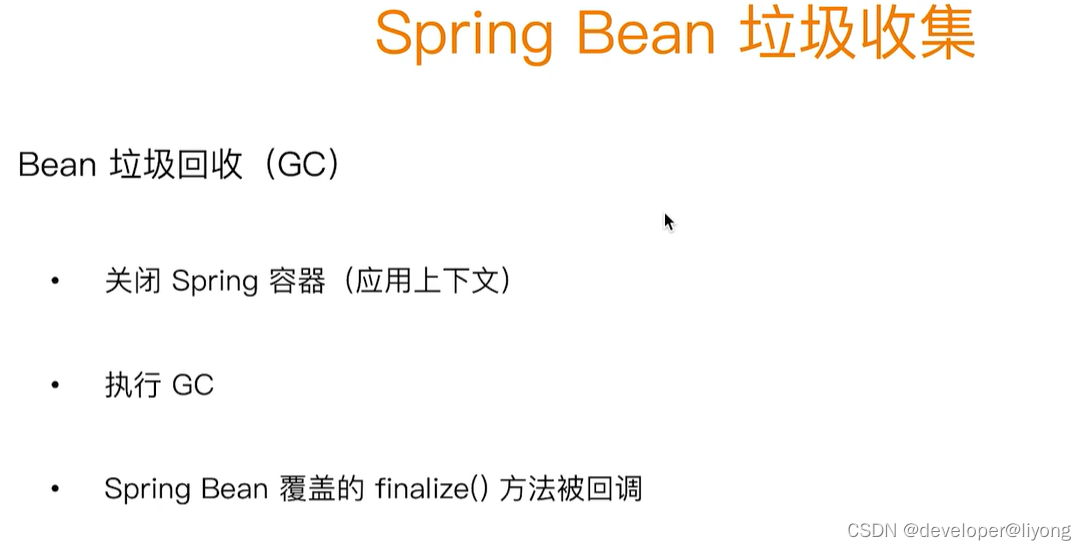
Spirng Bean垃圾回收
顺序测试案例
public class TestBean implements InitializingBean {
   public TestBean() {
       System.out.println(String.format("%s Constructor Order: {%s}", this.getClass().getSimpleName(), String.valueOf(Constant.ORDER_OF_BEAN_LIFE ++)));
   }
   @Override
   public void afterPropertiesSet() throws Exception {
       System.out.println(String.format("%s afterPropertiesSet Order: {%s}", this.getClass().getSimpleName(), String.valueOf(Constant.ORDER_OF_BEAN_LIFE ++) ));
   }

   @PostConstruct
   public void init() {
       System.out.println(String.format("%s PostConstruct Order: {%s}", this.getClass().getSimpleName(), String.valueOf(Constant.ORDER_OF_BEAN_LIFE ++)));
   }
   @PreDestroy
   public void destroy() {
       System.out.println(String.format("%s PreDestroy Order: {%s}", this.getClass().getSimpleName(), String.valueOf(Constant.ORDER_OF_BEAN_LIFE ++)));
   }

}

public class TestBeanPostProcessor implements BeanPostProcessor {
   @Override
   public Object postProcessBeforeInitialization(Object bean, String beanName) throws BeansException {
      if (bean instanceof TestBean) {
          System.out.println("TestBeanPostProcessor.postProcessBeforeInitialization()" + " Order : {" + Constant.ORDER_OF_BEAN_LIFE++ + "}");
      }
      return bean;
   }

   @Override
   public Object postProcessAfterInitialization(Object bean, String beanName) throws BeansException {
       if (bean instanceof TestBean) {
           System.out.println("TestBeanPostProcessor.postProcessAfterInitialization()" + " Order : {" + Constant.ORDER_OF_BEAN_LIFE++ + "}");
       }
       return bean;
   }
}


public class Main {
   public static void main(String[] args) {
       AnnotationConfigApplicationContext context = new AnnotationConfigApplicationContext();
       context.register(TestBean.class);
       context.register(TestBeanPostProcessor.class);
       context.refresh();
       TestBean bean = context.getBean(TestBean.class);
       context.close();
       BeanDefinition beanDefinition = new GenericBeanDefinition();
   }
}


 7238
7238

 被折叠的 条评论
为什么被折叠?
被折叠的 条评论
为什么被折叠?
 到【灌水乐园】发言


