


thymeleaf模版引擎
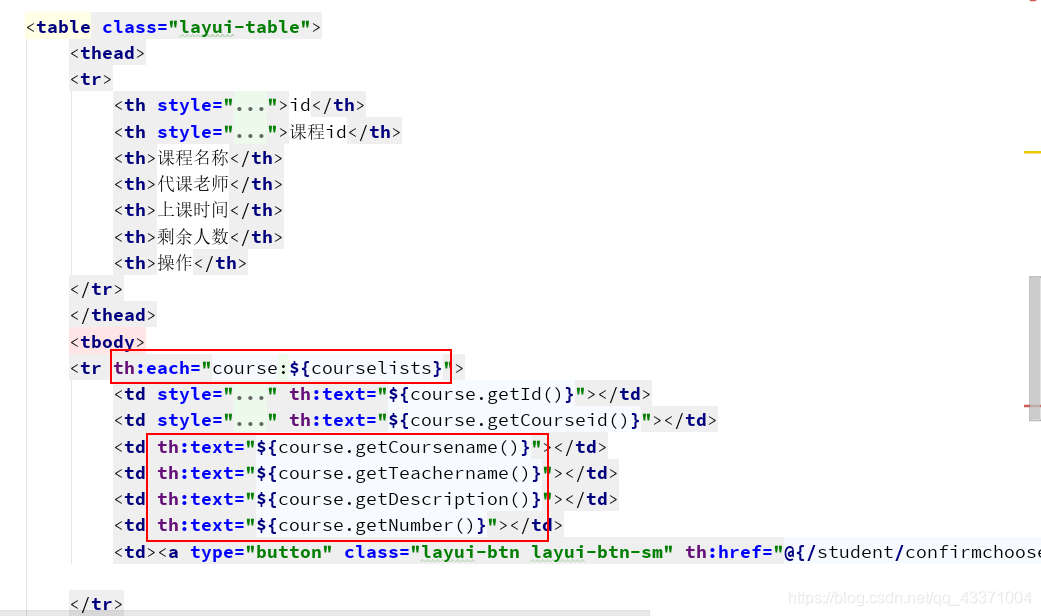
写项目用到了thymeleaf模版引擎,然后前后端交互用model存数据,然后controller跳转,通过model将数据带过去,利用thymeleaf遍历,这种的话,如果出现错误的情况,前台不好显示提醒。
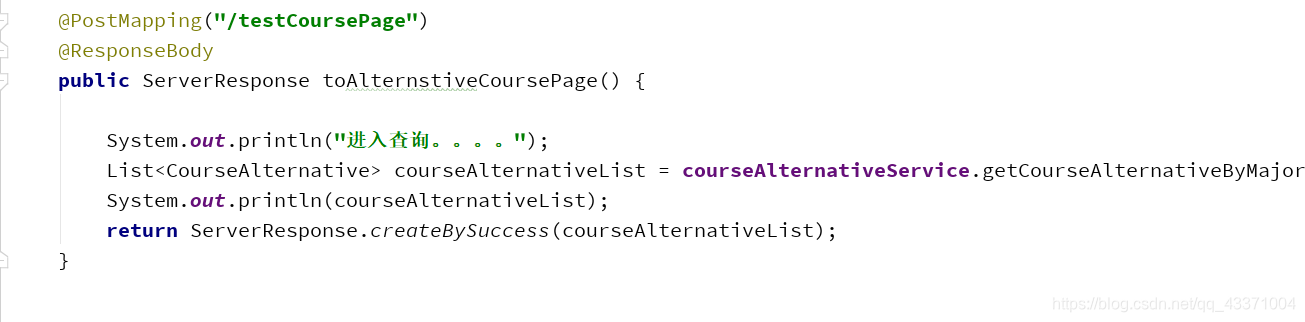
然后就想着要统一返回格式,这样前端可以根据状态码判断,从而做出提示。(完整代码在下面)
然后就想着用ajax请求,这样可以通过返回数据判断。
本来是想将ajax返回数据传入thymeleaf中遍历的那块,th:each这里,但是这样好像不行。所以只能是传统的方式。遍历拼接html,然后写入。
function todo() {
        $.ajax({
            type: "post",
            contentType: "application/json",
            url: "/testCoursePage",
            data: "",//不需要传入数据就没传
            // beforeSend: function () {
            //     loadingIndex = layer.msg('处理中', {icon: 16});
            //},
            success: function (result) {
                //layer.close(loadingIndex);
                console.log(result);
                if (result.status) {
                    //window.location.href = "main";
                    //alert(result.data);
                    userList=result.data;
                    var inf="<tr>\n" +
                        "                            <th style=\"display: none\">id</th>\n" +
                        "                            <th style=\"display: none\">课程id</th>\n" +
                        "                            <th>课程名称</th>\n" +
                        "                            <th>代课老师</th>\n" +
                        "                            <th>上课时间</th>\n" +
                        "                            <th>剩余人数</th>\n" +
                        "                            <th>操作</th>\n" +
                        "                        </tr>";
                    for (var i=0;i<userList.length;i++){
                        var course=userList[i];
                        inf+= "<tr> <td style=\"display: none\" >"+course.id+"</td> <td style=\"display: none\">"+course.courseid+"</td>"+
                            "<td>"+course.coursename+"</td> <td >"+course.teachername+"</td> <td>"+course.description+"</td> <td >"+course.number+"</td>"+
                            "<td><a type=\"button\" class=\"layui-btn layui-btn-sm\" >确认选课</a></td></tr>";
                    }
                    $("#table2").html(inf);//写入table中

                } else {
                    alert("获取错误!")

                }
            }
        });

    }
参数:
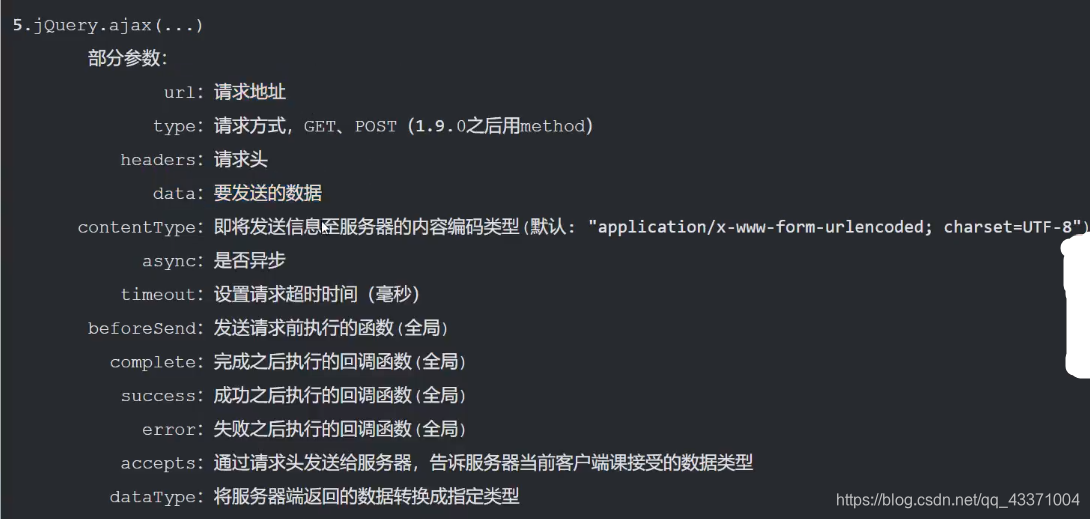
注意Content-Type:
1. 使用Ajax默认格式来传递数据【推荐】
Ajax的默认格式为:application/x-www-form-urlencoded,相当于(username=“admin”&password=123)来传递数据(这是GET请求的固定格式)
前端代码:
当Ajax以默认格式上传时,data数据直接使用JSON对象user,不用转换为JSON字符串(很方便)
此时写data : user,
var user= {

"username" : username,

"password" : password,

"rememberMe":rememberMe

};

$.ajax({

url : "http://...../jsontest.do",

type : "POST",

async : true,

data : user,

dataType : 'json',

success : function(data) {

}

});
后端使用@RequestParam注解或省略注解都可以接收到传来的数据:
【推荐】
//直接省略注解
@RequestMapping("/jsontest.do")

public void test(User user,String username,String password,Boolean rememberMe){

System.out.println(user);

System.out.println("username: " + username);

System.out.println("password: " + password);

System.out.println("rememberMe: " + rememberMe);


}
优点:
1).前端传递数据不用转换为json字符串:JSON.stringify(user)
2).后端接受的参数很灵活,即可以封装为User对象,亦可以使用单个参数username,rememberMe,甚至User对象和单个rememberMe参数混合使用都可以
2. 使用application/json格式来传递数据
Content-Type使用application/json的时候,要将JSON对象转换为JSON字符串
前端代码:
这里 data : JSON.stringify(user),
var user= {

"username" : username,

"password" : password

};

$.ajax({

url : "http://...../jsontest.do",

type : "POST",

async : true,

contentType: "application/json; charset=utf-8",

data : JSON.stringify(user),

dataType : 'json',

success : function(data) {

}

});
后端必须使用 @RequestBody 注解:
//这种方式下所有的参数都只能封装在User对象中,不能单独设置参数

@RequestMapping("/jsontest")

public void test(@RequestBody User user ){

String username = user.getUsername();

String password = user.getPassword();

}


//或者
@RequestMapping("/jsontest")

public void test(@RequestBody Map map ){

String username = map.get("username").toString();

String password = map.get("password").toString();

}


//或者
public void test(@RequestBody String jsonData) {

JSONObject jsonObject = JSON.parseObject(jsonData);

String username= jsonObject.getString("username");

String username= jsonObject.getString("password");

}
缺点:
1.前端需要使用JSON.stringify()将JSON对象转换为JSON字符串
2.后端在接受参数的时候比较麻烦,没有第1种简单,也没有第一种灵活
统一返回格式完整代码:
package com.jf.common;
import com.fasterxml.jackson.annotation.JsonIgnore;
import com.fasterxml.jackson.databind.annotation.JsonSerialize;
import java.io.Serializable;
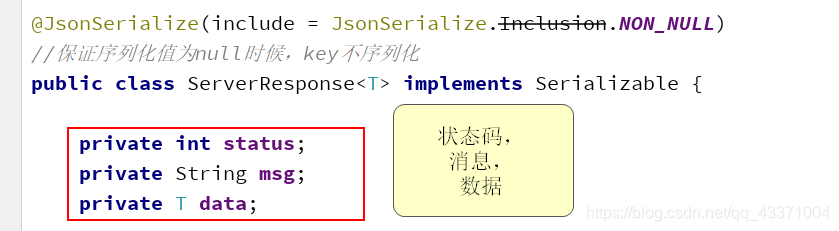
@JsonSerialize(include = JsonSerialize.Inclusion.NON_NULL)
//保证序列化值为null时候,key不序列化
public class ServerResponse<T> implements Serializable {
private int status;
private String msg;
private T data;
private ServerResponse(int status) {
this.status = status;
}
private ServerResponse(int status, T data) {
this.status = status;
this.data = data;
}
private ServerResponse(int status, String msg) {
this.status = status;
this.msg = msg;
}
private ServerResponse(int status, String msg, T data) {
this.status = status;
this.msg = msg;
this.data = data;
}
@JsonIgnore//忽略
public boolean isSuccess(){
return this.status==ResponseCode.SUCCESS.getStatus();
}
public int getStatus() {
return status;
}
public String getMsg() {
return msg;
}
public T getData() {
return data;
}
public static <T>ServerResponse<T> createBySuccess(){
return new ServerResponse<T>(ResponseCode.SUCCESS.getStatus());
}
public static <T>ServerResponse<T> createBySuccessMessage(String msg){
return new ServerResponse<T>(ResponseCode.SUCCESS.getStatus(),msg);
}
public static <T>ServerResponse<T> createBySuccess(T data){
return new ServerResponse<T>(ResponseCode.SUCCESS.getStatus(),data);
}
public static <T>ServerResponse<T> createBySuccess(String msg,T data){
return new ServerResponse<T>(ResponseCode.SUCCESS.getStatus(),msg,data);
}
public static <T>ServerResponse<T> createByError(){
return new ServerResponse<T>(ResponseCode.ERROR.getStatus(),ResponseCode.ERROR.getMsg());
}
public static <T>ServerResponse<T> createByErrorMessage(String errorMsg){
return new ServerResponse<T>(ResponseCode.ERROR.getStatus(),errorMsg);
}
public static <T>ServerResponse<T> createByErrorMessage(int errorStatus,String errorMsg){
return new ServerResponse<T>(errorStatus,errorMsg);
}
}
package com.jf.common;

public enum ResponseCode {
    SUCCESS(1,"SUCCESS"),
    ERROR(0,"ERROR"),
    NEED_LOGIN(10,"NEED_LOGIN"),
    ILLEGAL_ARGUMENT(2,"ILLEGAL_ARGUMENT")

    ;

    private final int status;
    private final String msg;

    ResponseCode(int status, String msg) {
        this.status = status;
        this.msg = msg;
    }

    public int getStatus() {
        return status;
    }

    public String getMsg() {
        return msg;
    }
}
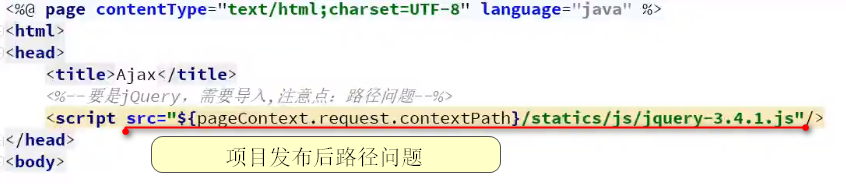
jsp注意jquery路径,防止项目发布后找不到jquery。


 2413
2413

 被折叠的 条评论
为什么被折叠?
被折叠的 条评论
为什么被折叠?
 到【灌水乐园】发言


