


例子源于OpenCV官网–创建边界旋转框和椭圆的轮廓
(https://docs.opencv.org/4.x/de/d62/tutorial_bounding_rotated_ellipses.html)
使用OpenCV函数cv:: minarerect:
查找包含输入2维点集的最小面积的旋转矩形。
该函数计算并返回指定点集的最小面积边界矩形(可能经过旋转)。
使用OpenCV函数cv::fitEllipse:
拟合一组二维点的椭圆。
该函数计算最适合(在最小二乘意义上)一组2维点的椭圆。它返回椭圆内接的旋转后的矩形。
代码:
from __future__ import print_function
import cv2 as cv
import numpy as np
import argparse
import random as rng
rng.seed(12345)
def thresh_callback(val):
    threshold = val
    #使用cv::Canny检测图像中的边缘。
    canny_output = cv.Canny(src_gray, threshold, threshold * 2)

    #找到轮廓并保存到向量轮廓和层次结构。
    contours, _ = cv.findContours(canny_output, cv.RETR_TREE, cv.CHAIN_APPROX_SIMPLE)

    # Find the rotated rectangles and ellipses for each contour
    #为每个轮廓找到旋转的矩形和椭圆
    minRect = [None]*len(contours)
    minEllipse = [None]*len(contours)
    for i, c in enumerate(contours):
        minRect[i] = cv.minAreaRect(c)
        if c.shape[0] > 5:
            minEllipse[i] = cv.fitEllipse(c)
    # Draw contours + rotated rects + ellipses
    #绘制轮廓+旋转矩形+椭圆
    drawing = np.zeros((canny_output.shape[0], canny_output.shape[1], 3), dtype=np.uint8)

    for i, c in enumerate(contours):
        color = (rng.randint(0,256), rng.randint(0,256), rng.randint(0,256))
        # contour轮廓
        cv.drawContours(drawing, contours, i, color)
        # ellipse椭圆
        if c.shape[0] > 5:
            cv.ellipse(drawing, minEllipse[i], color, 2)
        # rotated rectangle旋转矩形
        box = cv.boxPoints(minRect[i])
        box = np.intp(box) #np.intp: Integer used for indexing (same as C ssize_t; normally either int32 or int64)
        cv.drawContours(drawing, [box], 0, color)


    cv.imshow('Contours', drawing)
#加载图像:打开图像,将其转换为灰度,并将其模糊以去除噪声。
parser = argparse.ArgumentParser(description='Code for Creating Bounding rotated boxes and ellipses for contours tutorial.')
parser.add_argument('--input', help='Path to input image.', default='ball.png')
args = parser.parse_args()
src = cv.imread(cv.samples.findFile(args.input))
if src is None:
    print('Could not open or find the image:', args.input)
    exit(0)
# 打开图像,将其转换为灰度,并将其模糊以去除噪声。
src_gray = cv.cvtColor(src, cv.COLOR_BGR2GRAY)
src_gray = cv.blur(src_gray, (3,3))
source_window = 'Source'
cv.namedWindow(source_window)
cv.imshow(source_window, src)
max_thresh = 255
thresh = 100 # initial threshold初始阈值
cv.createTrackbar('Canny Thresh:', source_window, thresh, max_thresh, thresh_callback)
thresh_callback(thresh)
cv.waitKey()
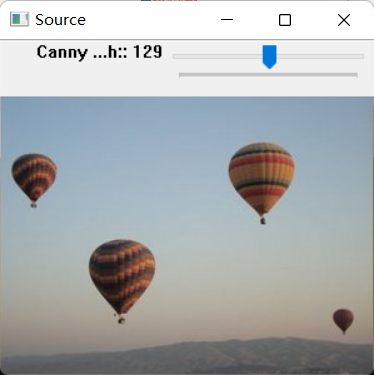
原图:
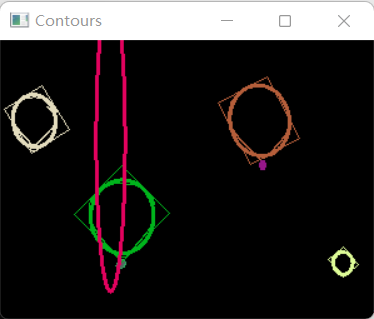
运行结果:


 3126
3126


 被折叠的 条评论
为什么被折叠?
被折叠的 条评论
为什么被折叠?
 到【灌水乐园】发言


