


- 安装ideal
- 配置jdk
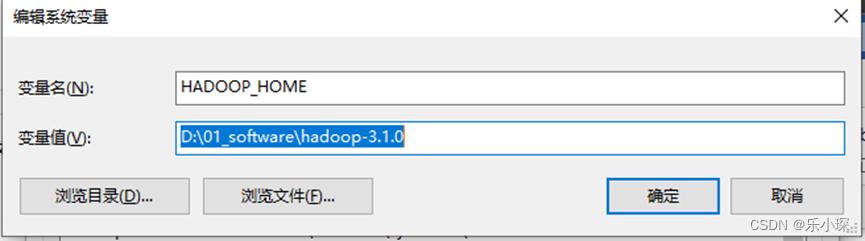
- 配置主机的hadoop环境变量,D:\01_software\hadoop-3.1.0 hadoop-3.1.0文件建议安装到没有中文,空格的文件目录下。
在path下添加环境变量:
-
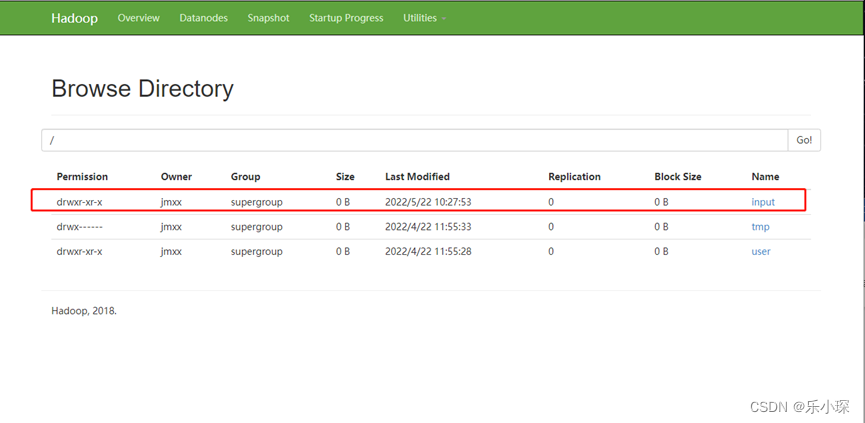
网页若不可以直接创建文件夹,则使用
[atguigu@hadoop102 ~]$ hadoop fs -mkdir /input
再网页查看创建结果:
-
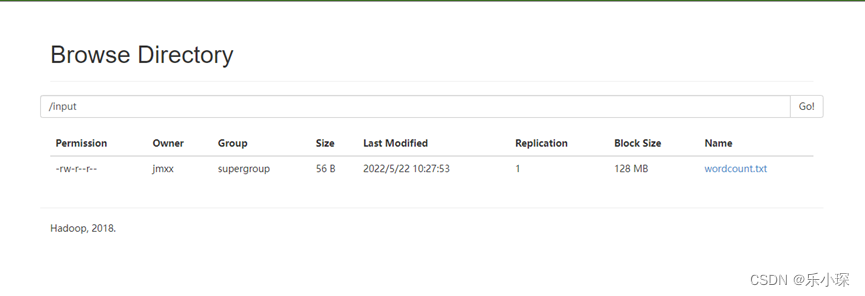
使用vim命令创建wordcount.txt文件夹,并将文件夹上传至HDFS的/input 文件夹下。
[atguigu@hadoop102 ~]vim wordcount.txt (内容随便吧)
[atguigu@hadoop102 ~]hadoop fs -put wordcount.txt /input
-
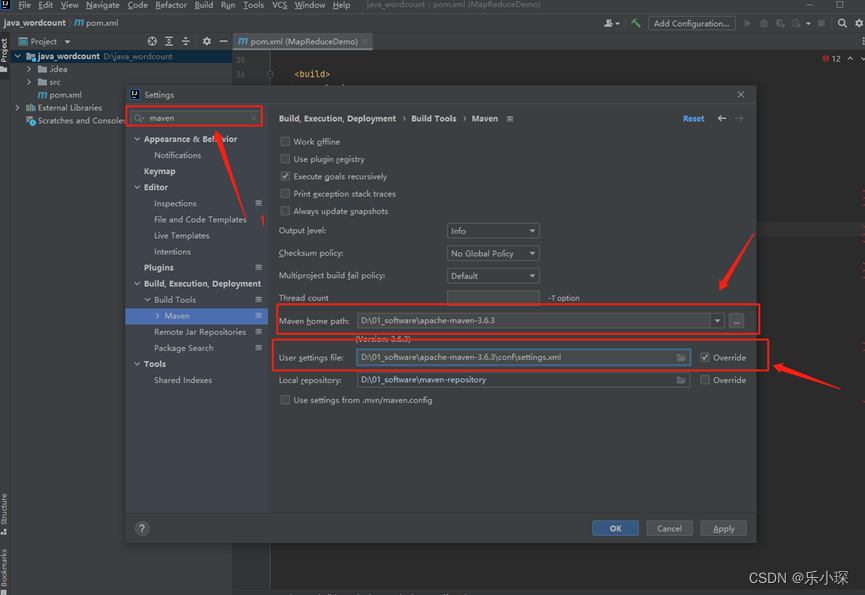
使用idea编译器编写wordcount案例
① 创建maven工程,更改maven路径
② ,修改pom.xml文件。
<?xml version="1.0" encoding="UTF-8"?>
<project xmlns="http://maven.apache.org/POM/4.0.0"
         xmlns:xsi="http://www.w3.org/2001/XMLSchema-instance"
         xsi:schemaLocation="http://maven.apache.org/POM/4.0.0 http://maven.apache.org/xsd/maven-4.0.0.xsd">
    <modelVersion>4.0.0</modelVersion>

    <groupId>com.aiguigu</groupId>
    <artifactId>MapReduceDemo</artifactId>
    <version>1.0-SNAPSHOT</version>

    <properties>
        <maven.compiler.source>8</maven.compiler.source>
        <maven.compiler.target>8</maven.compiler.target>
    </properties>

    <dependencies>
        <dependency>
            <groupId>org.apache.hadoop</groupId>
            <artifactId>hadoop-client</artifactId>
            <version>2.9.1</version>
        </dependency>
        <dependency>
            <groupId>junit</groupId>
            <artifactId>junit</artifactId>
            <version>4.12</version>
        </dependency>
        <dependency>
            <groupId>org.slf4j</groupId>
            <artifactId>slf4j-log4j12</artifactId>
            <version>1.7.30</version>
        </dependency>
    </dependencies>
<build>
    <plugins>
        <plugin>
				<groupId>org.apache.maven.plugins</groupId>
            <artifactId>maven-compiler-plugin</artifactId>
            <version>3.6.1</version>
            <configuration>
                <source>1.8</source>
                <target>1.8</target>
            </configuration>
        </plugin>
        <plugin>
      <groupId>org.apache.maven.plugins</groupId>
      <artifactId>maven-assembly-plugin</artifactId>
      <version>3.0.0</version>
            <configuration>
                <descriptorRefs>
                    <descriptorRef>jar-with-dependencies</descriptorRef>
                </descriptorRefs>
            </configuration>
            <executions>
                <execution>
                    <id>make-assembly</id>
                    <phase>package</phase>
                    <goals>
                        <goal>single</goal>
                    </goals>
                </execution>
            </executions>
        </plugin>
    </plugins>
</build>
</project>
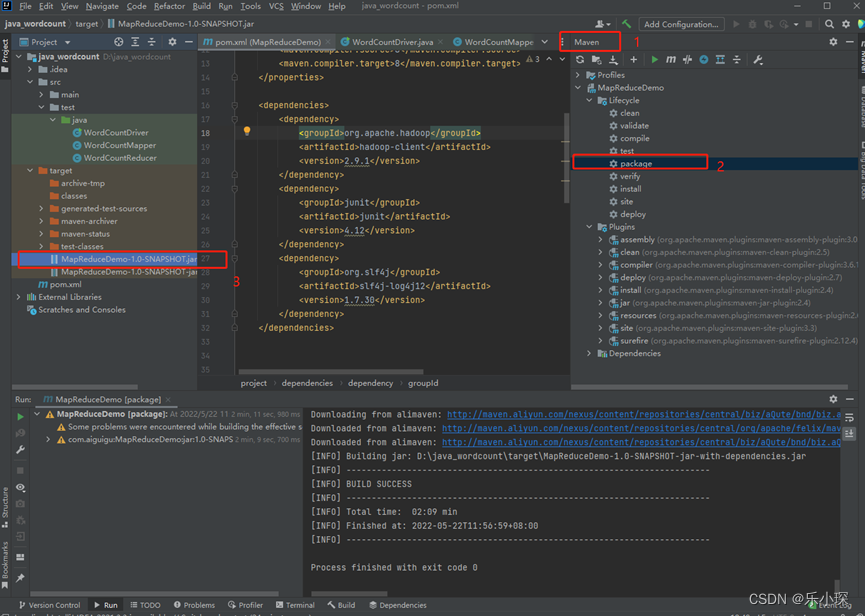
③编写wordcountDriver、wordcountMaper、wordcountReducer代码,点击maven->package 打包运行,在target文件中生成*.jar文件。复制到桌面上,并重命名为wc.jar。
wordcountMapper:
**package com.atguigu.mapreduce.wordcount2;**(自己换一下包名)
import org.apache.hadoop.io.IntWritable;
import org.apache.hadoop.io.LongWritable;
import org.apache.hadoop.io.Text;
import org.apache.hadoop.mapreduce.Mapper;
import java.io.IOException;
/**
 * KEYIN,map阶段输入的key类型:LongWritable(默认的输入类型)
 * VALUEIN, map阶段输入value类型:Text
 * KEYOUT, map阶段输出的key类型:Text
 * VALUEOUT,map阶段输出的Int类型
 */
public class WordCountMapper extends Mapper<LongWritable, Text, Text, IntWritable> {

    /**
     *  全局变量:将toString字符串类型转换为Text类型,之所以不放在map方法中,
     *  是因为全局变量可以减少生成Text的次数。性能达到最佳
     */
    private Text outK = new Text();
    private IntWritable outV = new IntWritable(1);
    @Override
    protected void map(LongWritable key, Text value, Mapper<LongWritable, Text, Text, IntWritable>.Context context) throws IOException, InterruptedException {
        //获取一行
        String line = value.toString();
        //对字符串进行切割
        String[] words = line.split(" ");
        //循环写出,有context写出
        for (String word : words) {
            //封装
            outK.set(word);
            //写出
            context.write(outK,outV);
        }
    }
}
wordcountReducer:
package com.atguigu.mapreduce.wordcount2;

import org.apache.hadoop.io.IntWritable;
import org.apache.hadoop.io.Text;
import org.apache.hadoop.mapreduce.Reducer;

import java.io.IOException;

public class WordCountReducer extends Reducer<Text, IntWritable,Text,IntWritable>{
    private IntWritable outV = new IntWritable();
    @Override
    protected void reduce(Text key, Iterable<IntWritable> values, Reducer<Text, IntWritable, Text, IntWritable>.Context context) throws IOException, InterruptedException {

        int sum = 0;
        //atguigu(1,1)
        //累加
        for (IntWritable value : values) {
            sum += value.get();
        }

        outV.set(sum);
        //写出
        context.write(key,outV);
    }
}
wordcountDriver:
package com.atguigu.mapreduce.wordcount2;

import org.apache.hadoop.conf.Configuration;
import org.apache.hadoop.fs.Path;
import org.apache.hadoop.io.IntWritable;
import org.apache.hadoop.io.Text;
import org.apache.hadoop.mapreduce.Job;
import org.apache.hadoop.mapreduce.lib.input.FileInputFormat;
import org.apache.hadoop.mapreduce.lib.output.FileOutputFormat;

import java.io.IOException;

/**
 * 写driver的固定的7步走战略
 */
public class WordCountDriver {
    public static void main(String[] args) throws IOException, InterruptedException, ClassNotFoundException {

        //1.获取job
        Configuration conf = new Configuration();
        Job job = Job.getInstance(conf);

        //2.设置jar包路径
        job.setJarByClass(WordCountDriver.class);

        //3.关联mapper的reduce
        job.setMapperClass(WordCountMapper.class);
        job.setReducerClass(WordCountReducer.class);

        //4设置map输出的KV类型
        job.setMapOutputKeyClass(Text.class);
        job.setMapOutputValueClass(IntWritable.class);

        //5.设置最终输出的KV类型
        job.setMapOutputKeyClass(Text.class);
        job.setMapOutputValueClass(IntWritable.class);

		      //6.设置输入路径和输出路径。
        /*注:java代码不是在本地执行的,而是在maven中点击package打包生成jar文件,然后在左边的target中
        点击open in explore 复制进桌面,然后打开Hadoop集群,将jar文件拖拽至集群中去,在写入一行代码
        Hadoop jar jar文件名 输入路径 输出路径
        在集群中执行此java文件。
        在本地执行会显示数组越界异常
         */

        FileInputFormat.setInputPaths(job, new Path(args[0]));
        FileOutputFormat.setOutputPath(job, new Path(args[1]));

        //7.提交job
        boolean result = job.waitForCompletion(true);

        System.exit(result ? 0 : 1);
    }
}
-
通过xftp将wc.jar文件上传至hadoop文件夹(注意文件夹名称不重要,主要看文件夹的内容,里边有bin、etc、等)下,
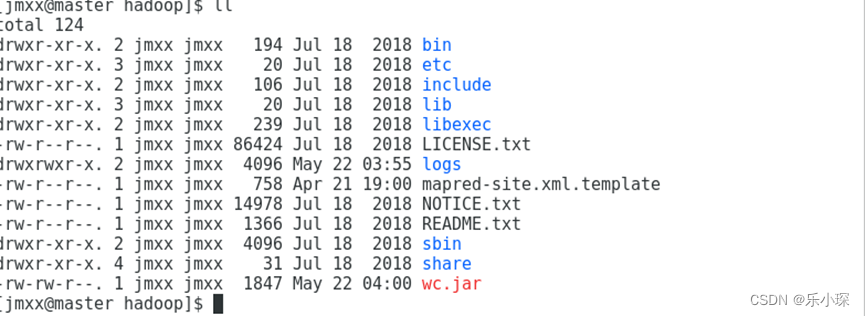
-
使用命令:
首先复制wordcountDriver 的路径
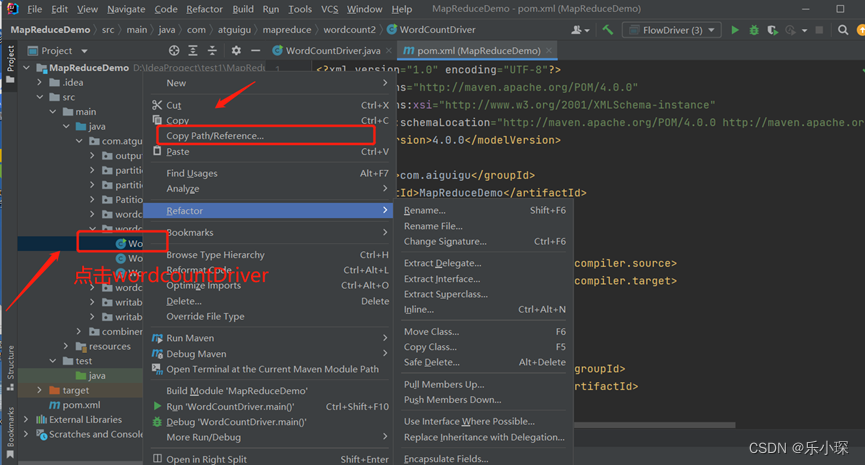
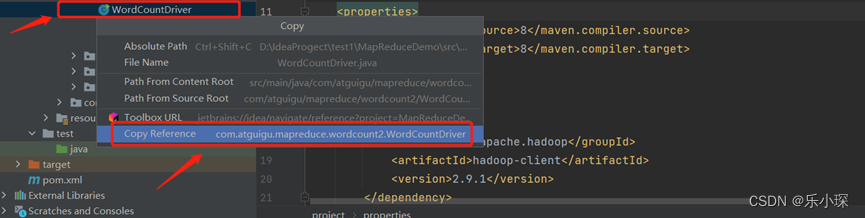
以我的为例:复制的路径为com.atguigu.mapreduce.wordcount2.WordCountDriver
[jmxx@master hadoop] hadoop jar wc.jar com.atguigu.mapreduce.wordcount2.WordCountDriver /input /output
注意:/input文件夹下一定要有文件(之前咱们已经在hdfs上创建了wordcoiunt.txt)
/output 一定不能存在output文件夹(它自己创建)
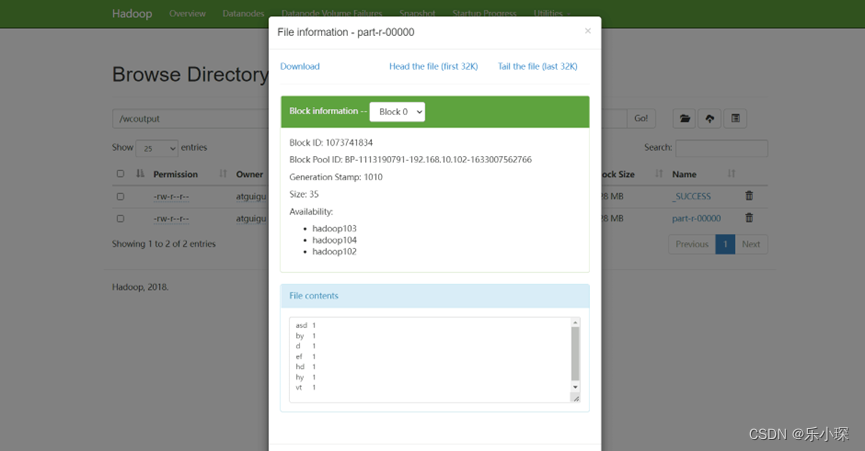
9. 网页显示结果(hdfs),点击查看part-r-000000文件,


 2334
2334


 被折叠的 条评论
为什么被折叠?
被折叠的 条评论
为什么被折叠?
 到【灌水乐园】发言


